


With TeamSpeak 3, you can make calls to other users from your computer or phone, similar to a conference call.
Multiple users connect from their computers or phones to a TeamSpeak server and can then talk to each other. Usually, a headset with a microphone is used for this.
In this tutorial, we show you how to set up a TeamSpeak Server on a server with Windows Server and how to connect to your TeamSpeak Server from your computer. To set up a TeamSpeak Server on a Linux Server , see this tutorial.
Installing TeamSpeak
This instruction was written for Windows Server, but you can also use these steps for Windows 10. In that case, start at step 2.
Step 1
Connect to your Windows Server via Remote Desktop or the VPS console in the control panel.
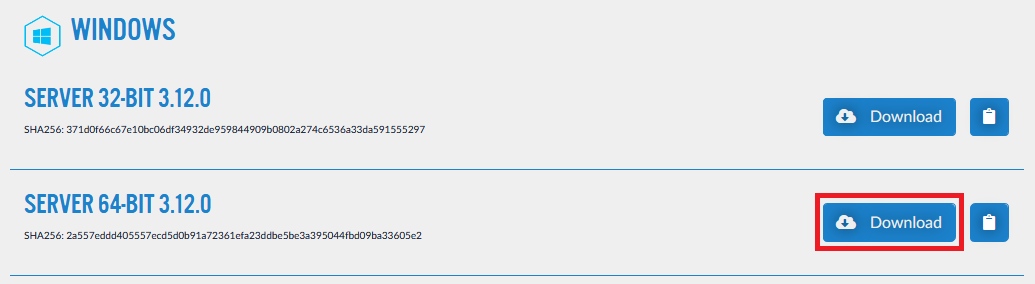
In your browser, go to the TeamSpeak server download page and click 'Copy' under 'Windows' behind 'SERVER 64-BIT 3.12.0'.
Step 3
In the download window that opens, click 'Open with' and then 'OK'.

Step 4
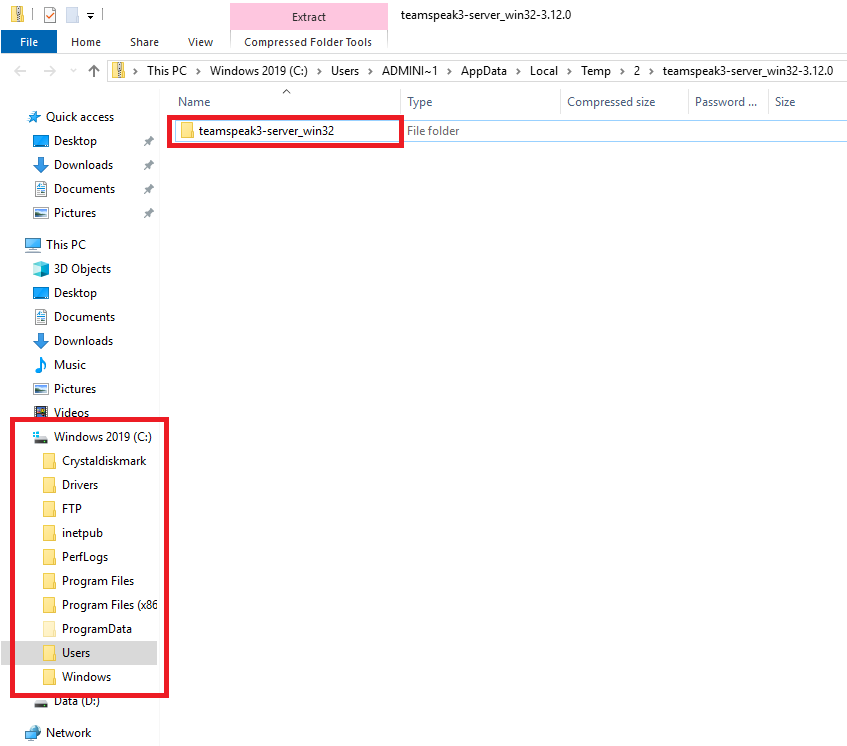
Click on the folder 'TeamSpeak-server_win32', hold down the left mouse button, and drag the folder to a location on the C drive, for example 'Program Files (x86)'.
Step 5
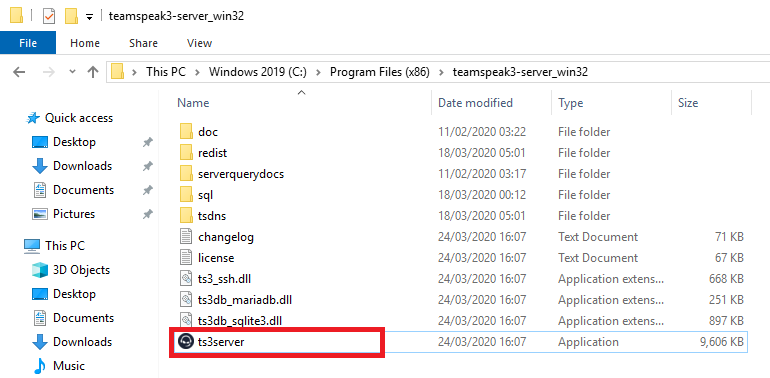
Go to the folder where you just moved the folder 'TeamSpeak-server_win32' and double click on 'ts3server'.
Step 6
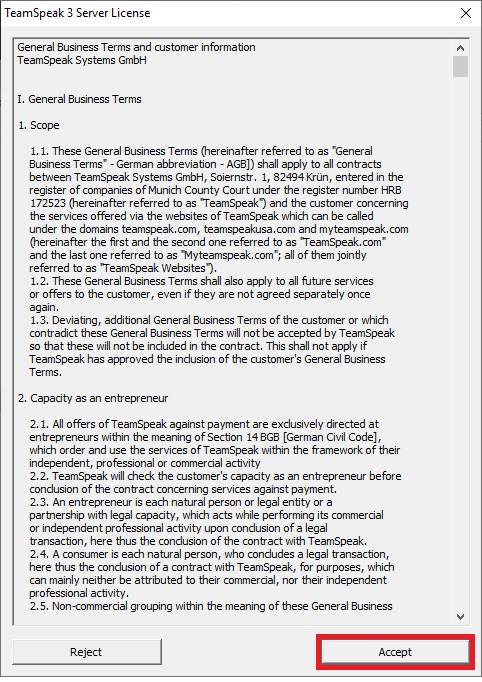
You will see the TeamSpeak license. Read the license and then click on 'Accept'.
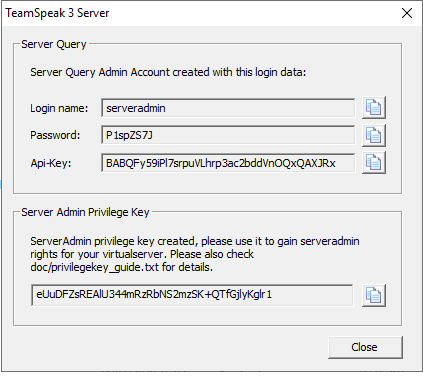
TeamSpeak will now take about a minute to generate the administrator login details and an admin token. Note this information down and keep it safe; without it, you cannot get administrator rights to your server.
Step 8
Before you can connect to your TeamSpeak server, you must open the ports in your firewall that TeamSpeak uses:
- 9987 / UDP for Voice.
- 30033 / TCP for File Transfer.
- 10011 / TCP for ServerQuery.
- 41144 / TCP for TSDNS (optional)
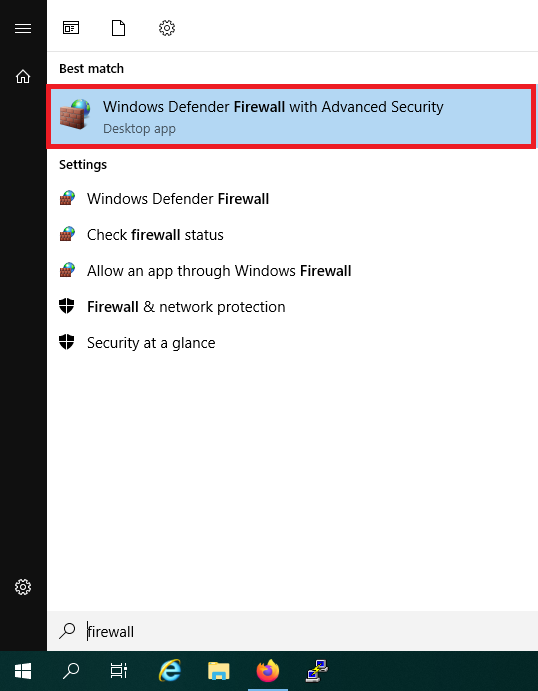
Click the Windows Start button, type 'firewall' and click 'Windows Defender Firewall with Advanced Security' in the search results.
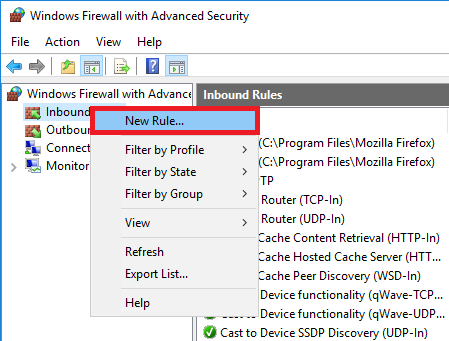
Right-click on 'Inbound rules' and select 'New Rule'.
Step 10
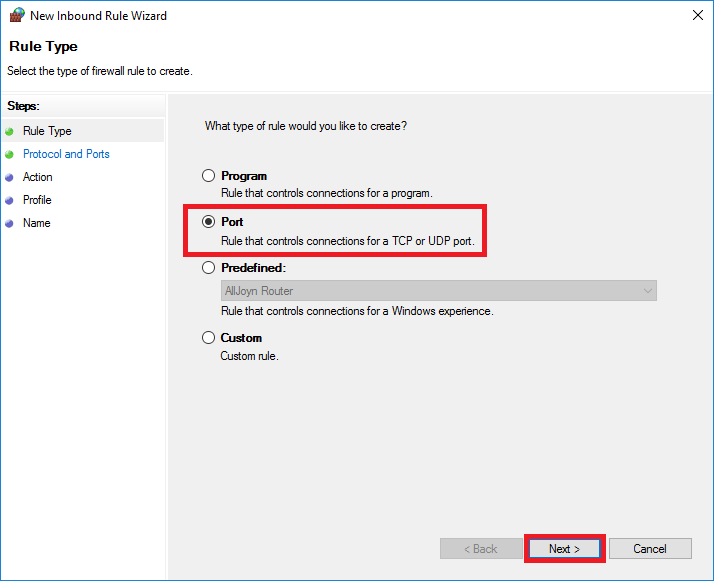
Select as rule type 'Port' and click on 'Next'.
Step 11
Select 'UDP' and enter the port number 9987 under 'Specific local ports'.
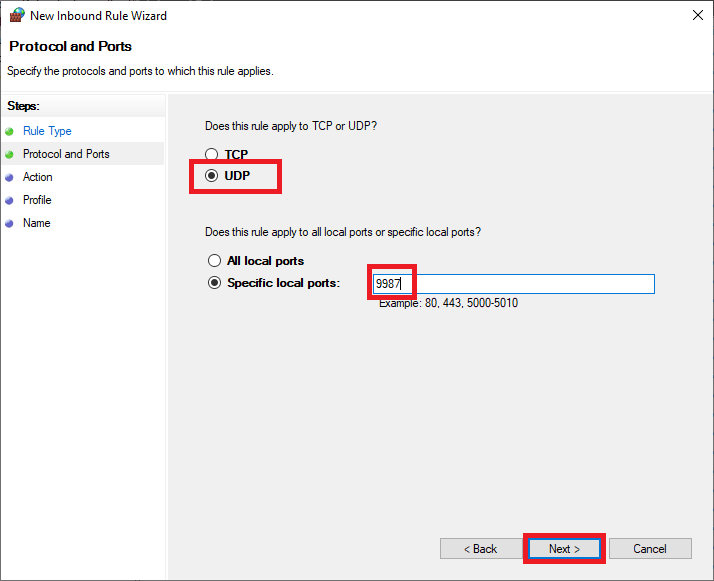
Step 12
Select 'Allow the connection' to allow connections over the selected port and click 'Next'.
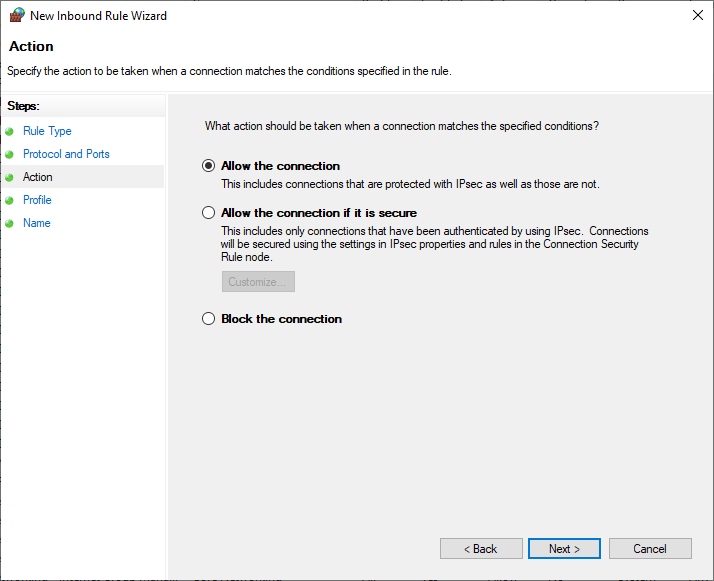
Step 13
Optionally you can adjust to which domain the rule applies. Usually, you do not need to change anything here, unless you use a private network and have created a private profile for it, see Microsoft's documentation for more information.
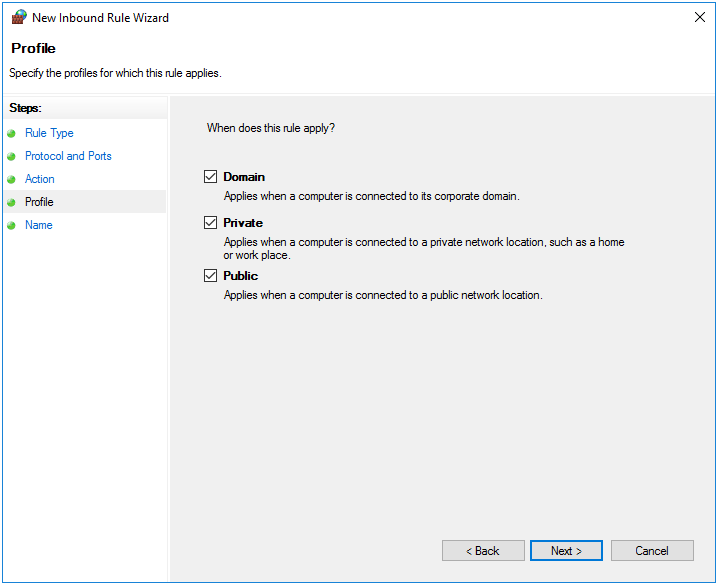
Step 14
Give the rule a name, for example 'TeamSpeak voice' and click 'Finish'.
Step 15
Repeat steps 9 through 14 and add three more (TCP) rules for the other ports mentioned in step 8.
Do you use the VPS firewall in your TransIP control panel? Do not forget to open the chosen gate there as well.
Connect to your TeamSpeak server
Step 1
To connect to your TeamSpeak server, you need a TeamSpeak client. Download the client from this page and install it on your computer or mobile.
Step 2
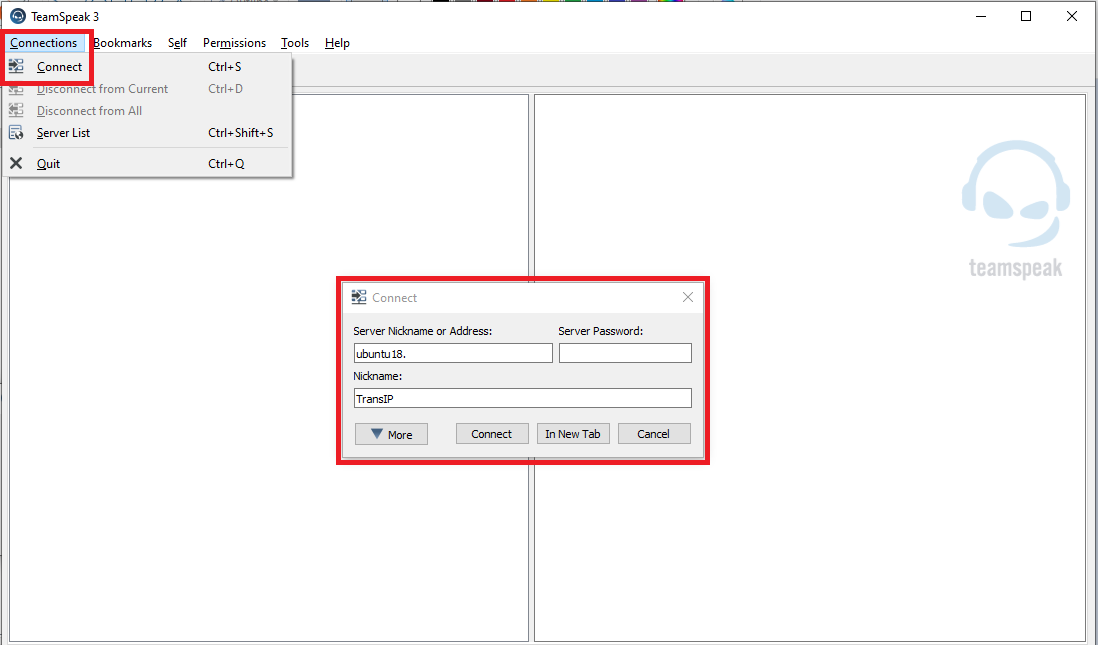
Start TeamSpeak and click on 'Connections'> 'Connect'. You have two options to enter as the address of your server:
- The IP address of your VPS (can be retrieved with windows start > cmd > ipconfig).
- A domain name that refers to your VPS. It doesn't matter if this is a subdomain or your main domain name, as long as it points to the IP address of your VPS.
Step 3
The first time you log in to your TeamSpeak server, you will be greeted by the screen below. Enter the administrator token that you noted in step 7 in the previous section. This allows you to claim the administrator rights of your TeamSpeak server.

You can now start using your server right away and invite people to use it. For example, right-click on 'Default Channel'> 'Edit Channel' to change the name of the channel.

Security tips
Your TeamSpeak server will be publicly available after completing this tutorial. We recommend the following options for securing your TeamSpeak server:
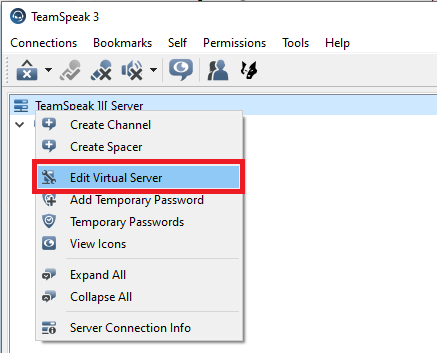
- Set a password: in TeamSpeak, right-click on the name of your server and select 'Edit Virtual Server'.
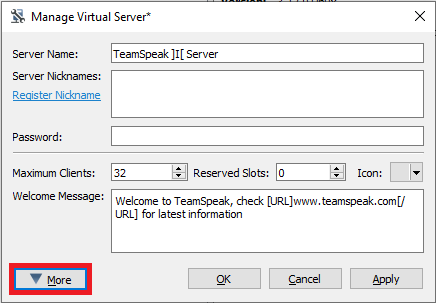
In the screen that appears, you can set a password behind 'Password'. Without this password, users cannot connect to your TeamSpeak server.

After configuring these settings, click 'Apply' and 'OK'. Tip: You can also edit the name and welcome message of your TeamSpeak server on the screen above.
-
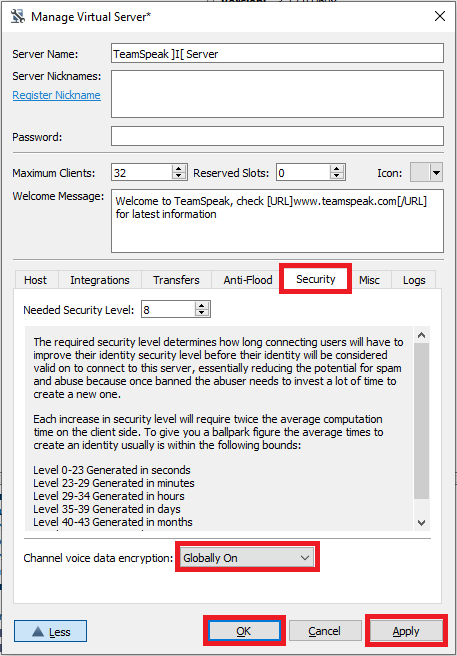
Apply encryption: in TeamSpeak right click on the name of your server and select 'Edit Virtual Server'> 'More'.
Click the 'Security' tab and set 'Channel voice data encryption' to 'Globally On' to apply encryption to all channels.
- Encryption increases the CPU utilization of your TeamSpeak server.
- The default value is 'Configure per Channel'. This allows you to apply encryption per channel via the right mouse button on channel > 'Edit Channel'> 'Advanced' > 'Voice Data encrypted'.
- Do you want to go one step further? Then you could also set up a VPN server and ensure that your TeamSpeak server is only accessible via your VPN.
This brings us to the end of this tutorial for installing your TeamSpeak Server in Linux.
Should you have any questions regarding this article, please do not hesitate to contact our support department. You can reach them via the button 'Contact us' at the bottom of this page.
Do you want to discuss this article with other users? Please leave a message under 'Comments'.