


To download and upload files to and from your Windows Server, you can use an FTPS or SFTP server. The key differences between FTPS and SFTP on Windows Server come down to:
- FTPS: Uses IIS, listens on port 21 plus a passive port range, and requires a TLS/SSL certificate.
- SFTP: Uses SSH on port 22. Convenient if you already use SSH or don’t want to install IIS.
Both options encrypt your traffic; the choice mainly depends on your environment’s requirements and your FTP client. In this guide, you’ll set up a secure SFTP file server on Windows Server 2022 or newer, without IIS. For FTPS, see our FTPS guide for Windows Server.
Installing SFTP on Windows Server (without IIS)
Step 1
Connect to your Windows Server via Remote Desktop, the VPS console (VPS) or the OpenStack console (OpenStack instance).
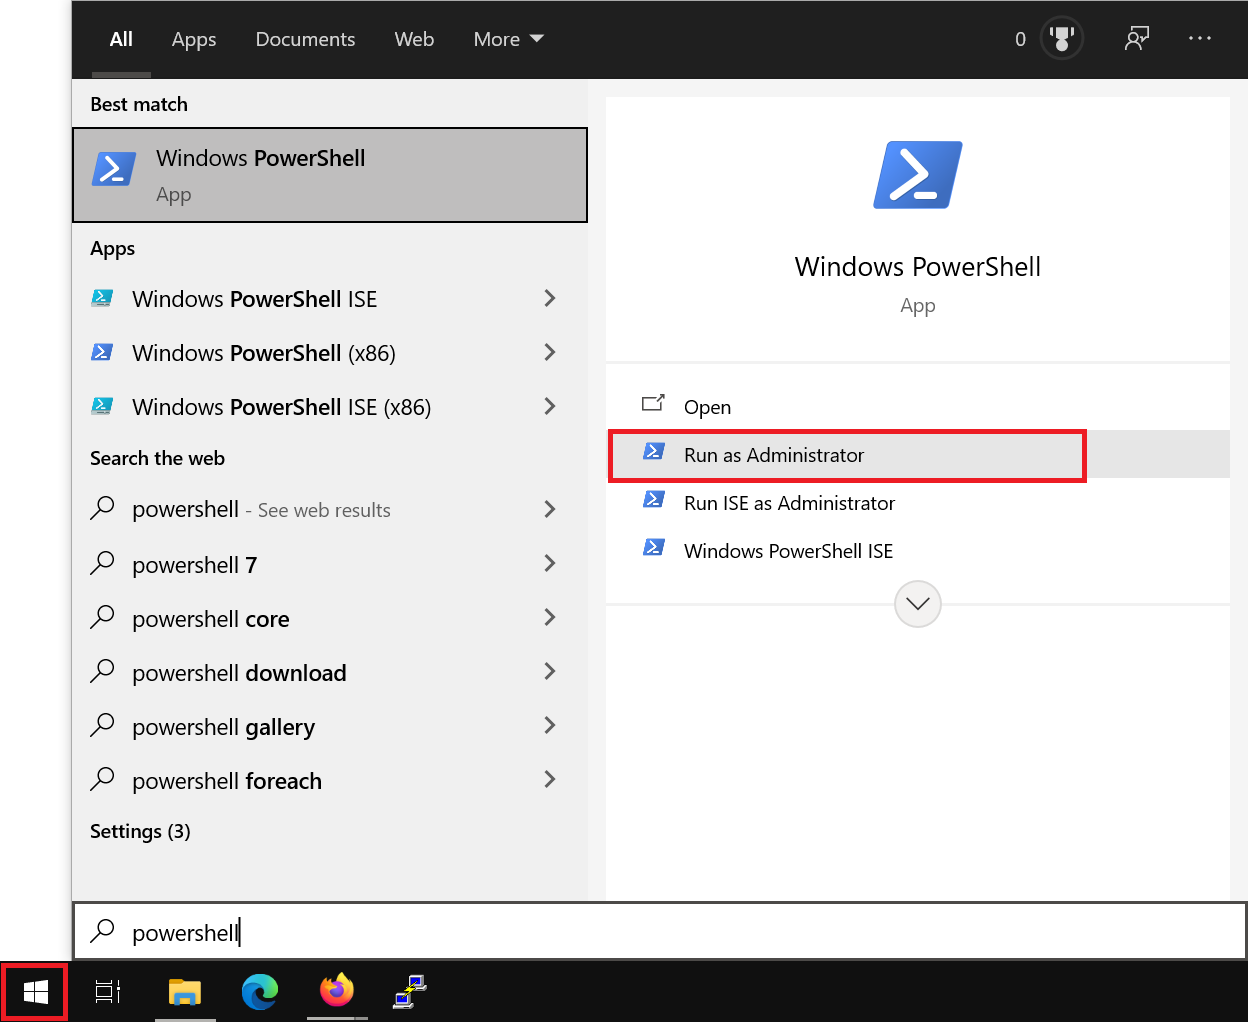
Step 2
Click the Windows Start button, type ‘PowerShell’, and click ‘Run as Administrator’.
Step 3
Install the OpenSSH Server feature, start the sshd service, and set the sshd service to start automatically. Starting the SSH service at this step ensures that a configuration file is created.
Add-WindowsCapability -Online -Name OpenSSH.Server~~~~0.0.1.0
Start-Service sshd
Set-Service -Name sshd -StartupType Automatic
Step 4 – optional
Apply any security changes you want directly in your SSH server’s configuration. To do this, open File Explorer and browse to C:\ProgramData\ssh. Then right-click on sshd_config and select ‘Open with…’. Finally, choose a text editor such as Notepad.

Adjust the options in the opened file as desired and save the changes. Be sure not to add a file extension when saving: sshd_config has no extension, and Notepad will try to change it to sshd_config.txt by default.

Some commonly used, recommended options are:
- Port: Automated attack bots scan for SSH servers on port 22. By changing the line #Port 22 to an unused port, for example Port 45123, you can prevent many attacks. If needed, check which ports are already in use in Windows Defender Firewall with Advanced Security.
- PermitRootLogin: By default this option is #PermitRootLogin prohibit-password (commented with the default). We recommend turning off root access entirely by changing the line to PermitRootLogin no.
- PasswordAuthentication: yes allows password authentication to your SSH server; no disables it. Change this only if you plan to use SSH keys (FileZilla supports these, for example in .ppk format).
- AllowUsers: a list of users allowed to connect to your Windows Server via SFTP, for example AllowUsers sftpuser yourname “yourdomain\domainuser”
Step 5
Restart the SSH server via PowerShell to apply any configuration changes:
Restart-Service sshd
Step 6
Next, open the SFTP/SSH port in Windows Firewall. If you changed the SSH port number in step 4, replace 22 in the command below with the new port number.
New-NetFirewallRule -DisplayName "OpenSSH Server (22/TCP)" -Direction Inbound -Protocol TCP -LocalPort 22 -Action AllowIf the SSH port isn’t already in use and the rule has been added correctly, the output will look roughly like the following (pay particular attention to the ‘Status’ line):
Name                  : {d47b9d44-fdc7-4eda-a3fe-35a74c9fbd6f}
DisplayName           : OpenSSH Server (45123/TCP)
Description           :
DisplayGroup          :
Group                 :
Enabled               : True
Profile               : Any
Platform              : {}
Direction             : Inbound
Action                : Allow
EdgeTraversalPolicy   : Block
LooseSourceMapping    : False
LocalOnlyMapping      : False
Owner                 :
PrimaryStatus         : OK
Status                : The rule was parsed successfully from the store. (65536)
EnforcementStatus     : NotApplicable
PolicyStoreSource     : PersistentStore
PolicyStoreSourceType : Local
Step 7
Depending on your choices in step 4, optionally create an SFTP user and an SFTP directory, and grant the SFTP user NTFS permissions so they can create and read files, etc.
net user sftpuser * /add
mkdir C:\SFTP\sftpuser
icacls C:\SFTP\sftpuser /grant "sftpuser:(OI)(CI)(M)"- After the first command, you’ll be prompted to set a password for the new user (sftpuser).
- In Active Directory environments, you can skip the net user command and grant a specific user access with /grant “domain\username:(OI)(CI)(M)”
Your SFTP server is now ready to use! In the section below, we show which details you need to connect to your server.
Connect to your SFTP server
Use the details below to connect to your SFTP server. In the screenshot below you can see an example in FileZilla:
- Protocol: SFTP – SSH File Transfer Protocol.
- Host: The IP address of your SFTP server or a (sub)domain that points to it.
- Port: The port number you set in step 4 of the previous section, or 22 if you use the default port.
- Logon Type: ‘Normal’ if you use a password, and ‘Key file’ for SSH keys
- User: A user account on your Windows Server that has access to your SFTP directory, for example the user created in step 7 of the previous paragraph.
- Password: The password for the user mentioned above.
In FileZilla this looks as follows under ‘File’ > ‘Site Manager…’ > ‘New site’:

That brings us to the end of our guide to setting up an SFTP server on a Windows Server. You can now safely use your Windows Server to download and upload files.