


Plesk distinguishes between a user, user roles, a customer and a subscription. If you want to give someone access to your VPS with Plesk, it is important to know the differences between these four. This ensures that you create the right type of account and assign the correct rights. In short, these four terms mean the following:
- Customer: A customer who hosts websites or email on your Plesk VPS.
- User: A user within a customer's account. For example, this can be an account of an administrator of one of your domains.
- User Role: Defines which Plesk functionality is available to the users you create.
- Subscription: The subscription of a hosting plan.
Plesk Customer
A Plesk Customer is a customer who hosts websites or email with you. The customer has his own account in Plesk and can create 'users' there.
In the customer account, they manage their own domains and can also create users and roles. Customers cannot get to the services of other customers. The steps below show you how to create a customer in Plesk.
Step 1
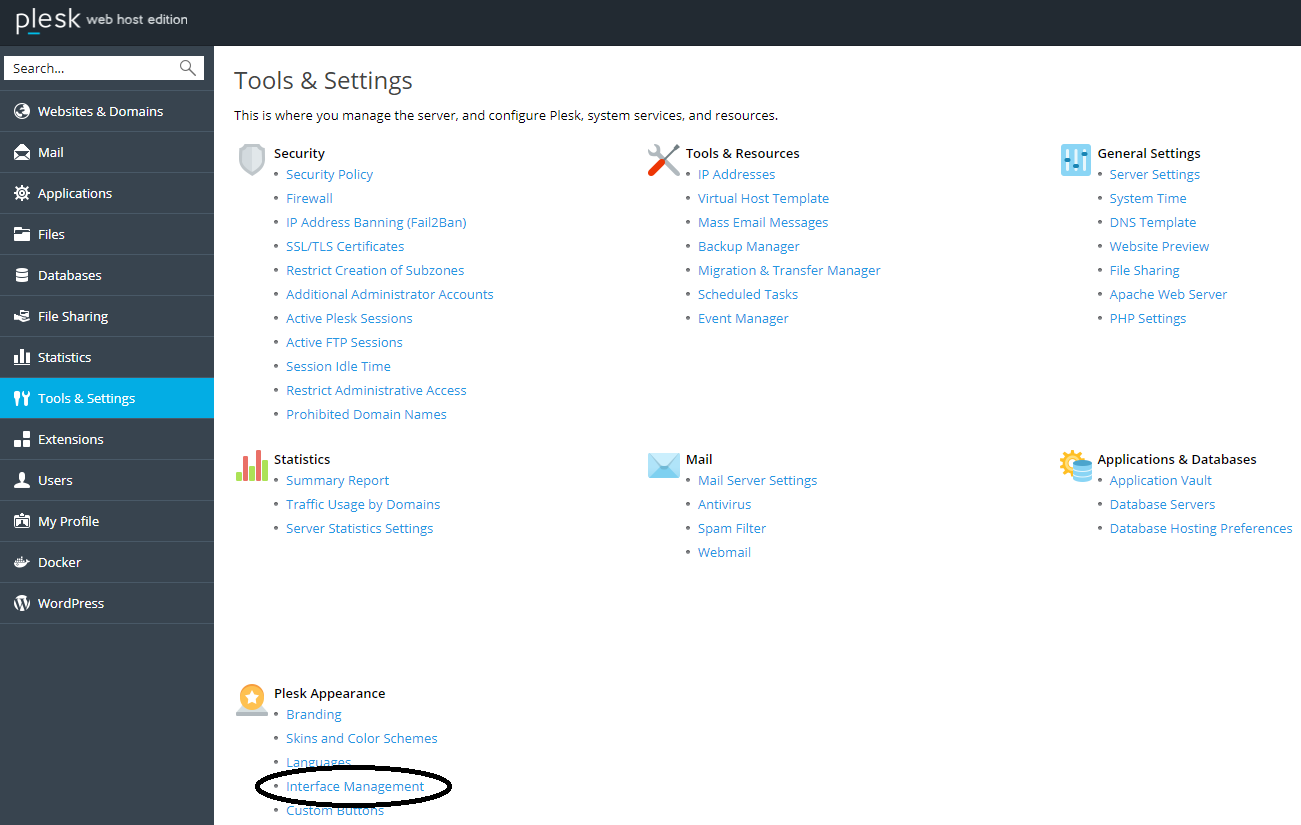
To create a new customer with their own subscription, you must first switch to the Plesk Service Provider View (go to step 3 if you're already in this view). Log in to Plesk and go to 'Tools & Settings' > 'Interface Management'.
Step 2
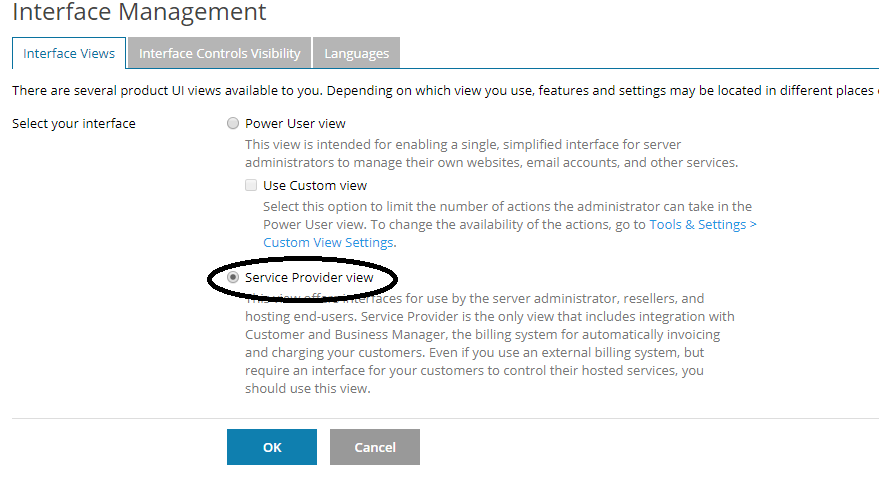
Change your interface selection to 'Service Provider view' and click 'OK'.
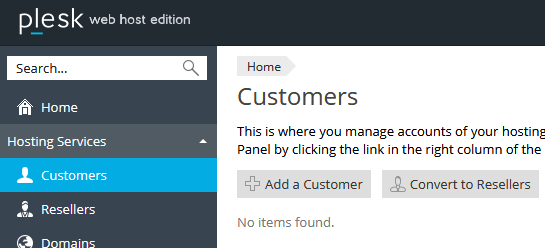
Go to 'Customers'> 'Add a customer'. On this page, you first provide more information about the person/party for which you are creating this account.
The information you provide from your customer is largely optional. We recommend filling in the data accurately for your own administration.
The 'Username' that you create under 'Access to Plesk' is actually a Plesk User, for this Plesk Customer.
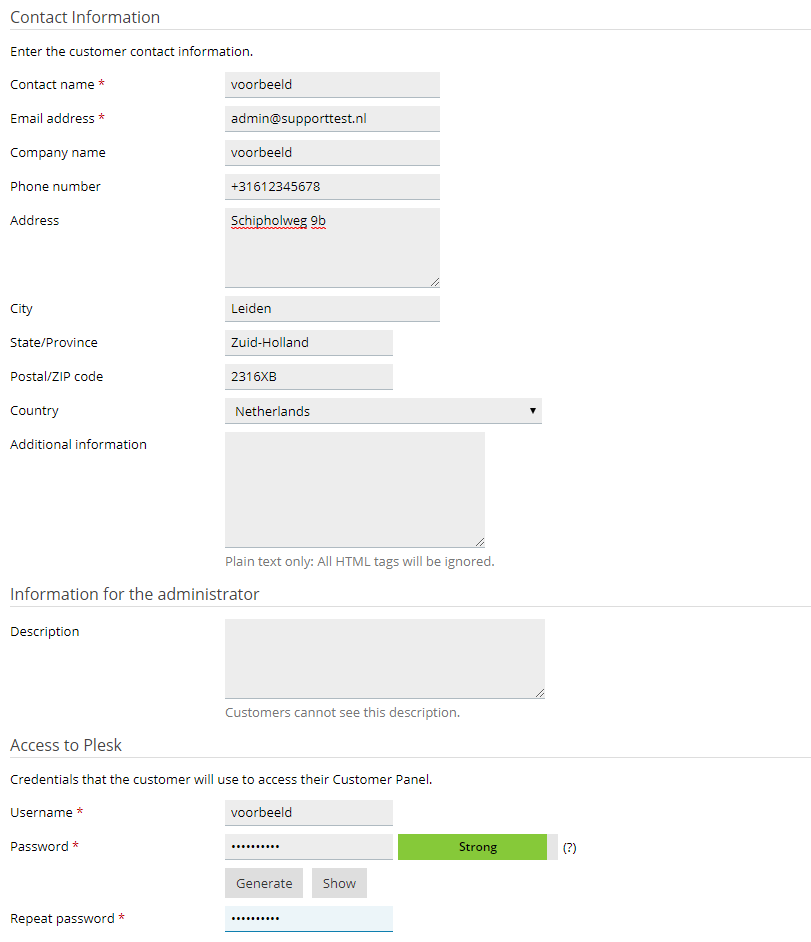
Then, scroll down and fill in the fields with your own data as shown in the example below.
If you do not use a subdomain called 'webmail', do not enable Let's Encrypt for your domain on this page. The reason behind this is that this option (at the time of writing) tries to link Let's Encrypt to webmail.yourdomain.com. You receive error messages in Plesk if you do not use this subdomain but do enable Let's Encrypt in the above steps.
It is more sensible to enable Let's Encrypt afterward. Use our article on SSL in Plesk to install an SSL certificate.
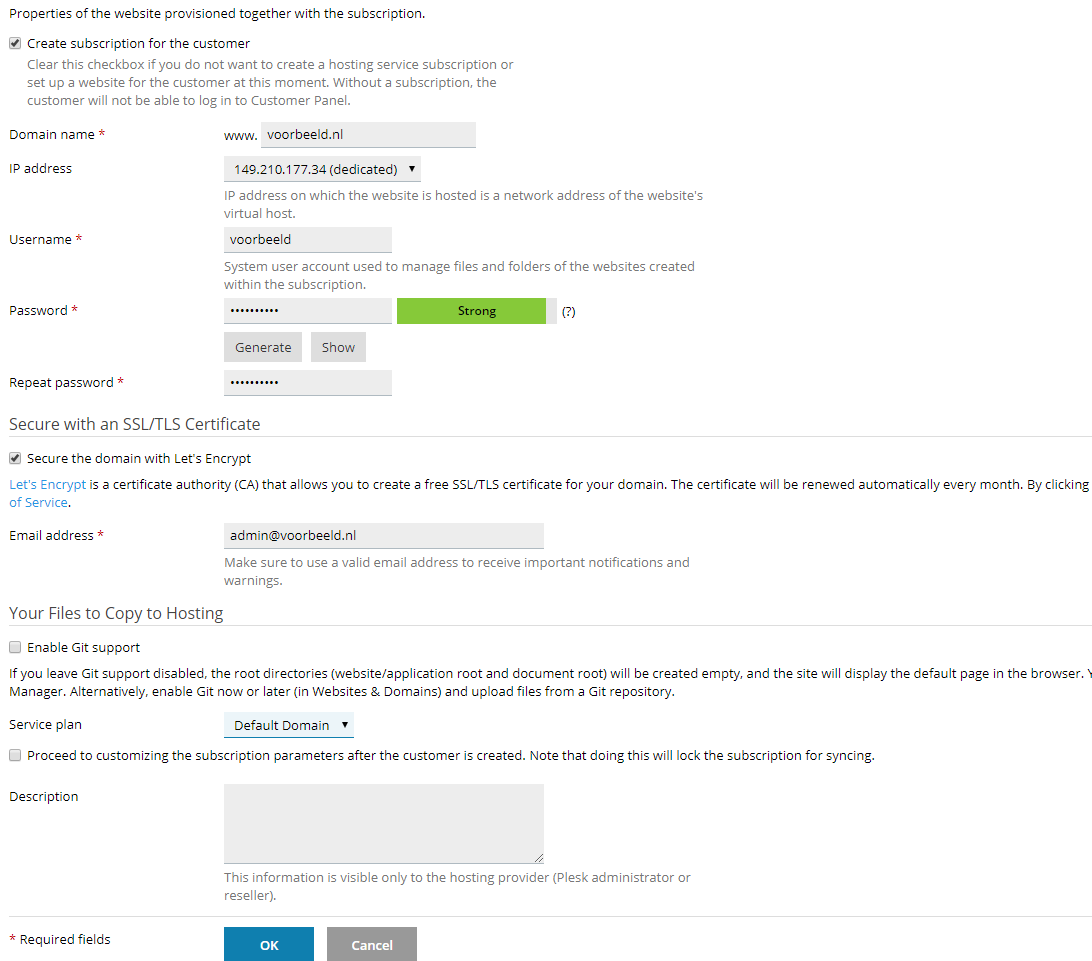
Click 'OK' when you're finished to create the account.
Step 4
In our articles (e.g. our Plesk tutorial series) we use the 'Power User view' unless stated otherwise. You switch back to this by repeating Step 1 & Step 2 above and using the 'Power User view' selection.
Please note: Is this new customer account the one in which you want to add domains, create email addresses, etc.? Then log out as root user and log in as this new customer before you add your domain or create an email address.
Plesk User
A user is a person who has access to Plesk and can manage your domain(s) (websites, applications, email, etc.). You create a user within the account of a customer. Using User Roles, you specify what access a user has. Think of options like:
- making email addresses
- management of domains
- total access to one subscription, or multiple subscriptions in Plesk.
Therefore, the user has no access to the services of another customer. Suppose you have a customer with a few domains called 'example', and you create a user within the root-account of Plesk, then that new user (and the root-user himself) does not have access to the services of that customer.
You create a user as follows:
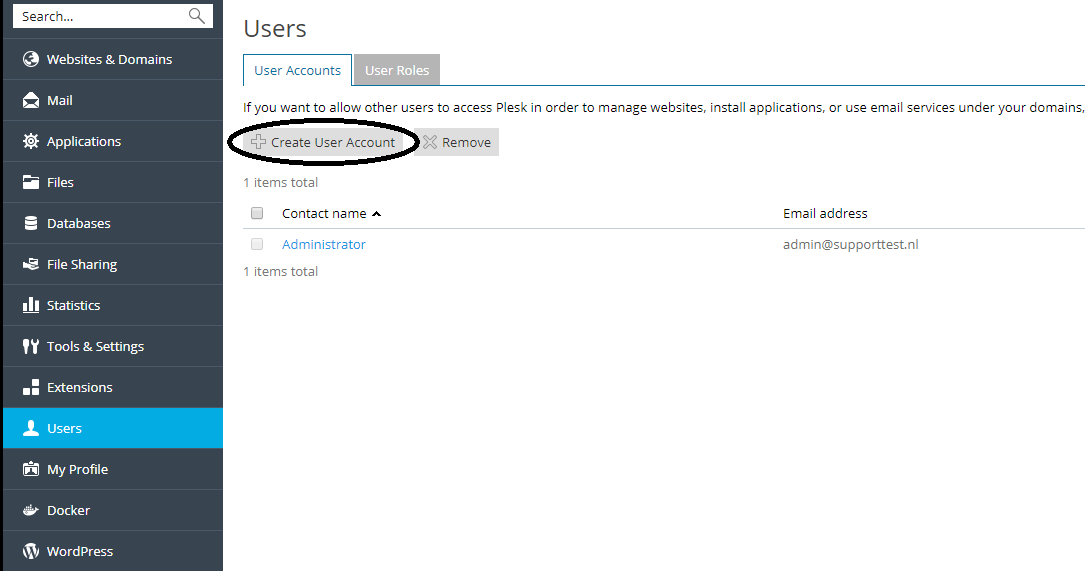
Step 1
Log in to Plesk with the customer or root account, within which you want to create the user. Click 'Users' in the left menu and then 'Create User Account'.
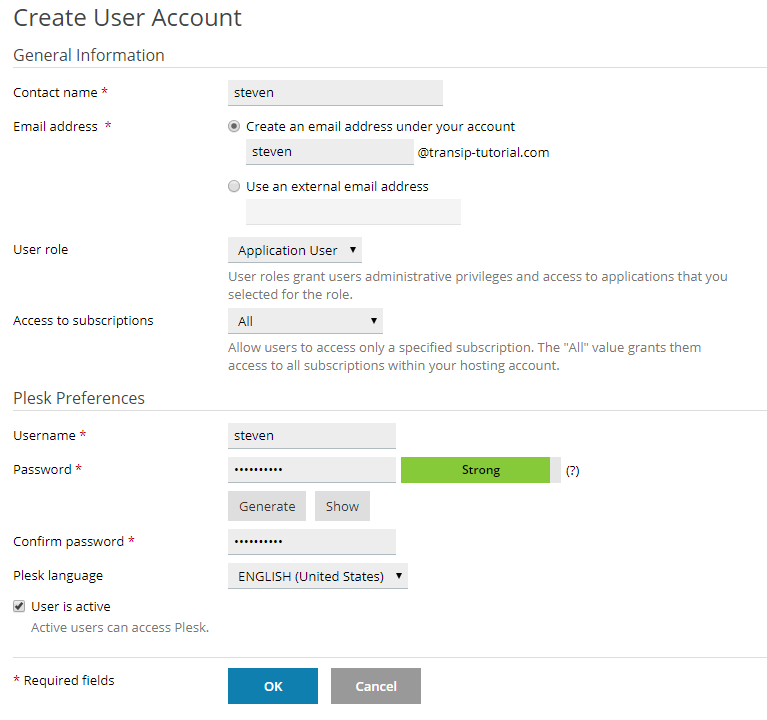
Step 2
Fill in the fields as shown in the screenshot below (but with your own data) and click 'OK'.
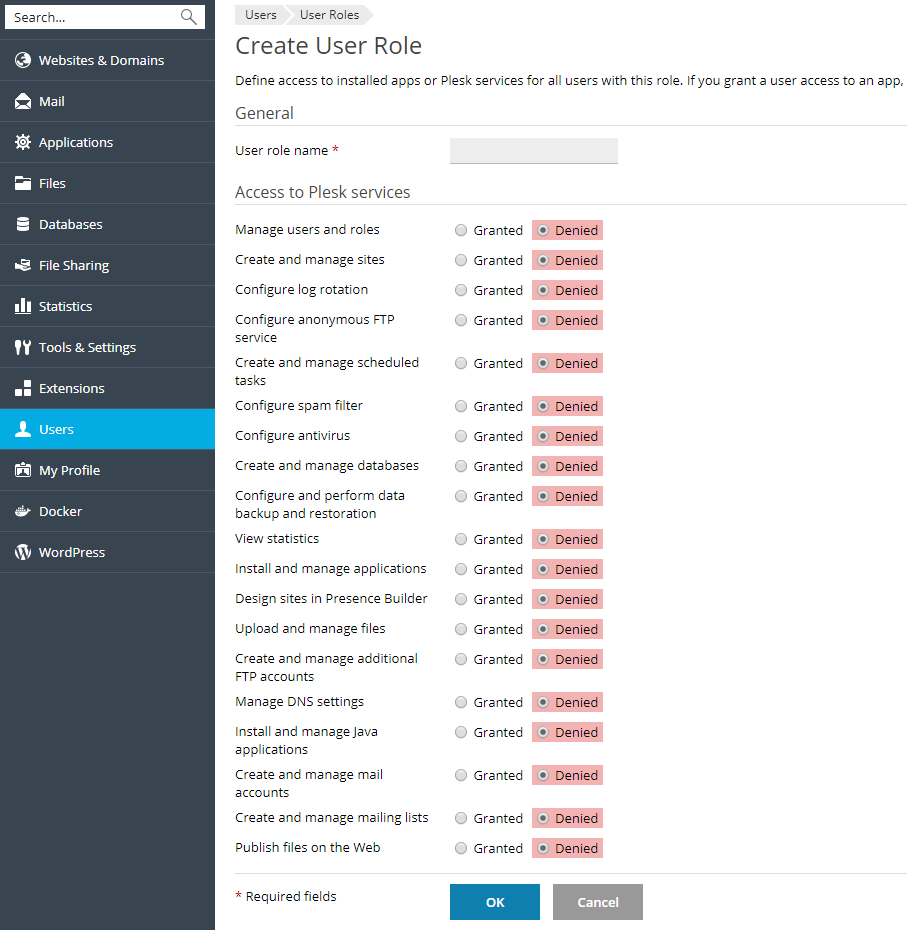
Plesk User Roles
In a Plesk User Role, you define which Plesk functionality is available to the users you create (see the Plesk User explanation above). A User Role gives you strong control over what a user can and cannot do within Plesk. You create a new User Role by following the steps below:
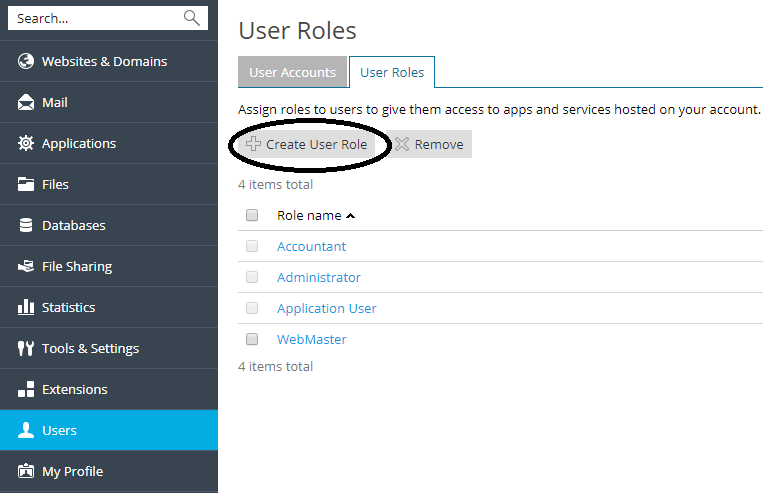
Step 1
Log in to Plesk with the customer or root account, within which you want to create the role. Click 'Users' in the left menu and then click the 'User Roles' tab > 'Create User Role’, or click the name of the role if you want to modify an existing one.
Step 2
You will then see an overview as below. Enter a 'User role name' and select which Plesk services this user can use. Finally, click 'OK' to create the role.
Plesk Subscription
Plesk Subscription refers to registering a hosting plan. A hosting plan comes down to all services that are related to hosting a domain, such as hosting websites and email for one or more domains. A subscription is automatically added in the following cases if:
- You log into Plesk for the first time and when you specify a domain when configuring your account.
- You create a customer and thereby specify a domain.
- You add a domain from Websites & Webhosting in the Power User view, or in the Service Provider view when you add a domain under Customers> Add Domain.
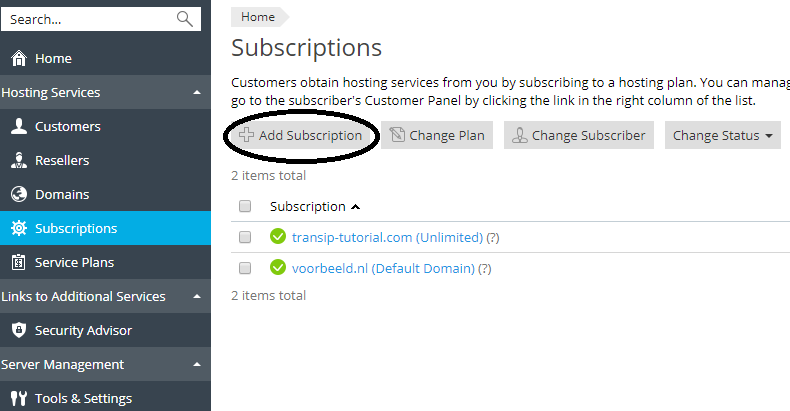
You add a subscription manually using the steps below.
Step 1
To create a new subscription, switch to the Plesk Service Provider View (go to step 3 if you already use it). Go to 'Tools & Settings'> 'Interface Management'.
Step 2
Change your interface selection to 'Service Provider view' and click 'OK'.
Go to 'Subscriptions'> 'Add Subscription'.
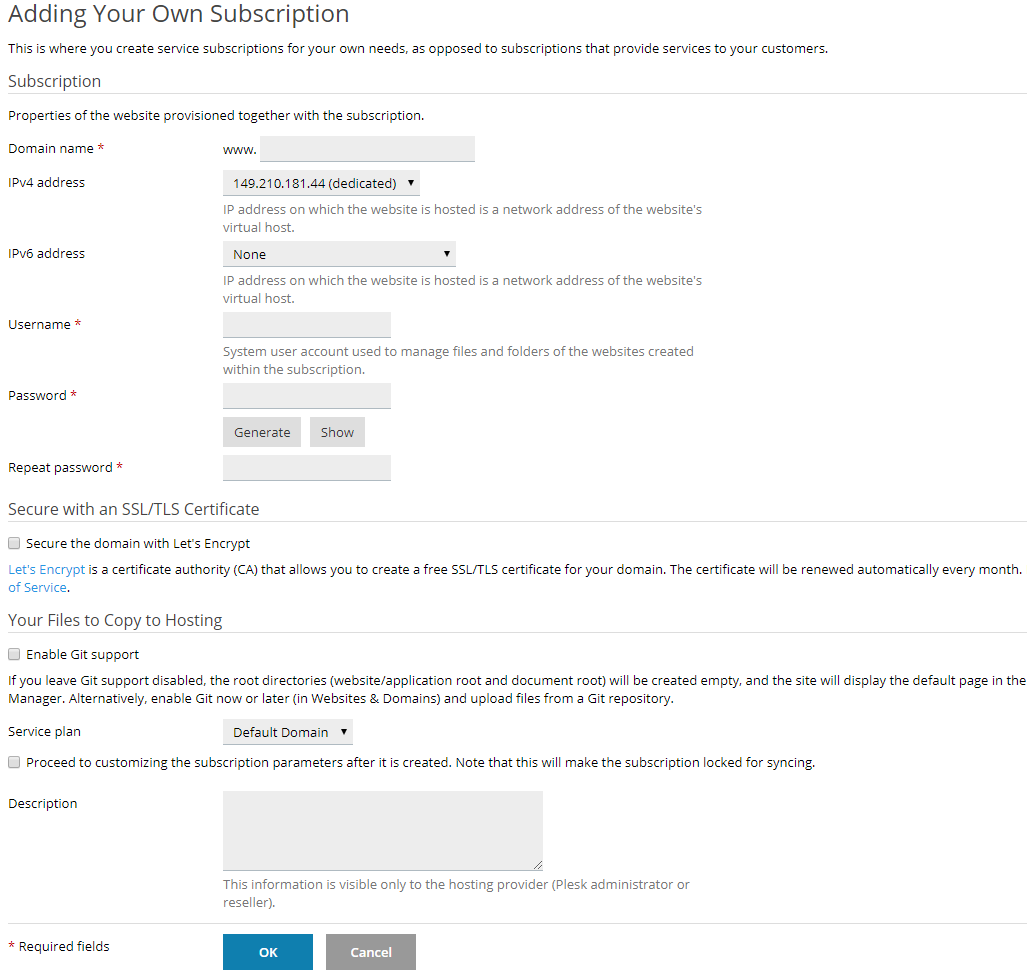
For a subscription, it is required to add a domain. Fill in all fields and then click 'OK' to create the account.
Step 4
In our Plesk tutorial series, we use the Powerview unless stated otherwise. You switch back to the Powerview by repeating Step 1 & Step 2 above and using the 'Power User view' selection.
With that, we have come to the end of the distinction between Plesk Users, User Roles, Customers, and Subscriptions. Should you have any questions left regarding this article, do not hesitate to contact our support department. You can reach them via the ‘Contact Us’ button at the bottom of this page.