Starting on a VPS for the first time is a big undertaking. In our Plesk tutorial series we explain how to get started with a VPS which uses Plesk. This tutorial series not only includes hosting your website and e-mail, but also how you can safely set up and update your VPS.
General information about Plesk you can find in our article ‘what is Plesk’ (or try the demo). Order a VPS with Plesk here if you don’t have one already.
Setting up a VPS with Plesk is covered in the following sections:
- Introduction, first login, creating an SSH user
- Securing your VPS
- Plesk, PHP and SQL updates
- Linking domains and subdomains to your VPS
- Uploading a website and database and using SSL
- Creating and using email addresses
- Additional articles and other questions
In the tutorial series we use the Power User View from Plesk unless stated otherwise.
The most recent update of this tutorial series is tested with Plesk 18.0.27 and AlmaLinux 8.
Command line is used in several places in this article. The commands can be executed via SSH or the VPS console in your control panel. If you do not have any experience with command-line, we advise you to first consult our tutorial on command-line for general information about command-line and the use of SSH.
Perform all steps in this tutorial series as either the root user, or a user with sudo rights, unless indicated otherwise.
In this first part of the Plesk tutorial series the following topics are discussed:
- What size of VPS do I need?
- Logging in to Plesk for the first time
- Configuring your hostname
- Creating an extra Plesk user
- Adding Software packages to Plesk
After the installation of Plesk, we will automatically send you an e-mail with the password for the root user. You use this password when logging in for the first time in Plesk and for switching to the root user in SSH. Be sure to keep the password safe because passwords are not transparent to us and are not stored.
The mail also contains the web address of Plesk. This address is the IP of your VPS with the addition: 8443, for example 123.123.123.123:8443. When you log in for the first time in Plesk, there are a few steps to the initial setup that we explain below.
Step 1
First go to the login page of Plesk (e.g. 123.123.123.123:8443). You will see a message like the one below (depending on your browser).
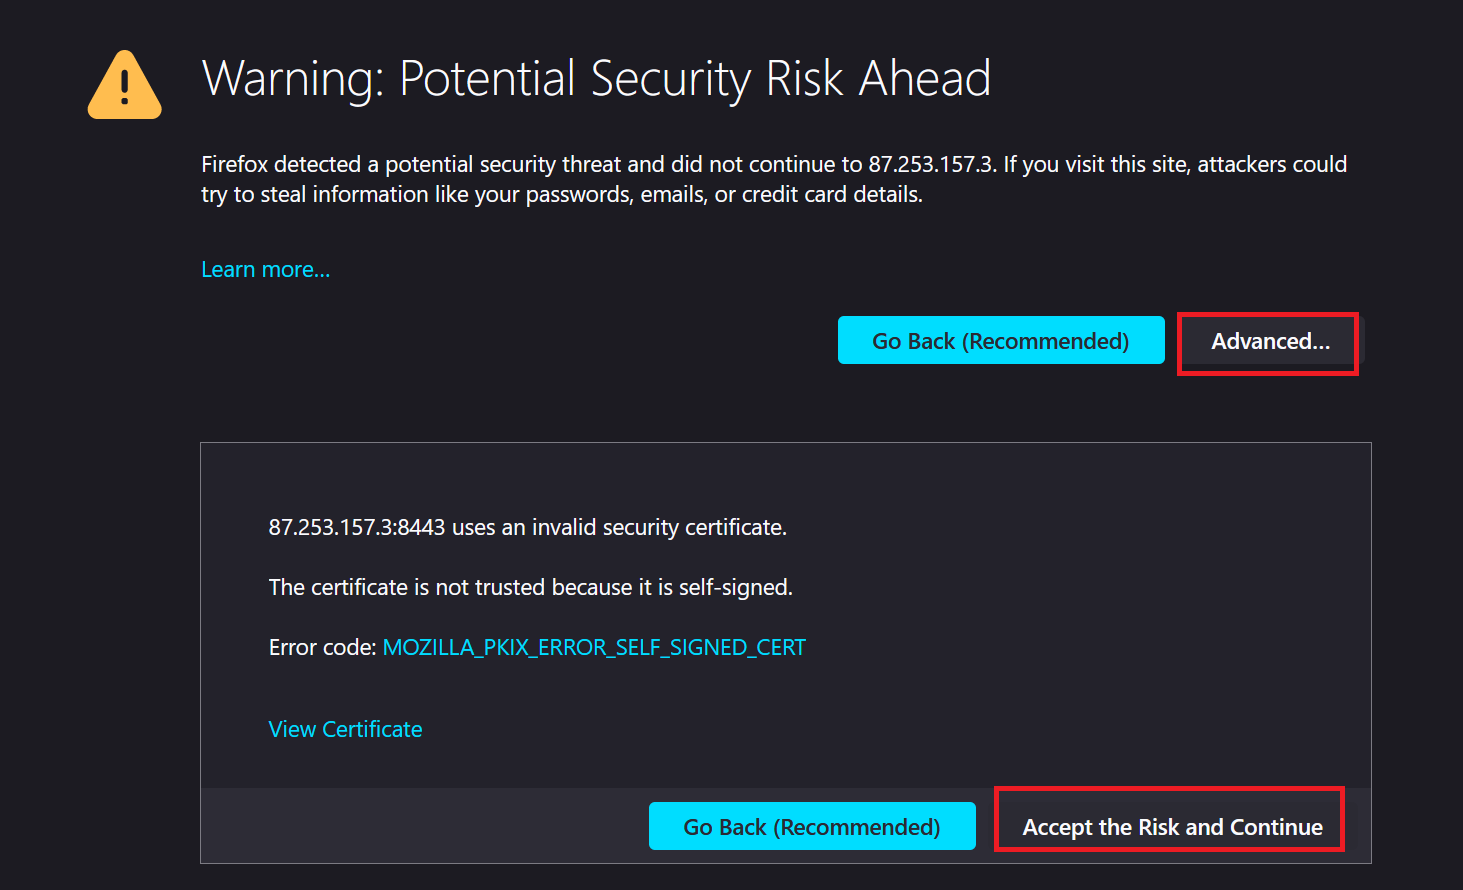
The notification is shown because there is no SSL linked to your hostname yet/you're not using your hostname yet. You will no longer see it after you have configured SSL (further on in this tutorial series).
Click on ‘Advanced’ and then ‘Continue to 123.123.123.123 (unsafe)’ or 'Accept the Risk and Continue' to continue.
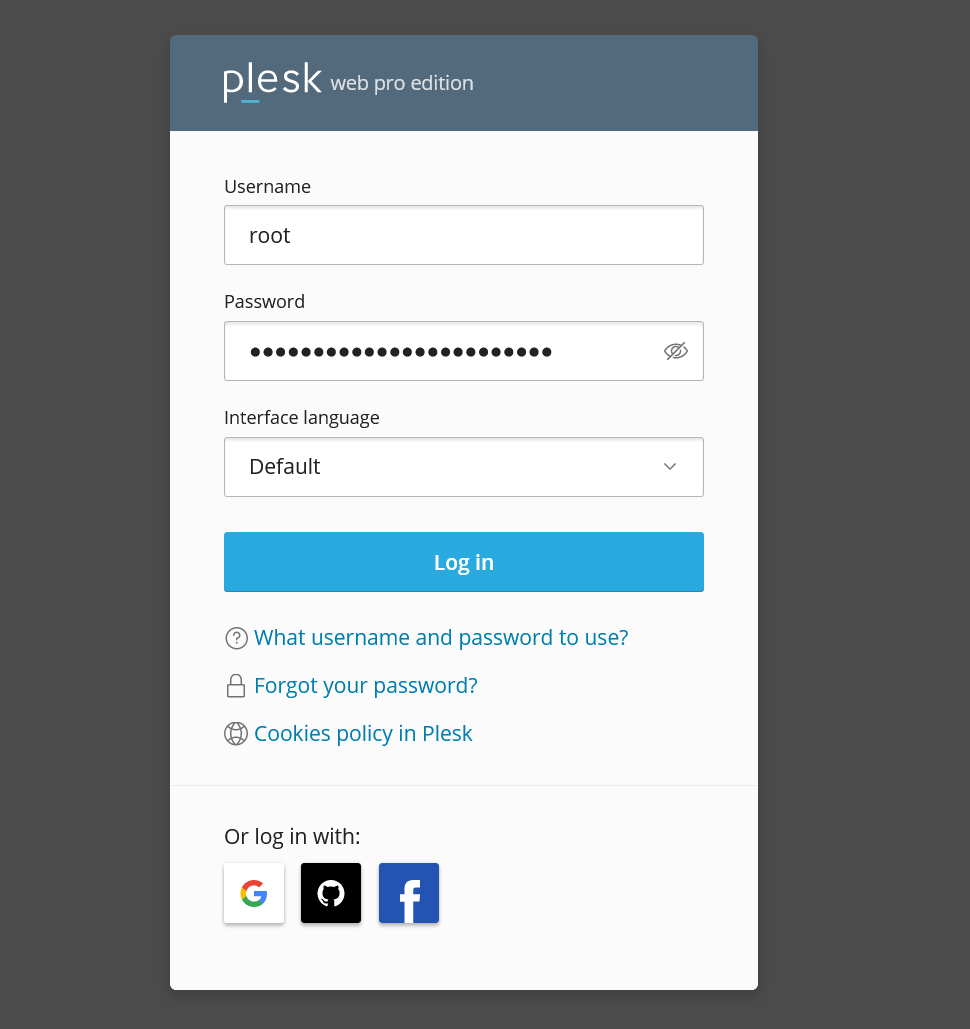
Now log in to Plesk by using your Plesk root username and password sent by e-mail. An example can be seen in the screenshot below.
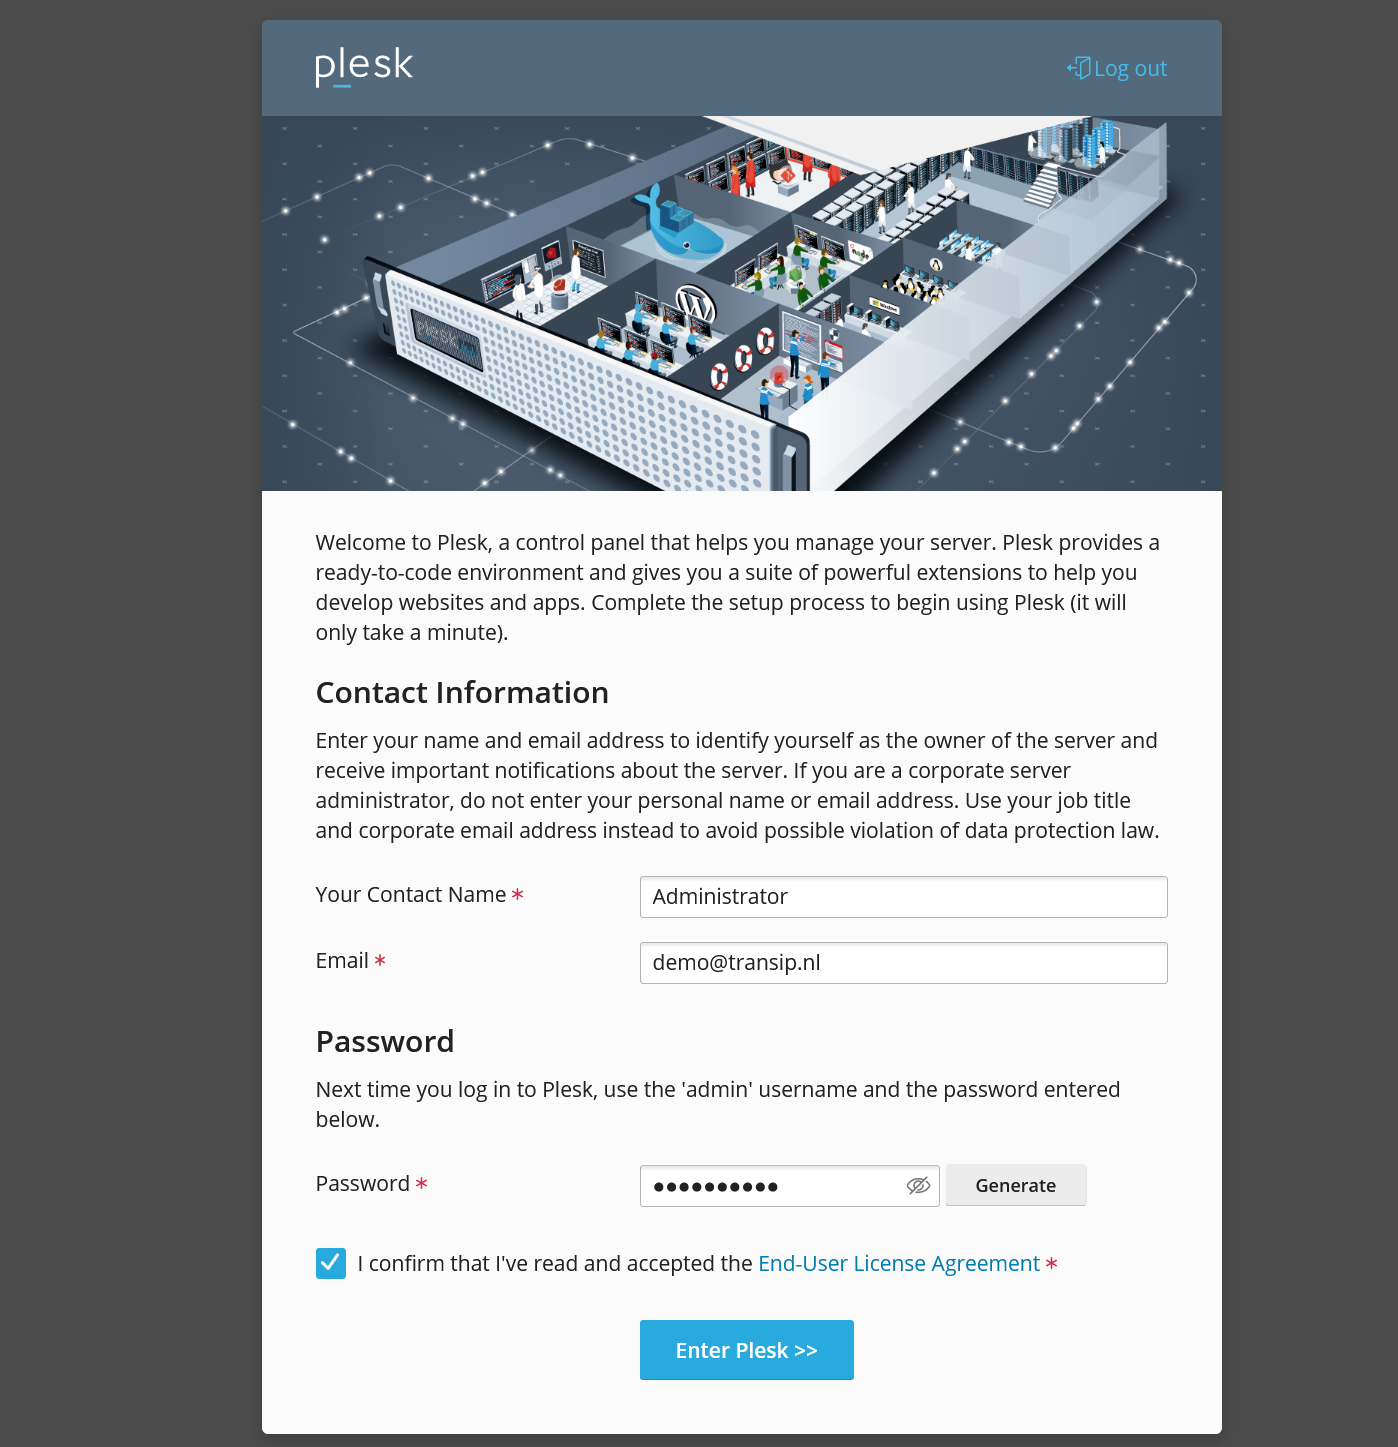
Step 2
You'll be greeted by the screen below. Supply a Contact Name, Email and Password, and confirm the License Agreement. Click 'Enter Plesk' after you're done filling the forms.
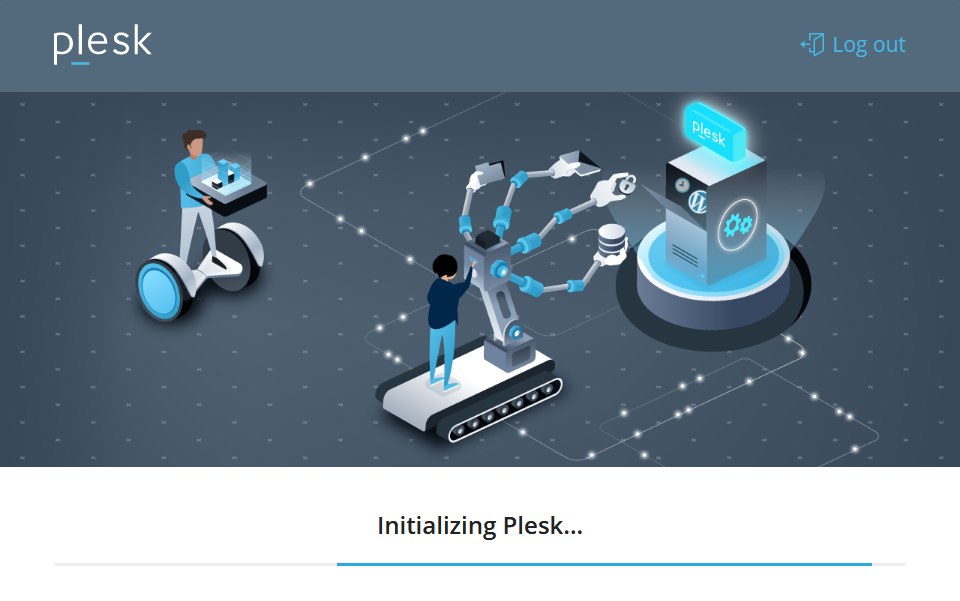
Step 3
You'll now see the initialisation screen. It will take about a minute before you automatically proceed to the next step.
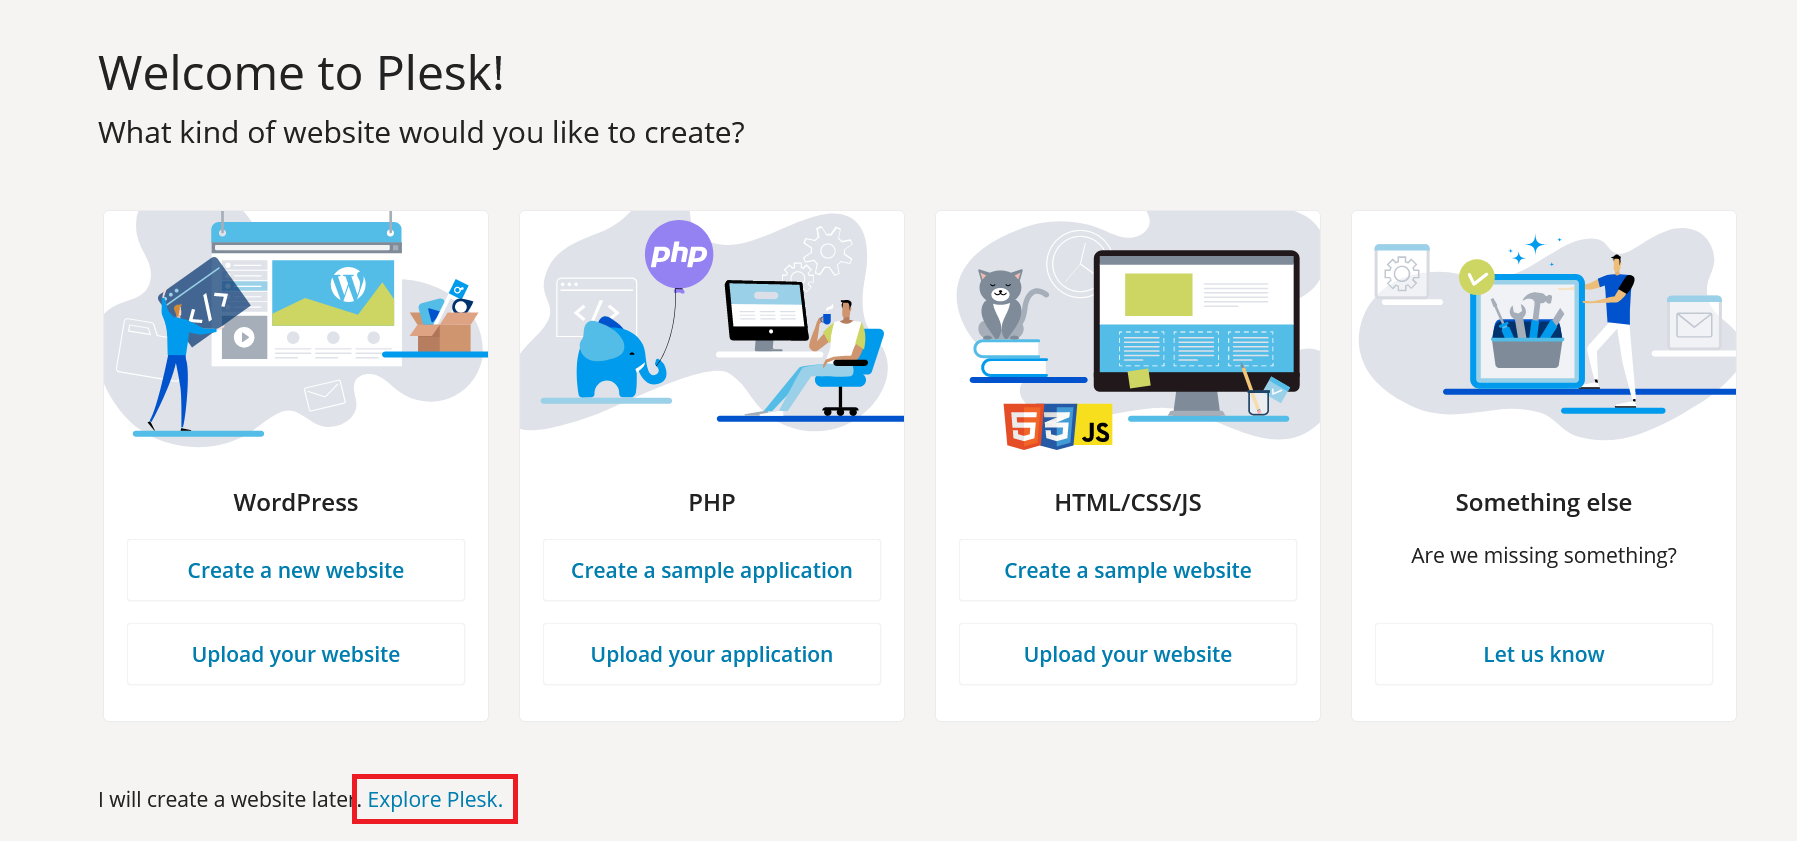
Step 4
Plesk will offer to set up a temporary site. As we don't want to add a site right now but only a domain (required for an ssh user) we'll skip this for now. Click 'Explore Plesk' to continue.
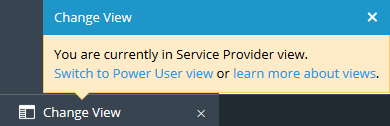
You'll now arrive at the 'Home' menu. Plesk's layout is automatically configured to use the Power User view. Should your layout not match our tutorials, click 'Change View' in the bottom left, followed by 'Switch to Power User view'.
Step 5
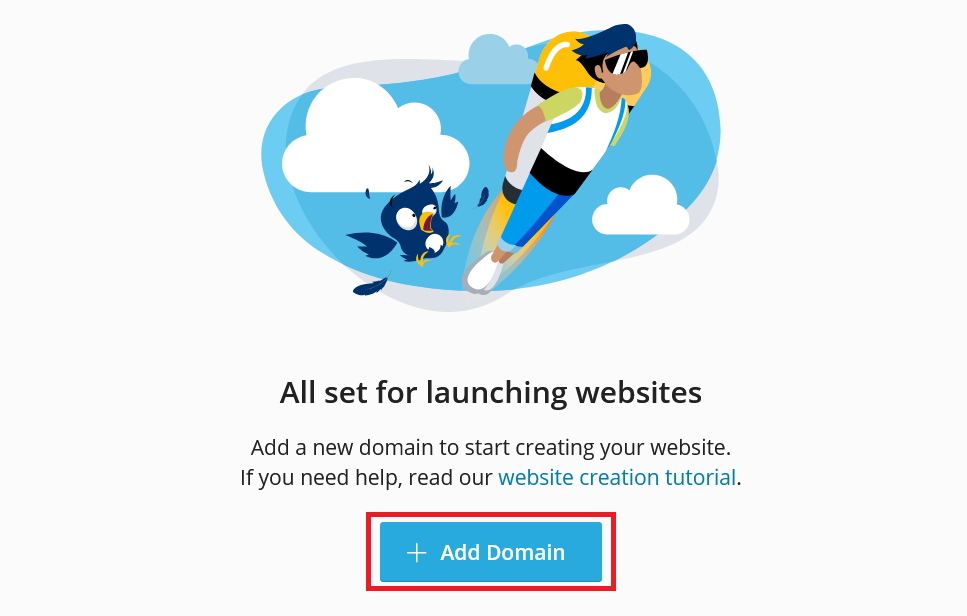
SSH login is disabled for the root user for security reasons. Aditional steps are required before you can connect over SSH. In order to be able to use SSH, you first add a domain to your Plesk VPS.
After switching to the Power User view you'll automatically see the add domain option in the screenshot below. Click 'Add Domain'.
Step 6
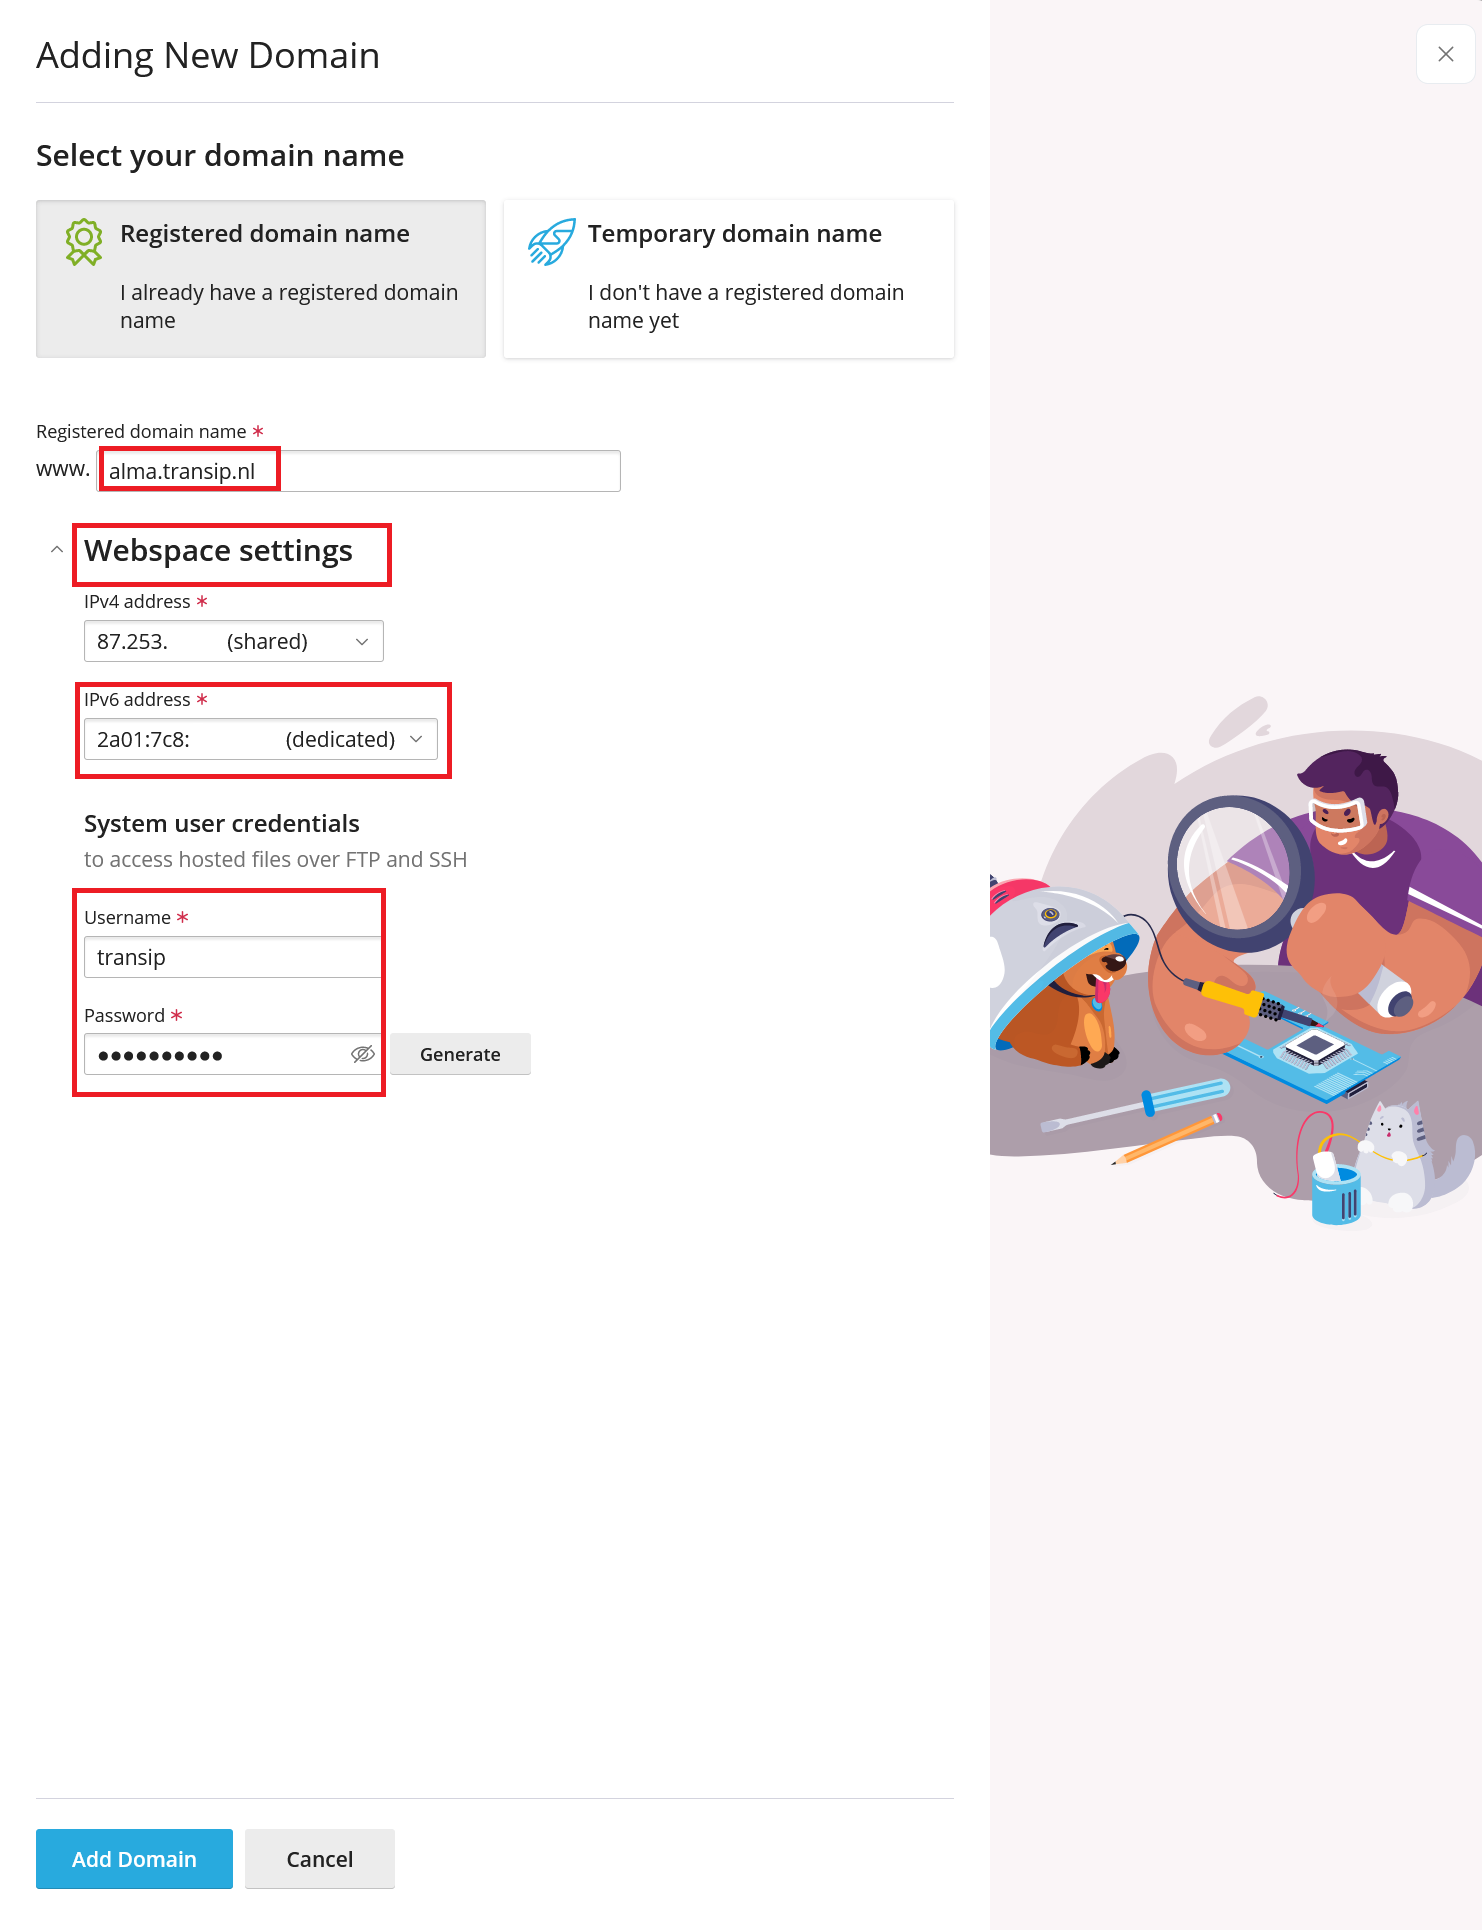
Fill the forms like in the screenshot below (but using your own). Please note the points below and click 'Add domain' when finished to add your domain to Plesk.
- You're free to select 'Registered domain name' or 'Temporary domain name'. This option is only required for creating your SSH user so a non existant domain works just as well.
- Select an IPv6 address.
- Use a unique name as your 'Username'. You're free to change the provided username.
- The 'Username' and 'Password' which you configure, are used for FTP and SSH. Ensure that the password is secure (i.e. strong) and make sure you store it securely.
Stap 7
In the previous step you've created an FTP and SSH user, but SSH access is still disabled for this user. We'll first enable SSH at this point as you'll need it for some of the other instructions in these tutorials.
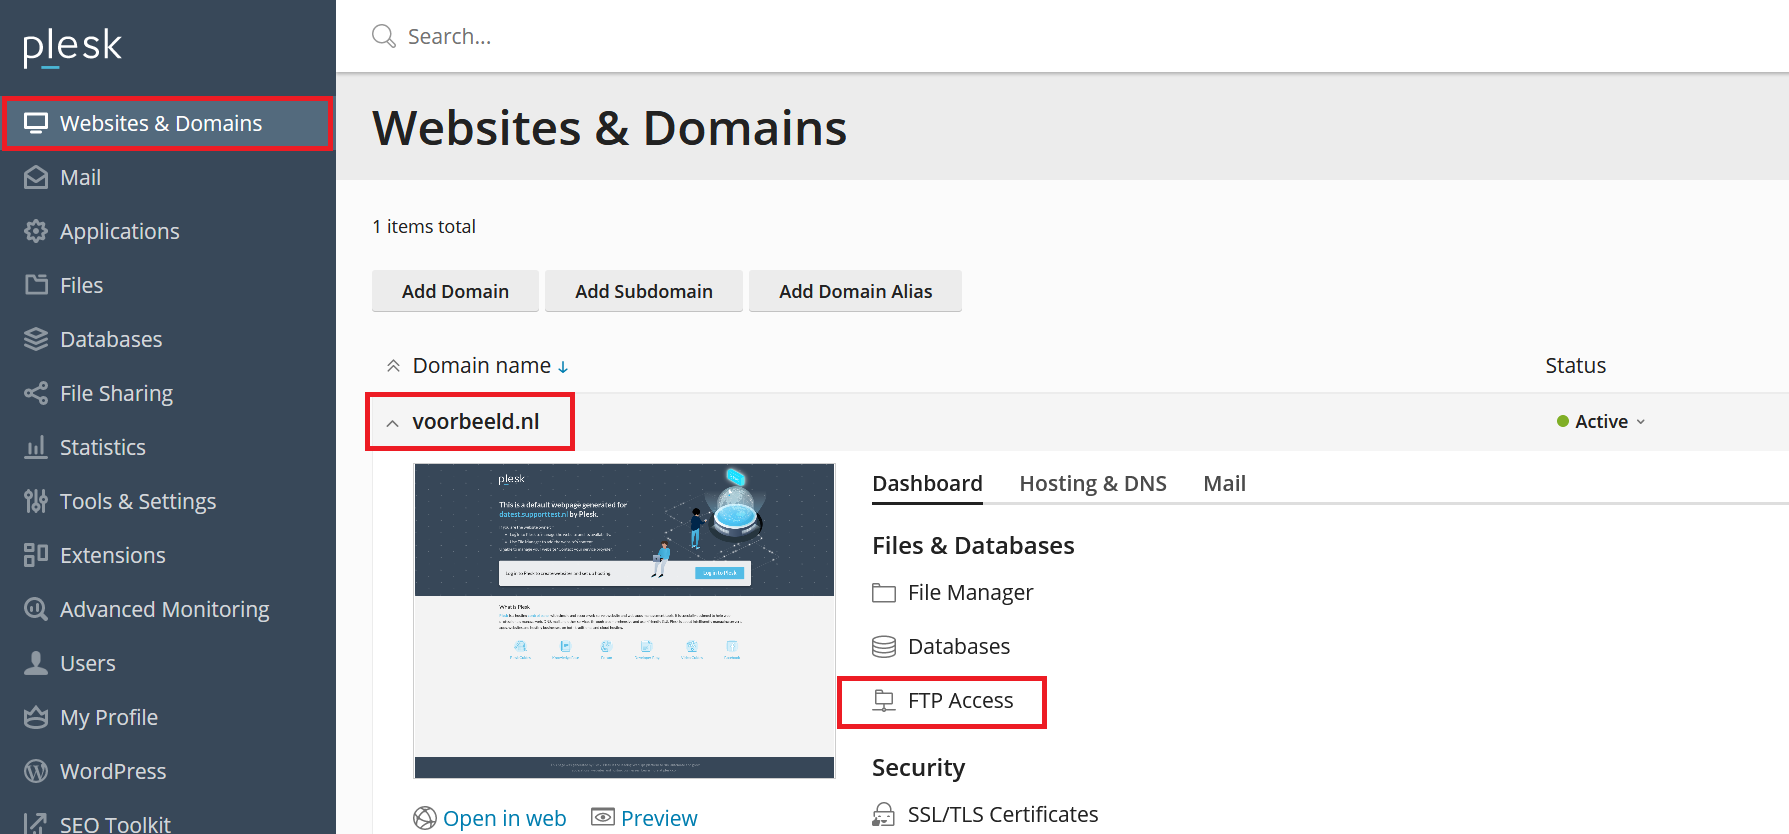
In Plesk click on 'Websites & Domains' > your domain name > 'FTP Access'.
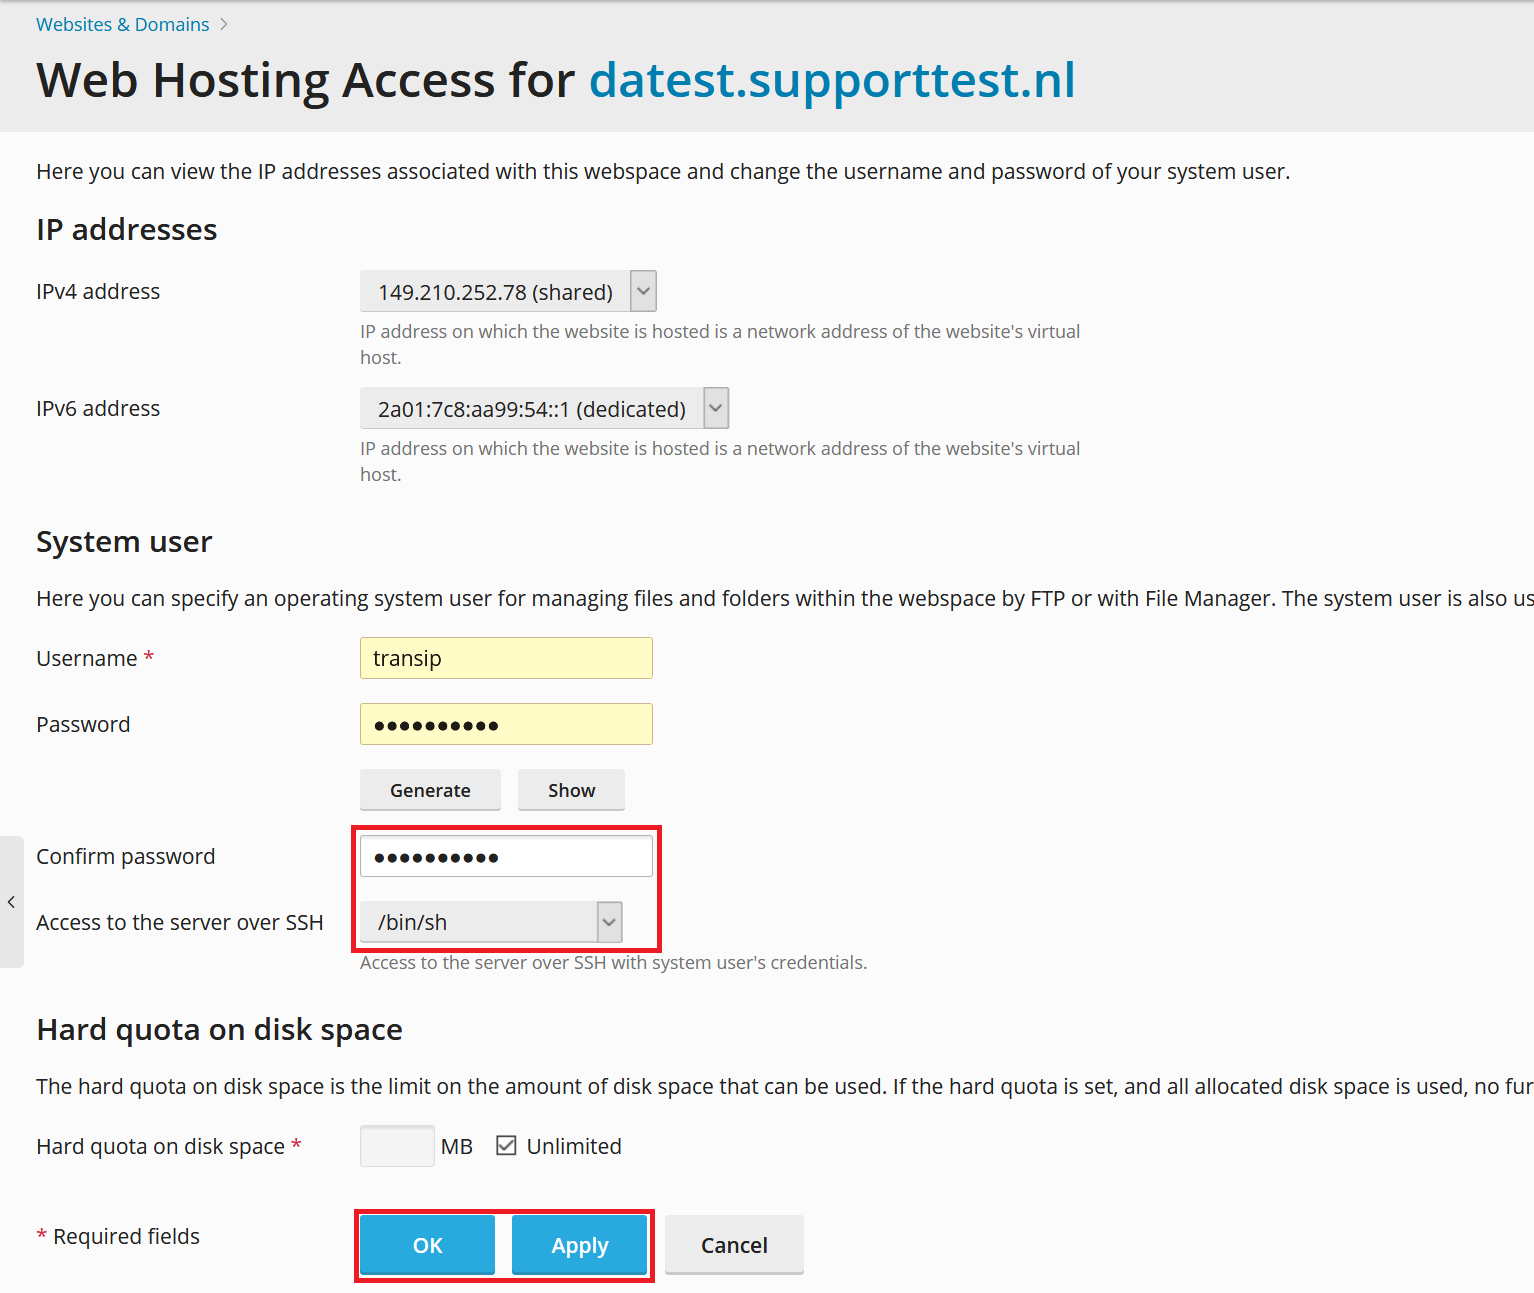
Step 8
The user name which you created in step 6 is filled in automatically. Change 'Access to server over SSH' from 'forbidden' to /bin/sh/ and click 'Apply'.
The user now has SSH and FTP access. Once connected over SSH you switch to the root user with the command (see our article how to use command-line for more information on the use of command-line / SSH):
su root
Your VPS comes with a temporary/placeholder hostname. In order to be able to use certain functions such as 'Updates & Upgrades', it's necessary to include a valid hostname. Your hostname can be configured in Plesk as follows:
Step 1
Log in to Plesk and click 'Tools & Settings' in the left hand menu.
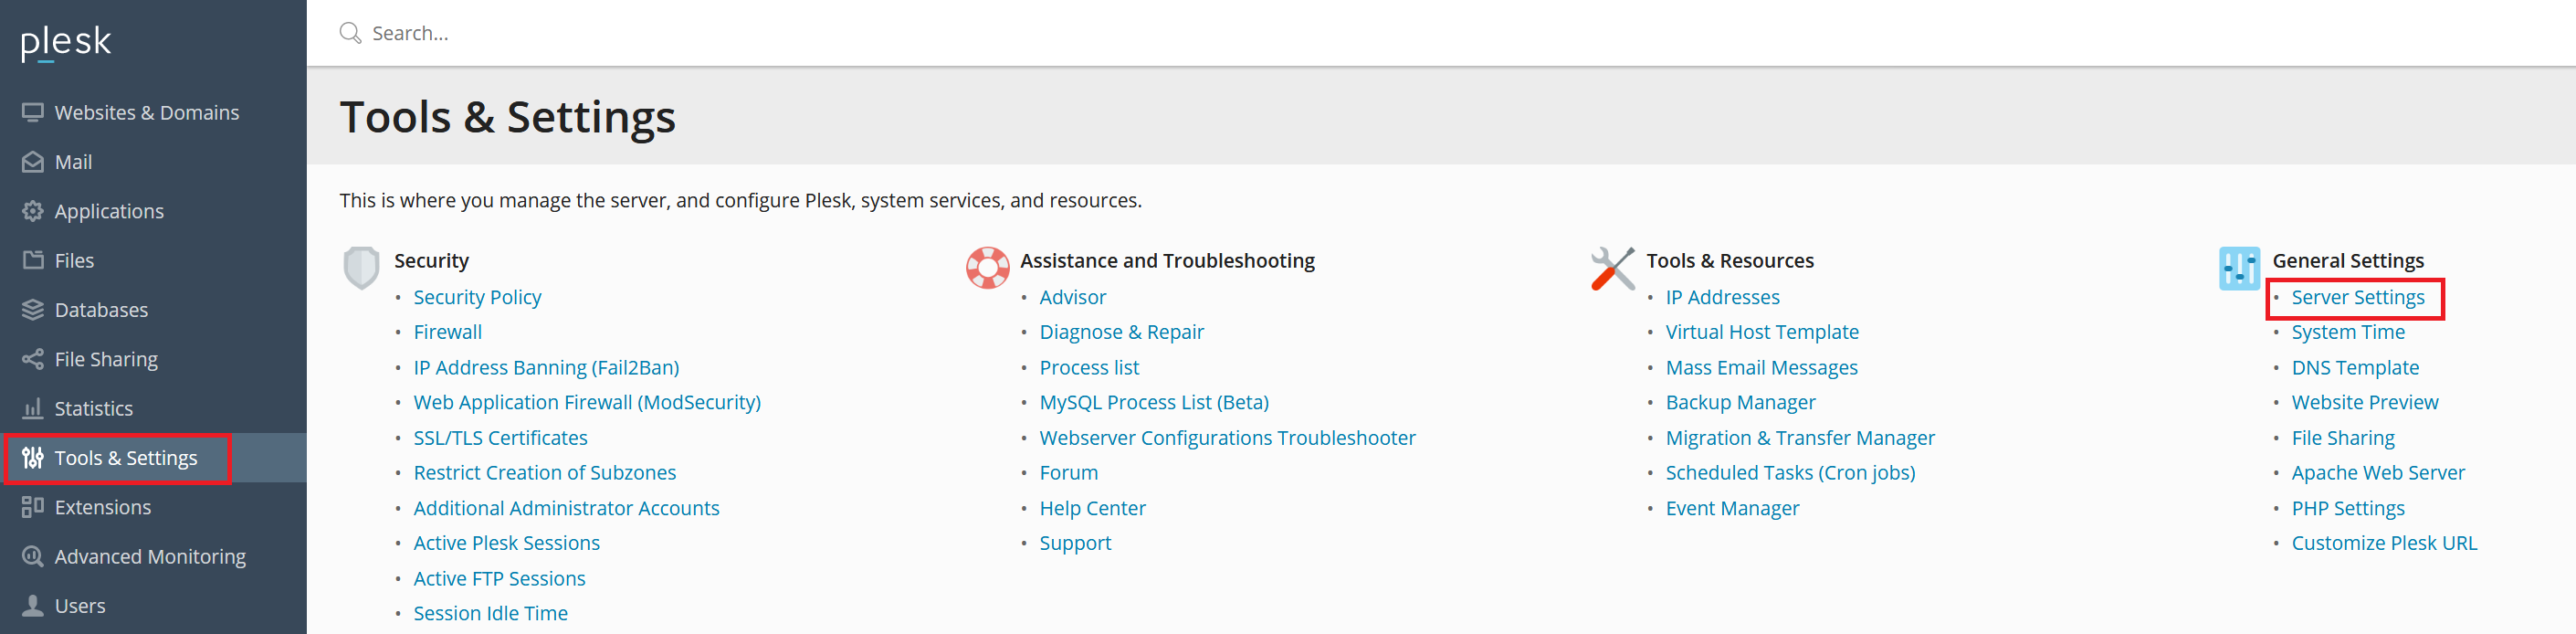
Step 2
Click 'Server Settings' under 'General Settings' (in the top right).
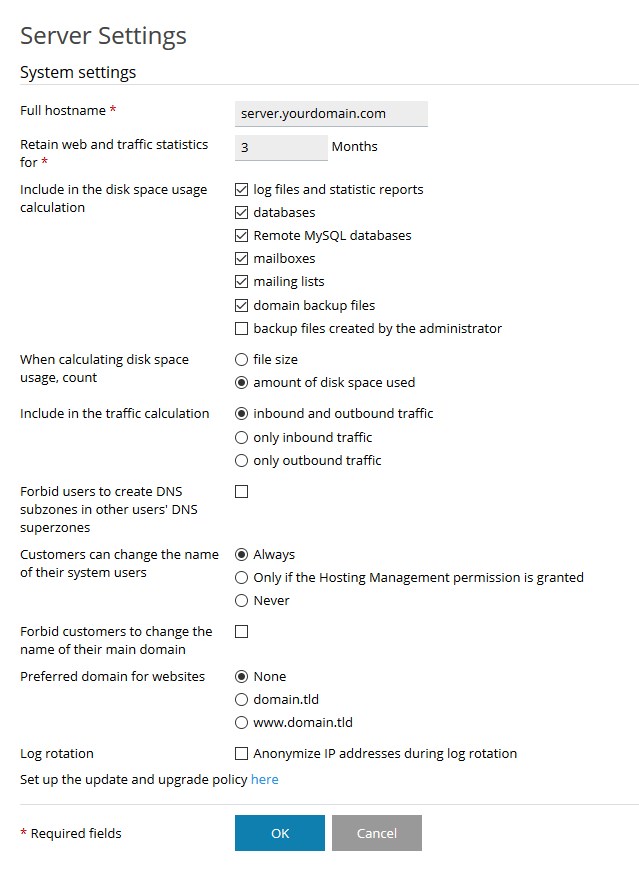
Step 3
Adjust your hostname in the input field behind 'Full hostname' and click 'OK'. We recommend using a syntax such as server.yourdomain.com. Don't forget to ensure the domain used for the hostname also has the hostname configured in its DNS.
Plesk automatically uses the primairy IPv6 address of your VPS. The address is configured as a 'dedicated' address. This means that it can only be used by one specific account, in this case the root/administrator user.
Other Plesk accounts which configure your IPv6 address in their domains' DNS settings, will notice that people who visit their websites over IPv6 are redirected to your host's primary website instead.
In order to make your IPv6 address available for other Plesk account, change the IPv6 address to be 'shared' as follows:
Step 1
In Plesk navigate to 'Tools & Settings' > 'IP addresses'.
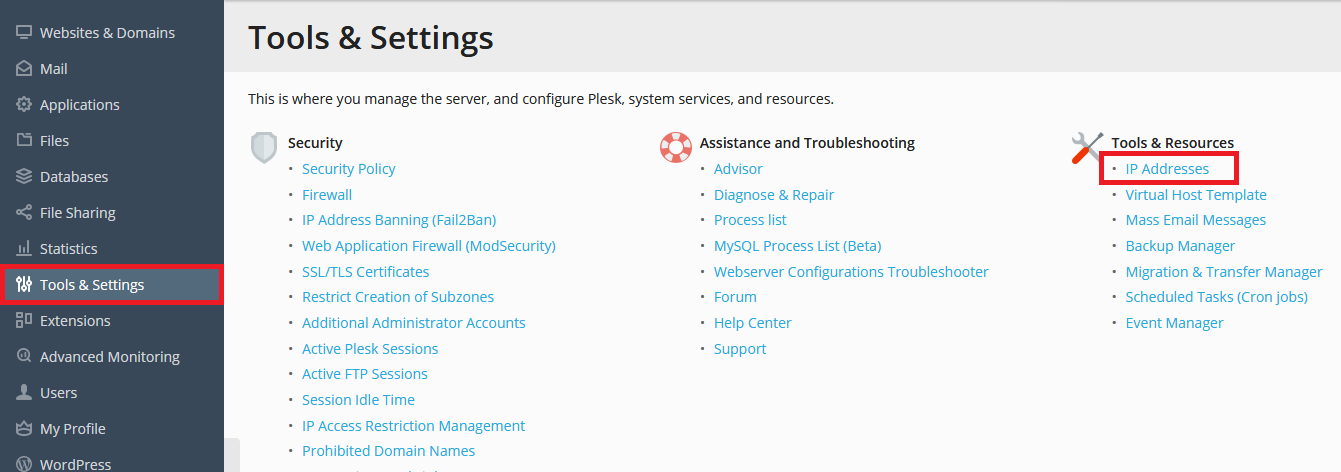
Step 2
Click the IPv6 address which you'd like to share (on the right hand side you can see which of your addresses are shared or dedicated).

Would you like to keep the primairy IPv6 address dedicated? Alternatively you can add an extra IPv6 address instead by clicking the 'Add IP Adddress' button on the top left and creating a new shared address.
Step 3
Change the IPv6 address from 'Dedicated' to 'Shared' and click 'OK'.

All Plesk users on your VPS cannow make use of your shared IPv6 address.
Plesk offers you the possibility to install a wide range of software from Plesk itself. We recommend using this method of installation where possible and not, for example, to perform the installation from SSH.
Plesk contains many packages (software) that contain a configuration that is provided by Plesk itself. This ensures optimum operation in combination with Plesk. If you install packages from SSH instead of Plesk (where possible), then you increase the chance of problems with the configuration of your VPS.
You install new components from Plesk as follows:
Step 1
Log in to Plesk and go to ‘Tools & Settings’ > ‘Updates & Upgrades’.
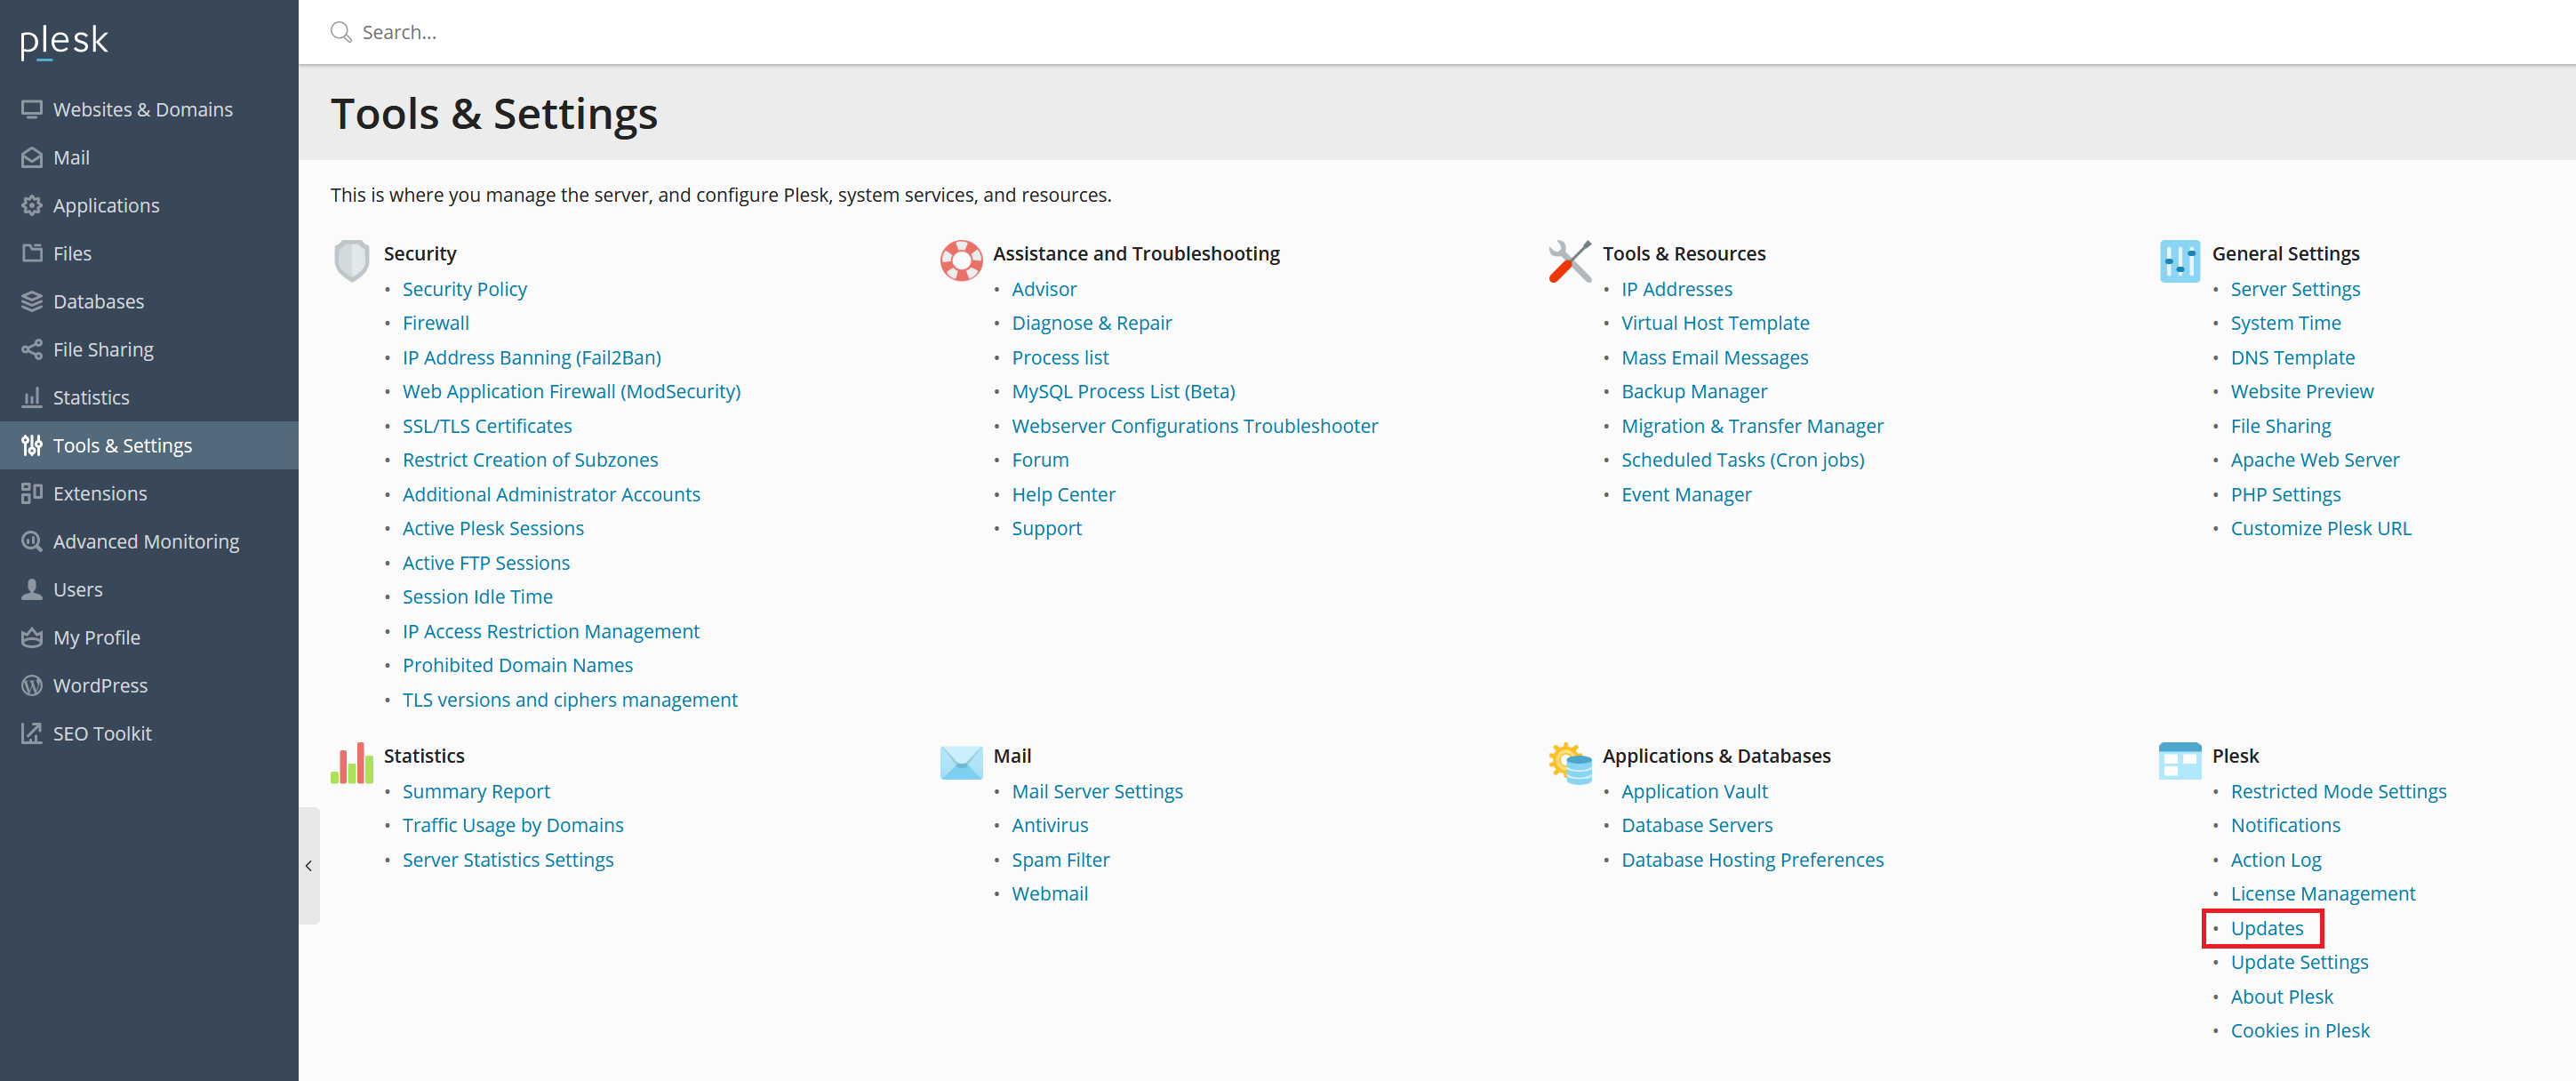
Step 2
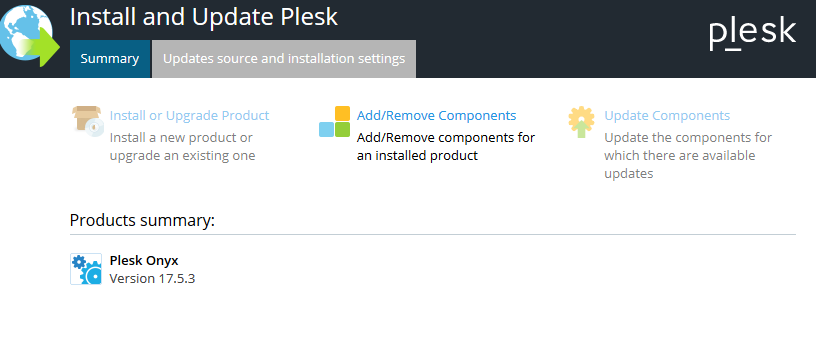
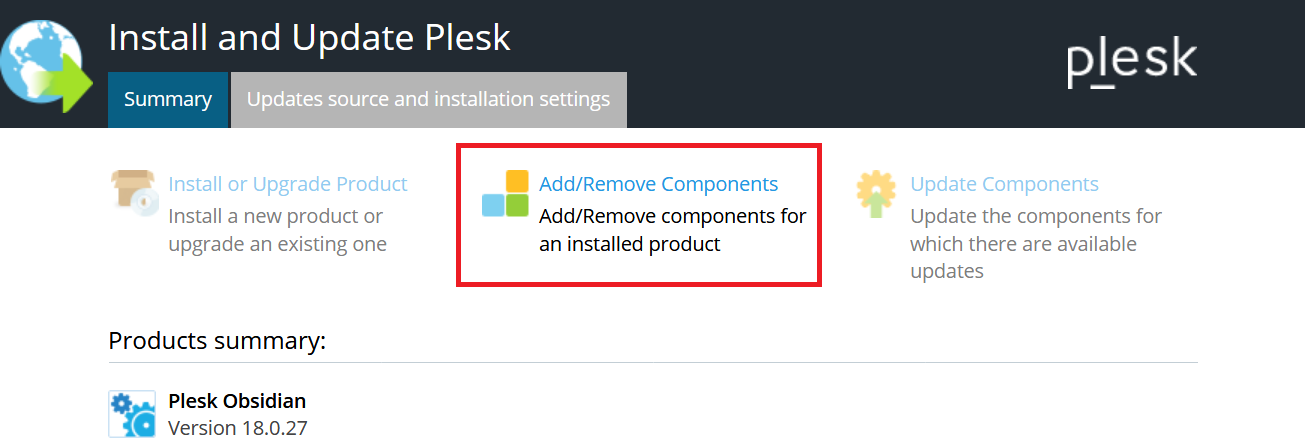
Click on ‘Add/Remove Components’ in the page that appears.
If you've logged in to Plesk over your IP (123.123.123.123:8443) instead of your hostname secured with SSL (https://server.pleskexample.com:8443) you will get an SSL warning. Ignore it and proceed to the page below.
Step 3
You will see an overview of components that you can install from Plesk. To install a component just click on the dropdown arrow behind the red cross, select 'Install', and then click 'Continue'.
With that we arrive at the end of this introductory chapter. Click here to continue to Part 2: Securing your VPS
Should you have any questions left regarding this article, do not hesitate to contact our support department. You can reach them via the ‘Contact Us’ button on the bottom of this page.
If you want to discuss this article with other users, please leave a message under 'Comments'.