


When you're already logged in to your WordPress Dashboard, you can easily change the password of your WordPress website. If you're not logged in (which isn't surprising if you've lost your password), there are several other ways to reset this password.
Read this article to learn about the different ways of restoring the password for your WordPress website.
Changing the password in the WordPress Dashboard
If you're already logged in to your WordPress Dashboard, you can change your password with just a few clicks.
Step 1
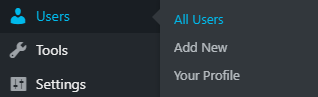
In the WordPres Dashboard, hover over 'Users' on the left hand side and click 'All users'.
Step 2
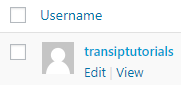
Click your user name.
Step 3
Scroll down to 'Account Management' at the bottom of the page. Click on 'Generate Password'.
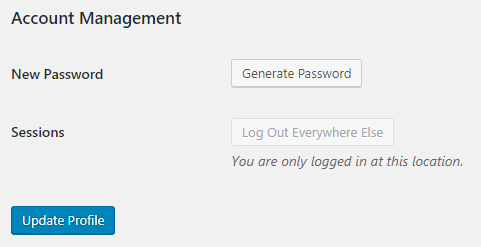
A new password will now be generated. You are free to change this password to something else. Click 'Update Profile' to save the new password.
Changing the password in the WordPress log in page
If you're not already logged into your WordPress Dashboard, you can also reset your password in the WordPress log in page.
Step 1
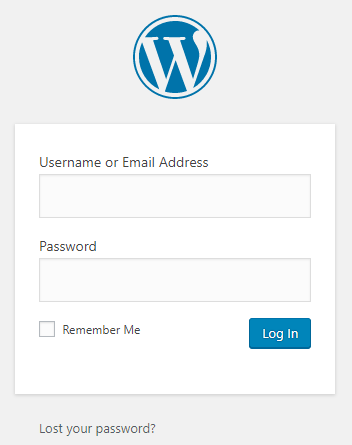
Visit the log in page of your WordPress website. You do this by entering your domain name in the address bar of your browser, followed by either /wp-admin/ or /wp-login/.
For example, if your domain name is site-example.com, enter site-example.com/wp-admin/ or site-example.com/wp-login/ in the address bar.
Next, click 'Lost your password?'.
Step 2
Now enter either the username or email address for your WordPress website and click 'Get New Password'.
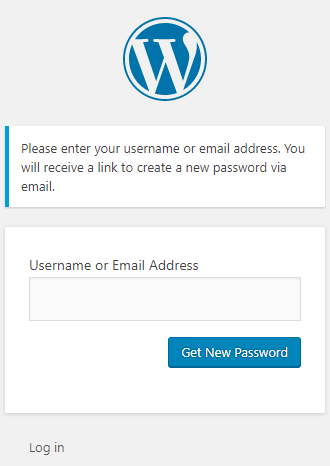
WordPress will then send an email to the email address linked to your WordPress website. Use the link in this email to reset the password of your WordPress website.
Changing the password using phpMyAdmin
If you can't remember or reach the email address linked to your WordPress website, you can also change the password of your WordPress website using the website's database.
The database contains the data of your WordPress website and can be managed using phpMyAdmin. We will now explain how to log in to phpMyAdmin and how to reset your password in your database.
Take note: Make sure you closely follow the next steps. Making incorrect changes to your database can cause harm to your website.
Step 1
Log in to the control panel and click 'Shared Hosting' in the menu. Next, select your domain below 'Products'.
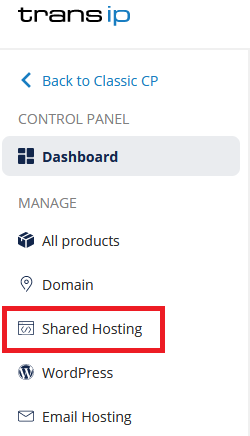
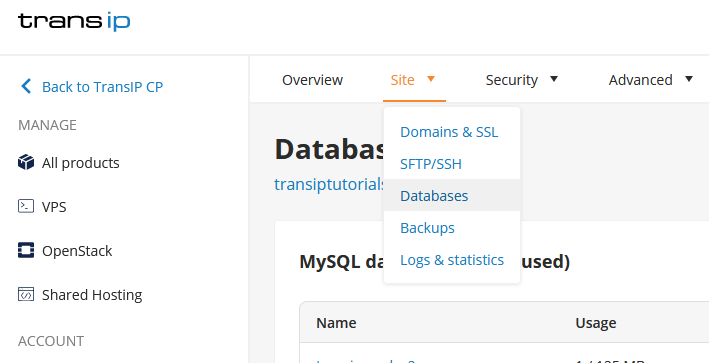
Click the 'Site' tab at the top, followed by 'Databases'.
Step 2
You'll now see an overview of the database created on your Web Hosting. The database name is shown, and the amount of space that is allocated to your database.
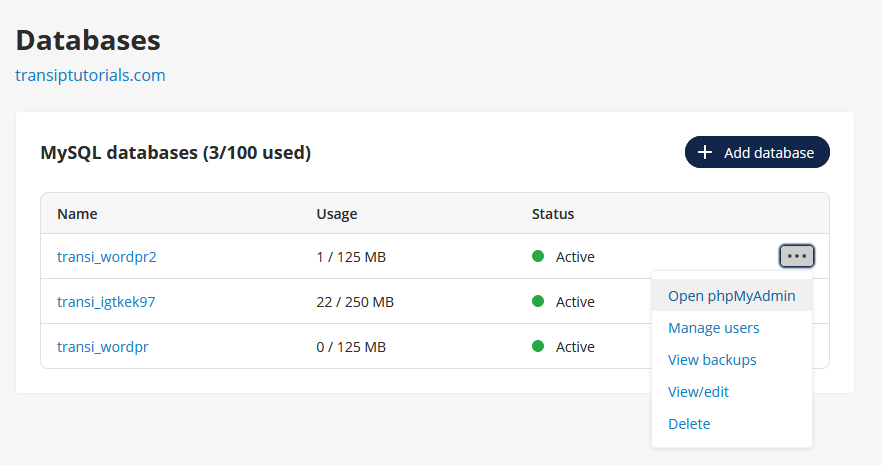
Click the three dots on the right side and click 'Open phpMyAdmin' to log in to phpMyAdmin automatically.
Step 3
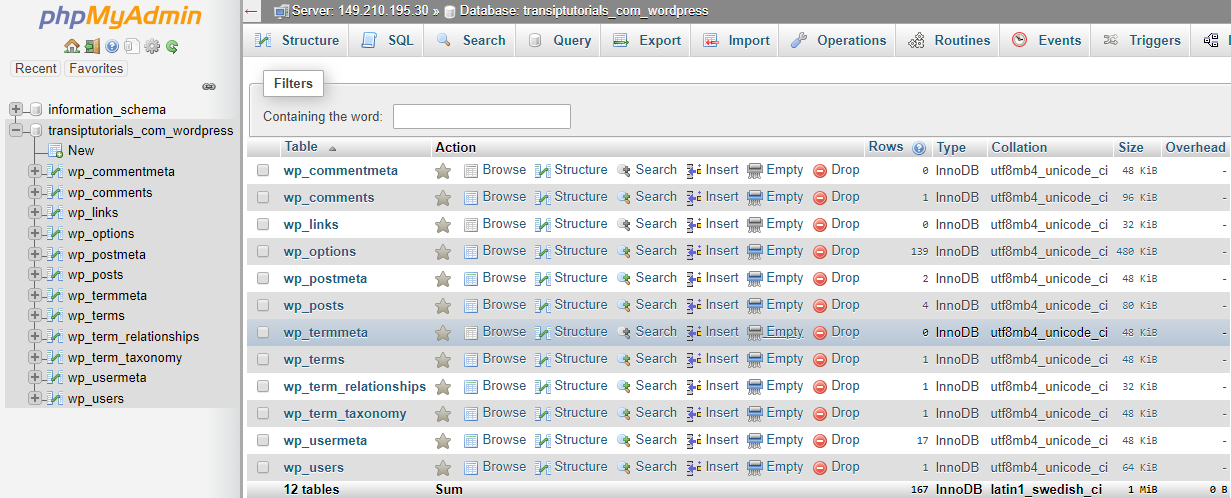
Once you are logged in to phpMyAdmin, you will arrive on the main page. Click on the table called 'wp-users'.
Step 4
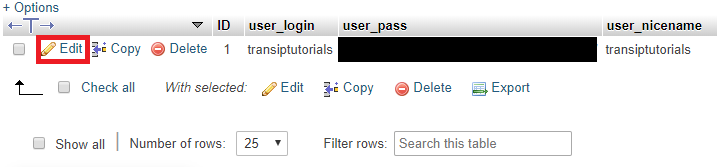
You'll now see various options for the usernames of your WordPress users. Click on 'Edit'.
Step 5
Next to 'user_pass' you'll see a series of numbers and letters. Replace this hash with your new WordPress password. In our example we've used 'examplepassword1', we highly recommend using a more secure password.
Now open the drop down menu next to 'user_pass' and make sure 'MD5' is selected. Click 'Go' to save your changes.
Tip: Next to 'user_email' you can see the email address currently used with your WordPress website.
Changing this email address here allows you to reset the password in 'Changing the password in the WordPress log in page' with that email address.