


In this article we will show you how to link your domain to Google Workspace so it can be used for Google Apps. In order to do this, you need to prove that you own the domain. Google verifies this based on a DNS record that has to be added to your domain's DNS settings.
Verify your domain automatically
Step 1
Register a domain with TransIP.
Step 2
Create a Google Workspace account, based on your domain. You can easily setup a Google Workspace account for your domain on their website.
You are required to enter payment information when you make your Google Workspace account. If your payment information is not accepted, try a different payment method such as PayPal, or contact Google's support team.
Step 3
For any Google service that connects to your website, it is required to validate your domain. After your login, you will immeditely be asked to protect your domain. Click on 'Verify' highlighted in blue next to 'Show that you own this domain name' if this is your first time.
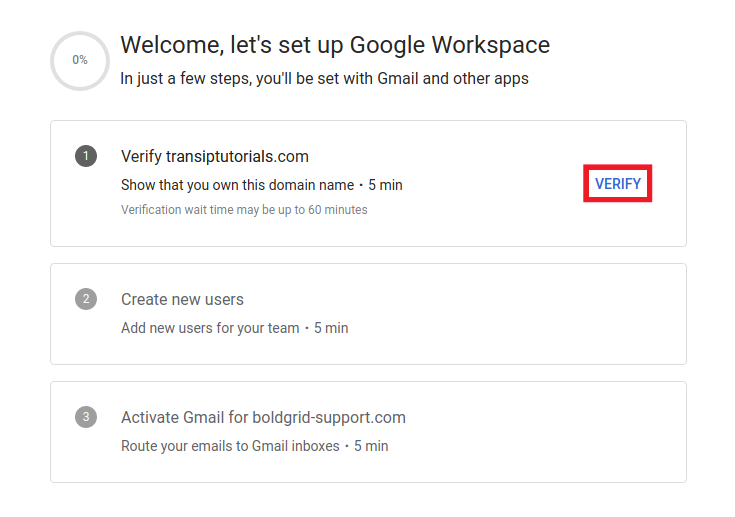
If it is not the first domain in your account, open the menu by clicking the three white lines next to 'Google Admin' in the top left corner of the screen. Then, click on 'Account' in the menu on the left side. Next, click 'Domains' -> 'Manage domains' to go to your domain overview.
To add a new domain, click 'Add a domain' at the top. The buttons are highlighted in the image below:

Step 4
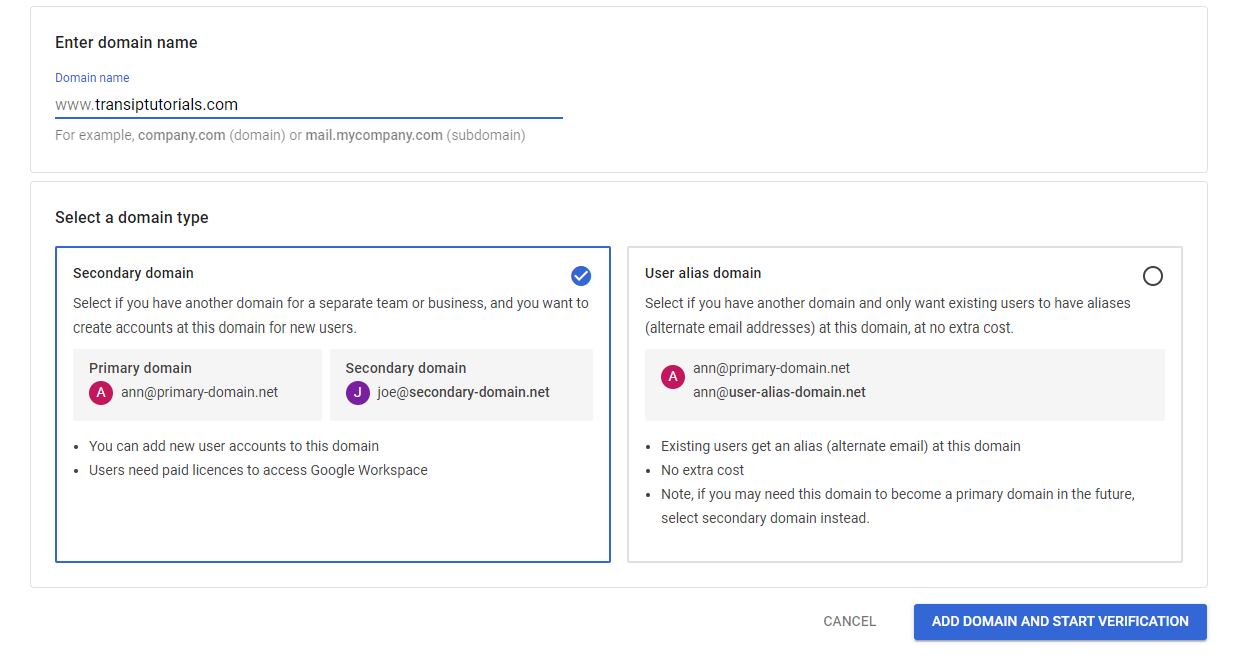
Confirm that you want to verify your domain. If it is not your first domain, enter the domainname and click 'Add domain and start verification'.
Make sure TransIP is selected as your domain host. This will usually be selected automatically. Click on 'Sign in to verify'
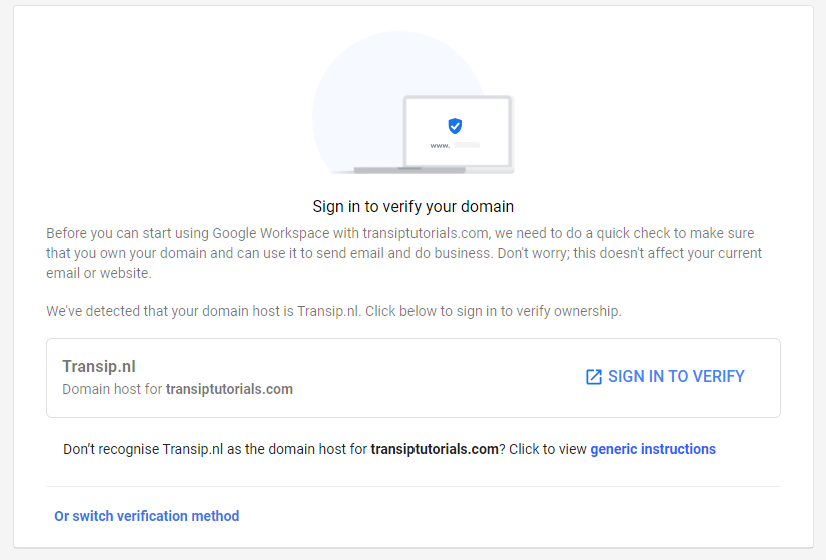
If you want to add the verification record manually, click on 'generic instructions' instead and continue here.
Step 6
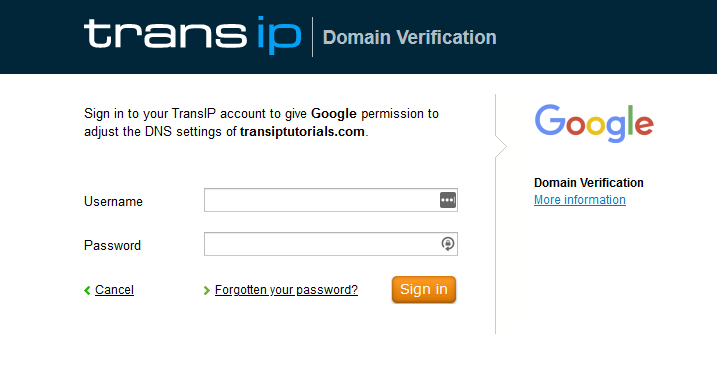
Log in with your TransIP credentials
Step 7
Give Google permission to make changes to your DNS-settings.
Congratulations! Your DNS-settings are modified. It can take up to 24 hours before DNS changes are implemented worldwide. Usually, the changes will become effective within a few hours.
If you are not using the TransIP nameservers, automatic verification of your domain will not be possible. You can add the TransIP nameservers in your control panel by following the steps in this article, or by verifying your domain manually via the steps below.
Verify your domain manually
If you don't use the TransIP nameservers it is not possible to complete the automatic verification. In this case you can add the verification record yourself.
Follow the steps above, but do not log in to your TransIP account by clicking 'sign in to verify' at step 5. Instead, click on 'generic instructions' and follow the steps below.
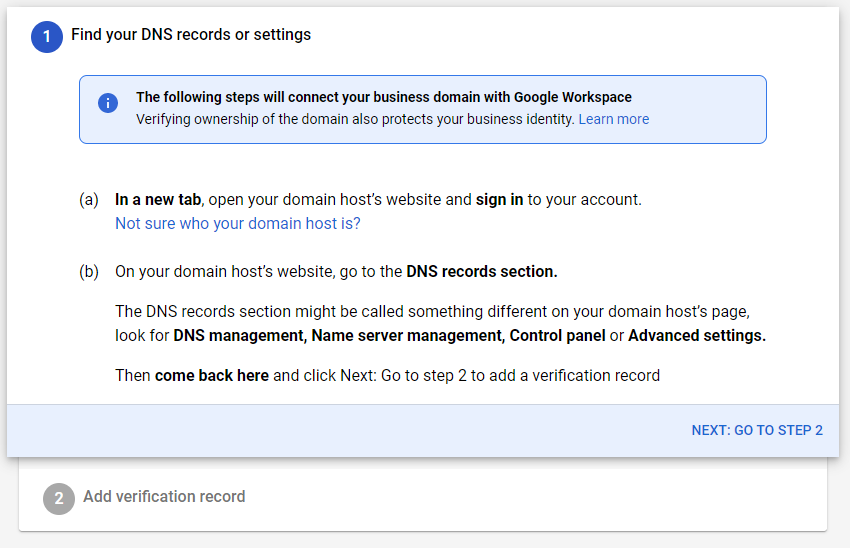
Step 1
Make sure you are logged in to your nameservers first, in order to be able to add a verifcation record to your DNS settings. Next, click on 'Next: go to step 2'.
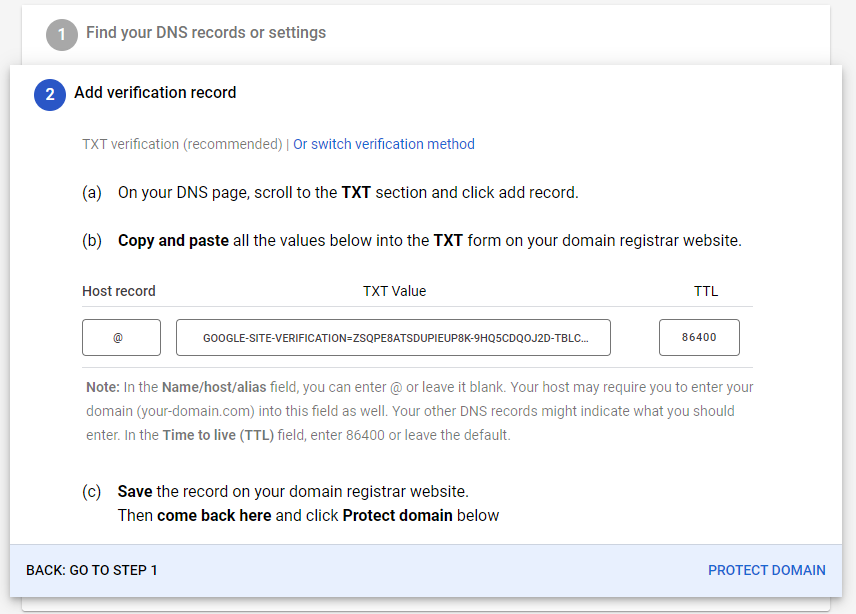
Step 2
You will now see the TXT record that is used for verification. Add the record to your current DNS settings. After having done so, click on 'Protect domain' to finish the verification.
It can take up to 24 hours before DNS changes are implemented worldwide. Usually, the changes will become effective within a few hours.