


Within the OpenStack Dashboard ‘Horizon’, you can use ‘Community Images’.
A ‘Community Image’ is an image shared with all other existing OpenStack projects. These are images created and maintained by the OpenStack community itself. Community Images are an excellent way to share your own creations with other OpenStack users.
In this guide, we will show you how to use ‘Community Images’ and the challenges you might face.
Risks
Using a ‘Community Image’ is not without risks. When you decide to use an image, you trust that the owner provides you with a correct image. The owner can essentially do anything with the image, and you cannot directly see what that might be.
Here are some examples of misuse:
- installing malware
- installing viruses
- installing backdoors
- installing keyloggers
Of course, these are not the only things that can happen, but they are some examples.
Using Community Images does not automatically mean your instance will be misused. Most users create safe images that you can use immediately, but we would like to warn you about the risks associated with 'Community Images’. If you want to be sure you are using a safe image, use the images available within OpenStack that we provide.
OpenStack users at TransIP cannot create a ‘Community Image’ by default. Are you interested in creating community images within our OpenStack domain? Then contact our support department.
Support for Community Images
Unfortunately, support for a 'Community Image' is not included with most providers. If you encounter problems with a 'Community Image’, contact the owner of the image. In most cases, the owner of the image can help you with your issue.
If the owner of the image cannot help you with your issue, you can always contact the support team of the OpenStack provider. However, the support team of the OpenStack provider may not be able to help you because the ‘Community Image’ was not created by them.
Creating/uploading a Community Image
Be aware that when you upload an image, it is available to all OpenStack users within the TransIP domain when set to ‘Community’ visibility.
Creating a ‘Community Image’ is mostly identical to creating a normal image. The only difference is that during creation, you change the ‘visibility’ to ‘Community’.
Step 1
Log in to the OpenStack Dashboard ‘Horizon’.
Step 2
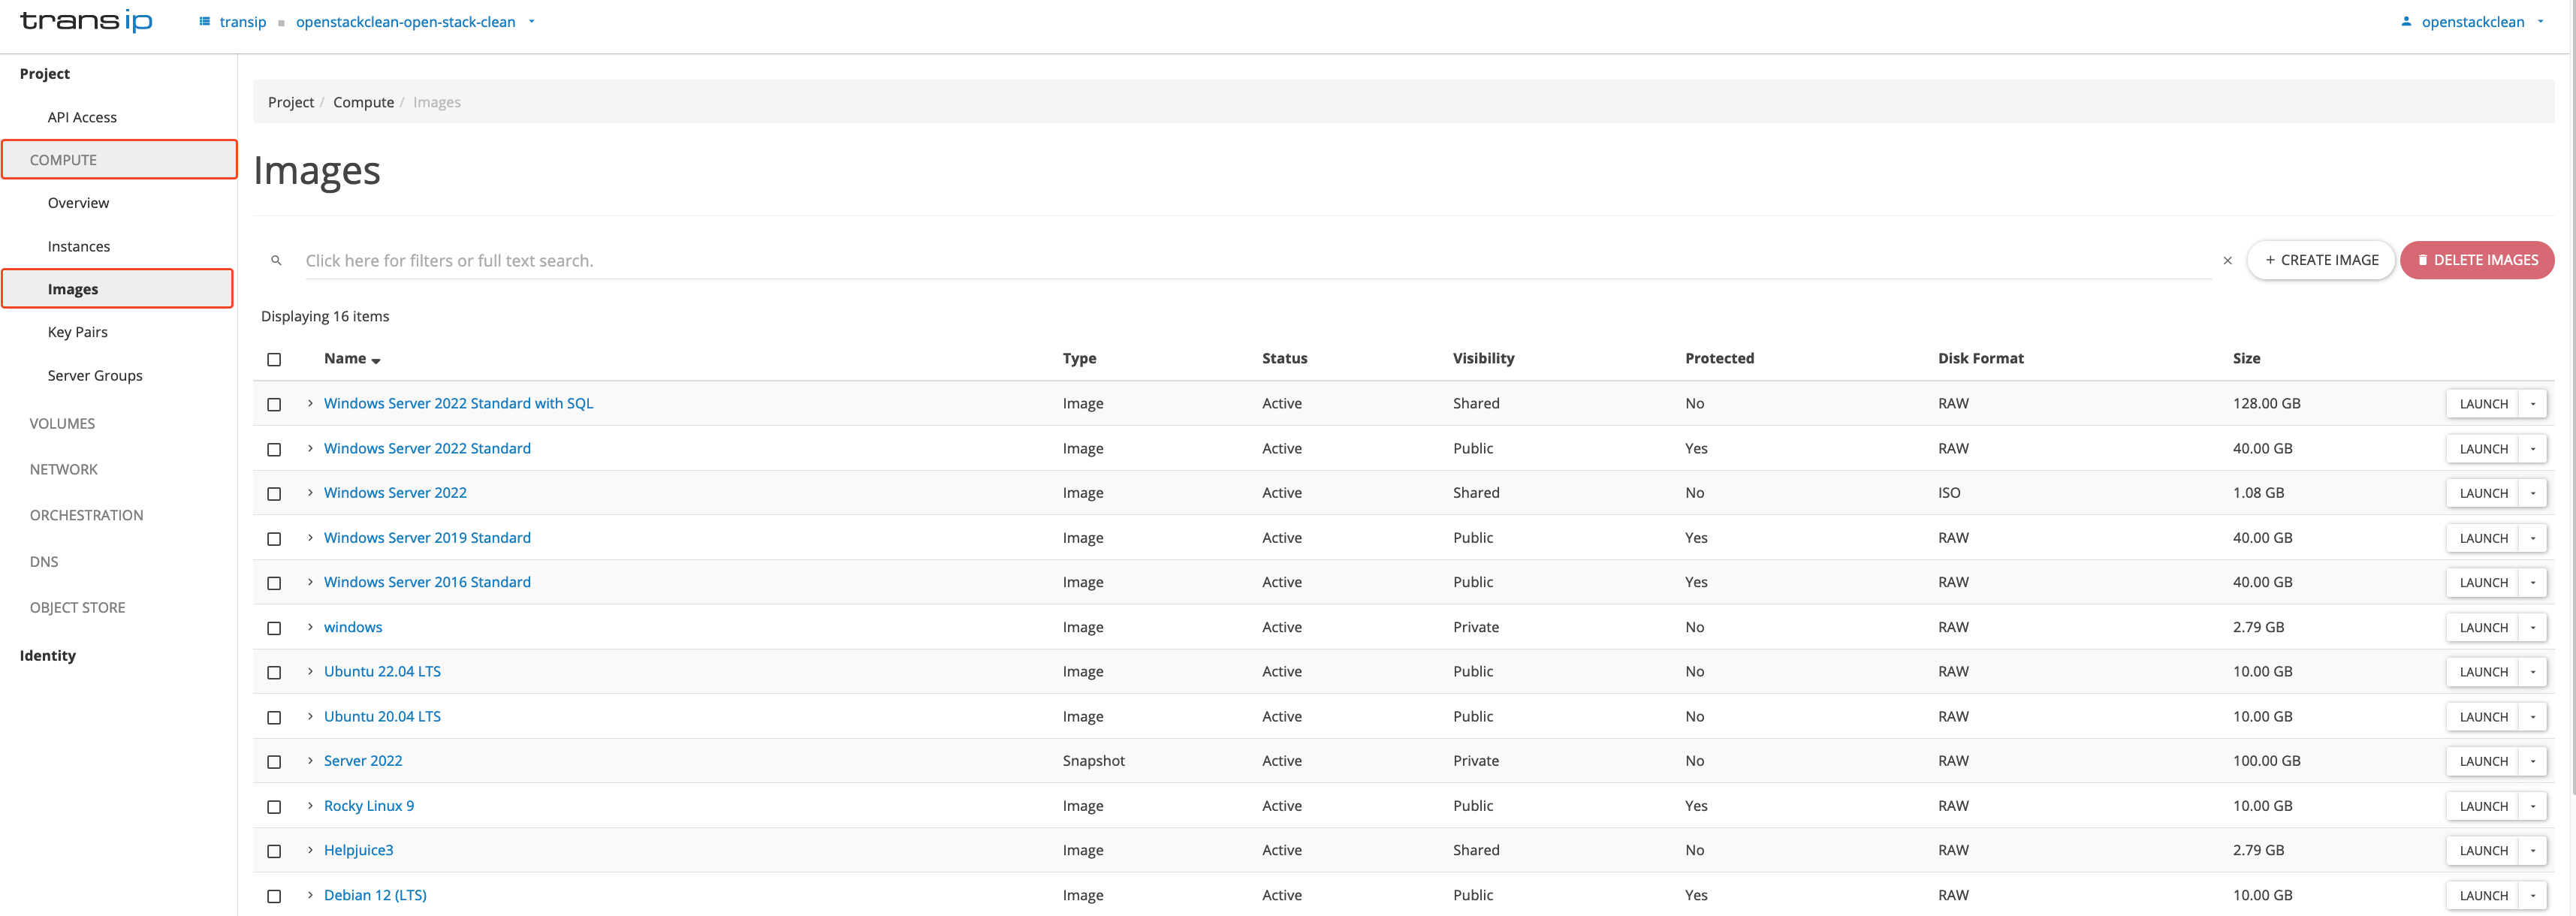
In the overview, navigate to 'Compute' and select ‘Images’ from the submenu.
Step 3
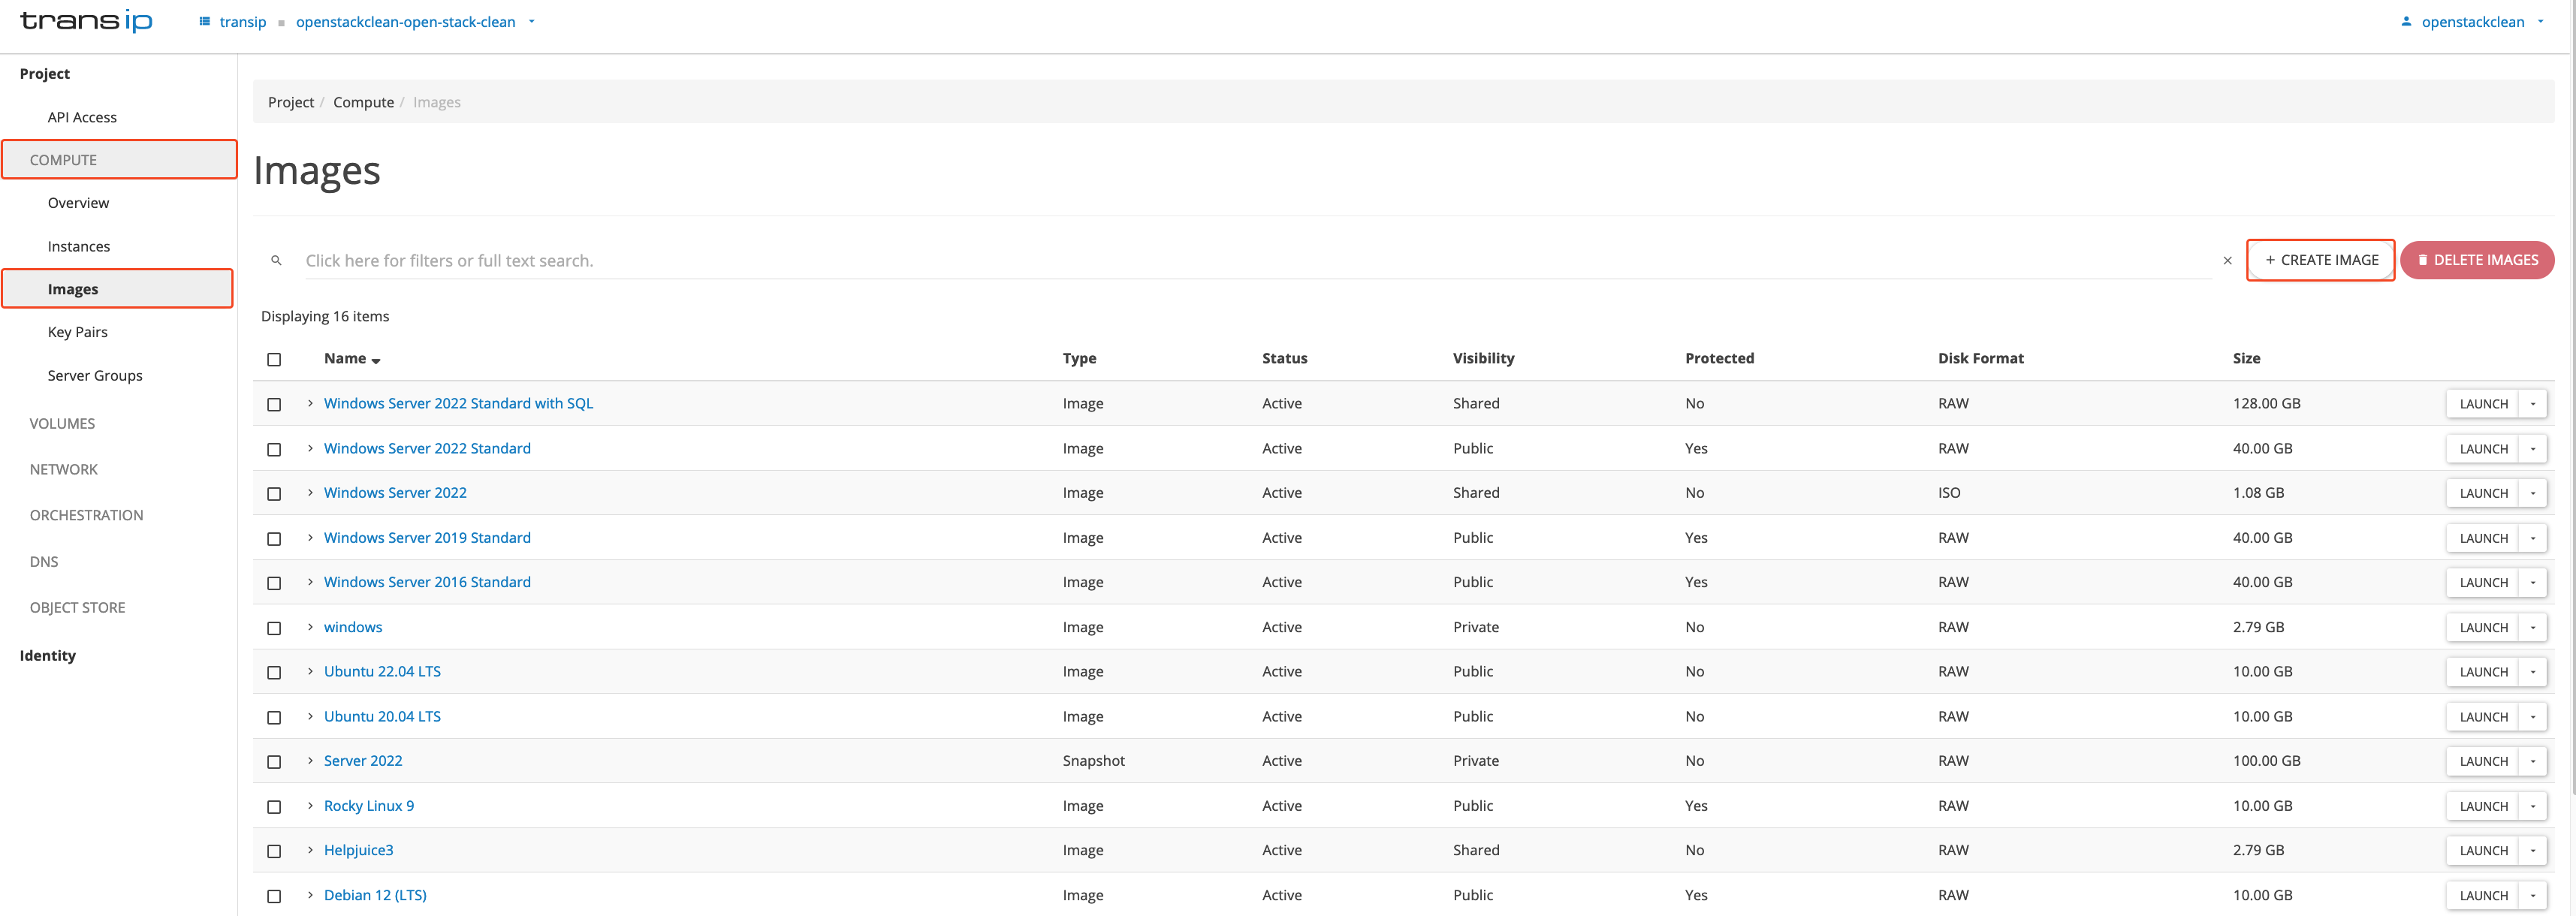
Then, click ‘Create Image’ on the right side, as shown in the image below.
Step 4
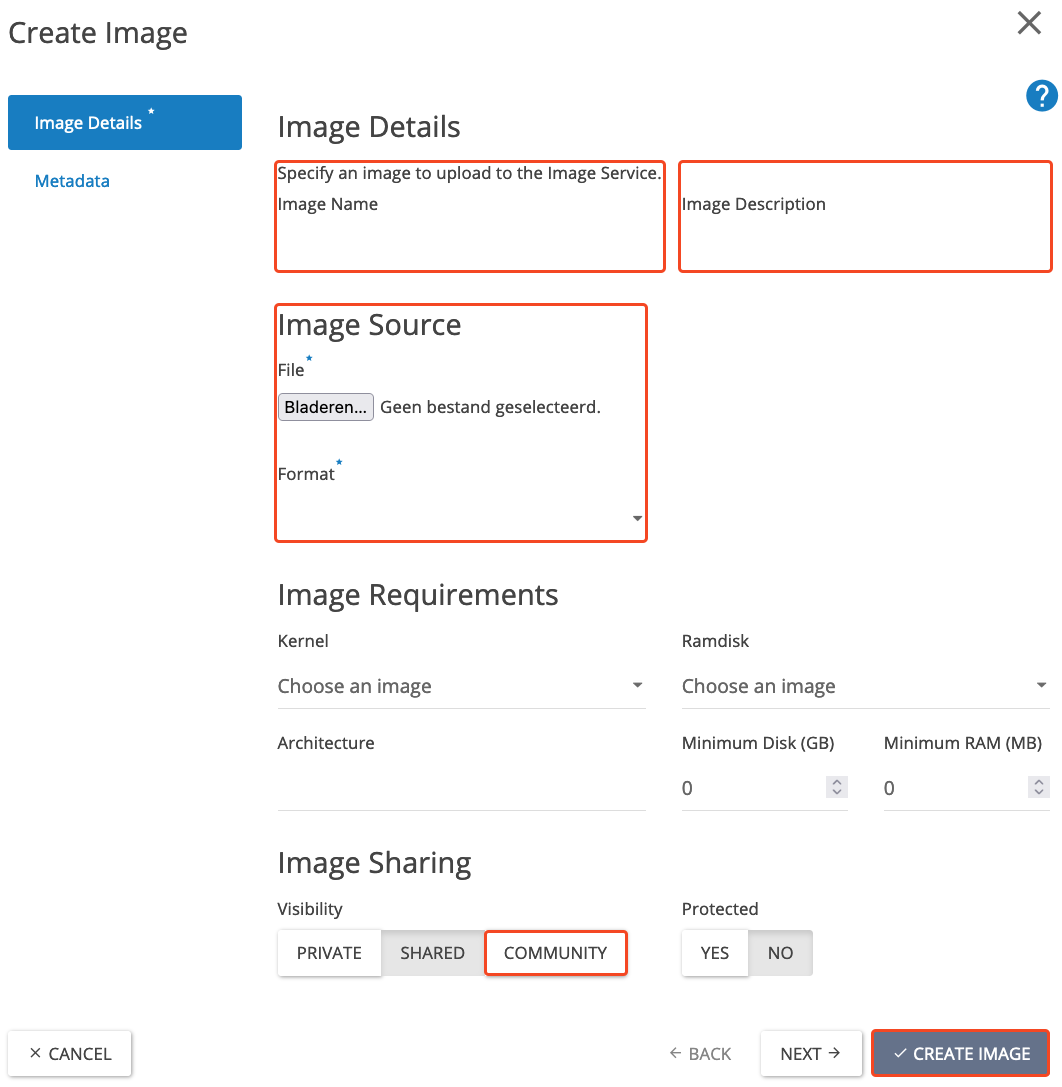
How you configure the ‘Image Details’ does not matter; the only thing you need to do is set the ‘visibility' to ‘Community’ to make the image a ‘Community Image’. Once everything is set, click on ‘Create Image’ to create and upload your image.
After clicking ‘Create Image’, the image will appear under ‘Compute’ > ‘Images’, as shown in 'Step 2' and ‘Step 3’.
Deleting a Community Image
When you, as the owner, no longer need a community image, you can delete it. Unfortunately, this also means that other users can no longer use it.
If you have an instance that originates from a community image, and the source is deleted, it will remain intact. However, if you want to rebuild the instance or create a new one with the same settings from the image, that will no longer be possible.
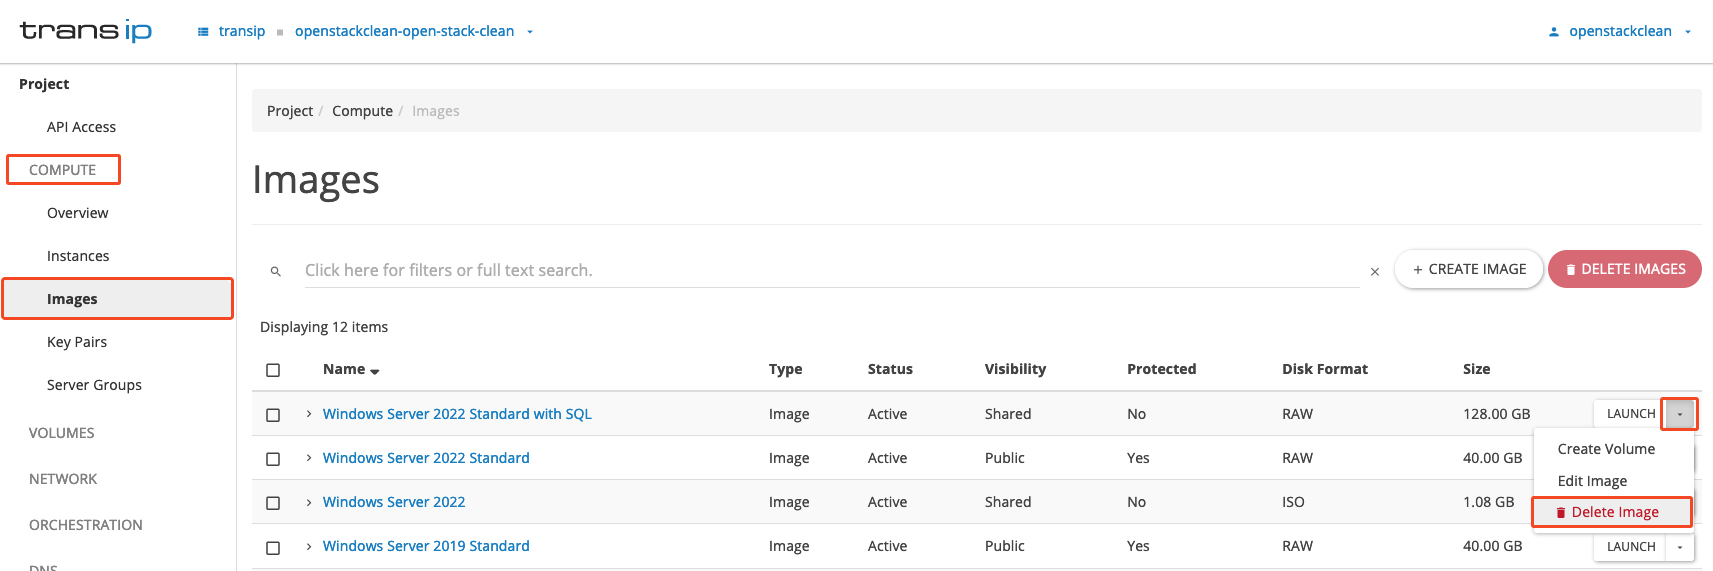
Navigate again to 'Compute' and select ‘Images’ from the submenu. Click on the arrow next to ‘Launch’ on the right side. Then, in the menu that appears, click on ‘Delete Image’ (see the image below).
Now you know everything about Community Images, and maybe you've even made one available for the Community. Well done!