


An encrypted volume is a storage space, such as a hard drive or a partition, whose data is encrypted. This encryption ensures that the data is unreadable to anyone who does not have access to the correct key or password. When creating an instance, it is not possible to choose to make your volume encrypted. You can do this afterward by creating a new volume and encrypting it. You can then attach the volume to the instance.
In this guide, we will show you how to create an encrypted volume via the OpenStack Dashboard ‘Horizon’.
It is possible to change a volume type between, for example, NVMe, archive, or SSD in Horizon.
Creating an encrypted volume
Step 1
Log in to the OpenStack Dashboard ‘Horizon’.
Step 2
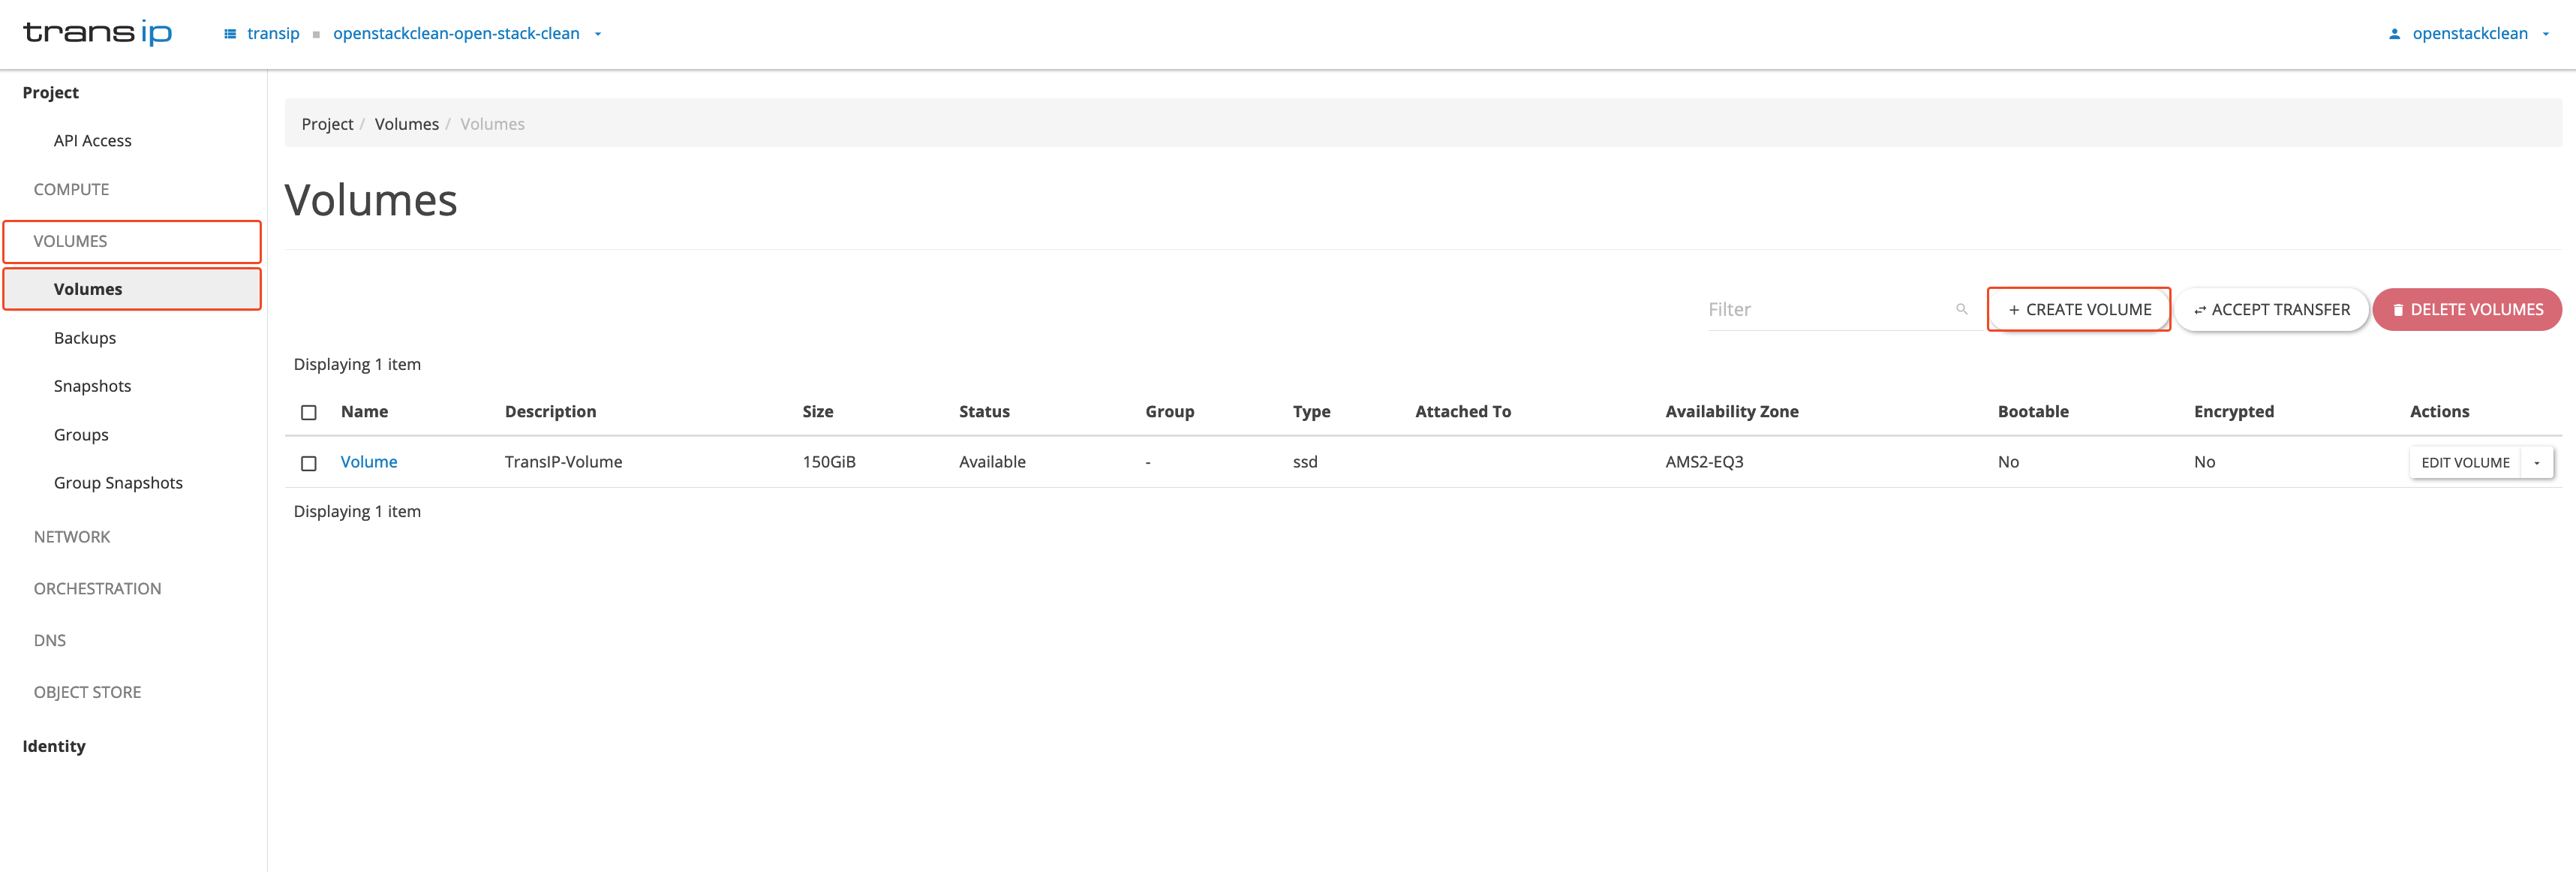
Step 3
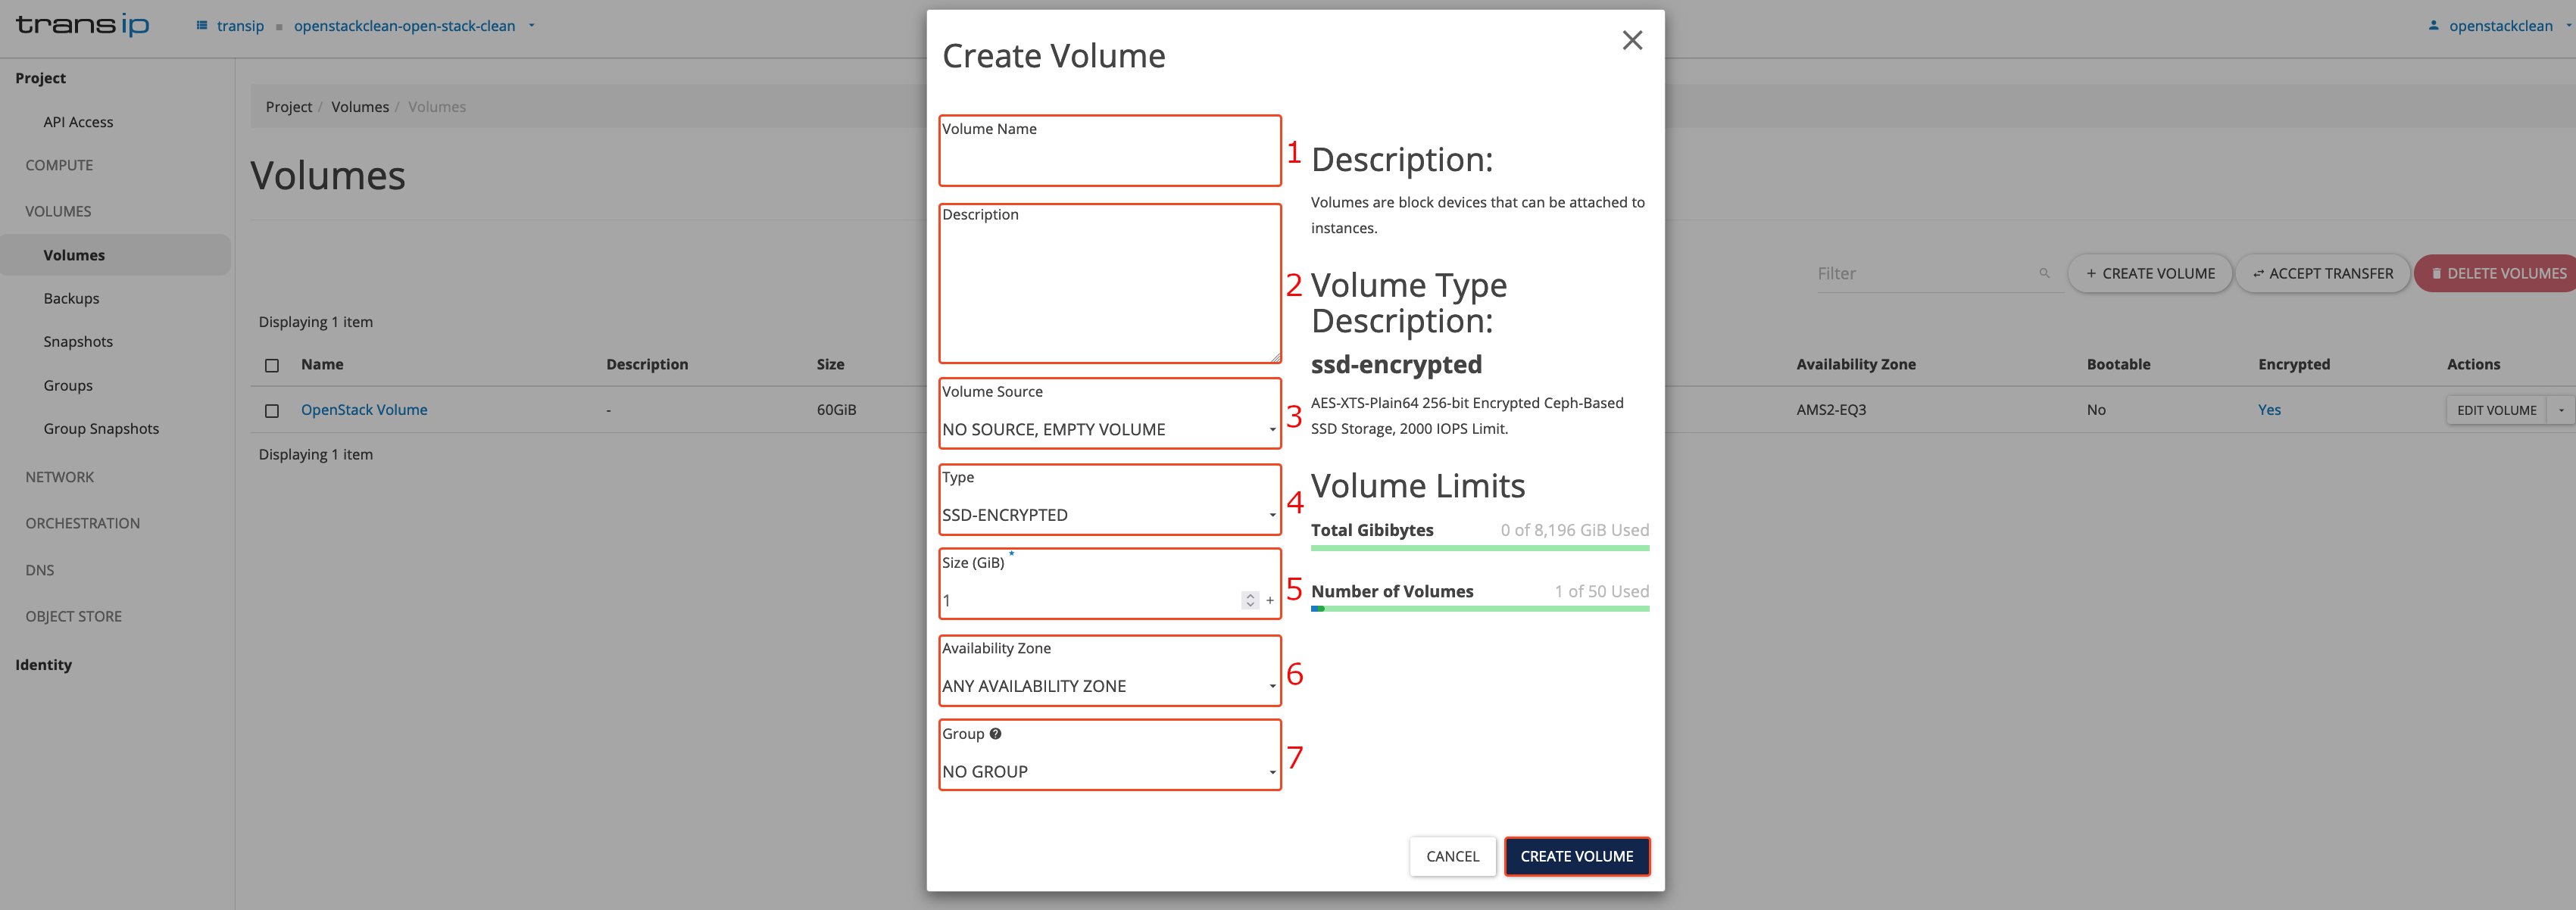
A pop-up page will open. Adjust the options as described below and click ‘Create Volume’ to create your volume.
1. Volume Name: Enter a name for your volume.
2. Description: Here you can indicate which instance the volume belongs to, its purpose, and what information it contains.
3. Volume source: Select an existing image or volume from which your encrypted volume will be created. The new encrypted volume will retain the same data and configuration as the original volume.
4. Type: Specify your 'Type' of volume, for example, ssd-encrypted, nvme-encrypted, or archive-encrypted. You will also immediately see the IOPS (Input/Output operations per second) limits of the selected volume.
5. Size: The size of your volume. A volume can be expanded afterwards, but not reduced. For an alternative option, please refer to the following article.
6. Availability zone: You can leave this option set to ‘Any Availability Zone' to automatically have a zone assigned.
7. Group: If you use a ‘Volumegroup’, you can add the volume to it here.
This concludes our guide on creating encrypted volumes.