


No automatic backups of your volumes are created in your OpenStack project. Therefore, it is important to regularly make backups of your volumes so that you are prepared to restore them from your backup if needed.
In this guide, we will not only show you the steps for creating a backup of your 'Volume', but also how to restore a backup.
Create a backup of a volume
Step 1
Log in to the OpenStack Dashboard ‘Horizon’.
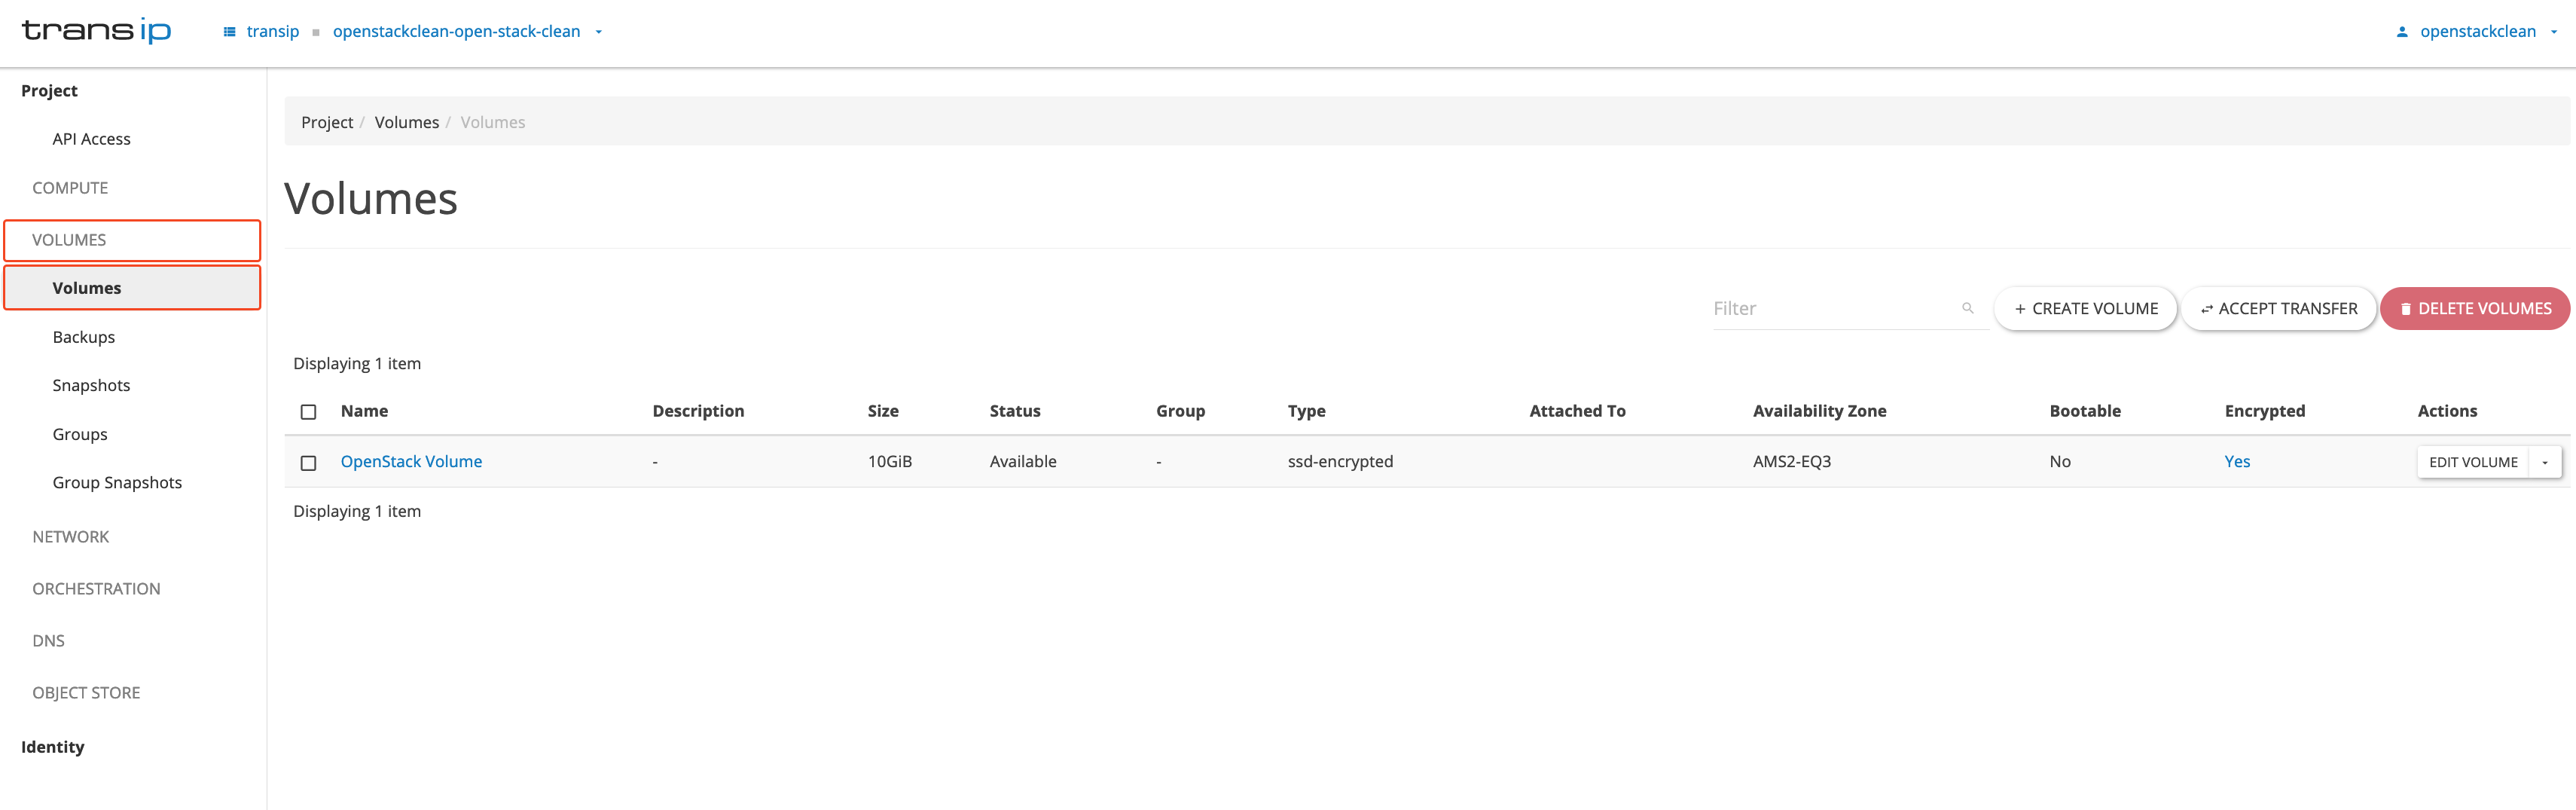
Step 2
Navigate to the volume overview as shown in the image below. Click on ‘Volumes’ in the menu on the left, and then click on ‘Volumes’ again in the submenu.
Step 3
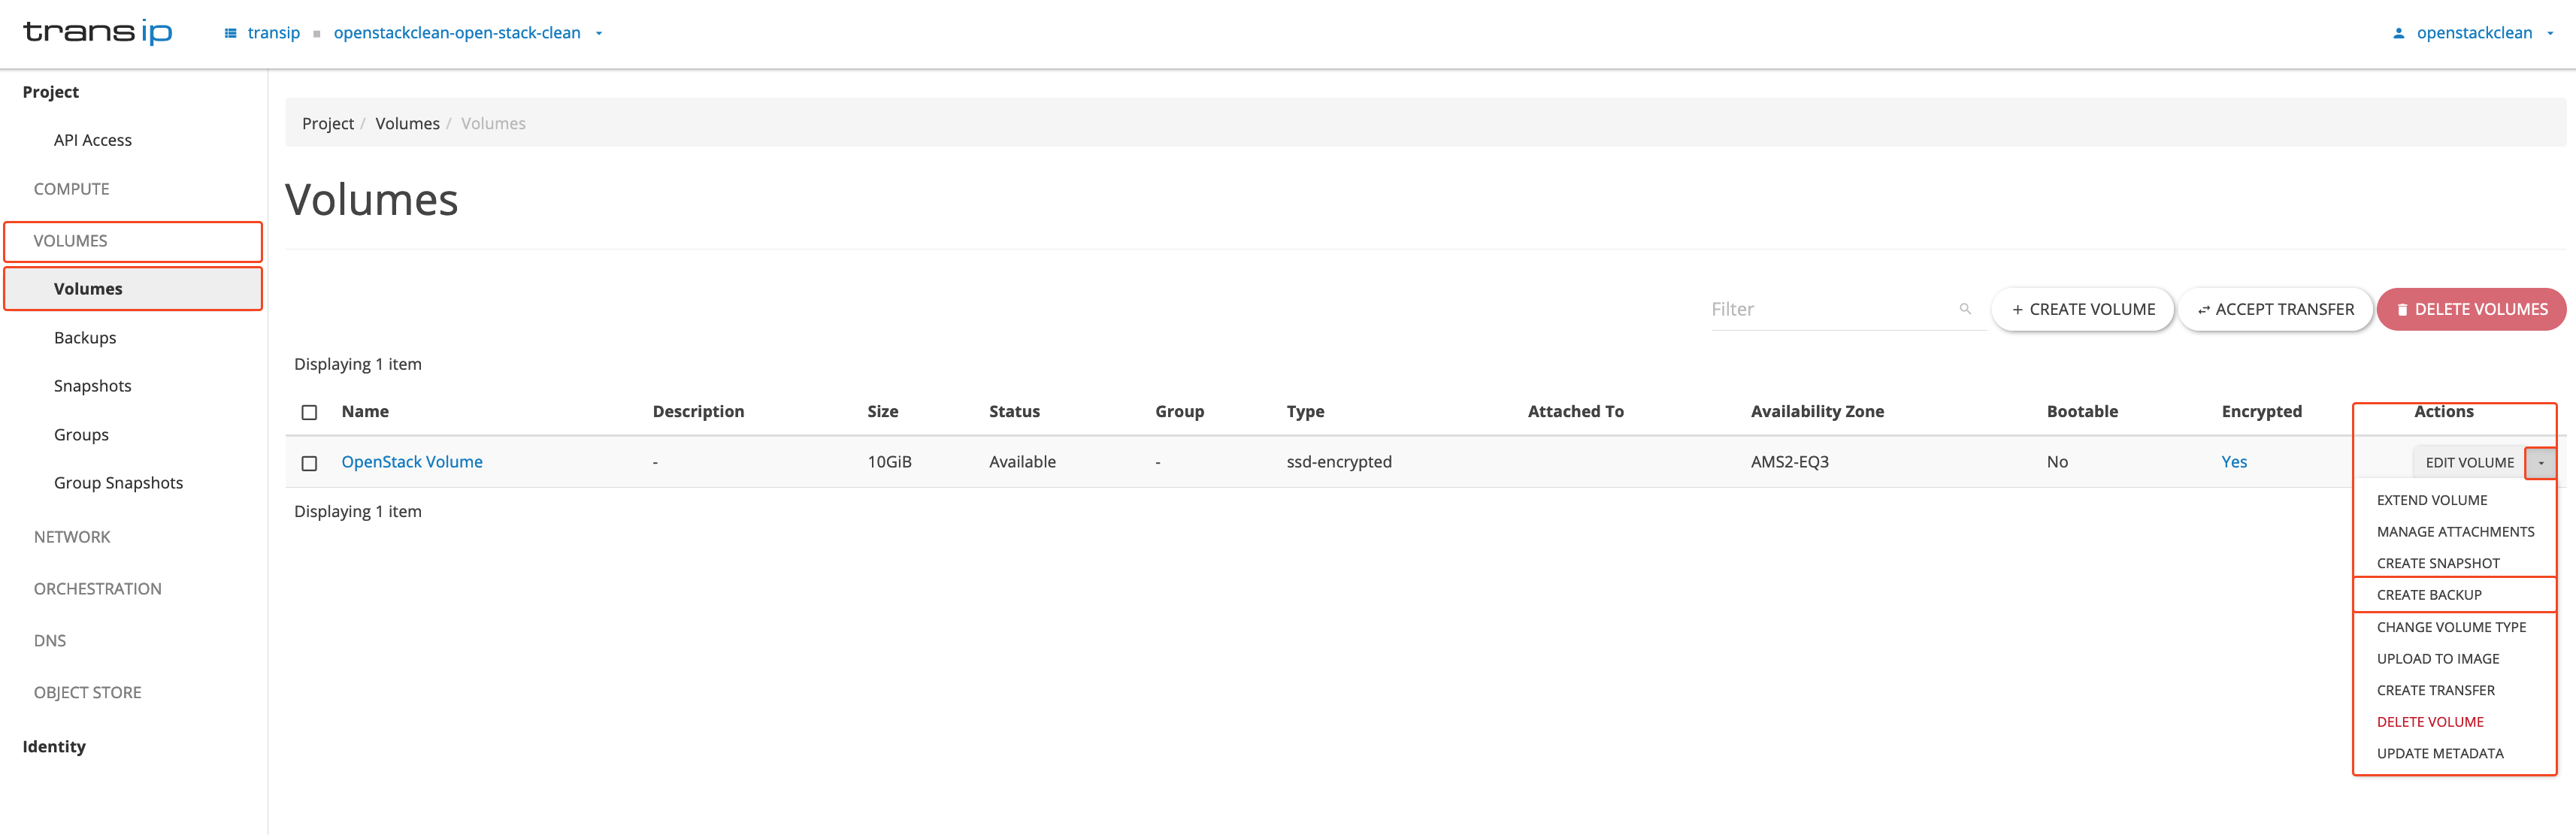
Next, on the right side of the volume, click the arrow under ‘Actions’ and select 'Create backup' from the menu that appears.
Step 4
The following screen will appear. In this screen, you can fill in the following fields:
- Backup Name: Give your backup a name.
- Description: Description of your backup.
- Container Name: Give your container a name.
- Backup Snapshot: Specify which snapshot you want to back up.
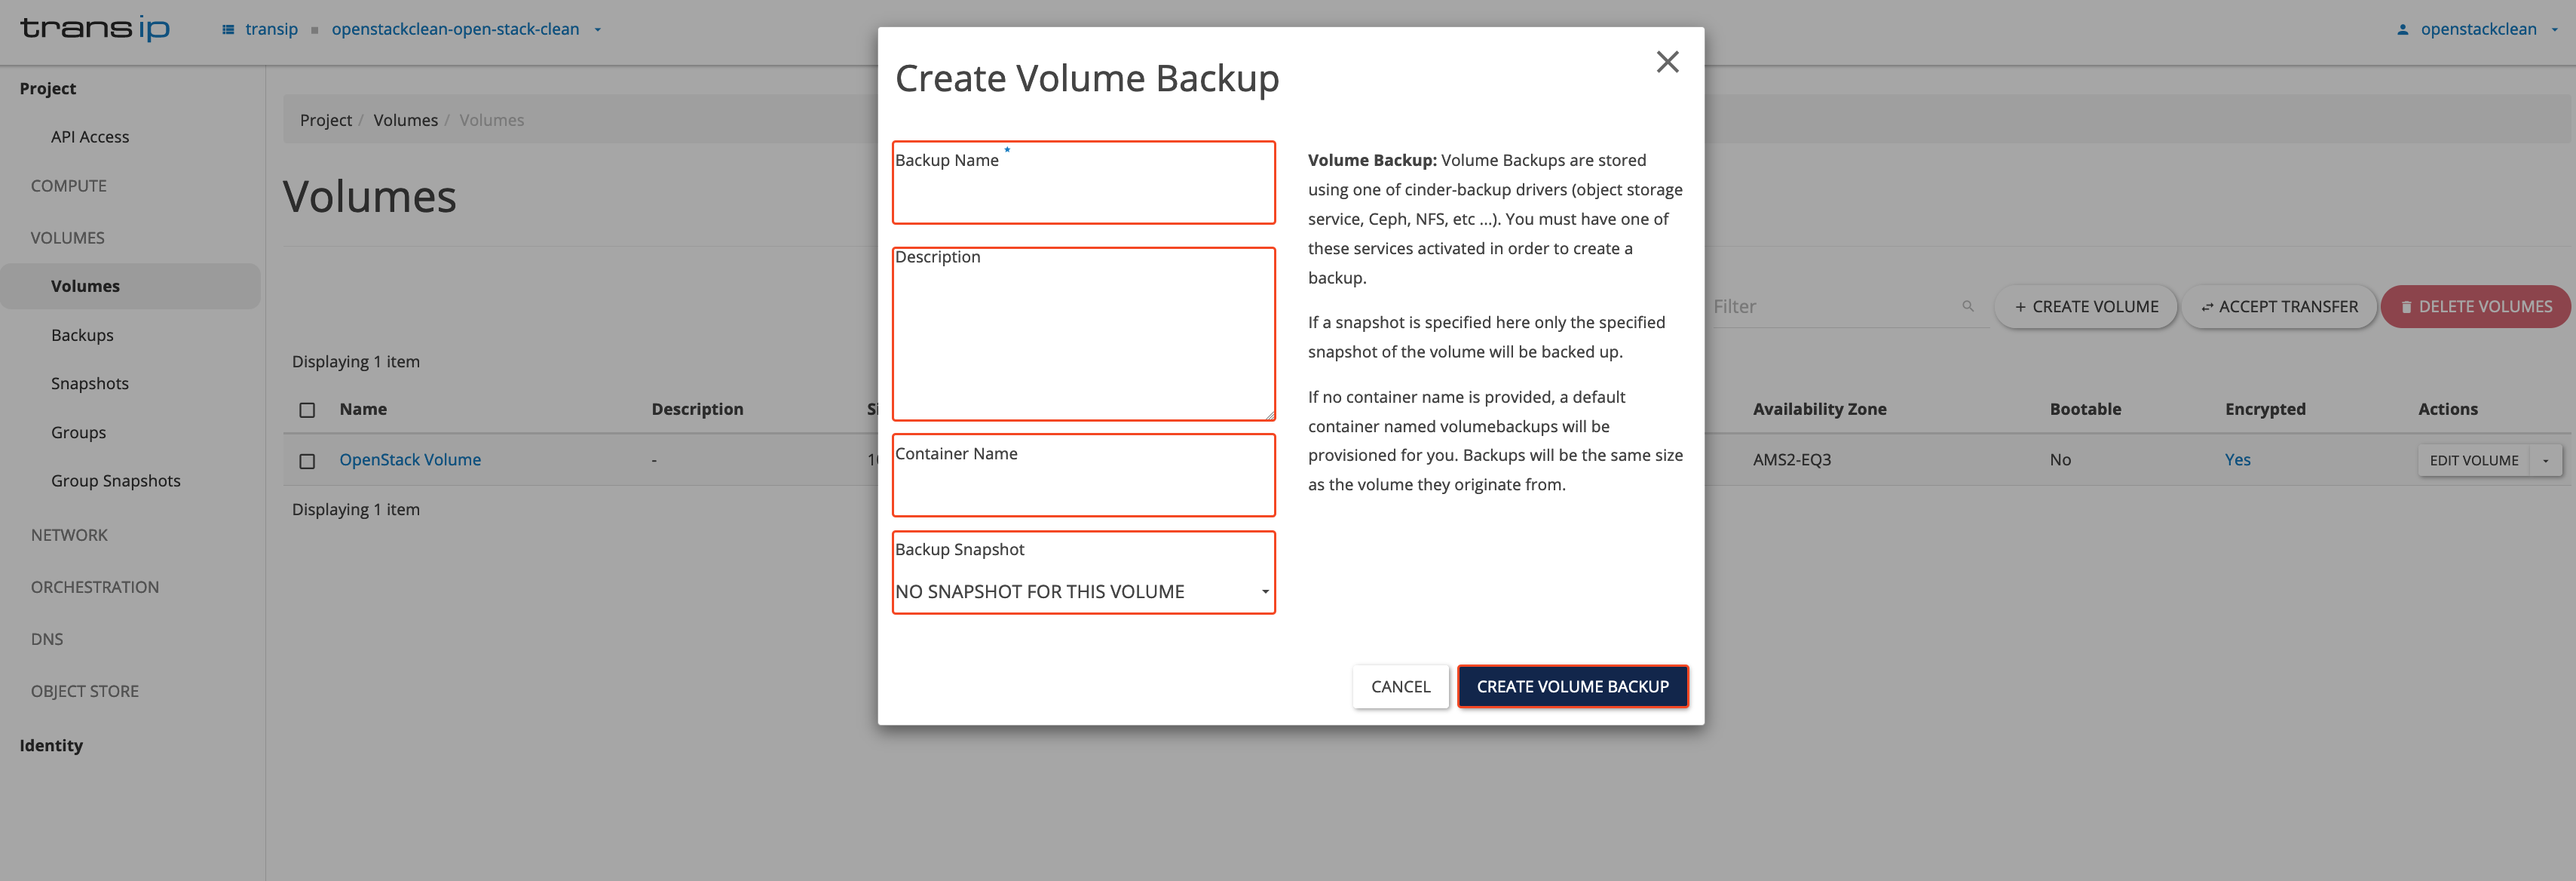
To create the backup, fill in the details and click ‘Create Volume Backup’ at the bottom right. Creating a backup can take anywhere from 5 to 30 minutes, depending on the size, type of volume, and the amount of data it contains.
Example: Creating a backup of a 250 GB Volume (SSD) used as an ‘Image Source’ with Windows Server 2022 Standard - 40 GB takes about 1 minute.
Step 5
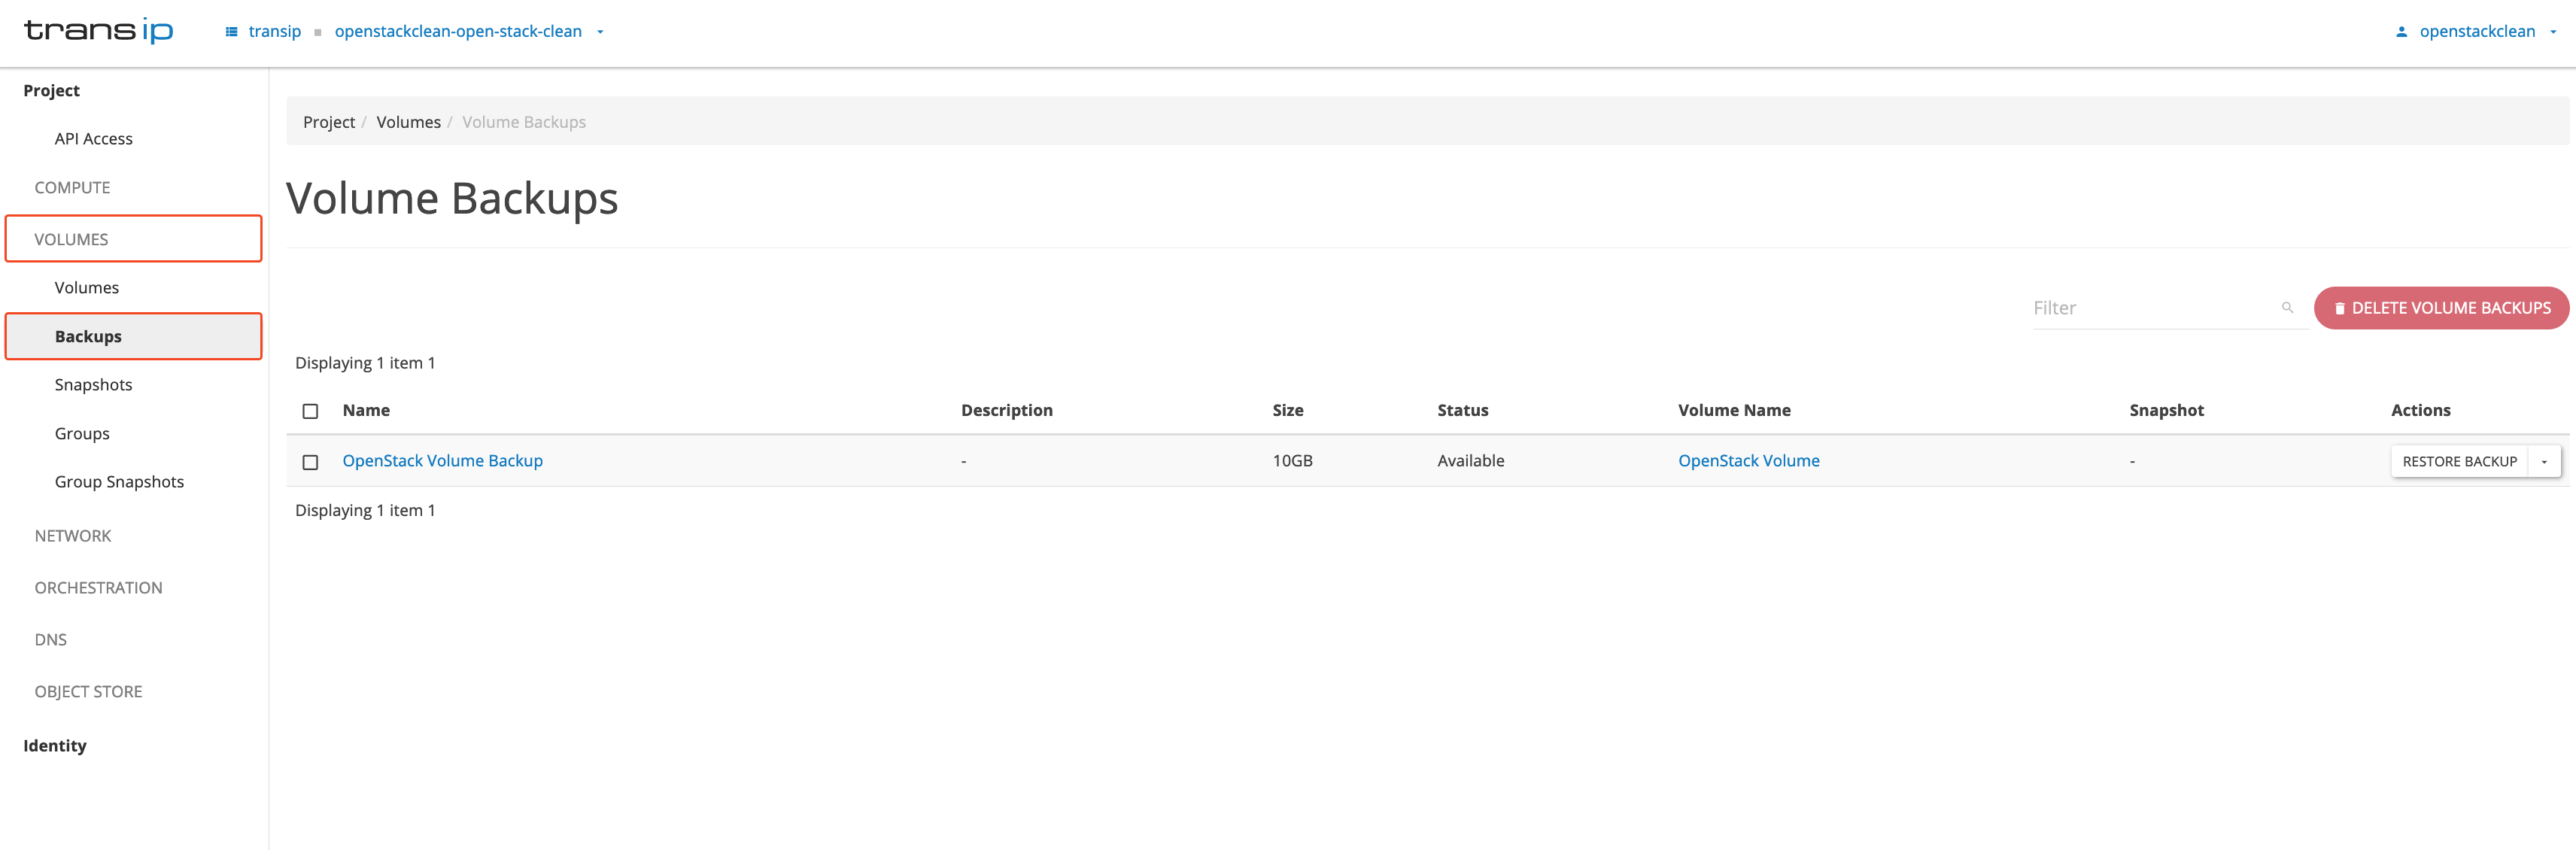
Navigate back to the ‘Volume’ backup overview, as shown in the image below.
Restoring the volume backup
Step 1
Log in to the OpenStack Dashboard ‘Horizon’.
Step 2
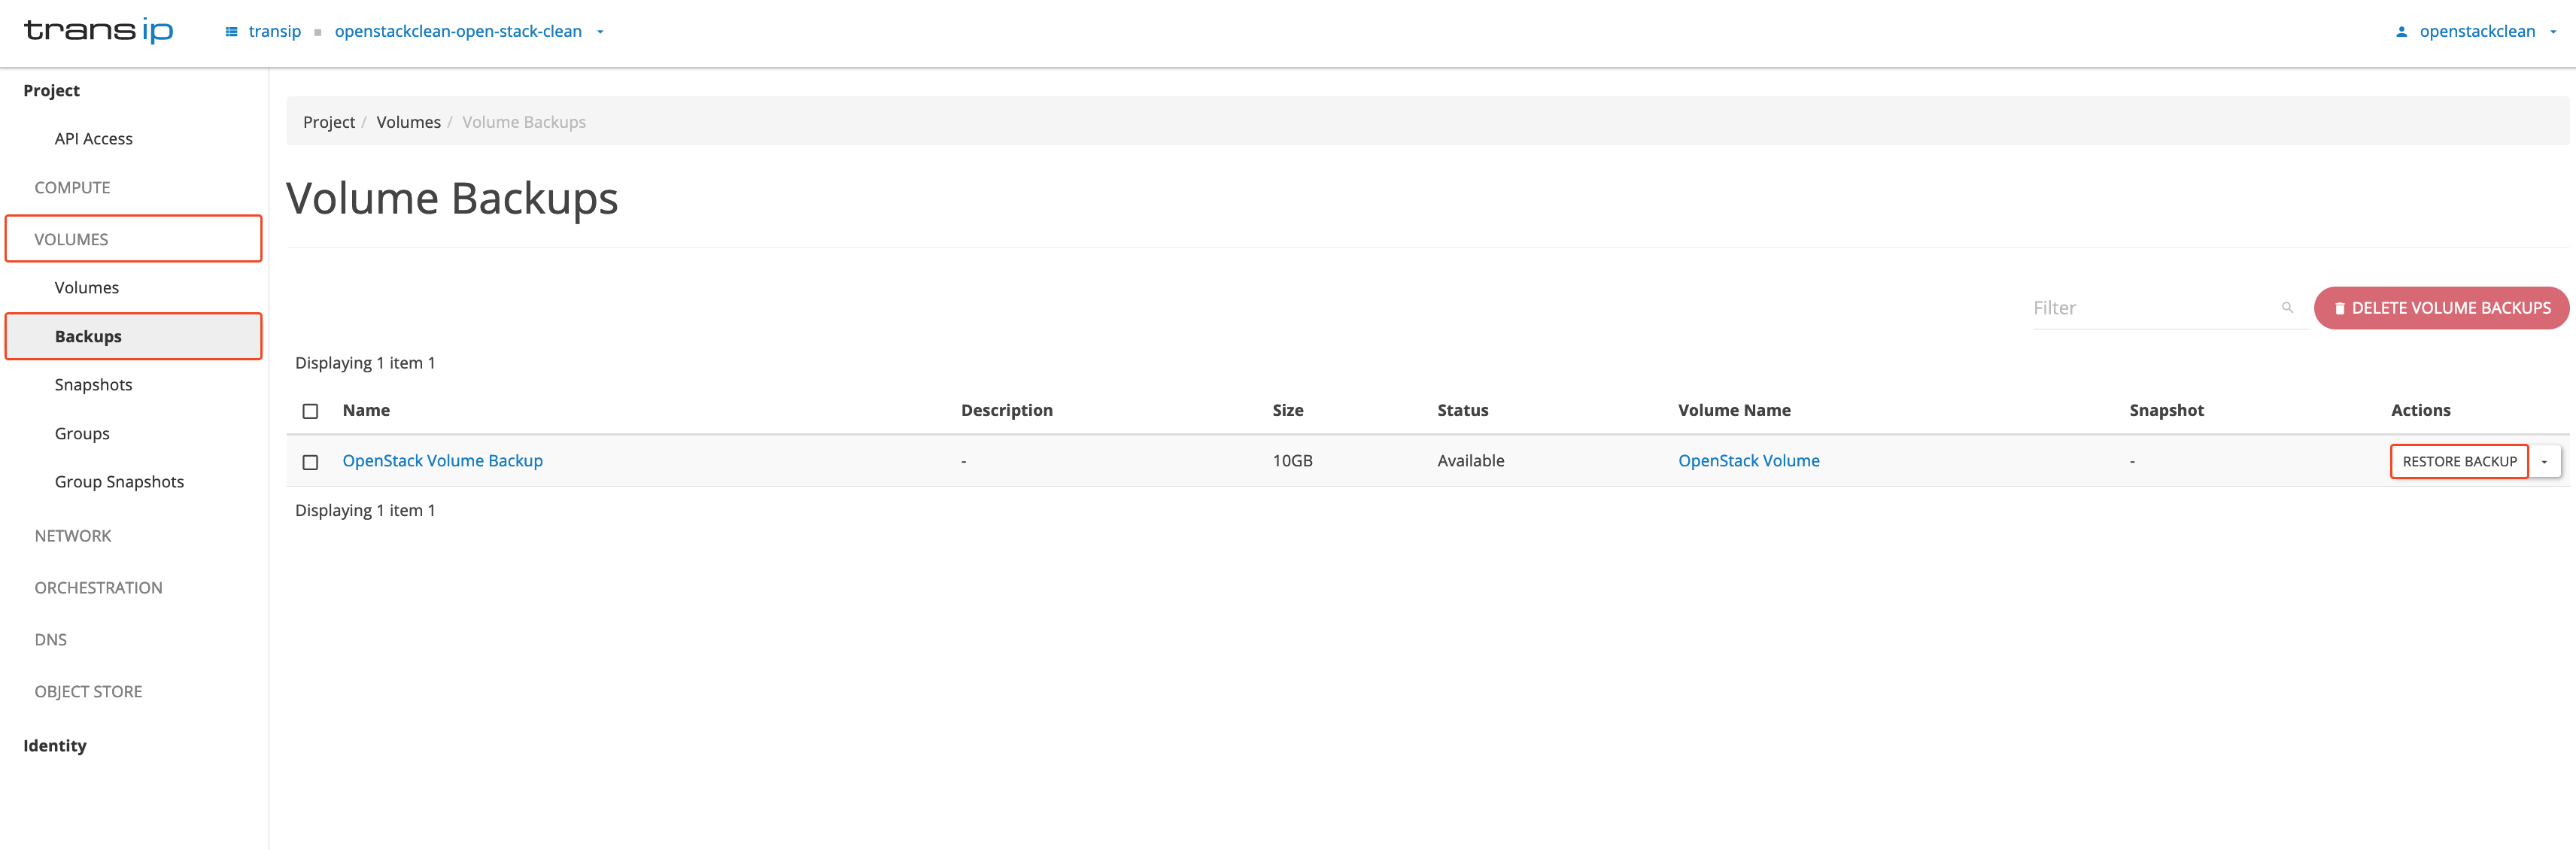
Navigate to the ‘Volume’ backup overview to view your volume backups, as shown in the screenshot below.
On the right-hand side, under ‘Action’, click the ‘Restore backup’ button.
Step 3
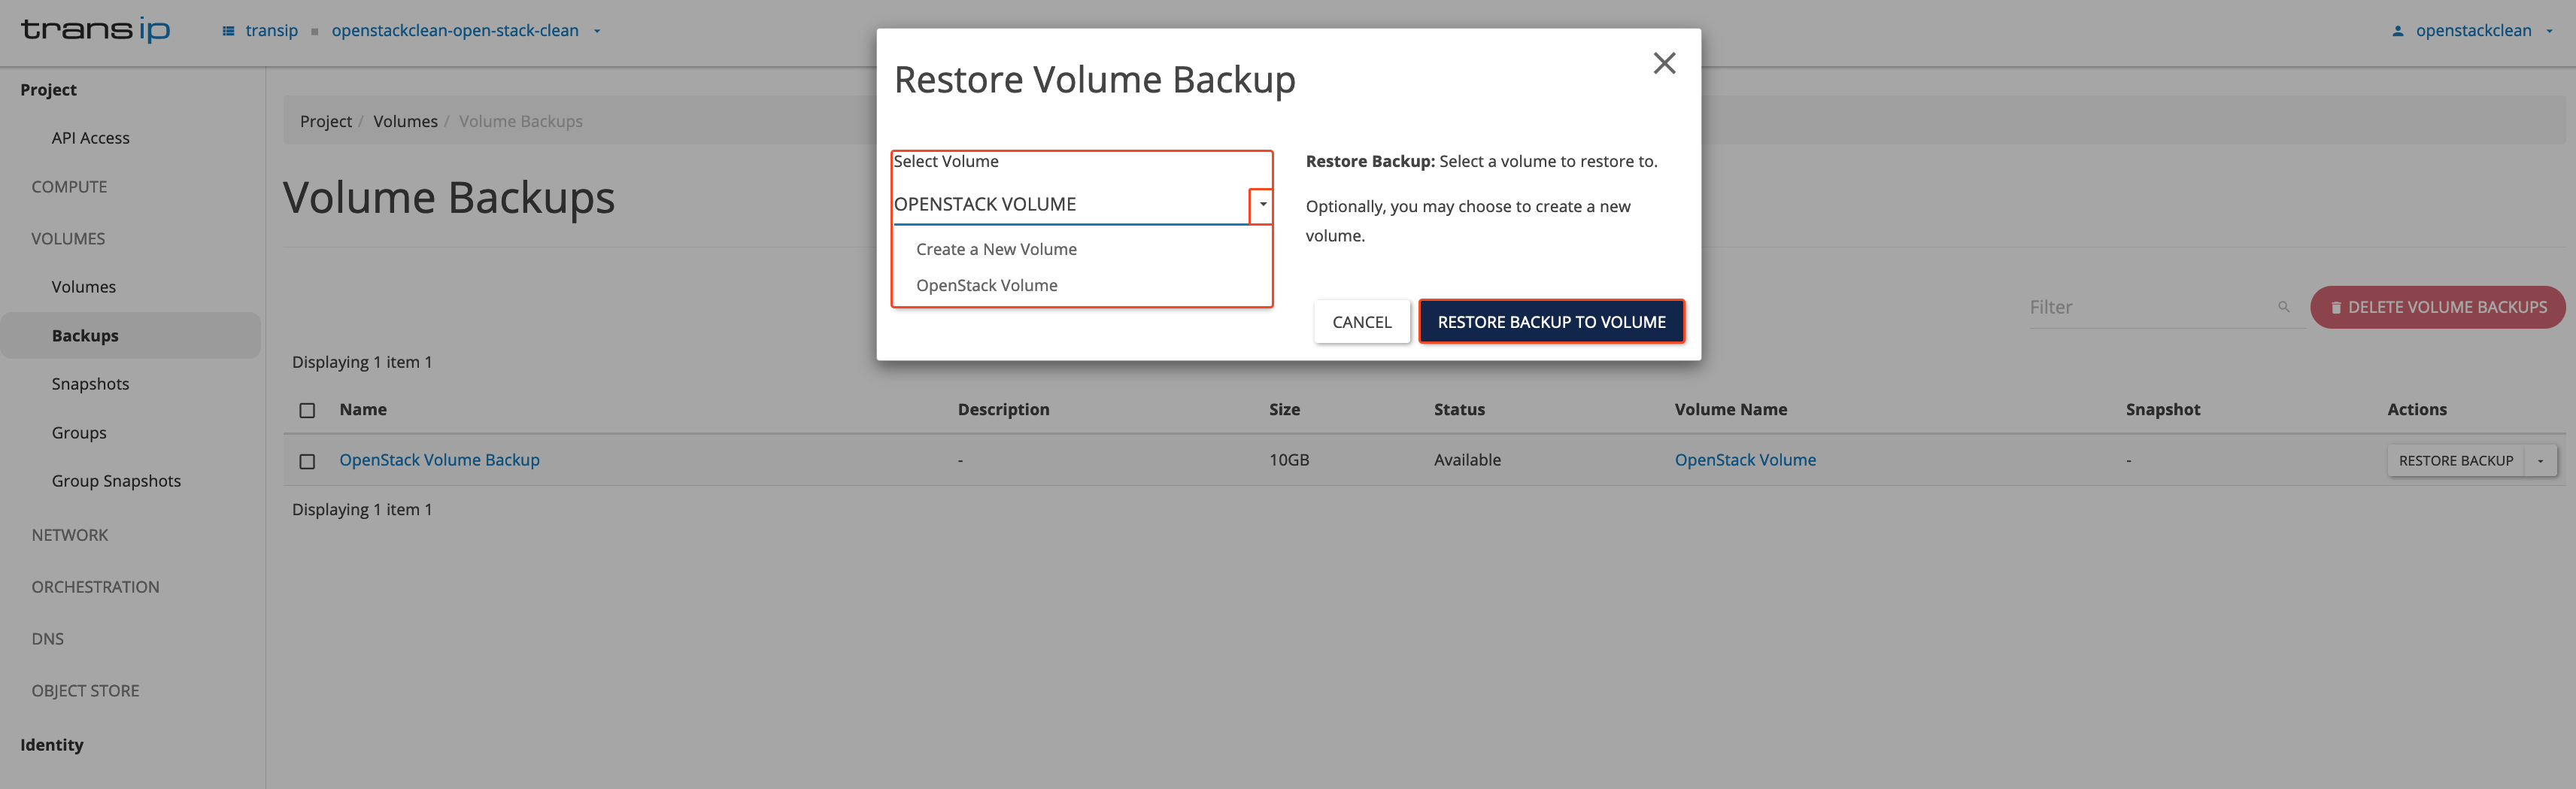
In the ‘Restore Volume Backup’ pop-up window, you can:
- Restore the backup by creating it as a new volume.
- Restore the backup to an existing volume.
In this case, we choose ‘Openstack Volume’. This will restore the backup to an existing volume.
Note: The volume being overwritten by the backup must be at least the same size as the backup volume.
Click on ‘Restore Backup to Volume’ to start the restoration process for your volume backup.
Step 4
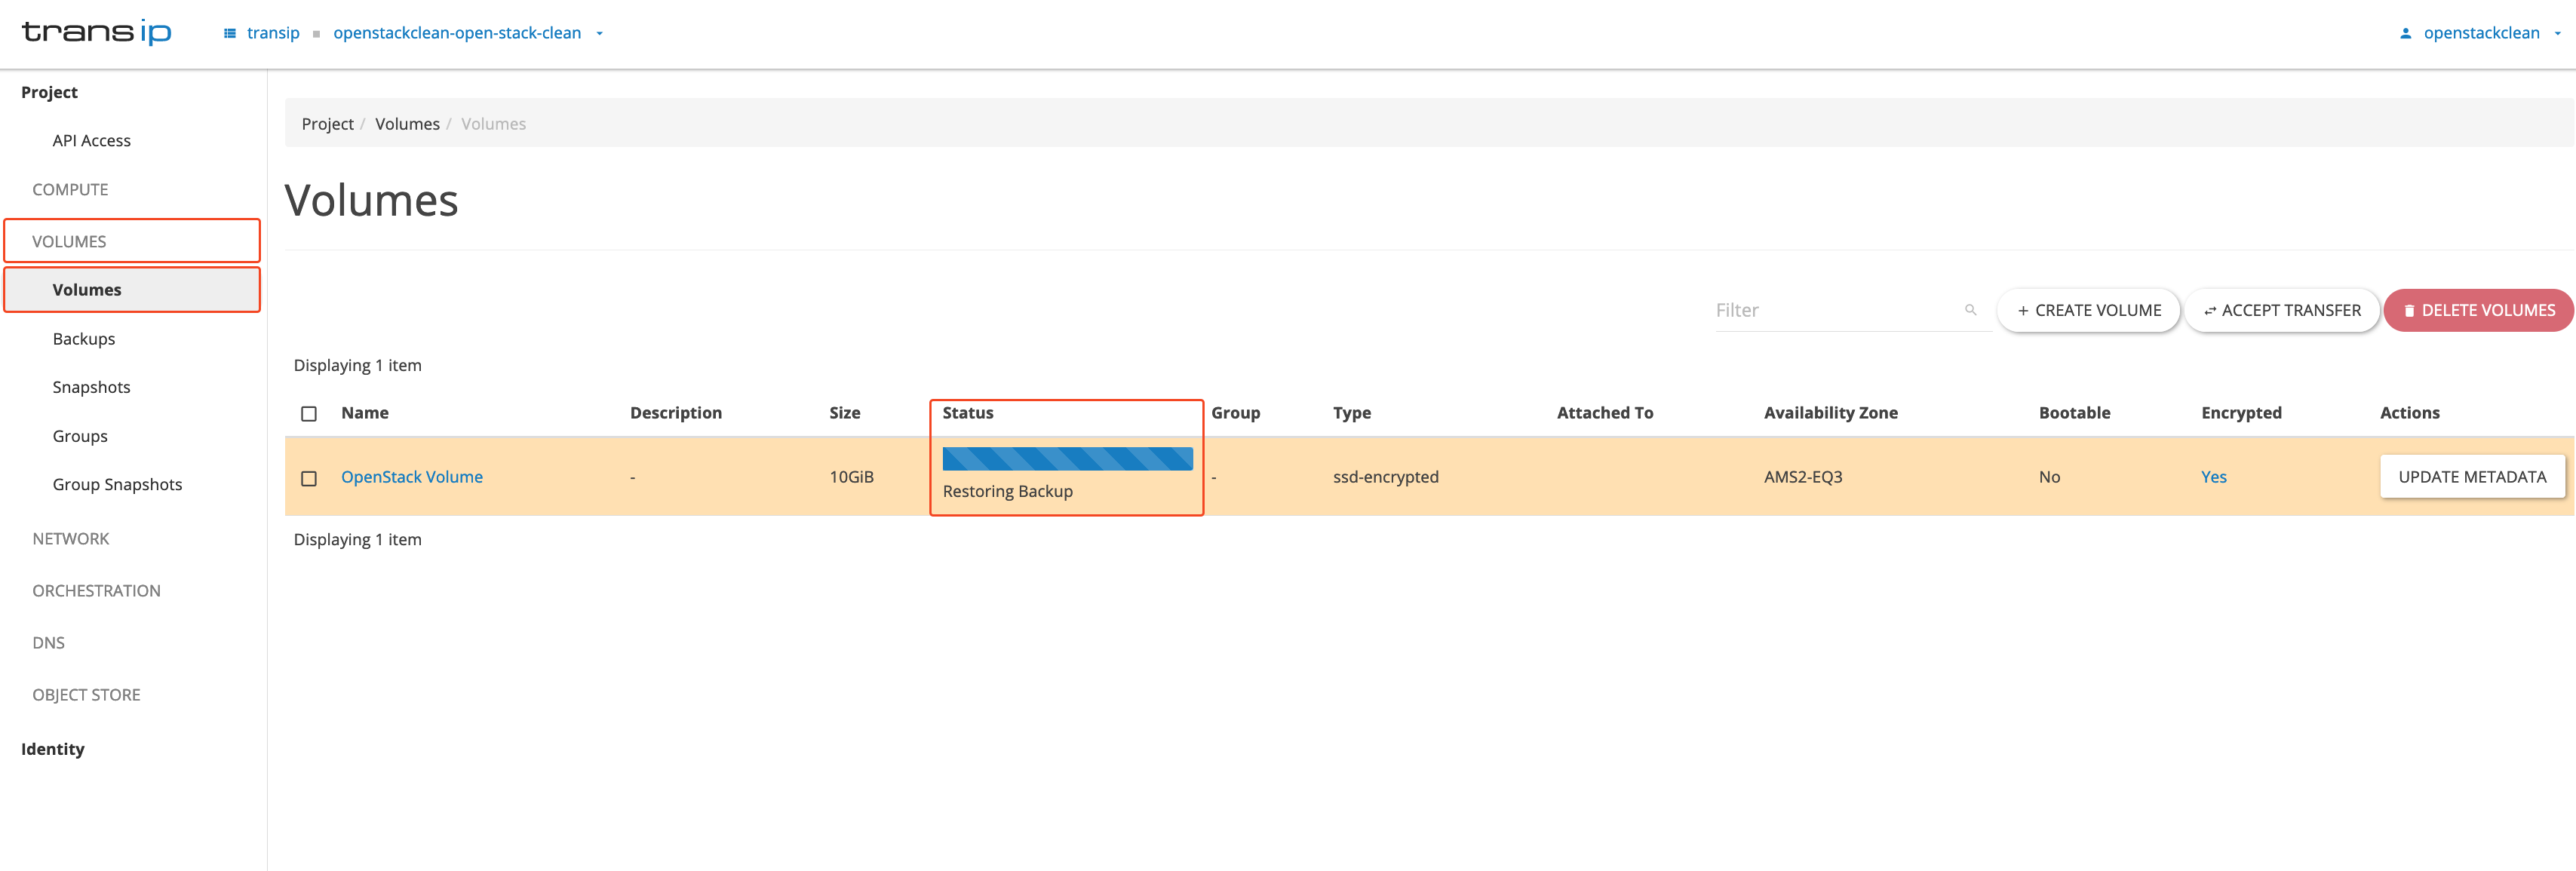
Navigate back to the volume overview and you will see that the system is restoring your backup. The volume will display a blue bar, as shown below, indicating that the system is in the process of restoring the volume.
You have now created a backup of a volume. While we hope you never need to use it, it is always useful to have a backup in case of emergency.