


ClamAV is a free, open source antivirus program for the detection of trojans, viruses and malware on your VPS. In this tutorial we show you how to install ClamAV in CentOS Stream, AlmaLinux or Rocky Linux and how to ensure that ClamAV starts automatically and your VPS scans daily.
- Execute the commands in this article as a root user, or user with sudo rights.
- ClamAV is fairly run intense. Make sure to have at least 1GB of RAM available. You can check this using the top-command.
Installing ClamAV
Step 1
Connect to your VPS via SSH or the VPS console and update your VPS first:
dnf -y update
Step 2
ClamAV is not included in the official CentOS/AlmaLinux package repository. It is included in the Extra Packages for Enterprise Linux (EPEL). Therefore, first install the latest release of EPEL.
dnf -y install epel-release
Step 3
Next install ClamAV with the command (please note: there is a scroll bar because it is a long command):
dnf -y install clamav-server clamav-data clamav-update clamav-filesystem clamav clamav-scanner-systemd clamav-devel clamav-lib clamav-server-systemd
Real-time automatic scanning with the ClamAV daemon
Step 1
CentOS Stream, AlmaLinux and Rocky Linux are supplied with SELinux. Check whether SELinux is enabled with the command below.
sudo sestatusIf the SELinux status is 'disabled', proceed to 'Step 2'. If the SELinux status is 'enabled', give ClamAV access to all your files with the following command:
sudo setsebool -P antivirus_can_scan_system 1
sudo setsebool -P clamd_use_jit 1
ClamAV is supplied with a standard configuration file. A small adjustment is needed in this file before you can use it. The word ‘example’ needs to be commented out or removed from scan.conf and the LocalSocket should be uncommented:
sudo sed -i -e "s/^Example/#Example/" /etc/clamd.d/scan.conf
sudo sed -i -e "s/#LocalSocket /LocalSocket /" /etc/clamd.d/scan.conf
Step 3
Before you can use the scan service, Freshclam needs to be enabled and configured. Freshclam updates the database that ClamAV uses with virus definitions (the database is empty in a new installation). Again remove / uncomment 'Example' from the configuration file.
sudo sed -i -e "s/^Example/#Example/" /etc/freshclam.conf
Step 4
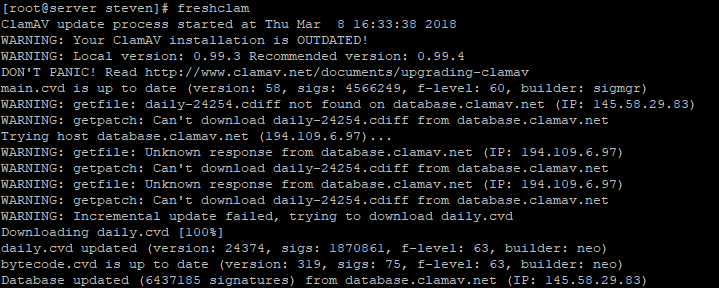
Run Freshclam with the command below. Freshclam will then immediately download the latest virus definitions.
sudo freshclamFor example, the output looks like below.
Step 5
Next you create a systemd service so ClamAV is automatically started and executed:
sudo nano /usr/lib/systemd/system/freshclam.service
Step 6
Add the following content and save the changes with ctrl + x> y> enter.
[Unit]
Description = freshclam scanner
After = network.target
[Service]
Type = forking
ExecStart = /usr/bin/freshclam -d -c 1
Restart = on-failure
PrivateTmp =true
[Install]
WantedBy=multi-user.target
Change the number 1 behind ExecStart to 2 if necessary, or another number to make sure the scan is performed more than once a day.
Step 7
The virus definitions are now up-to-date. Enable autostart for the ClamAV scan service and freshclam, and start both services as follows:
sudo systemctl enable clamd@scan
sudo systemctl enable freshclam
sudo systemctl start clamd@scan
sudo systemctl start freshclam
Timed automatic scanning with a cron job
At the beginning of this article, we indicated that the ClamAV daemon uses quite a bit of RAM. Alternatively, you can choose not to install the ClamAV daemon and create a cronjob with which you automatically carry out the manual ClamAV scan (with a cronjob, you create a task on your VPS to perform one or more assignments at fixed times). This works like as follows:
Step 1
Create a cronjob in the /etc/cron.d/ directory with the command:
sudo nano /etc/cron.d/clamav-scanThe cronjob is created in /etc/cron.d because it’s easier to manage, gives you the flexibility to pick the timing, survives package upgrades, and runs as root without using sudo.
Step 2
Create the clamav log folder and a log file for the cronjob:
mkdir /var/log/clamav
touch /var/log/clamav/cron-scan.log
Step 3
For example, give your cronjob the following content:
MAILTO=root
0 2 * * * root /usr/bin/clamscan \
  --quiet --infected --recursive / \
  --exclude-dir=/proc/* \
  --exclude-dir=/sys/* \
>> /var/log/clamav/cron-scan.log 2>&1- The cronjob is executed at 2AM (defined by * 2 * * *). Do you prefer to scan daily at a specific time? For example, to scan at 18:00 every day you use * 18 * * *. At https://crontab.guru/, you can see how you specify specific times in a cronjob.
- The Clamscan command is explained in more detail under 'Scanning your VPS manually for viruses'.
- The addition >> /var/log/clamav/cron-scan.log causes the output to be written to /var/log/clamav_log. This way you can always take a look at the scan results.
Running the clamscan command will cause increased use of your hardware as long as the scan is running. Keep this in mind when determining the times at which you have the scan done.
If desired, you can remove the cronjob as follows (removing all crontabs):
sudo crontab -ror you can of course edit the existing cronjob with:
sudo crontab -eYou can check your cronjob itself (without adjusting it) with:
sudo crontab -lPlease note: if you use a custom logfile directory as above, do not forget that to create it (mkdir /var/log/siteupdates).
Manual scanning with Clamscan and ClamD
There are 2 options availble to you for scanning your server manually: Clamscan and ClamD. Both are valid options and you're free to choose which one to use. ClamD is usually a bit faster, but it has fewer scan options than clamscan and is mainly intended to scan specific folders, not your entire OS disk at once.
Manual scanning with Clamscan
ClamAV only scans files to which the executing user has rights. Therefore, always scan as root user, or use sudo.
Clamscan is a command-line tool that allows you to scan your server with a single command:
clamscan --exclude-dir=/proc/* --exclude-dir=/sys/* -i -r /- With the addition --exclude-dir=/proc/* and --exclude-dir=/sys/* you make sure that ClamAV does not scan these folders. The /proc/ and /sys/ folders are virtual filesystems which, among other things, provide communication between the hardware of your VPS / the processes of your VPS and your OS.
- -i (infected) ensures that only infected files are shown
- -r (recursive) ensures that all underlying folders are scanned
- / indicates that all folders of your VPS are being scanned. You can also use this to scan specific folders, e.g. /etc/
Manual scanning with ClamD
Step 1
You can also scan your OS manually with the ClamAV daemon. Run the scan as follows, replacing /folder with the name of the folder you'd like to scan:
clamdscan --fdpass -i /folder
- --fdpass: the ClamAV daemon is executed by the user ClamAV and has few rights to folders. With --fdpass, you give the rights of the user with whom you are working to clamdscan. If you execute this command as root user, then, with –fdpass, clamdscan thus has rights to scan all folders to which the root user has access.
- -i (infected) ensures that only infected files are shown
- /folder Indicates which folder you want to scan (recursively).
Scanning with ClamD uses the configuration in clamd.conf. You can edit this file to adjust the scanning to your own wishes:
nano /etc/clamav/clamd.conf
The installation of ClamAV is now complete! This concludes our tutorial on installing ClamAV in CentOS Stream, AlmaLinux or Rocky Linux