Each Web Hosting package contains a unique 'test URL'. The test URL is an address on the web that allows you to view the website on your Web Hosting package before it's actually published.
This can be particularly useful for working on a new website or transferring your website to TransIP with as little downtime as possible, which we explain in further detail below:
Using the TransURL
After ordering a Web Hosting package, we will send you an email containing important information regarding your Web Hosting, including your very own test URL.
Your TransURL will always start with an unique code based on your domain name, followed by .site.transip.me. For instance, if your domain name yourwebsite.com uses a Web Hosting package, your test URL could be yourwe.site.transip.me.
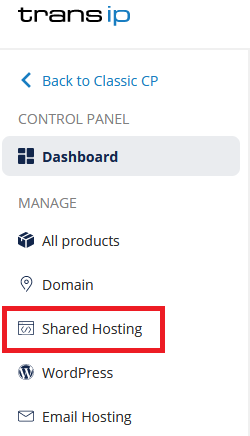
You can view the unique code in your control panel by logging in to the control panel and clicking 'Shared Hosting' in the menu. Next, select your domain below 'Products'.
Next, click on 'Site' at the top of the screen, followed by 'SFTP/SSH'. You will now see your SFTP and SSH details. Copy the line below 'Host' and replace 'ssh' with 'site' to get your test URL.

When navigating to your test URL, you will see the progress you've made on your website even if your domain isn't pointing to your Web Hosting package yet.For that reason, we recommend using the test URL for creating new websites and transferring websites.
The test URL can not be disabled, but will also not be indexed. This means it will not be visible unless you link to it directly.
Please note that if you use a reference to the test URL in your live environment or use an XML sitemap plugin, the test URL may be indexed.
The test URL can only be used for the root domain, it is not possible to use for sub domains.
Using the test URL on a WordPress website
Becasue WordPress uses an internal setting to determine the URL of a website, an addidtional step is required to use the test URL for WordPress websites.
When transferring a website, you want to avoid WordPress redirecting you to the old hoster. This is something that may happen when you try to log in to the WordPress dashboard.
To change this, the following lines need to be added to the wp-config.php file (in the root folder of your website). Add these lines above the line that says '/* That's all, stop editing! Happy publishing. */':
define('WP_SITEURL', 'http://' . $_SERVER['HTTP_HOST']);
define('WP_HOME', 'http://' . $_SERVER['HTTP_HOST']);
Do note that you may possibly encounter an error message when visiting the test URL, because SSL does not work on it. You can ignore this by pressing 'Continue' in your browser.
It is important to delete these lines again when your website is fully transferred, so WordPress can manage these options again.
This article discussed the test URL and how to optimally use this feature to view the progress of the website on your Web Hosting package.
If you have any questions regarding this article, please contact our support team. You can reach them using the 'Contact us' button below or via the 'Contact' button inside your control panel.
If you wish to discuss this article with other users, feel free to leave a comment below.