


When using a VPS with Windows Server, the most efficient way to work on it is to use the Remote Desktop Protocol (RDP).
Since most Windows Servers worldwide use Remote Desktop, it is a favored target for hacker / automated bots attacks: It is not uncommon for bots to attack RDP port of a Windows Server within minutes of a Windows Server coming online for the first time.
You can protect your Windows Server from such attacks by changing the Remote Desktop Port and / or limiting access to the Remote Desktop Services to specific IP addresses (for example, from a VPN connection). In this tutorial we explain how to do this.
Step 1
Connect to your Windows Server via Remote Desktop or the VPS console.
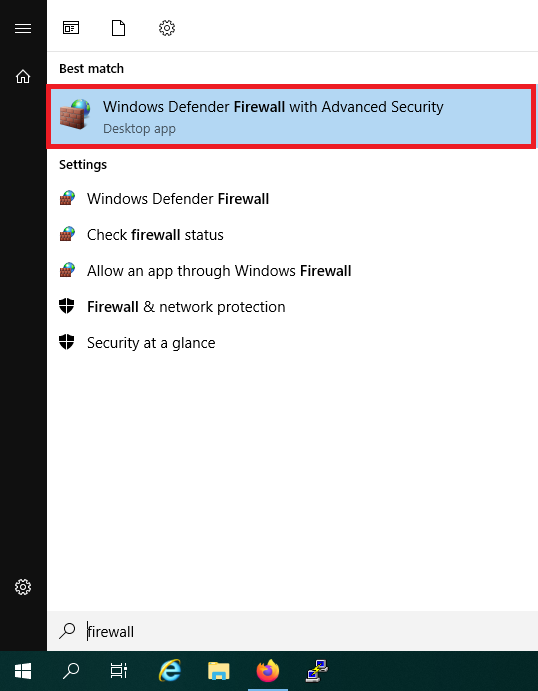
Step 2
Click the Windows Start button, type 'firewall' and click 'Windows Defender Firewall with Advanced Security' in the search results.
Step 3
Click left on 'Inbound Rules' and scroll down to 'Remote Desktop'. Then double click on the line 'Remote Desktop - User Mode (TCP-In)'. Have you changed the RDP port? Then double-click the name of the firewall rule you specified in step 11 above.

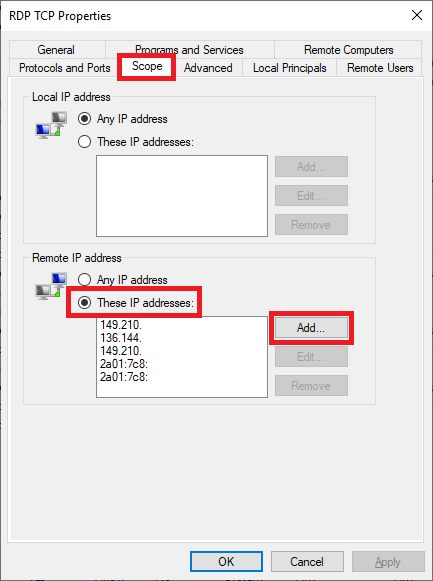
Step 4
Select the 'Scope' tab, 'These IP addresses' and click 'Add'.
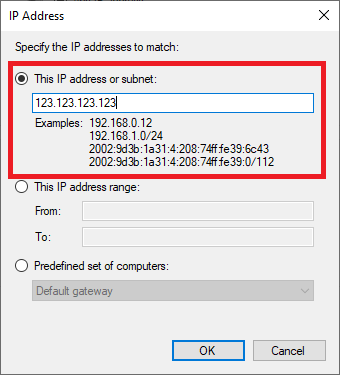
Step 5
Enter the IP address from which you want to allow RDP connections (this can be a range that you define via a subnet) and click 'Ok'.
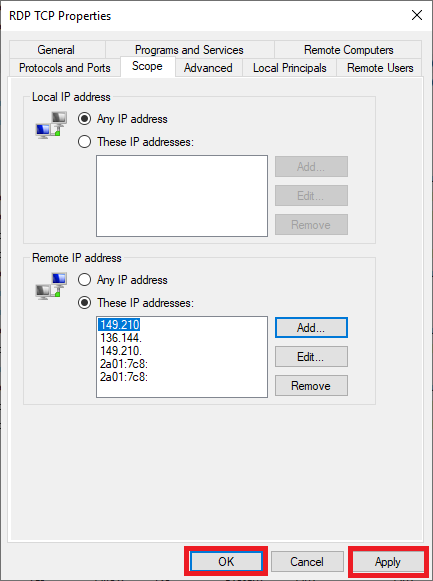
Step 6
Finally click 'Apply' and 'Ok' to implement the changes. Repeat steps 3 through 6, but this time in step 3 open the line for 'Remote Desktop - User Mode (UDP-In)'.
This brings us to the end of this tutorial for restricting remote desktop access to specific IP addresses on a Windows Server.
If you have any further questions on the basis of this manual, do not hesitate to contact our support department. You can reach them via the button 'Contact us' at the bottom of this page.