


The e-mail and HTTPS-ports of our Plesk VPS'es are automatically secured using SSL (TLS v1.2). The certificate used for this is self-signed and containts information (countr, city, etc.) which does not match your own information.
As such we highly recommend using a certificate of your own, or Let's Encrypt (or to at least generate a new certificate). Plesk offers various options, which are explained in this article:
The certificate used to secure Plesk and your mail ports (except for Let's Encrypt) can also be used to secure your website. The steps for securing your website are explained at the end of this article.
Using an SSL certificate of your own
- For these steps you need an (Comodo) SSL-certificaat.
Step 1
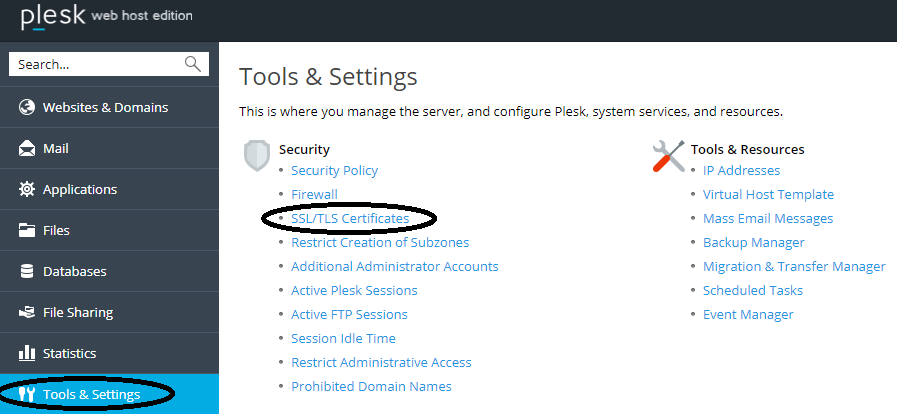
Log in to Plesk and navigate to 'Tools & Settings' > 'SSL/TLS Certificates'.
Step 2
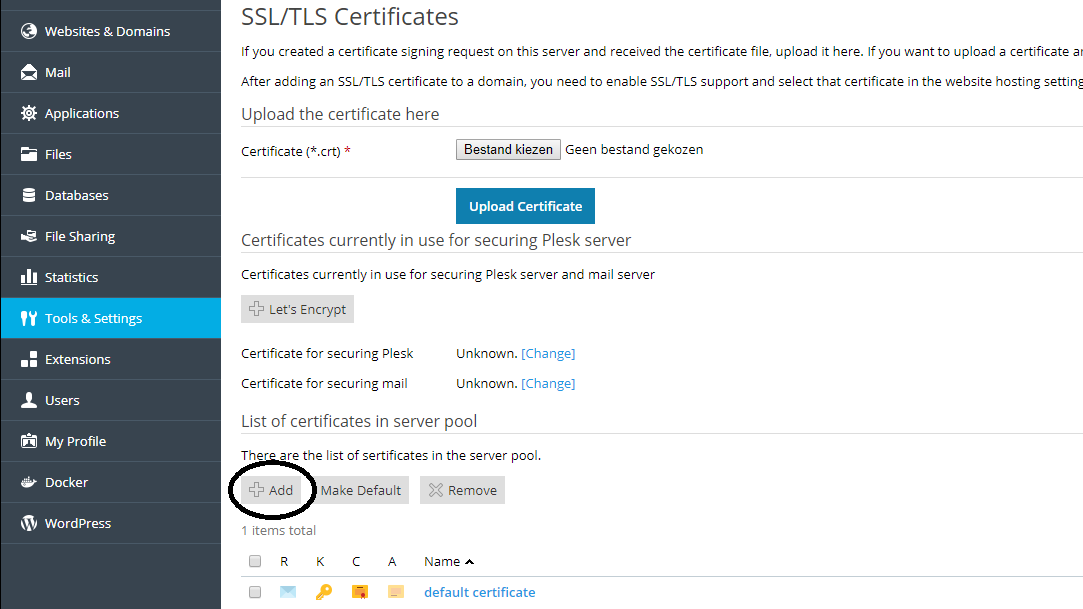
In the menu that appears, click on 'Add' under 'List of certificates in server pool'.
Step 3
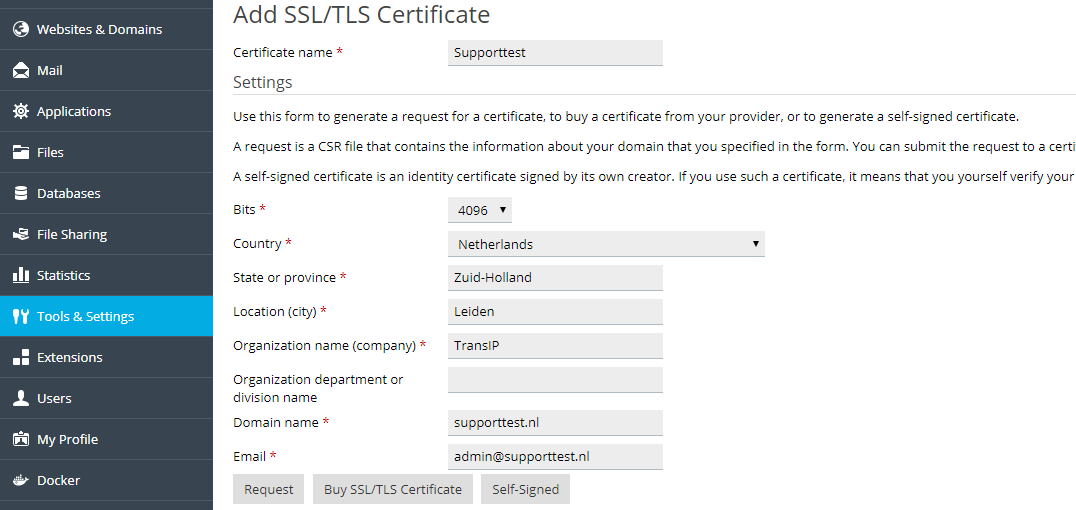
Fill in the required fields like in the screenshot below. Please note that you should use your own information.
Step 4
In order to upload the files of your certificate, use the 'Choose file' button under 'Upload the certificate files'. For 'CA certificate (*-ca.crt)' use the file called 'cabundle.crt'
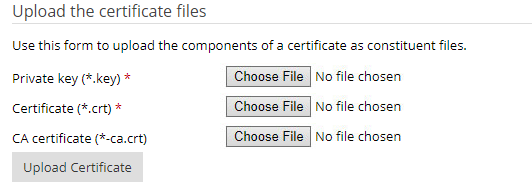
After selecting the files click on 'Upload Certificate'.
Step 5
You're automatically returned to the 'Tools & Settings' > 'SSL/TLS Certificates'-overview. Select your new certificate and click on 'Make Default'.
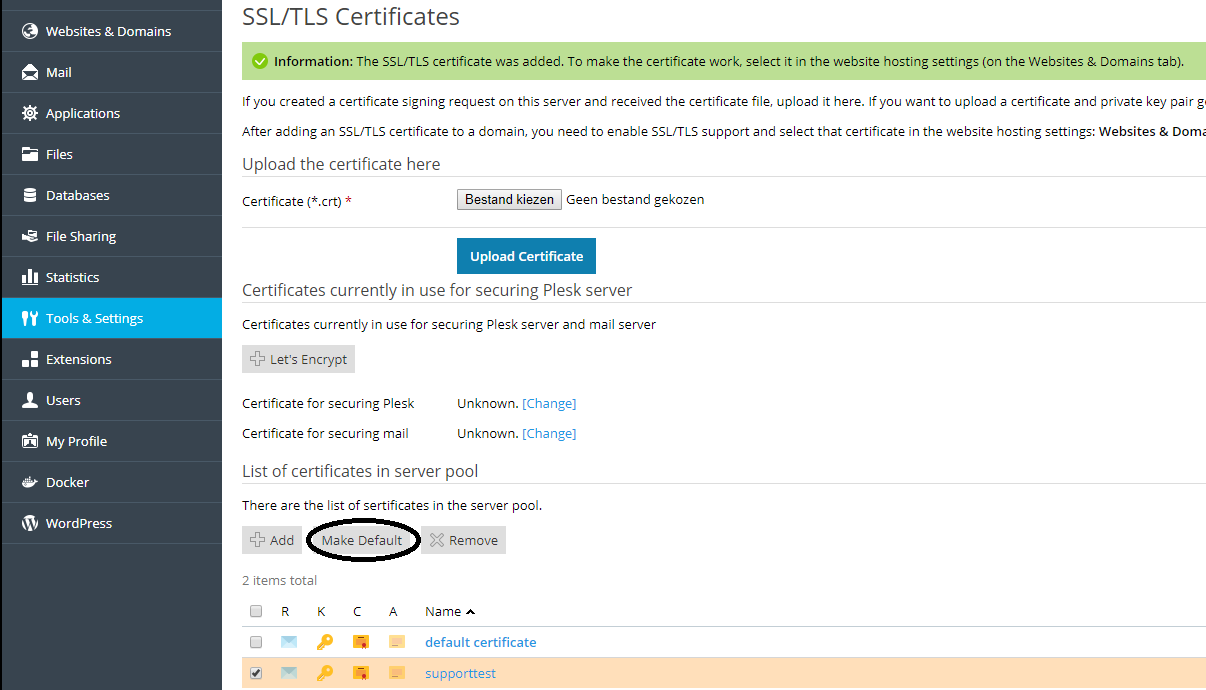
Stap 6
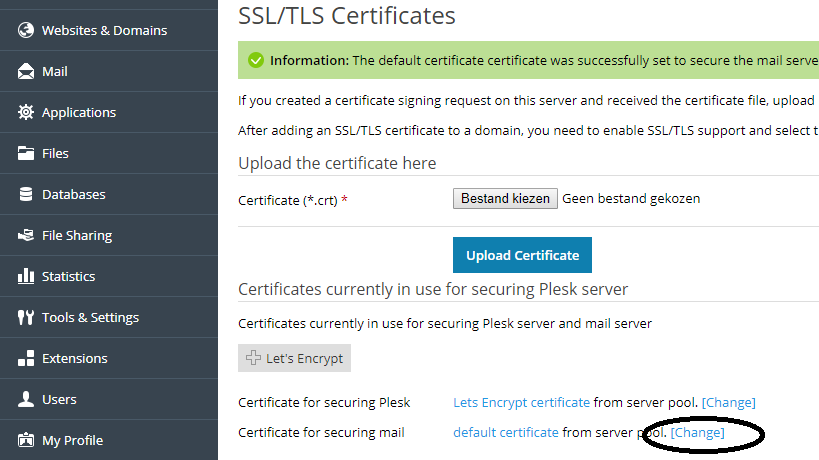
Your new certificate is now automatically used for Plesk, but not your e-mail. To also secure your mail click 'Change' behind 'Certificate for securing mail'.
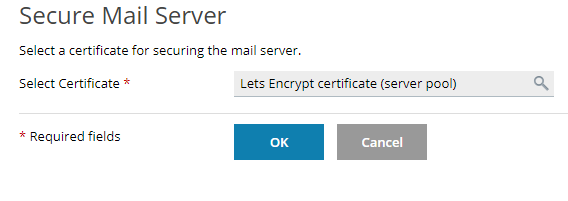
Stap 7
Select your new certificate name which you've set in step 3 (in this example Let's Encrypt, but it will most likely be your domain name) and click 'Ok'. Your Plesk installation is now secure!
Using a Let's Encrypt-certificate
Securing your hostname with Let's Encrypt
Step 1
Log in to Plesk and navigate to 'Tools & Settings' > 'SSL/TLS Certificates'.
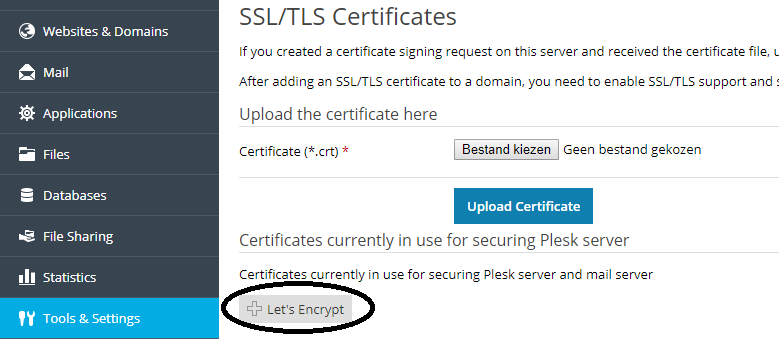
Step 2
In the menu that appears click on '+ Let's Encrypt' under 'Certificates currently in use for securing Plesk server' .
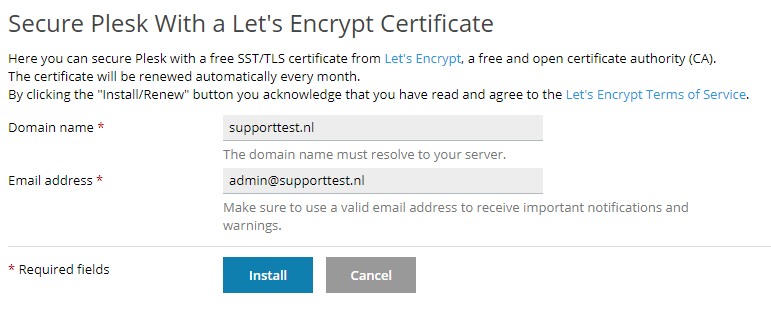
Step 3
Provide your localhost (provided by default) and your e-mail address and click on 'Install'.
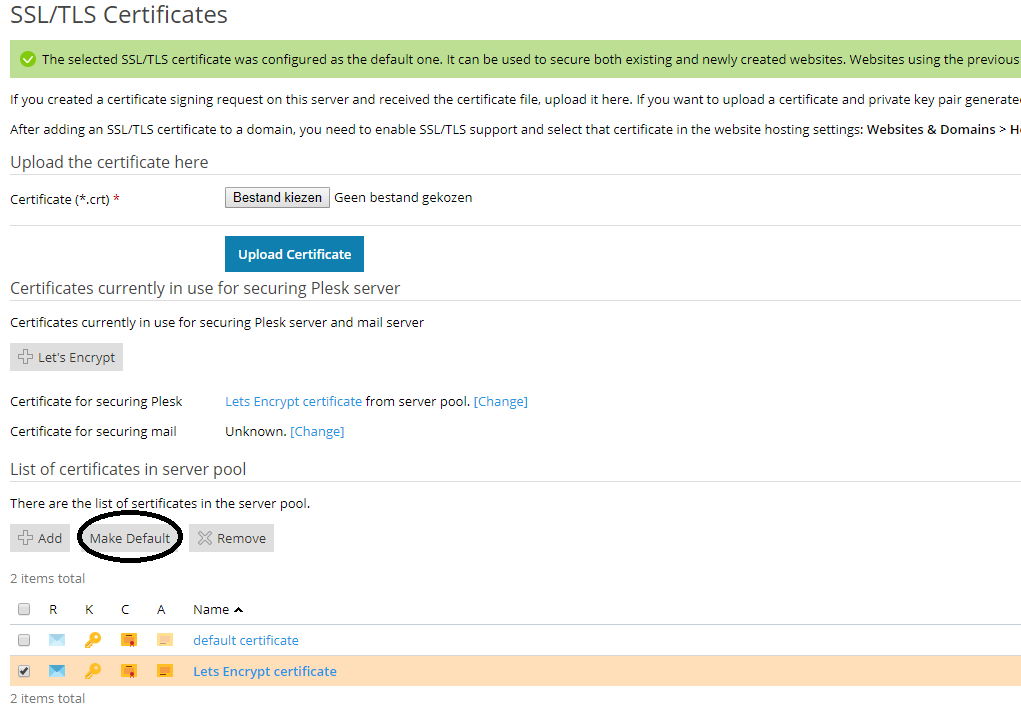
Step 4
You're now taken back to the 'SSL/TLS certificates'-overview. Select your Let's Encrypt certificate and click on 'Make Default' to ensure you're using Let's Encrypt.
Stap 5
Let's Encrypt is now automatically used for Plesk, but not your e-mail. To also secure your mail click 'Change' behind 'Certificate for securing mail'.
Stap 6
Select 'Let's Encrypt certificate' and click 'Ok'. Your Plesk installation is now secure!
Securing your website using Let's Encrypt
Step 1
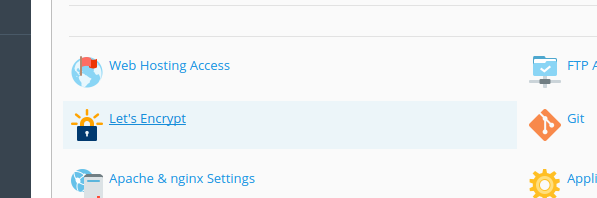
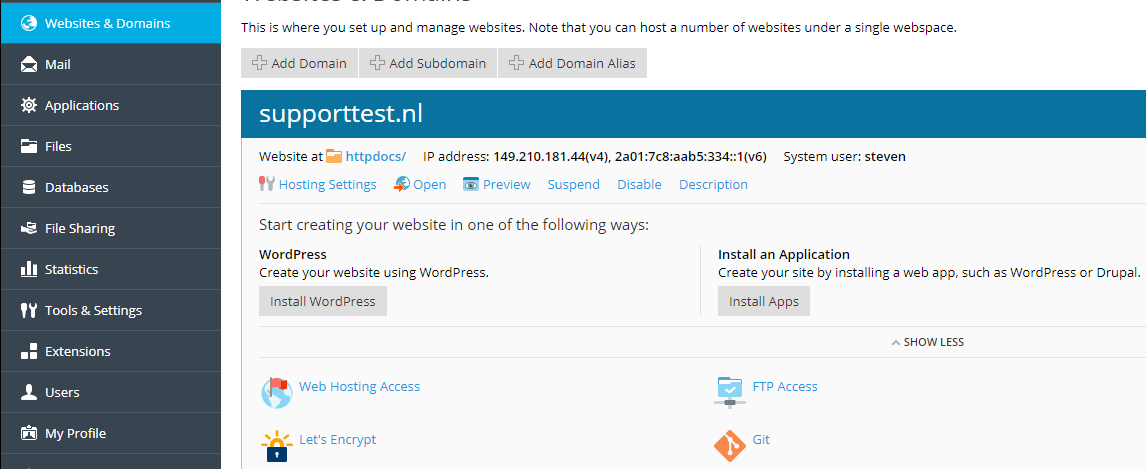
Under 'Websites & Domains' navigate to your and click the 'Let's Encrypt' option.
Stap 2
Now you can generate an SSL-certificate for your domain. Provide an e-mail address (you'll receive reminders on it about the automatic renewal of your Let's Encrypt-certificate(s)) and select whether you'd also like to secure 'www.yourdomain' and/or 'webmail.yourdomain' with an SSL-certificaat.
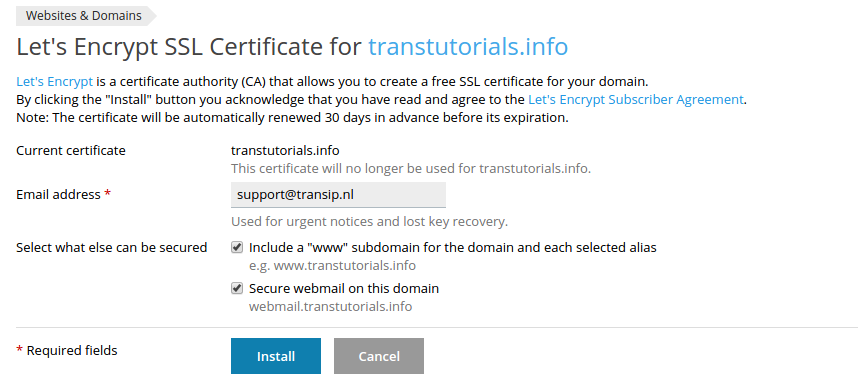
Click on 'Install' om het certificaat aan te maken en te installeren.
Step 3
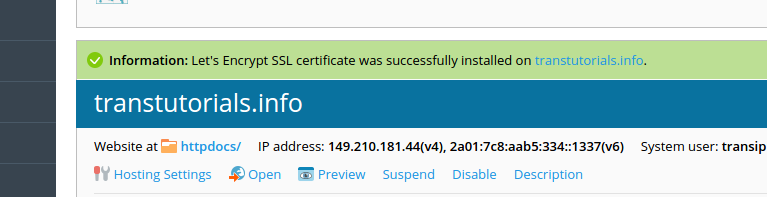
You'll see a notification like below after the installation has completed.
Step 4
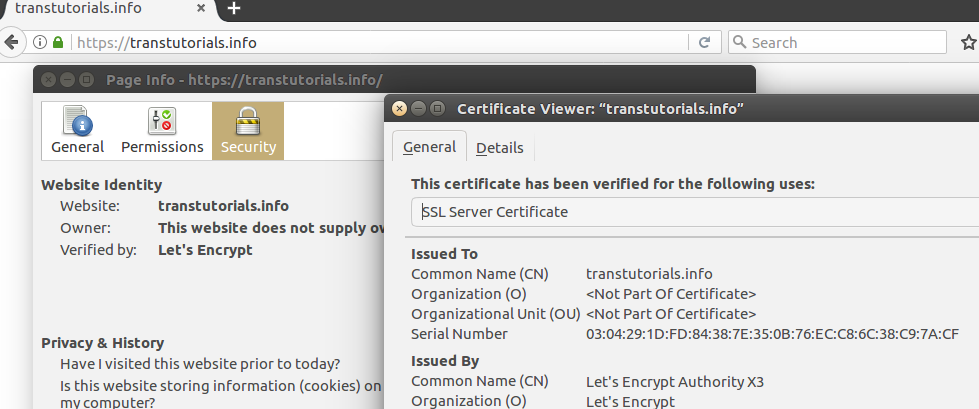
If you open your website in your browser (using https:// or through a redirect under 'Websites & Domains' > your domain > 'Hosting Settings' > 'Permanent SEO-safe 301 redirect from HTTP to HTTPS') you'll see a green lock thanks to the Let's Encrypt certificate!
Using a self-signed-certificate
Step 1
Log in to Plesk and navigate to 'Tools & Settings' > 'SSL/TLS Certificates'.
Step 2
Click on 'Add' under 'List of certificates in server pool'.
Step 3
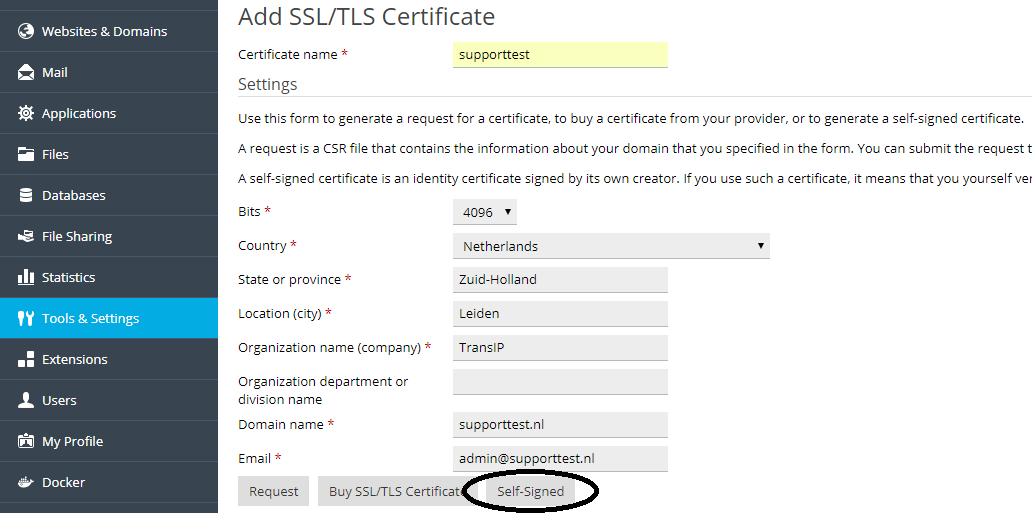
Fill in the required fiels like in the example below and click on 'Self-Signed'. Please note that you should use your own information.
Step 4
You're automatically returned to the 'Tools & Settings' > 'SSL/TLS Certificates'-overview. Select your new certificate and click on 'Make Default'.
Stap 5
Your new certificate is now automatically used for Plesk, but not your e-mail. To also secure your mail click 'Change' behind 'Certificate for securing mail'.
Stap 6
Select your new certificate name which you've set in step 3 (in this example Let's Encrypt, but it will most likely be your domain name) and click 'Ok'. Your Plesk installation is now secure!
Securing your website
After completing the steps above your Plesk installation and your mail servers are secured using SSL (TLS v1.2). The certificate used for this can be linked to your website using the steps below.
Step 1
Click on 'Websites & Domains' > 'Hosting Settings' for the website you'd like to secure.
Step 2
Make sure the option 'Permanent SEO-safe 301 redirect from HTTP to HTTPS' is selected and select the name of the certificate you added in from the dropdown menu behind 'Certificate'.
Next click on 'Apply' at the bottom of the page. If you visit your website now you'll see a green lock before your domain name, indicating your site site is secure!