


When extending the disk spcae of your VPS, you will first need to add this extra disk space to a partition before your OS can use this. When upgrading your VPS or when ordering a SSD AddOn this extra space will therefore not be immediately visible in your OS or web control panel.
The following steps basically work for any Linux-based operating system, regardless of whether or not you use LVM. GParted is the graphical version of 'parted' and while both have the same functionality, GParted's GUI is a little easier.
Please note!
- Always make a snapshot before expanding a partition! The process of expanding a partition is error-sensitive and it's important that you can always fall back on a snapshot to restore the state of your VPS.
- In addition, your VPS is disabled when you use rescue mode. Therefore, do these actions at a time when you do not actively use (the services) your VPS.
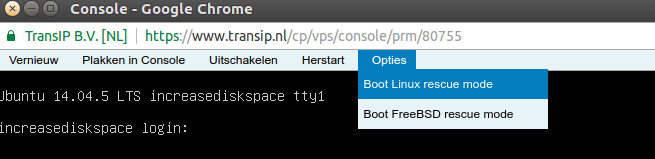
- Start the 'Linux Rescue Mode'. You can do this by opening the console in the control panel by clicking the bottom left of the icon. Then you will see some options in the "popout" menu in the menu bar, including "Options". In that menu, select "Linux Rescue Mode". Starting this may take a while.
- When the rescue mode is fully started and you see a command prompt, run the 'startx' command to start the graphical interface.
- When the graphical interface has started, click the 'CD' icon in the bottom left corner on the taskbar. Then choose System > GParted.

- Once started, you'll see the current partitions in GParted. If you have just increased your disk space, you'll see a number of GiB of 'unallocated' space here. If this unallocated space comes directly after the partition you want to enlarge, right-click that partition and choose Resize / Move. Via the slider you can add as much space as available.
- If you want to add additional space to the /root partition (usually /dev/vda1), there are some additional actions needed. You can only add space directly next to the partition you want to add the extra space to. By default there will be an 'extended' partition containing the linux swap partition after the /root partition.
- First, you expand the swap partition. Right-click the /dev/vda2 partition (with as extended file system) and choose Resize/Move. Drag the slider as far as you want (if you want to assign all space to /dev/vda1 then drag it all the way to the right). If you're satisfied, press the Resize/Move button.
- Now move the swap partition. Right-click the partition labeled 'linux swap' (often /dev/vda5) and choose Resize/Move again. Now you drag the entire block to the far right. You will now see a warning, but moving the swap partition on the disk will usually not cause any problems.
- Now right click on the extended partition and choose Resize/Move again. Now you can reduce the space of the partition to the left, for example, to half of the original space. Now you can assign the unallocated space to the first (/root) partition.
- Now right-click the primary partition (/dev/vda1) and choose Resize/Move again. Drag the slider all the way to the right. Choose Resize/Move to save this change.
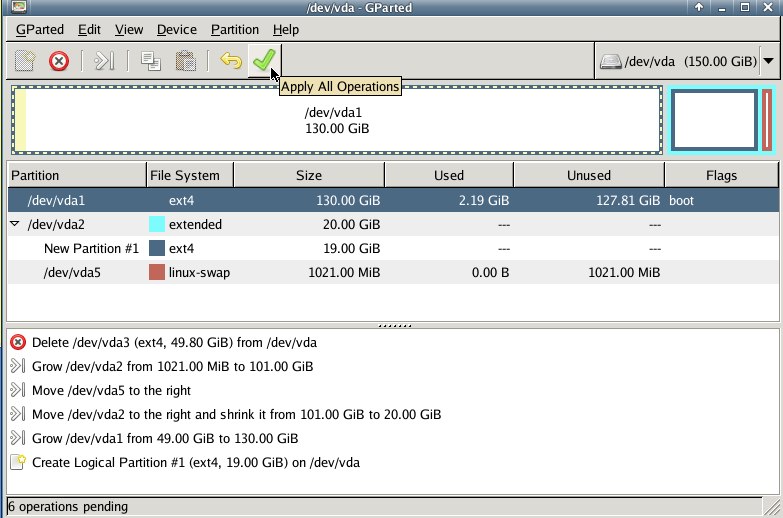
- Now you click on the green checkmark to make all changes permanent. You'll get a warning again, because reducing/moving partitions can cause problems. Click Apply when you are sure that everything is correctly adjusted.
Please note! Reducing the space of the root partition is strongly inadvised. The chances are high that you create data corruption and your VPS will no longer start.
- When you restart your VPS via Restart on the console menu and log in to your OS, you can see the new partition(s) via a command such as
df -h