


When ordering a VPS, you can choose from one of four different installation options. One of the options available is to use a cloud config file.
With a cloud-config file you can automatically adjust the configuration of a Linux server after the installation process: During the first boot of your server, a program called cloud-init reads the data in the cloud-config file and adjusts the configuration based on this file to your wishes. For example, you can create users, set passwords, add SSH keys, add repositories, install packages and much more.
In this guide, we'll show you how to create and use a cloud config file when ordering a VPS. More general information about cloud init and cloud config can be found in this article.
Creating a cloud config file
The setup of a cloud config file is pretty self-explanatory if you have an example. In the steps below, we therefore emphasize examples of different use cases. Cloud-init supports multiple formats, but for this guide we use the YAML format.
- We recommend configuring at least one user and an SSH key in your cloud config file and not putting sensitive information in your cloud config file.
- All options in this section are optional and it is not necessary to use them all. For example, if you don't set up groups in your cloud-config file then only the default system groups and user groups are created.
Step 1
Start a text editor, such as Notepad, Notepad ++, Texteditor, or Gedit.
Step 2
The first line of a cloud config file should always be announced as such so that cloud-init can recognize it as a cloud config file. You do this by opening the file with the line:
#cloud-config
Then you add to the file the options that you want to adjust during the installation of your VPS. In this step we show this in the following parts:
Create groups
Create users: names, groups, passwords, ssh-keys
Change (root) password
Customize files
Execute first boot commands
Install packages
Remove automatically after installation
At the end of this section, we'll show what these options look like merged into your cloud-config file.
#cloud-config
 groups:
 - Ubuntu: [root, sys]
 - cloud-users
In the example below, we show some options that you can use when creating a user. In the explanation we show all available options. You are free to choose which of the available options you use.
#cloud-config users: - name: transip groups: transipssh_authorized_keys:-ssh-rsa AAAAB3NzaC1yc2EAn64SJAF8cNUkV40EiUrsXJpu+MNtK2IXs9NDitR5V17cDZtqN+W3+8w== transip@voorbeeld.nl - ssh-rsa AAAAB3NzaC1ycMNtK2IXs9NDi64SJAF8cNUkV40EiUrsXJpu+MNtK2IXs17cDZtIXs17+8w== transip@voorbeeld.nl sudo: ['ALL=(ALL) NOPASSWD:ALL'] shell: /bin/bash
The root password can be changed with the following syntax:
#cloud-config
chpasswd:
  list: |
    root: your password
It is also possible to enter passwords from other users, for example:
#cloud-config
chpasswd:
  list: |
    root: your password
    user1: another password
For security reasons, Cloud Init does not recommend modifying passwords via cloud config files.
Depending on your use case, it can be useful to configure an initial root password with chgpasswd during your installation. We recommend that you change the root password again after installing your server.
There are two ways to modify files using a cloud config file:
- You can completely overwrite a file via write_files and thus also change the owner or rights.
- With runcmd you execute one or more commands, for example 'sed' commands to adjust specific rules.
The first is useful if you are modifying a small file, and the second for specific changes. To keep your cloud-config file clear, it is usually not desirable to modify large files with write_files.
Below is an example of how to change the configuration of / etc / ssh / sshd_config. For the readability of this article, the comments have been omitted from the file.
#cloud-config
write_files:
- path: / etc / ssh / sshd_config
  permissions: 0600
  owner: root: root
  content: |
       Port 12345

       HostKey / etc / ssh / ssh_host_rsa_key
       HostKey / etc / ssh / ssh_host_ecdsa_key
       HostKey / etc / ssh / ssh_host_ed25519_key

       SyslogFacility AUTHPRIV

       PermitRootLogin No

       AuthorizedKeysFile .ssh / authorized_keys

       PasswordAuthentication no

       ChallengeResponseAuthentication no

       GSSAPIAuthentication yes
       GSSAPICleanupCredentials no

       UsePAM yes

       X11 Forwarding yes

       AcceptEnv LONG LC_CTYPE LC_NUMERIC LC_TIME LC_COLLATE LC_MONETARY LC_MESSAGES
       AcceptEnv LC_PAPER LC_NAME LC_ADDRESS LC_TELEPHONE LC_MEASUREMENT
       AcceptEnv LC_IDENTIFICATION LC_ALL LANGUAGE
       AcceptEnv XMODIFIERS

       Subsystem sftp / usr / libexec / openssh / sftp server
Run first boot commands with runcmd
Runcmd is a powerful tool to execute first boot commands (i.e. these are only executed the first time ever you start VPS). In the example below we show how to edit the contents of a file with a sed command (here the SSH port in the ssh configuration), but you can use runcmd for any command.
#cloud-config
runcmd:
  -  sed -i "s/#Port 22/Port 12345/" /etc/ssh/sshd_config
With a cloud config file you can very easily install specific packages during your installation. For this you use the syntax:
#cloud-config
packages:
 - package name 1
 - package name 2
 - etc
Remove automatically after installation
We recommend not putting sensitive information in the config. Your cloud-config data is always accessible from your VPS via http://pxe.frontend.transip.nl/cloudinit/user-data. You can solve this by adding the code below; this will remove your cloud-config data from the above address after installation.
phone_home:
  url: http://pxe.frontend.transip.nl/cloudinit/post-install
  post: []
  tries: 5
Alternatively, you can block 37.97.254.100 in your firewall.
Above you have seen a lot of options that you can use in a cloud config file. If you put them all together, your file will look like this:
#cloud-config
groups:
  - Ubuntu: [root, sys]
  - cloud users
users:
  - name: transip
    groups: transip
    ssh_authorized_keys:
      - ssh-rsa AAAAB3NzaC1yc2EAn64SJAF8cNUkV40EiUrsXJpu+MNtK2IXs9NDitR5V17cDZtqN+W3+8w == transip@example.com
      - ssh-rsa AAAAB3NzaC1ycMNtK2IXs9NDi64SJAF8cNUkV40EiUrsXJpu+MNtK2IXs17cDZtIXs17+8w == transip@example.com
    sudo: ['ALL = (ALL) NOPASSWD: ALL']
    shell: / bin / bash
chpasswd:
  list: |
    root: your password
write_files:
- path: / etc / ssh / sshd_config
  permissions: 0600
  owner: root: root
  content: |
    Port 12345

    HostKey / etc / ssh / ssh_host_rsa_key
    HostKey / etc / ssh / ssh_host_ecdsa_key
    HostKey / etc / ssh / ssh_host_ed25519_key

    SyslogFacility AUTHPRIV

    PermitRootLogin No

    AuthorizedKeysFile      .ssh/authorized_keys

    PasswordAuthentication no

    ChallengeResponseAuthentication no

    GSSAPIAuthentication yes
    GSSAPICleanupCredentials no

    UsePAM yes

    X11Forwarding yes

    AcceptEnv LANG LC_CTYPE LC_NUMERIC LC_TIME LC_COLLATE LC_MONETARY LC_MESSAGES
    AcceptEnv LC_PAPER LC_NAME LC_ADDRESS LC_TELEPHONE LC_MEASUREMENT
    AcceptEnv LC_IDENTIFICATION LC_ALL LANGUAGE
    AcceptEnv XMODIFIERS

    Subsystem       sftp    /usr/libexec/openssh/sftp-server

runcmd:
  -  sed -i "s/#Port 22/Port 12345/" /etc/ssh/sshd_config

packages:
 - packagename1
 - packagename2

phone_home:
  url: http://pxe.frontend.transip.nl/cloudinit/post-install
  post: []
  tries: 5
Step 3
Save your cloud config file, for example with the name cloud-config.yaml. You can then use your cloud config file, for example using our API or when ordering a VPS.
Debian IPv6-resolvers
Unlike for example Ubuntu, Debian does not configure IPv6 resolvers when using a cloud config file. Our SandboxVPSs exclusively use IPv6 and as such, it is important to add the IPv6 resolvers to yuor cloud config file. This can be done as follows:
/bin/sh -c 'echo "bmV0d29yazoge2NvbmZpZzogZGlzYWJsZWR9Cg==" | base64 -d > /etc/cloud/cloud.cfg.d/99-disable-network-config.cfg'
/bin/sh -c 'sed -i "s/inet/inet6/g" /etc/network/interfaces.d/50-cloud-init'
/bin/sh -c 'sed -i "s/dhcp/auto/g" /etc/network/interfaces.d/50-cloud-init'
/bin/sh -c 'echo "  dns-nameserver 2a01:7c8:7000:195::8:195:8" >> /etc/network/interfaces.d/50-cloud-init'
/bin/sh -c 'echo "  dns-nameserver 2a01:7c8:7000:195::135:195:135" >> /etc/network/interfaces.d/50-cloud-init'
/bin/sh -c 'ifdown ens3; ifup ens3'
Using your cloud config file when ordering a VPS
Step 1
When ordering a VPS, after choosing the specifications and operating system if you are logged in to your TransIP account, there are 2 options:
- If you haven't added an SSH-key yet, you're shown an option to enter your SSH key as shown below
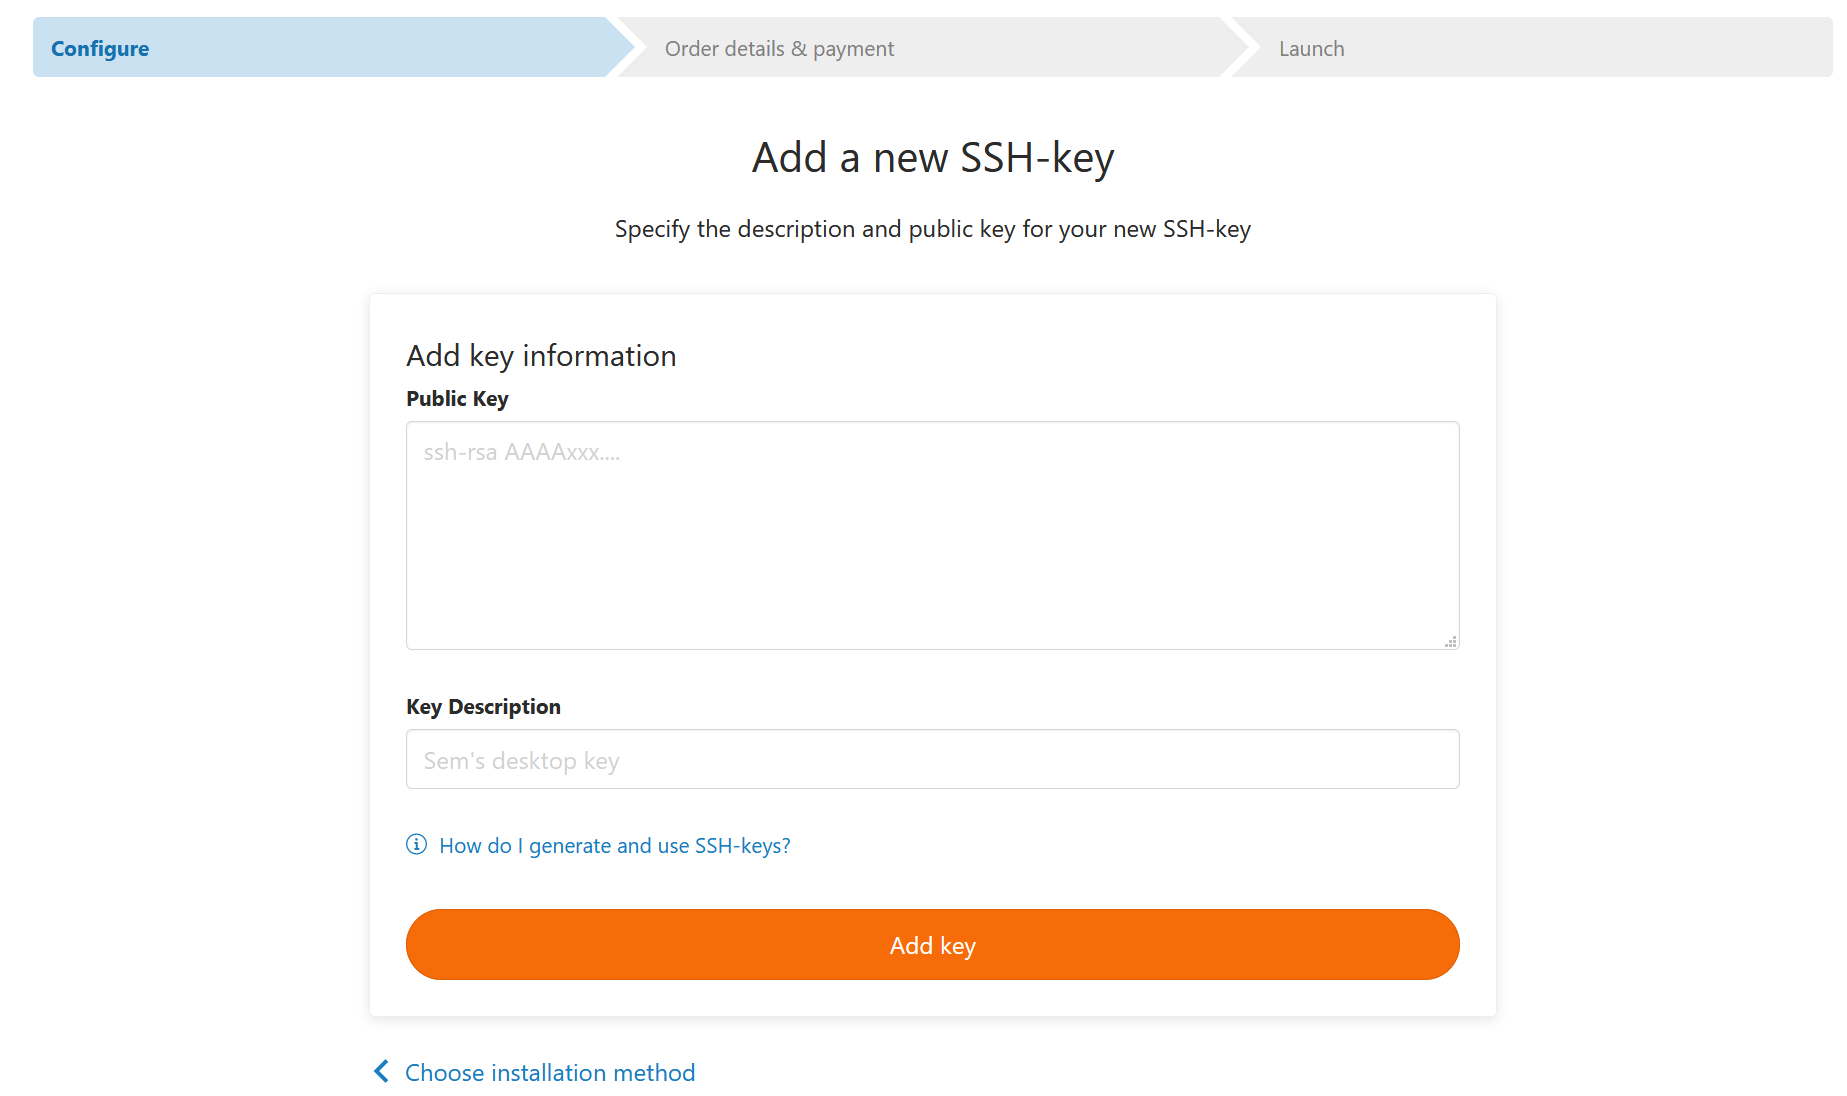
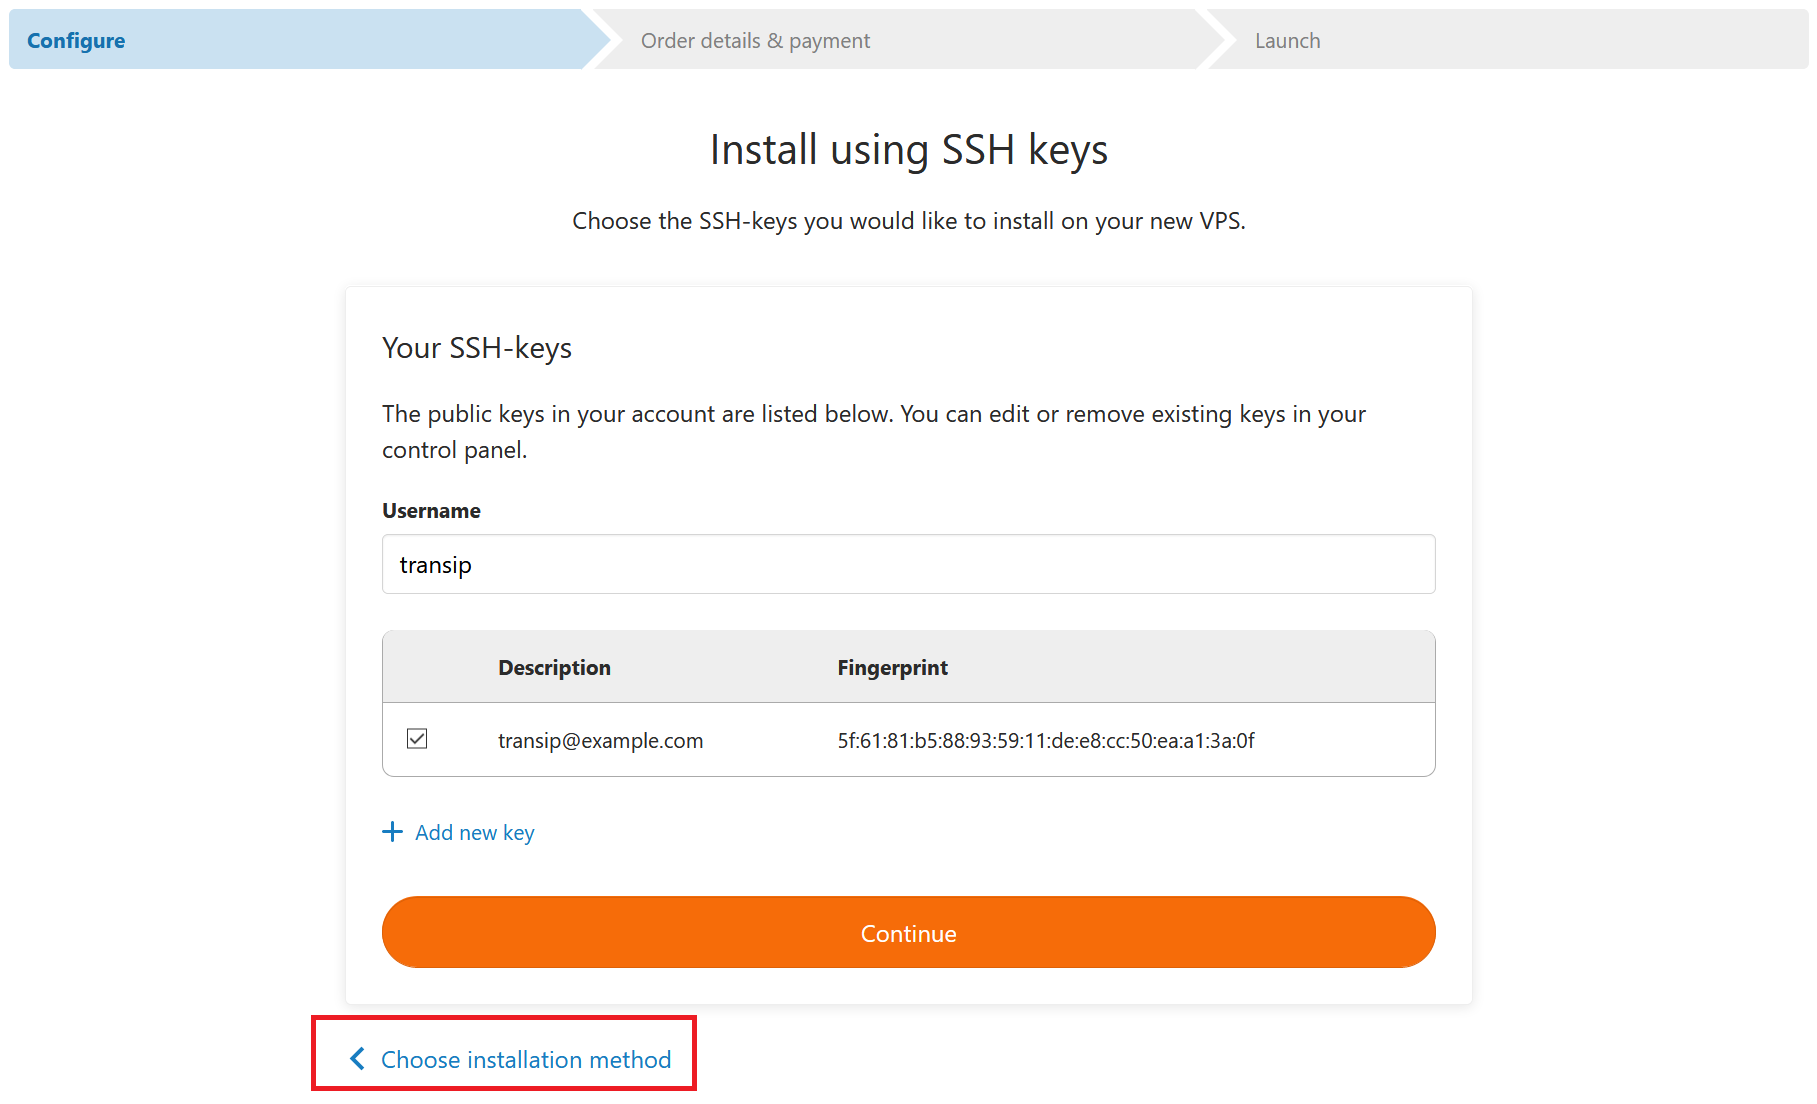
- If you have added aan SSH key before, you can either select it, or add a new one.
If you are not logged in, you will see the option for a one-time password:
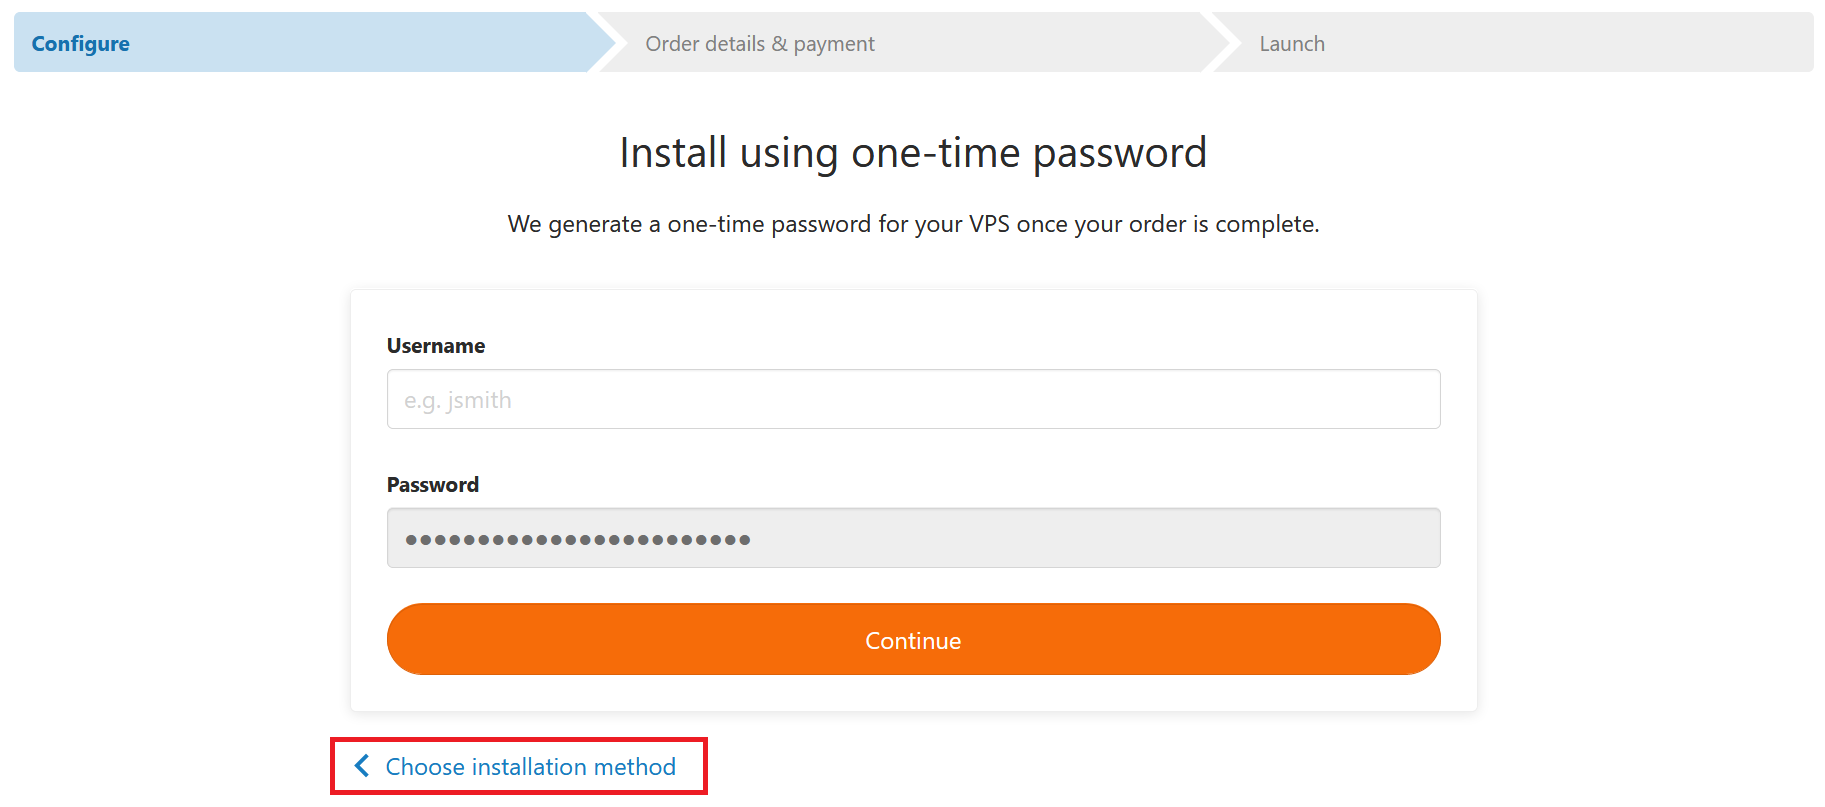
Whichever is the case, click on 'Choose another installation method'.
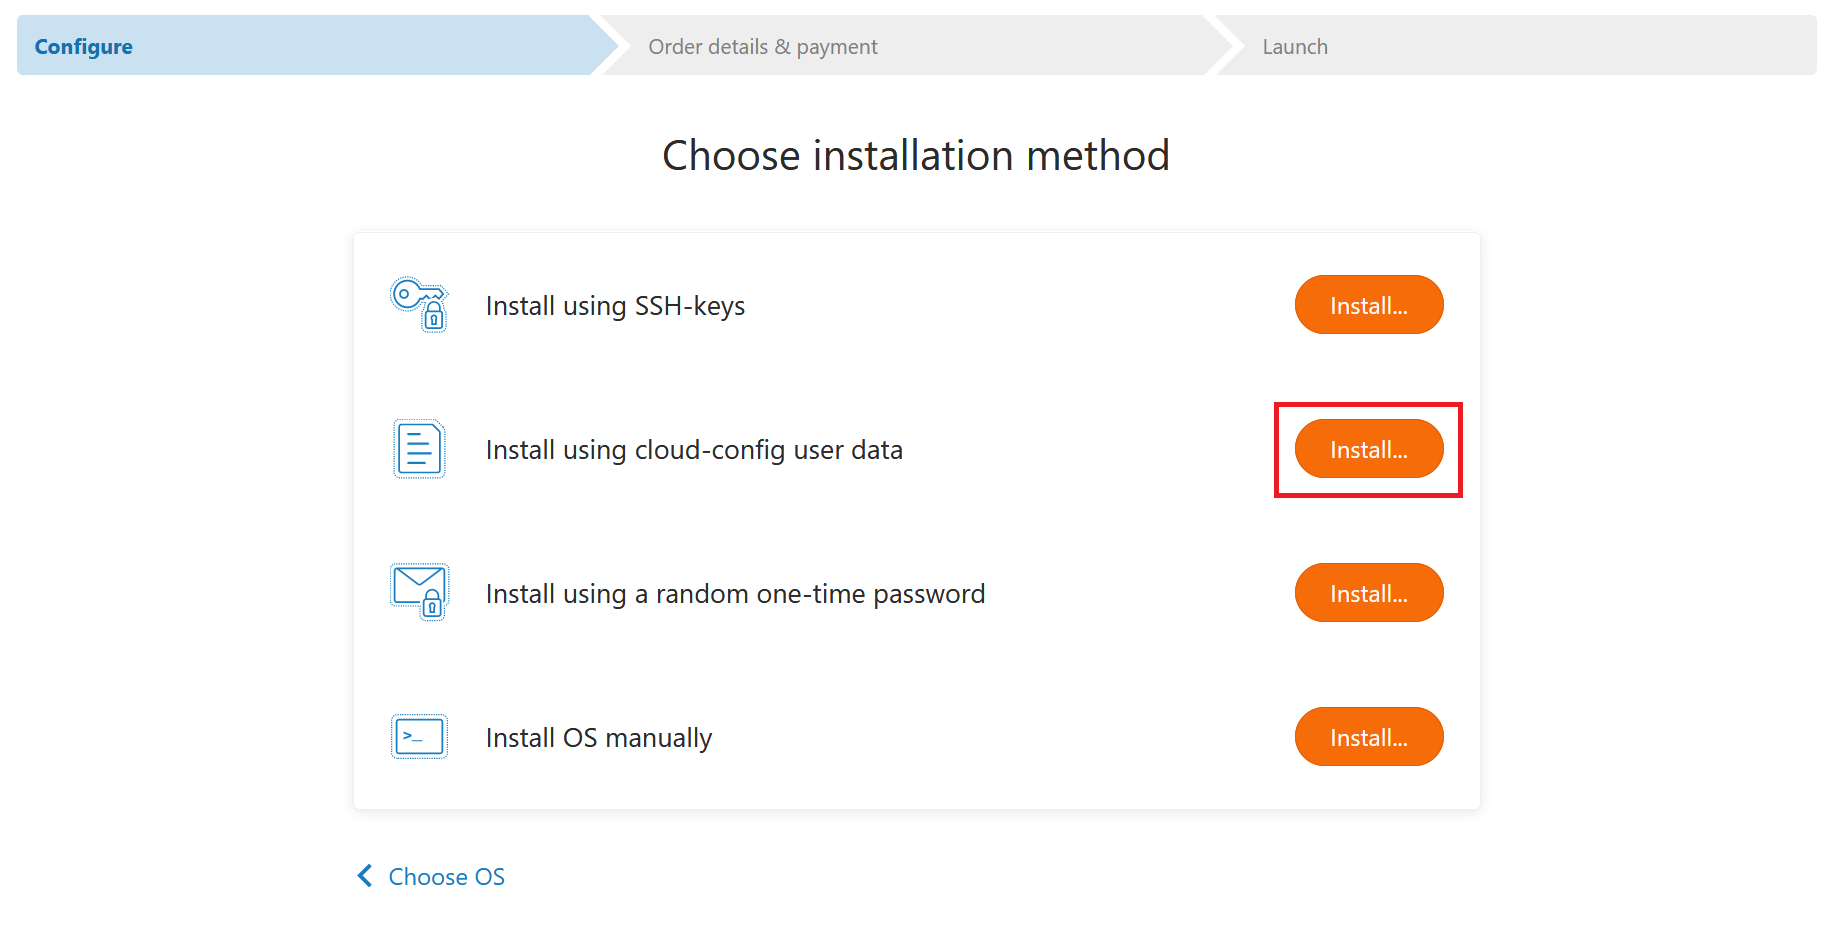
Step 2
You will now be given the choice to choose an installation method, as in the screenshot below. Select 'Install via cloud-config user data'.
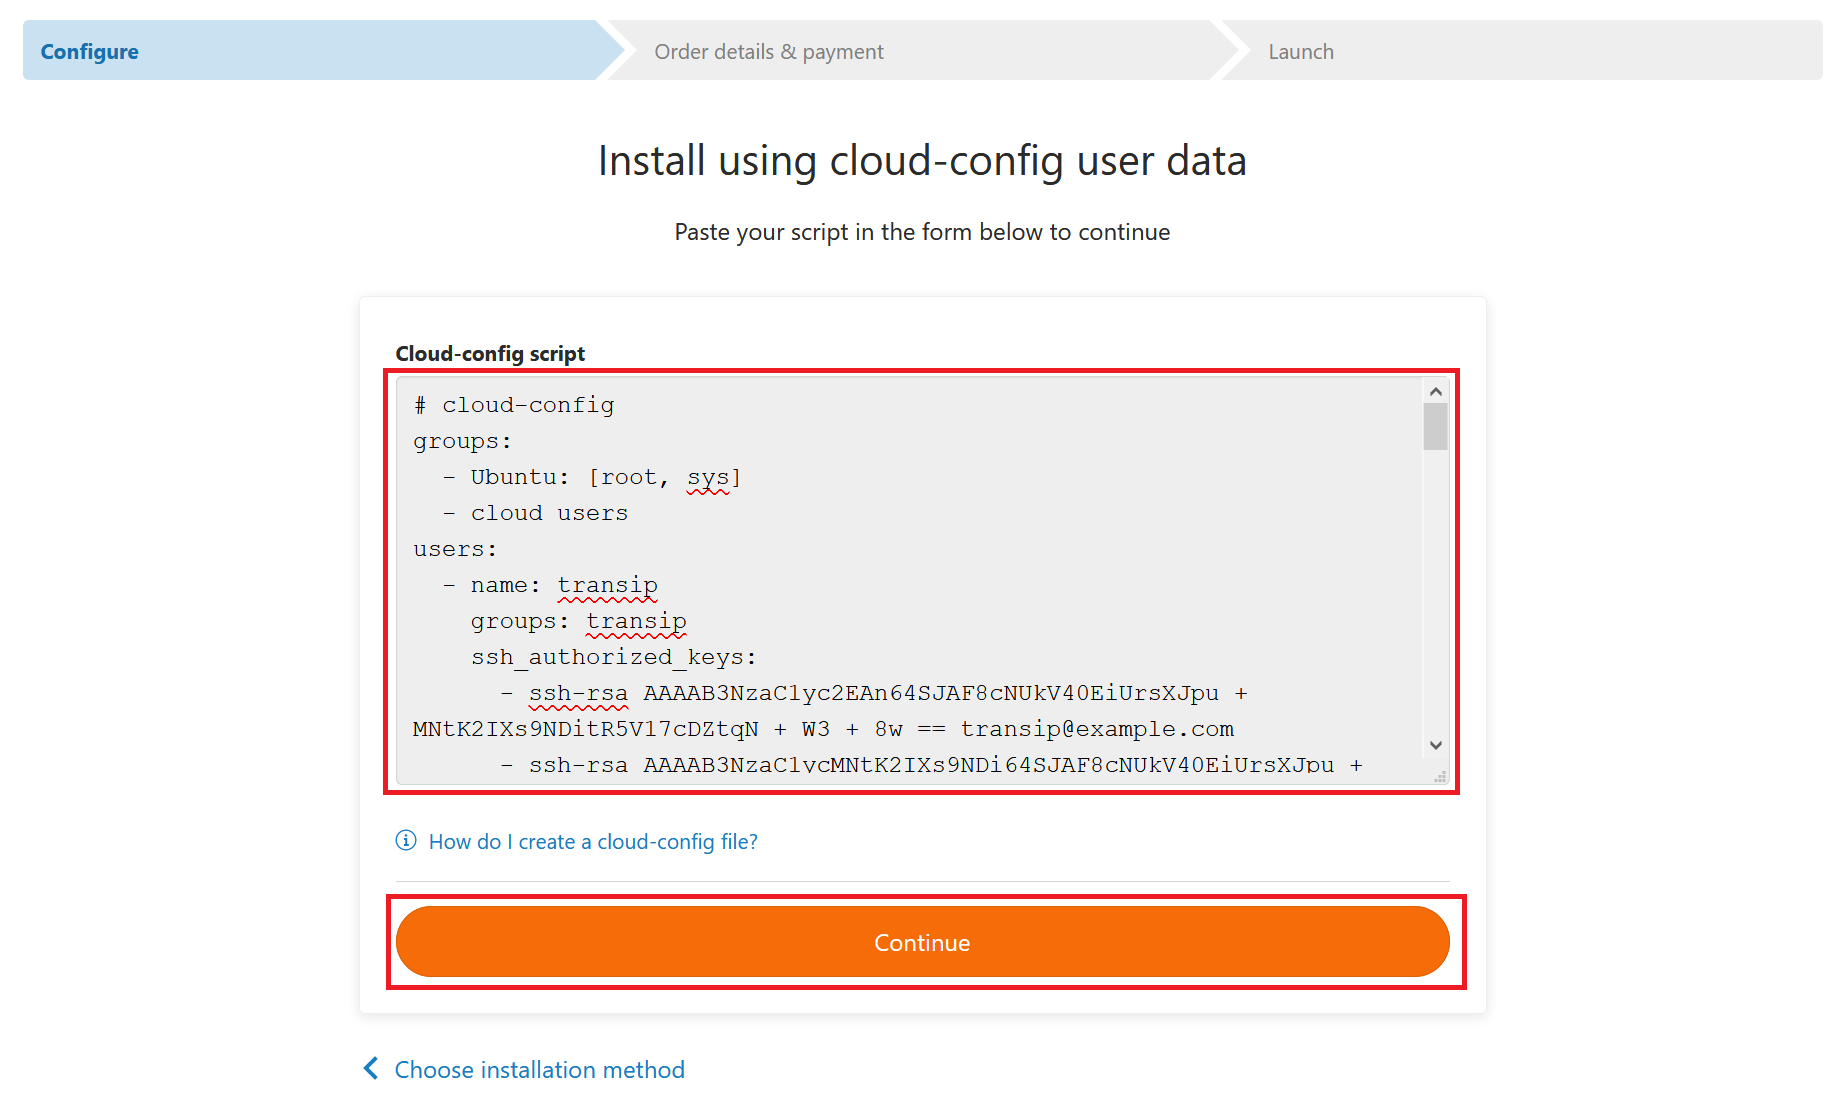
Step 3
You will now see the 'Install via cloud-config user data' screen. Copy and paste the contents of your cloud config file, as shown in the screenshot below.
Your cloud config data is now applied. You will receive a confirmation of your order by e-mail and, depending on which cloud init option you chose (ssh or temporary password), in the delivery mail your username and if applicable your temporary password.
This brings us to the end of this article. Are you looking for even more options such as adding repositories? Then take a look at cloud-init's documentation.
If you have any questions regarding this article, do not hesitate to contact our support department. You can reach them via the 'Contact us' button at the bottom of this page.
Do you want to discuss this article with other users? Please leave a message under 'Comments'.