


SSL certificates are often issued in both the .crt & .p7b format. However, new versions of IIS require a .pfx certificate (this includes both the certificate and the private key).
To ensure that your certificate (and the key) is converted to this type of certificate, you can generate the .pfx file via OpenSSL.
SNI (i.e. SSL support for more than one domain) is supported from IIS 8.0. This function is called 'SSLflags', see this article for more information.
Step 1
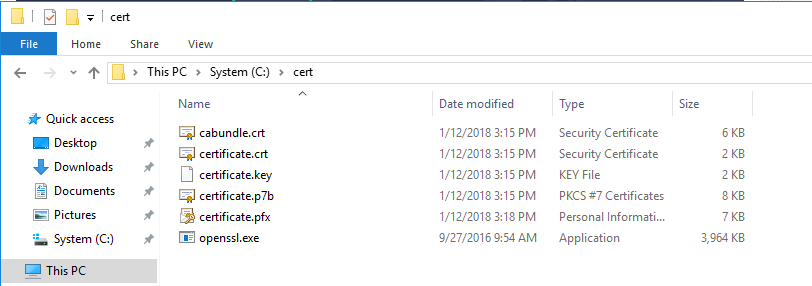
Download your SSL on your Windows Server. The file is usually a .zip file which contains four files. Unpack this to a random folder on your VPS, for example, c:\cert
Step 2
Download the latest version of OpenSSL from this site. OpenSSL comes in a .zip file. Unpack it also in a folder of your choice, for example, c:\program files\openssl\
For the version we used for this manual, the openssl.cnf file was located in the bin folder. Openssl.exe, however, gives an error message when openssl.cnf is located in the bin folder. Place the openssl.cnf file in the root folder of openssl. In our example above, this is c:\program files\openssl\
Step 3
In the OpenSSL folder you will find three folders: bin, include and lib. Open the bin folder and copy the openssl.exe file to the folder to which you extracted your SSL certificates. In our example, this is c:\cert
Step 4
Open the command prompt (cmd) as administrator and navigate to the folder which contains your certificate. Then execute the following command (note the scrollbar):
openssl pkcs12 -export -out certificate.pfx -inkey certificate.key -in certificate.crt -certfile cabundle.crt -password pass:wachtwoordnaarkeuze
Choose your own password and write it down: you will need the password later in this manual.
You will now see that a .pfx file is included in the folder which contains your certificate.
Step 5
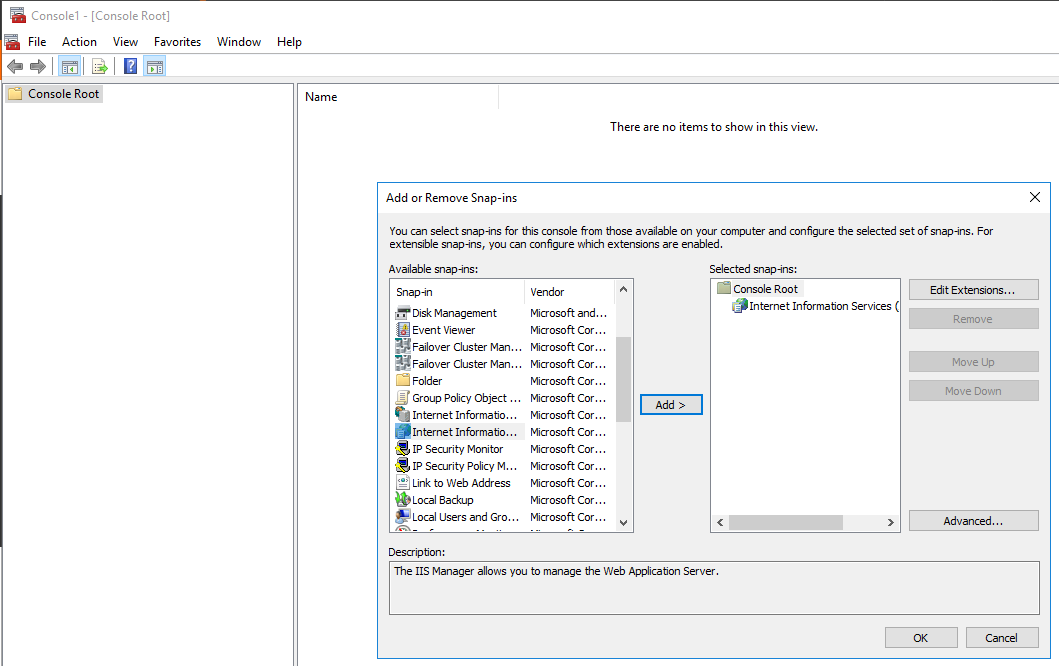
Open IIS Manager. You can do this, for example, by going through the following steps: start > mmc > file > add/remove snap-in > Internet Information Services (IIS) Manager > Add > Ok
Step 6
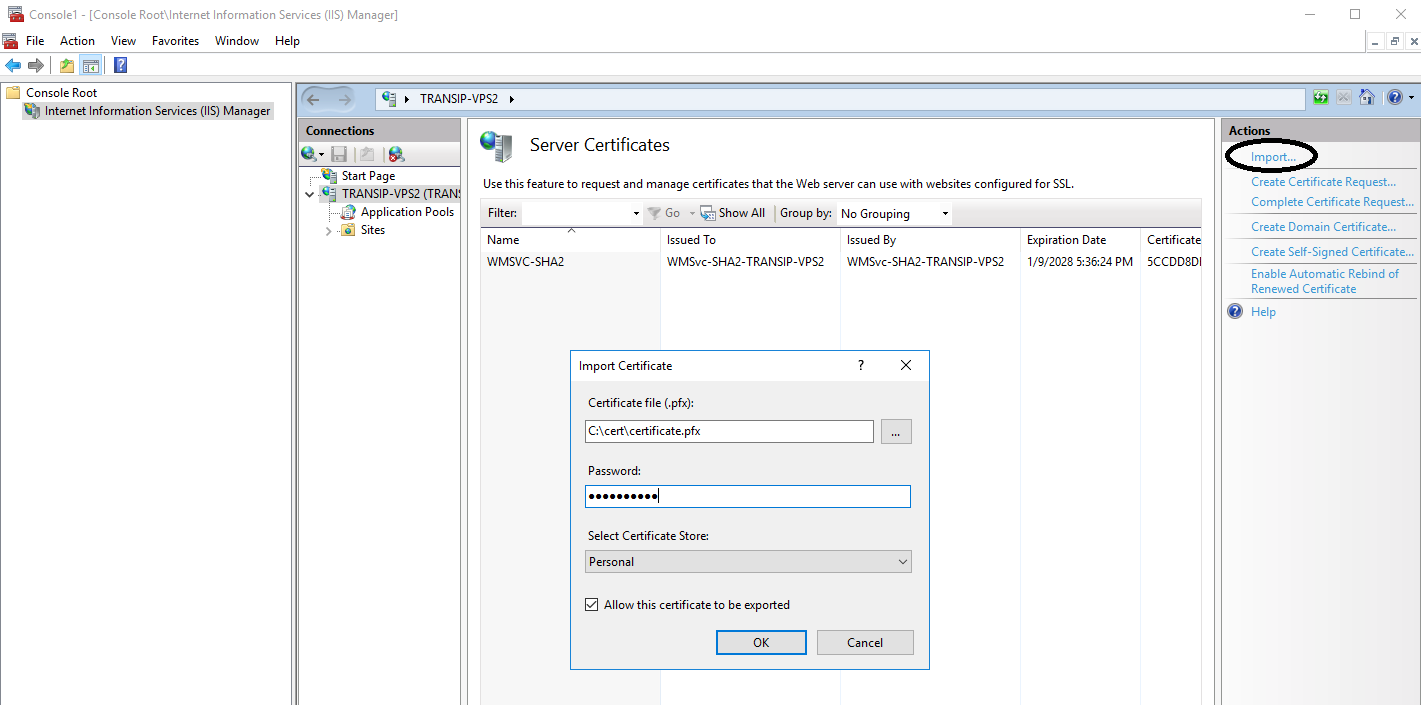
Click the name of your VPS, open 'Server Certificates' and click 'Import' > 'Add'. You can now select your .pfx file and enter your password.
Step 7
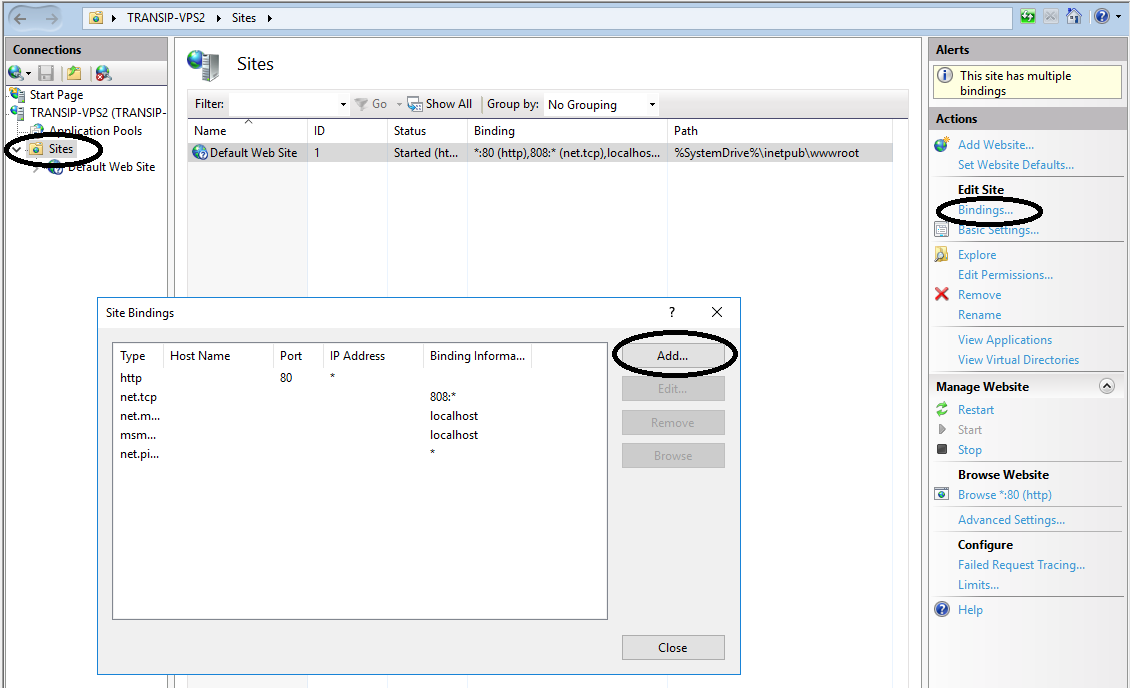
Create a new binding so https://yoursite refers to the site with the SSL certificate. You can do so by navigating to 'Sites'. Once you've found your site, select 'Bindings...' on the left and click 'Add...'.
Step 8
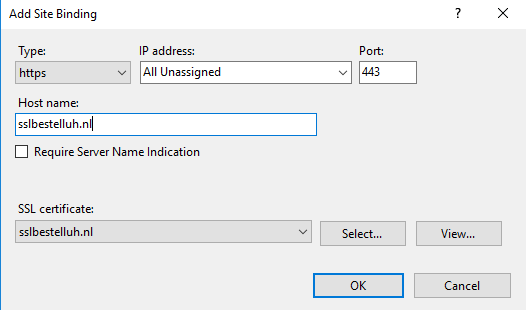
Under 'Type', you select 'https' because this is the protocol for SSL. Then change the IP address and/or the port (the port should pretty much always be 443). Whether this is necessary depends on the configuration of your Windows Server.
At 'Host name', you enter the domain name for this website, just like in your 'http' binding. At 'SSL certificate', you select the SSL certificate you just imported. If you can verify that all settings are correct, select 'OK'. This adds the binding.
If you go to your website with https:// added in front, you will see that your SSL certificate is being used. If you want to force http:// to direct to https:// , this can be done with the .htaccess equivalent of IIS (the web.config file). If you prefer that the SSL certificate is only used if https:// is used, then you are now finished with the set-up. You have now installed an SSL certificate for your site!
Should you have any questions left regarding this article, do not hesitate to contact our support department. You can reach them via the ‘Contact Us’ button at the bottom of this page.