


You can configure a TCP monitor in the control panel for each of your VPS' public IP addresses. The selected ports of your VPS are then automatically monitored by our systems. Should one or more of your selected ports become unreachable, you'll then automatically receive a notification per email and/or SMS.
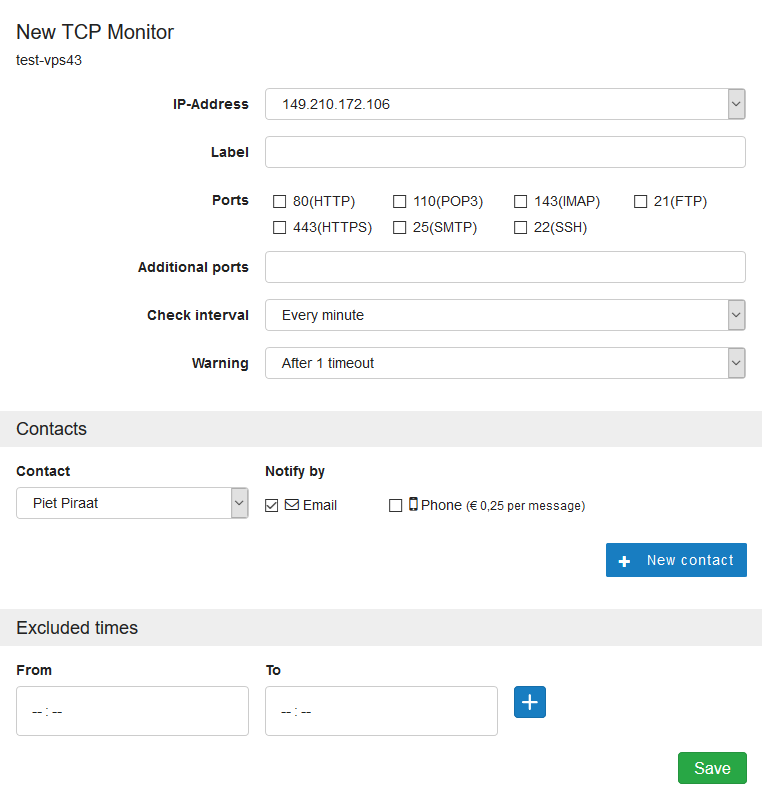
The following settings can be changed for the TCP monitor:
- The ports to be tested
- The monitor interfal (1-6 minutes)
- The number of time-outs after which you receive a notification
- Whether you'd like to receive a notification per e-mail and/or SMS
- The phone number / email address on which to receive the notification
- Hours during which the monitor is not active.
In case your server will go down and then up again, you will receive a total of two messages. If your VPS is reachable then of course you will not receive any notifications.
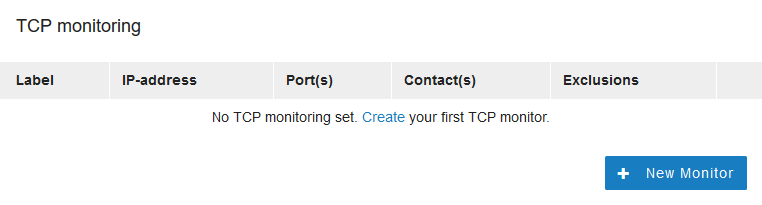
Enabling the TCP monitor
Step 1
Log in to your control panel, navigate to the 'VPS' tab and click the name of your VPS.
Step 2
Scroll down on the right hand side to 'TCP Monitoring' and click the cogwheel.

Step 3
Click on 'New monitor'.
Step 4
The configured ports will be tested at an interval of your choice. The interval can be set from 1 to 6 minutes. Additionally, you can configure after how many timeouts you receive a notification, who the contact person will be, and disable the monitoring between specific times.
Firewall
Your VPS' firewall can block monitoring if, for example, the port you want to monitor is only accessible to specific IP addresses.
The TCP connections to your servers are made by the VPS monitor from 87.253.155.96/27 & 2a01: 7c8: 7ca: ba11 :: / 64. Allow these IP ranges in your firewall if you want to monitor ports that are blacklisted in your firewall. Depending on which firewall you are using, you can use the following commands for Linux based systems:
- This does not apply to ports that are open to the public.
- The IP ranges are used by our renewed monitoring system which is launched on May 15th 2021. Until that date, you also need to whitelist the IP addresses of our current monitoring system. These are: 80.69.67.10 / 2a01:7c8::ba11
- The IP addresses for TCP monitoring are automatically whitelisted in the VPS firewall in the control panel (you don't see this in the control panel).
UFW (Ubuntu/Debian):
sudo ufw allow from 87.253.155.96/27
sudo ufw allow from 2a01:7c8:7ca:ba11::/64
Firewalld (AlmaLinux/Rocky Linux/CentOS Stream):
sudo firewall-cmd --permanent --zone=public --add-source=87.253.155.96/27
sudo firewall-cmd --permanent --zone=public --add-source=2a01:7c8:7ca:ba11::/64
False positives
The packages used to test your VPS' connection, have a low priority for your server and are easily dropped. As such we recommend choosing 4 or 5 timeouts, to decrease the chances of false positives.