


Security of communication and data is increasingly important. After all, you do not want the communication between visitors and your website(s) to be viewed by malicious parties. That is why it is extremely important to encrypt sensitive information such as customer data and payment data via 'https' traffic. To do this you will need to install an SSL certificate on your VPS.
The mail, FTP, SSH and HTTPS ports of our cPanel/WHM VPSs are automatically secured with SSL (TLS 1.2). However, the certificate is self-signed and contains information (country, city, etc.) that do not match your own data.
Therefore, we recommend using your own SSL certificate or Let's Encrypt. This manual covers these topics in the following sections:
- Installing your own SSL certificate in WHM
- Installing your own SSL certificate in cPanel
- Generating a free certificate with AutoSSL (WHM)
- If you want to use Let's Encrypt & AutoSSL, you at least need WHM 58.0.17.
- WHM / cPanel has enabled SNI by default since cPanel 60, allowing you to install multiple SSL certificates on one IP.
- For this manual, we assume that you are familiar with the material which is covered in our cPanel tutorial series and that you have created a domain / user within WHM with which you can also log into cPanel.
- The root user can’t log in to cPanel. You can therefore only install an SSL certificate in WHM.
- If you use a CAA record in your DNS settings, make sure you have included "Comodo" or "Lets Encrypt" (depending on what SSL certificate you use) in such a record.
Using your own SSL certificate
You need your own SSL certificate for these steps.
Installing your own SSL certificate in WHM
Step 1
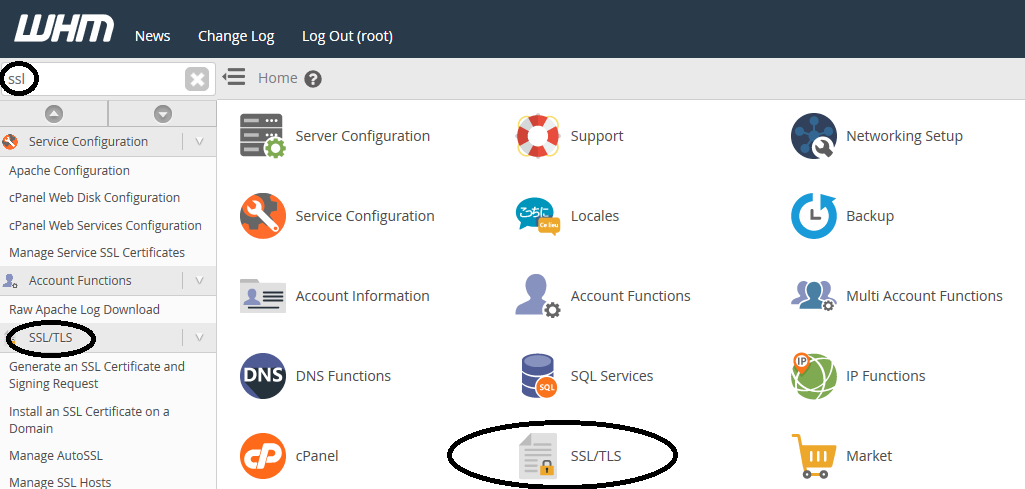
Log in to WHM and click 'SSL/TLS' in the WHM Home Dashboard or look for 'SSL' on the top left and click 'SSL/TLS' in the left menu.
Step 2
Click 'Install an SSL Certificate on a domain'.

Step 3
Fill in the fields on the page that appears as shown in the example below (but using your own data). Then click 'Install'.
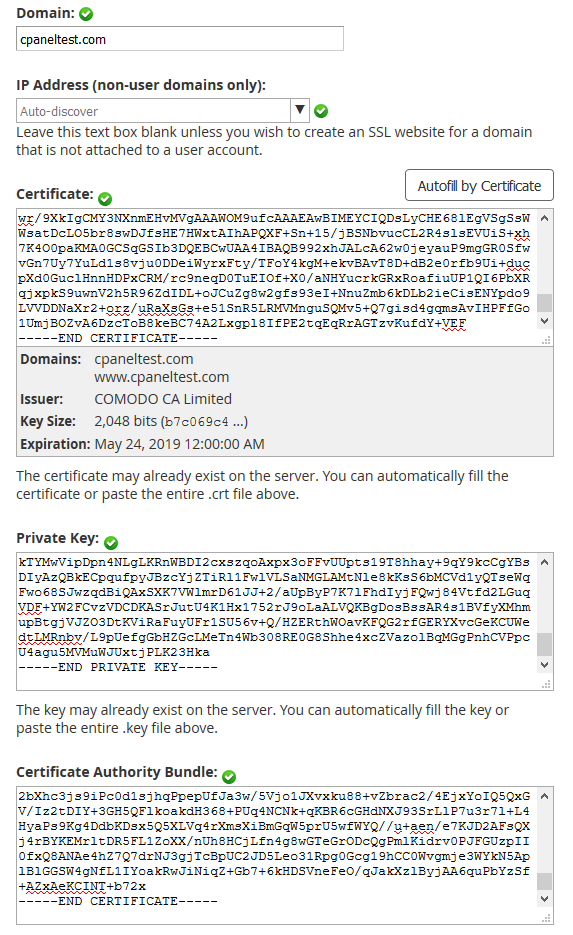
- Domain: Here you enter the domain for which you want to install the SSL certificate.
- IP Address: You can simply leave this on Auto-discover in almost all cases.
- Certificate: Here, you enter the entire contents of the certificate (crt). Open the certificate with your favorite text editor and copy all content (including the piece ----- BEGIN CERTIFICATE ----- & ----- END CERTIFICATE -----) and paste it into the field concerned.
- Private Key: Here, you enter the entire contents of the private key (key). Open the private key file with your favorite text editor and copy all content (including the piece ----- BEGIN PRIVATE KEY ----- & ----- END PRIVATE KEY -----) and paste it into the field concerned.
- Certificate Authority Bundle: Here you install the 'root and intermediate certificates'. Open the bundle containing the root and intermediate certificates (crt) with your favorite text editor and copy all content. Then paste it into the appropriate field.
Please note: These root and intermediate certificates contain all information about parent certificates and provide the 'Chain of Trust' with the issuing authority (Comodo in this case). Many desktop browsers will already contain a copy of these certificates by default (which is why this step is also optional), but many mobile browsers, for example, do not. That is why it is important to install it too.
Step 4
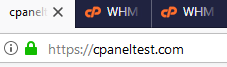
The SSL certificate is now successfully installed! When you go to https://www.yourwebsite you will see that your website is fully secured via https!
Installing your own SSL certificate in cPanel
Step 1
Log in to cPanel with the user account which contains the domain for which you want to install the certificate. Scroll down to 'Security' and click 'SSL/TLS'.

Step 2
When it comes to installing your certificate, there is more than one way of skinning a cat, but the fastest is to click 'Manage SSL sites' on this page under 'Install and Manage SSL for your site (HTTPS)'.

Step 3
Scroll down to 'Install an SSL Website'.
Fill in the fields on the page that appears as shown in the example below (but using your own data). Then click 'Install'.
- Domain: Here you enter the domain for which you want to install the SSL certificate.
- IP Address: You can simply leave this on Auto-discover in almost all cases.
- Certificate: Here, you enter the entire contents of the certificate (crt). Open the certificate with your favorite text editor and copy all content (including the piece ----- BEGIN CERTIFICATE ----- & ----- END CERTIFICATE -----) and paste it into the field concerned.
- Private Key: Here, you enter the entire contents of the private key (key). Open the private key file with your favorite text editor and copy all content (including the piece ----- BEGIN PRIVATE KEY ----- & ----- END PRIVATE KEY -----) and paste it into the field concerned.
- Certificate Authority Bundle: Here you install the 'root and intermediate certificates'. Open the bundle containing the root and intermediate certificates (crt) with your favorite text editor and copy all content. Then paste it into the appropriate field.
Please note: These root and intermediate certificates contain all information about parent certificates and provide the 'Chain of Trust' with the issuing authority (Comodo in this case). Many desktop browsers will already contain a copy of these certificates by default (which is why this step is also optional), but many mobile browsers, for example, do not. That is why it is important to install it too.
Step 4
The SSL certificate is now successfully installed! When you go to https://www.yourwebsite you will see that your website is fully secured via https!
Generating a free certificate using AutoSSL (in WHM)
AutoSSL allows you to automatically provide your websites and hostname with free SSL-certificates. These certificates are also automatically renewed.
- Ensure your cPanel users all use an IPv6 address before following these steps. Configuring a shared IPv6 address is explained in the first part of our cPanel tutorial series. If you don't do this, chances are that you'll get an error when following the steps below.
- Please note: AutoSSL only works as of WHM 58.0.17
Step 1
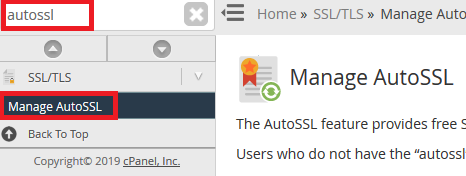
Log in to WHM and search for 'SSL' in the top left. Click 'Manage AutoSSL' in the left hand side.
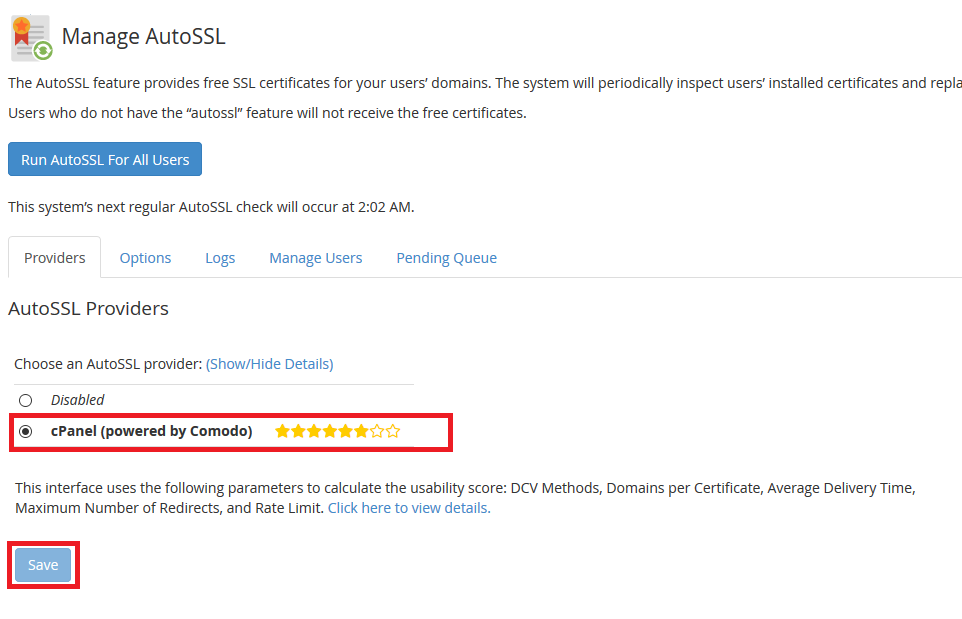
Step 2
Is 'cPanel (powered by Comodo)' selected (the default value)? Then proceed to step 3, if not, select 'Comodo' under 'AutoSSL Providers' and click 'Save'.
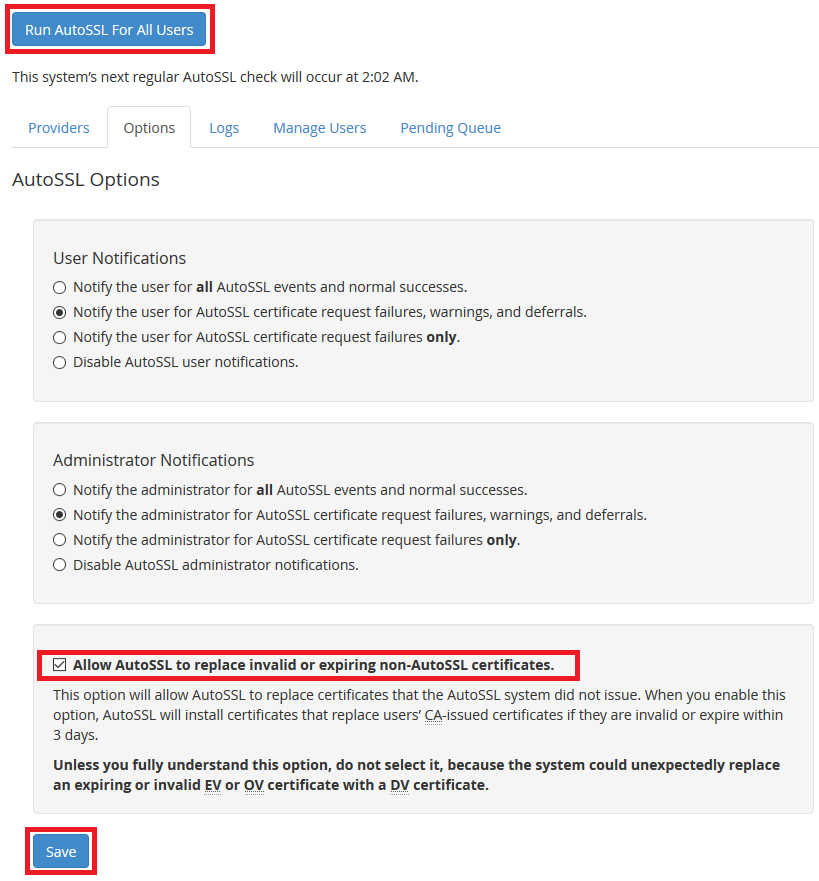
Step 3
Click the tab 'Options' and select 'Allow AutoSSL to replace invalid or expiring non-AutoSSL certificates.'. Your free to also change the notification options as desired.
Click 'Save' followed by 'Run AutoSSL For All Users'. WHM will now automatically generate SSL certificates for all your domains. The process can be followed in the tab 'Logs'.
Let's Encrypt
AutoSSL can also use Let's Encrypt. We recommend not doing this and to instead use the Comodo option (nowadays called Sectigo) and not Let's Encrypt (not available by default).
The reason for this is that as of WHM/cPanel v74 Let's Encrypt tries to generate certificates for non existing subdomains. This is no problem and automated if you use your WHM/cPanel as your nameserver, but if you manage your DNS externally this would lead to you, or your customer, having to create all these subdomains in your/their DNS system. As the Comodo option doesn't require this and is also fully automated we highly prefer using the AutoSSL Comodo option.
The SSL certificate is now successfully installed! When you go to https://www.yourwebsite you will see that your website is fully secured via https!
Should you have any questions left regarding this article, do not hesitate to contact our support department. You can reach them via the ‘Contact Us’ button at the bottom of this page.