


When using Windows Server, usually an LDAP-service will be active by default. LDAP is a protocol used for gaining access to a directory / service, although this is a very basic description of the applications LDAP is used for.
It is however possible for external parties to abuse the LDAP-service by performing a so called 'reflection attack'. This is done via an UDP-connection on port 389. To prevent these sort of outgoing attacks you can block UDP connections on port 389 in your VPS's firewall. Blocking these type of connections should not have any effect when using 'Active Directory' as that connects through TCP.
Windows Server Firewall
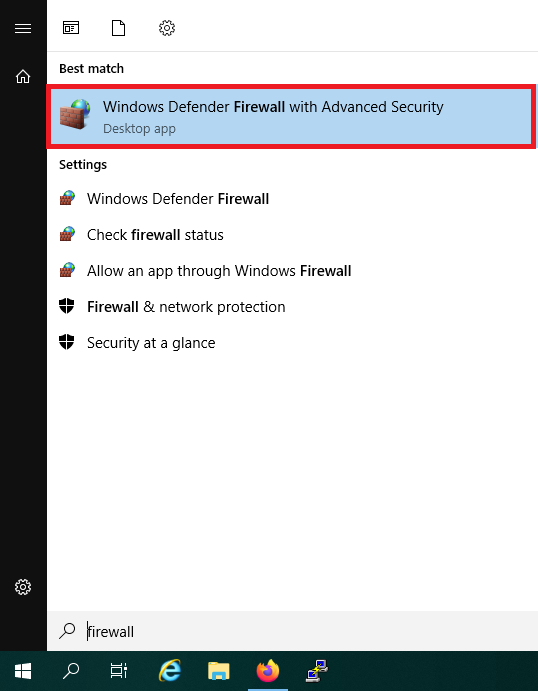
Step 1
Click the start button and use the search term 'Firewall'. Alternatively, you can also find the firewall in the Server Manager under 'Tools'.
Among the search results, 'Windows Firewall with Advanced Security' will appear. Click it.
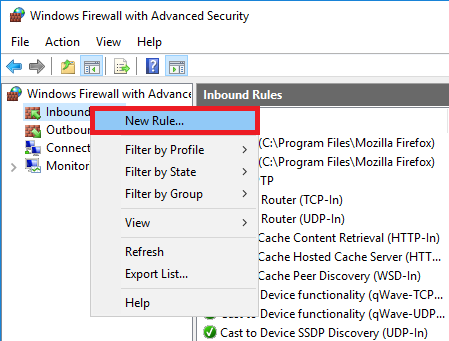
Step 2
Navigate to 'Inbound Rules', right click 'Inbound Rules' and choose 'New Rule'.
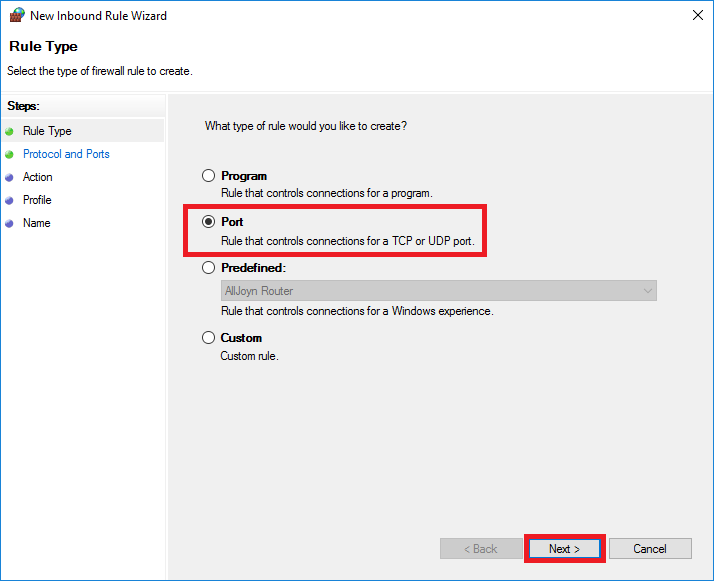
Step 3
Select: 'Port' and click 'Next'.
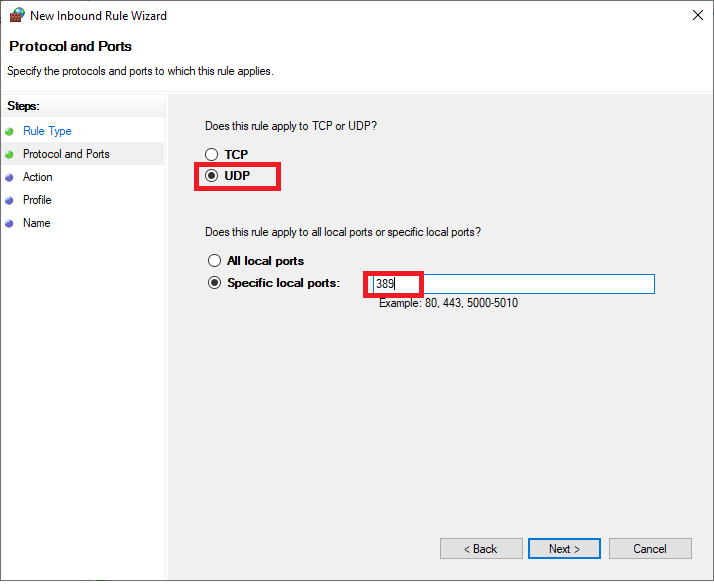
Step 4
Select 'UDP' and enter '389' at 'Specific local ports'. Then click 'Next'.
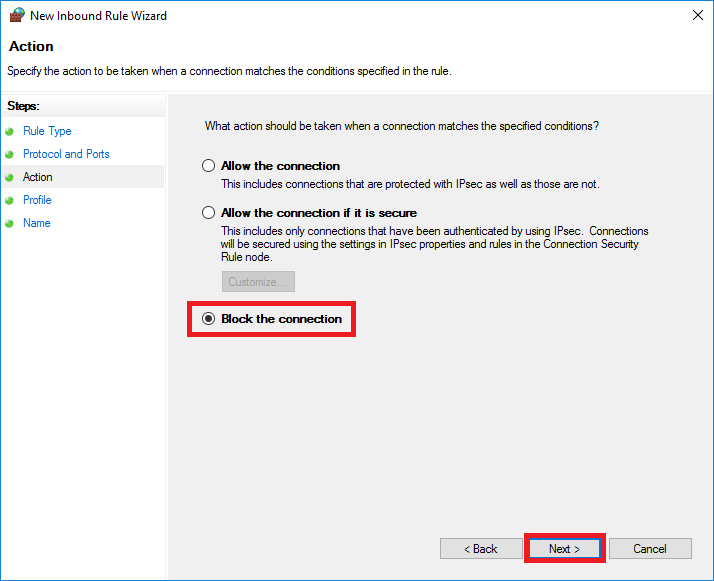
Step 5
Select 'Block the connection' and click 'Next'. On the next page, click 'Next' again.
Please note! The options 'Domain' & 'Private' are useful when you're using a Domain controller in combination with a private network, but if you deselect this option now, the LDAP port will still be available externally and thus be prone to abuse. Should you want to use your LDAP port over your private network, then after adding the rule, you can adjust the configuration under 'Properties' > 'interface types' and select that it only applies to the public network (WAN) and not for your private network (LAN).
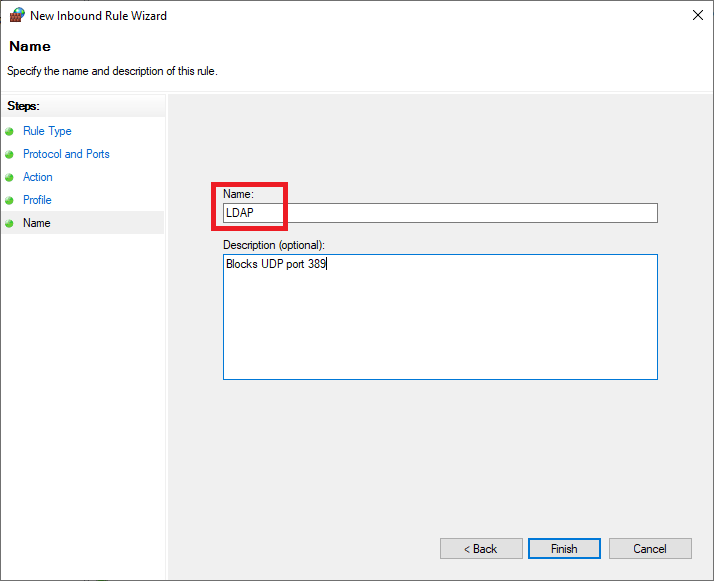
Stap 6
Then, give your new rule a name and optionally a description.
If you still want to make the service available locally, you can also set specific IP addresses in the whitelist for the properties of this rule.
The VPS-Firewall in your control panel
Instead of using the Windows firewall, you can also use the VPS-Firewall in the control panel. By using the VPS-Firewall in the control panel, all ports are automatically closed and you decide then which ports are opened.
Step 1
Log in to your control panel and navigate to the relevant VPS.
Step 2
Click the cogwheel behind 'Network' (directly under the VPS console) and click 'VPS-Firewall'.
Step 3
Enable the firewall by setting the switch to 'On' behind 'Enable VPS-Firewall for this VPS'. The most commonly used ports are then automatically opened.

Your VPS is now secure! More information about opening ports with the VPS-Firewall can be found in our VPS-firewall documentation.
Should you have any questions left regarding this article, do not hesitate to contact our support department. You can reach them via the ‘Contact Us’ button at the bottom of this page.