


In this tutorial we explain step by step how to transfer your website from one domain to the other at TransIP. We assume that you have registered both domains at TransIP, and that your website his hosted on a webhosting package. Is your new domain not registered yet, read this article to register your domainname.
Imagine you have made a website using a webhosting package on the domainname freshkalefromthebestbiologicalfarms.com. Eventhough the name says a lot about your company, many customers will have trouble remembering such a long domainname.
This is why you have registered a new domainnname: kalebykyle.com. You want to place your existing website on your new domain, but you don't know how. Don't worry, you can use this tutorial for exactly that!
To host your website on a different domainname, you need to make a backup of your website first. Specifically, this means saving the website files and the database(s). After having done that, you need a webhosting package for the new domain. Then, you place the backup of your website and database on the new webhosting package.
In our example we are moving the website on transiptutorials.com to a webhostingpackage on transipdemo.eu.
Attention: E-mail addresses are linked to the domain on which they are created. This means that when you move a webhosting package to a different domain, your e-mail will not be moved with it.
As an example: info@olddomain.com will not become info@newdomain.com automatically when changing webhosting package. Keep this in mind when you move your website. It is of course possible to make new e-mail addresses on the webhosting package of the new domain.
Make a backup of your website's files
You will now save the files which make up your website. Via the SFTP client of your choice you can easily make a backup of these files. In this tutorial we use the SFTP client FileZilla.
If you use a different client (such as Cyberduck), the steps are similar. If you are having trouble, we recommend consulting your SFTP client's documentation.
Step 1
Log in to your SFTP client, we are using FileZilla in this example. You can read how to use FileZilla in the article 'How to use SFTP with Filezilla'.
Start Filezilla, enter the SFTP information of your web hosting package into the four fields as shown below, and click on 'Quickconnect'.
- Host: <SFTP/SSH-host>
- Username: <SFTP/SSH-username>
- Password: <SFTP/SSH-password>
- Port: 22 or 2222

Step 2
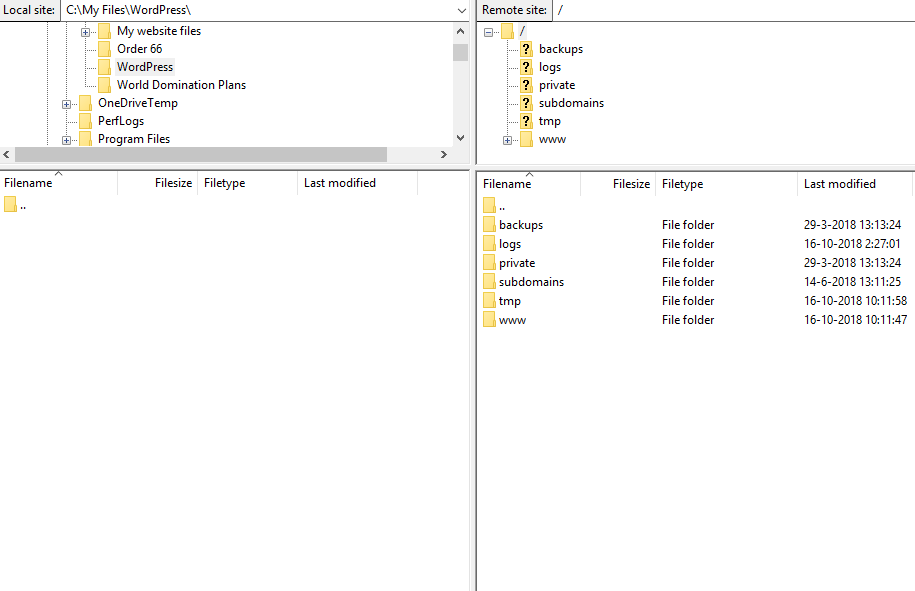
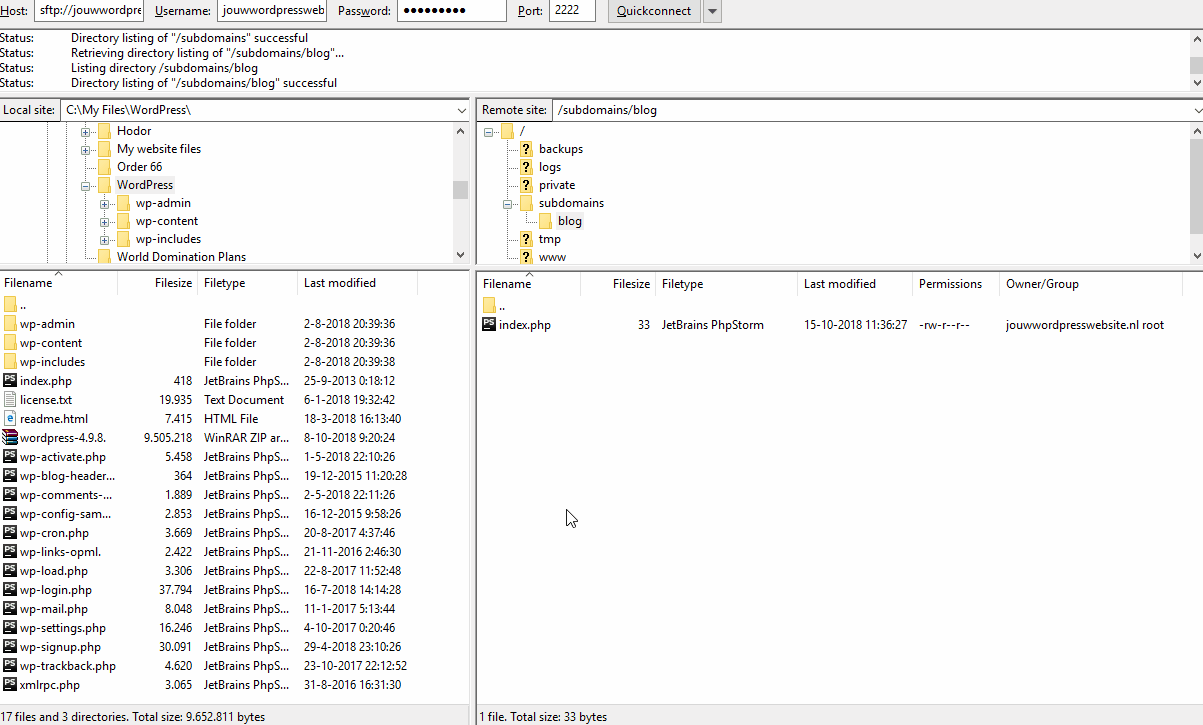
You will now see an overview of your local files on the left side, and the files of your website on the right side.
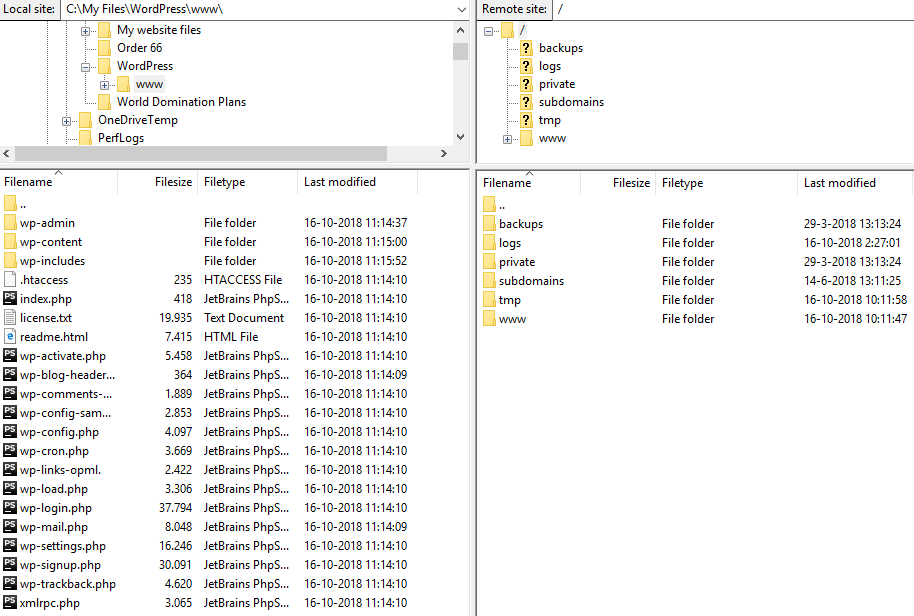
Select the folder in the left column where you want to save the backup of your website's files. Because we have made a WordPress website, we use a folder named 'WordPress'.
Step 3
To make a backup of the website on your rootdomain (www.yourdomain.extension) click with your right mouse button on the 'www' folder in the right column and next click 'Download'.
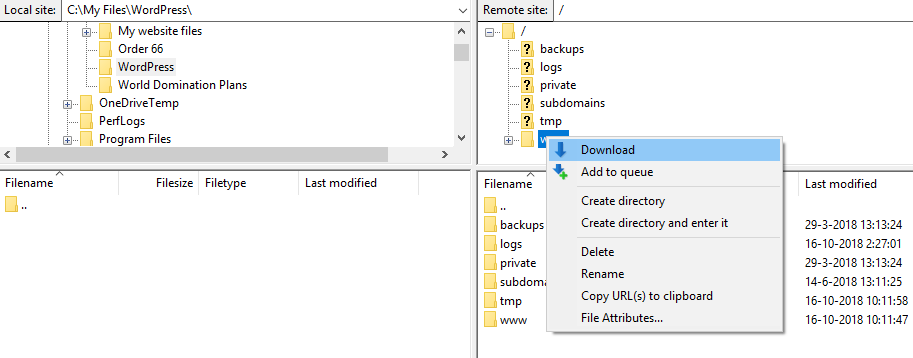
The 'www' folder, including the files inside it, are now downloaded to the folder you selected in the left column. After the download is complete, you have made a backup of your website's files.
If there are files in other folders (for instance in the folder 'Subsites'), you can download them the same way. Make sure you save these folders in a different folder.
We will use the files that are now saved in the local folder later to place them back on the other webhosting package. Make sure you remember in which folder you have saved this backup.
We will now explain how to make a backup of your database.
Make a backup of your website's database
The database contains the data of your website. If you want to place your website on a different webhsoting package, it is important to also make a backup of your database.
To manage databases, and to save and retreive data, we use phpMyAdmin. We will first show you how to log in to phpMyAdmin and then how to make a backup of your database.
Step 1
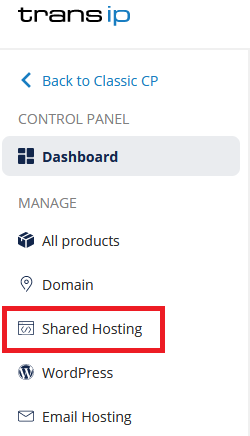
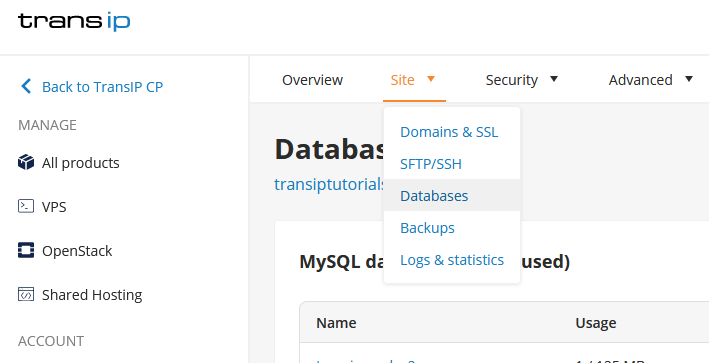
Log in to the control panel and click 'Shared Hosting' in the menu. Next, select your domain below 'Products'.
Click 'Site' at the top, followed by 'Databases'.
Stap 2
Here you will find an overview of your databases. Next to the database you can view the amount of storage your database uses and the status. Click the three dots on the right side, followed by 'Open phpMyAdmin'. You will be logged in automatically.

Step 3
When you are logged in to MySQL, you will see the screen as shown below. In this example we have installed WordPress, therefore the database that was made automatically by WordPress is shown.
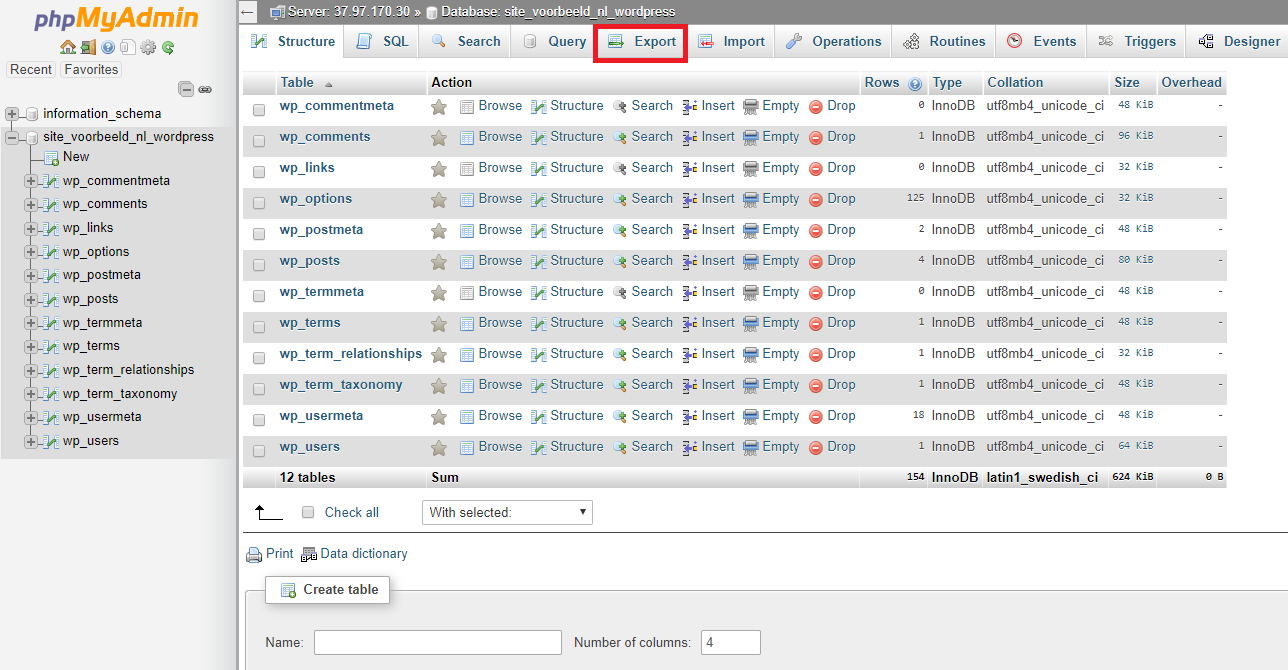
If you have uploaded a website and database yourself, you will see that data instead. The steps for making a backup are equal in both situations.
Make sure the database is selected by clicking it in the left column. Our database is called "site_voorbeeld_nl_wordpre". Click the 'Export' button, which is marked red in the image.
Step 4
You can now choose your Export method.
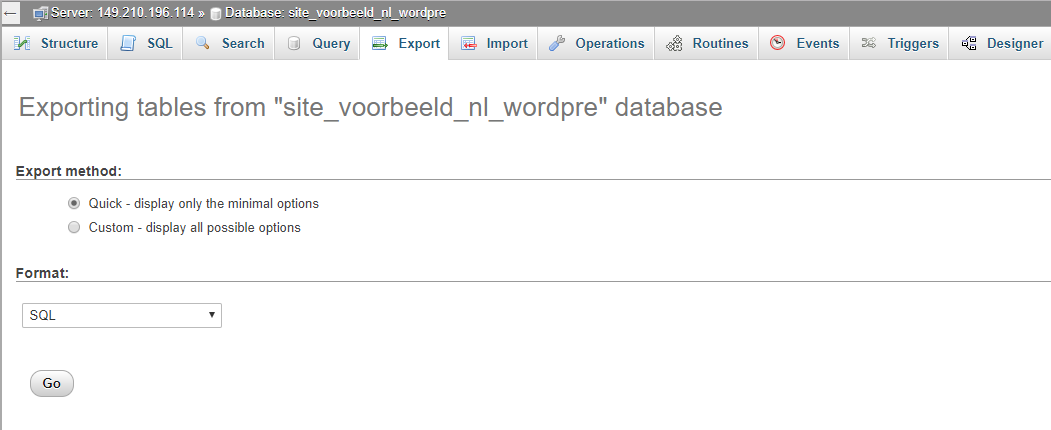
Pick the 'Quick' method and the 'SQL' format and click 'Go'. The backup will now be downloaded. Remember where you saved it, you may need it later.
Place a webhosting package on your other domain
Now you have saved the files and database of your website, it is time to order a webhosting package on your other domain. In this example we will pick a Webhosting Core package for our other domain 'transipdemo.eu'.
Step 1
Go to the Web Hosting product page and pick the size of the hosting package. Click 'Order' to continue.
Step 2
After finishing the order, your hosting package will be active within a few minutes.
Place the database backup on the new hosting package
After ordering the hosting package for the new domain, you can start placing the backups of your files and database on it. It is important to start by placing your database backup on the new hosting package first, and to import the backup of your website's files after having done so.
This is because you need the login details of your new database first, so you can add them to your website's files before placing it on your hosting package.
We will first explain how to make a new database and to log in. After that we will show you how to import the backup.
Step 1
Log in to the control panel and click 'Shared Hosting' in the menu. Next, select your domain below 'Products'.
Click on 'Site', followed by 'Databases'.
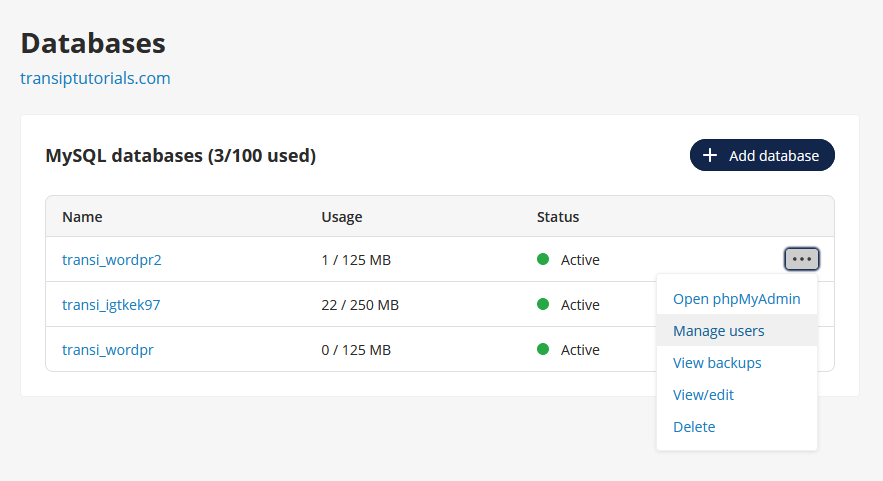
Step 2
You will now see the overview page of your databases.
Click '+ Add database'.

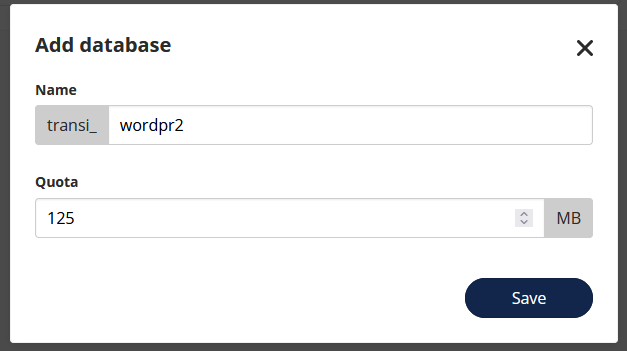
Step 3
Enter the Name of your database and the size. We have created a database called "wordpr2" and set it to 125 MB, which is in most cases more than enough.
Step 4
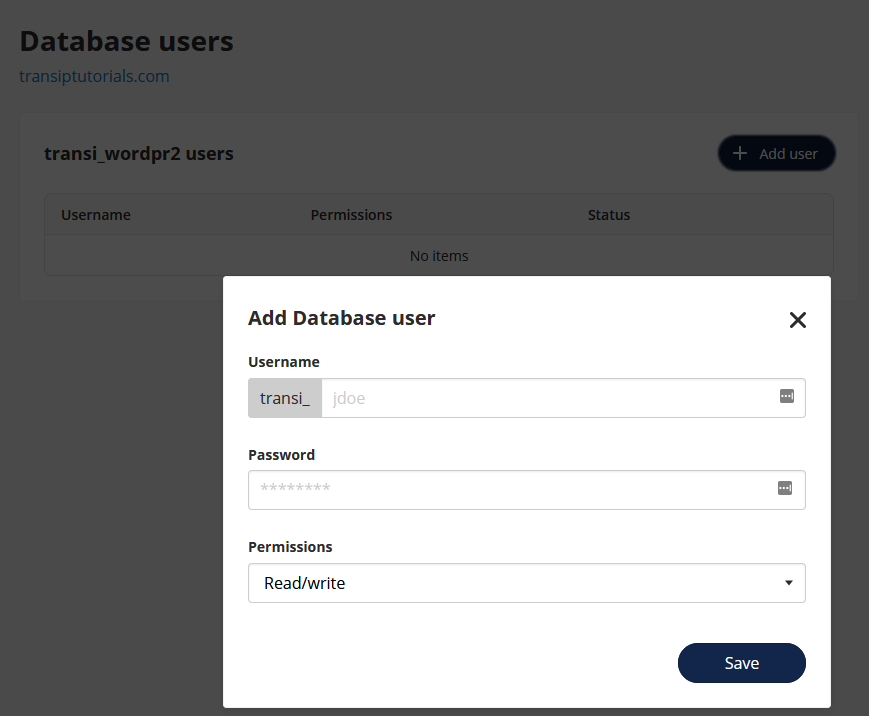
Click the three dots on the right side next to your database, and select 'Manage users' to be able to create a database user.
Click '+ Add user'. Fill in a username, set a password and click 'Save' to create your database user.
Step 5
After creating a database and database user, you can log in to your newly created database. Go back to the database overview and click the three dots to the right of your database. Click 'Open phpMyAdmin' to log in to your database automatically.
Step 6
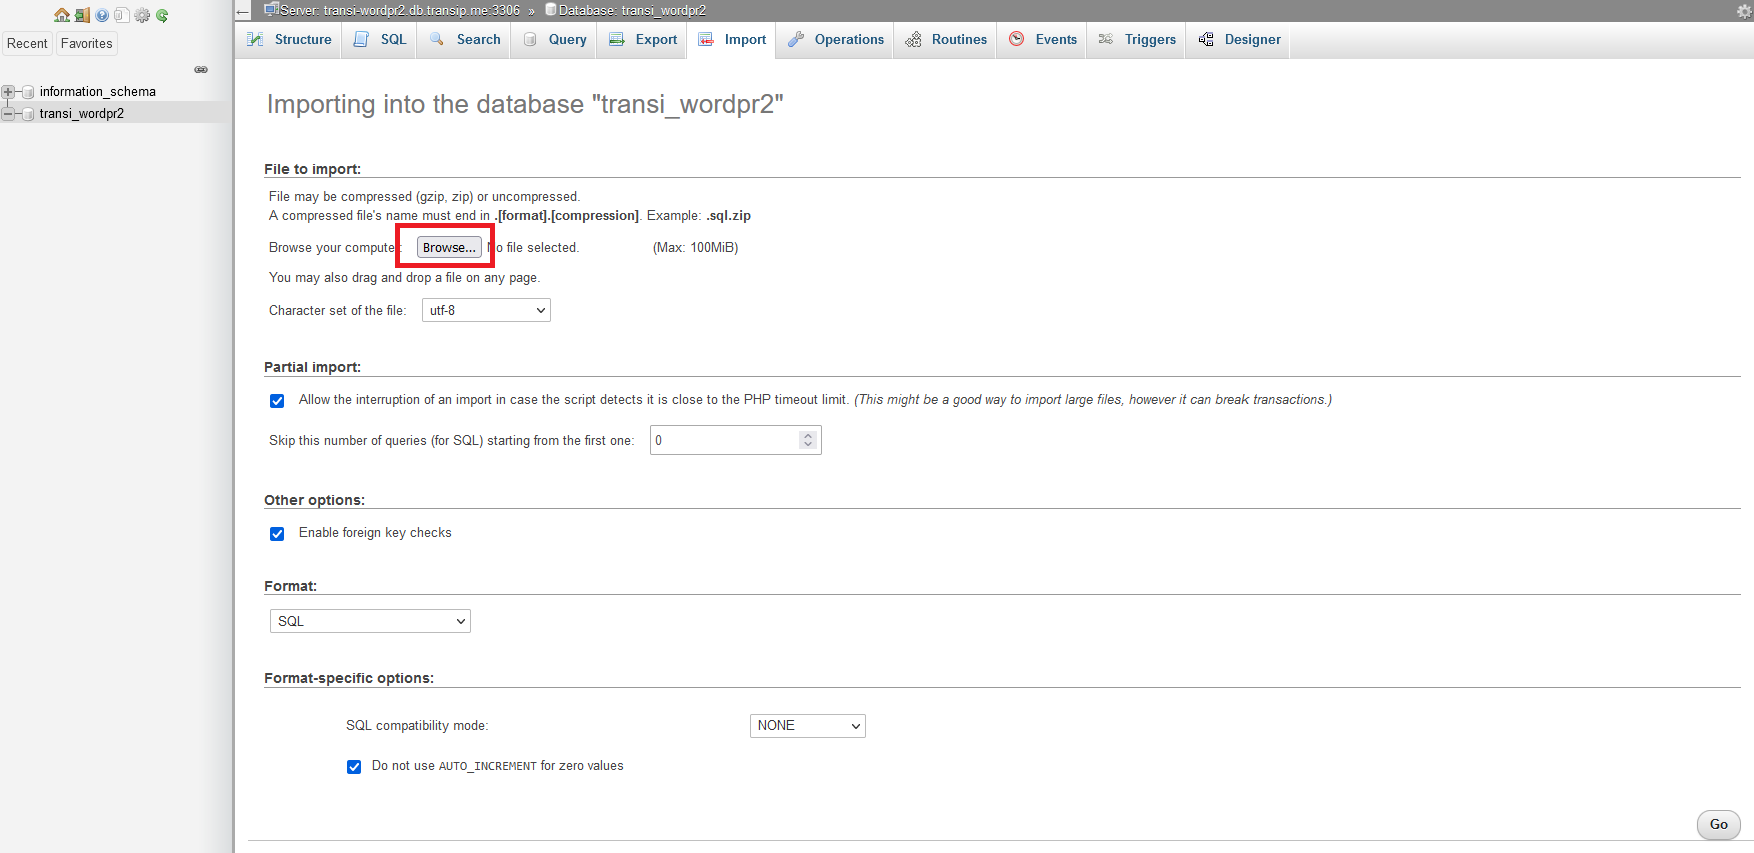
You will now see that your new database is empty. Make sure the database is selected by clicking it in the left column. Click 'Import' after that, as shown in the image below.

Step 7
Click 'Browse...' and look for the database you have saved earlier. The database will have the .sql extension.
Press 'Go' at the bottom to import the database.
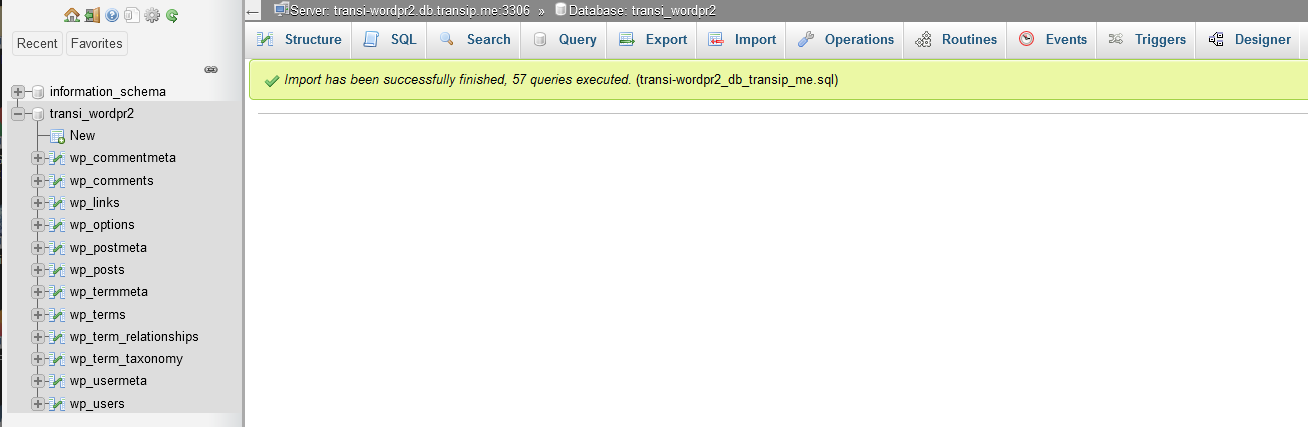
Step 8
You will see a confirmation once the import is done. You have now succesfully placed the backup of your database onto the new database.
Edit your database
After uploading your database, it will still have some mentions of the old domain name in it. We recommend strongly to replace these old mentions with the new domain name.
If you use a WordPress website you can use the plugin called 'Better Search Replace' to replace the old mentions of your domain name with the new domain name.
If you use a different type of website you can not use this plugin. Instead, you will have to manually replace the mentions via phpMyAdmin.
To do so, log in to phpMyAdmin and click on the database on the left side of the screen. Click the 'SQL' tab to be able to execute queries, which can replace the mentions of your old domain name with the new domain name.
Log hiervoor in op phpMyAdmin en selecteer links de database. Klik vervolgens op het tabblad 'SQL'. Hier kun je queries uitvoeren, waarmee je vermeldingen van je oude domeinnaam kan vervangen met de nieuwe domeinnaam.
Pay attention: Making incorrect changes to your database can cause your website to no longer function. Make sure to enter the queries carefully.
If you have made a mistake you can always import the backup again to start over.
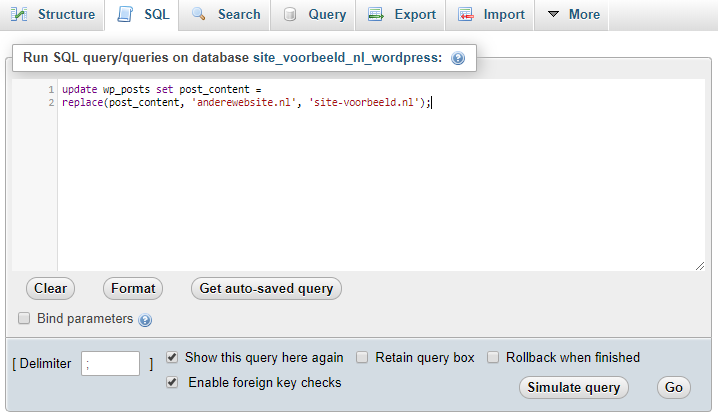
Enter the following lines in the SQL window to execute a Search & Replace in a 'field' within a table:
update TABLE_NAME set FIELD_NAME = replace(FIELD_NAME, 'text to search', 'text to replace with');
Replace TABLE_NAME with the name of a table. Replace FIELD_NAME (x2) with a field within that table.
Replace text to search with the old domain name. Replace text to replace with with your new domain name.
In the example below we adit the field 'post_content' within the 'wp_posts' table of a WordPress website. If you have a different type of website you will have to use different tables and fields.
In the example we have replaced mentions of the domain name 'anderewebsite.nl' with the new domain name 'site-voorbeeld.nl'.
Eventhough you can only edit one field per table this way, you can add multiple lines below. This way you can execute all changes at once.
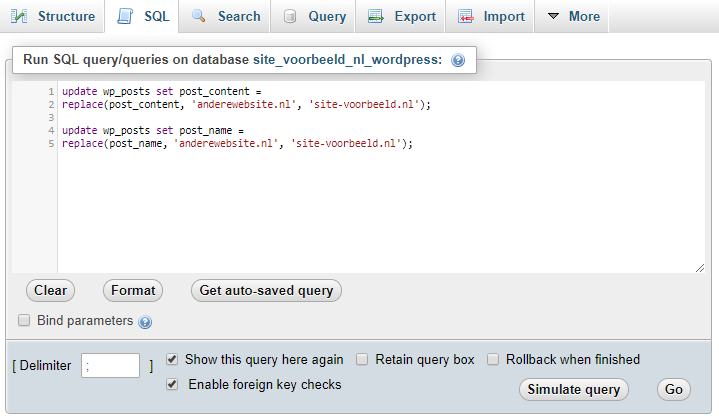
We recommend to do this for every table in your database. Click 'simulate query' to see if your input is correct and what the result will be.
Once you are happy with the results, click 'Go' to execute the query.
Keep in mind that we can not assist in executing queries or making other changes to your database.
Should you need more infomration about the possibilities of SQL queries, we recommend looking up documentation online.
Edit your website's configuration file
As mentioned earlier in this article, your website needs access to your database. Because you have made a new database, the login details have changed and will need to be added to your webside's code.
Besides that, your old domain name could still be present in your website's configuration file. This will have to be changed to the new domain name.
Step 1
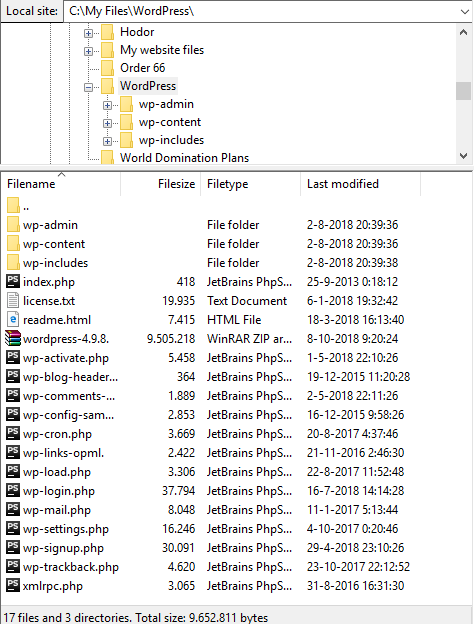
Open the folder on your computer where you saved your website's files first. Look for the 'wp-config.php' (WordPress) or config.php (other websites) and open it in a program which can read .php files. We recommend 'Notepad++' or 'PhpStorm'.
In our example we are editing the wp-config.php file of our WordPress website.
Step 2
Look up DB_NAME, DB_USER, DB_PASSWORD and DB_HOST in the file you opened. You can usually find them at line 17 and below. This is what it looks like in the wp-config.php file:
// ** MySQL settings - You can get this info from your web host ** //
        /** The name of the database for WordPress */
        define('DB_NAME', 'site_example_nl_wordpre');
        /** MySQL database username */
        define('DB_USER', 'site__nl_wordpre');
        /** MySQL database password */
        define('DB_PASSWORD', 'old_password');
        /** MySQL hostname */
        define('DB_HOST', 'localhost');
Because we have made a new database on a different domain name, it is important to edit the database name, database user, database password and the hostname.
You can do so by editing the values after DB_NAME, DB_USER, DB_PASSWORD and DB_HOST. Make sure to edit the values within parentheses.
The correcnt information can be found within your control panel. Go to your hosting package and open the database overview by clicking 'Site' -> 'Databases'.
- Next to 'DB_NAME', enter the database name. You can find it under 'Name' in your database overview.
- Next to 'DB_USER', enter the database username. You can find it by clicking the three dots next to the database name and clicking 'Manage Users'.
- Next to 'DB_PASSWORD', enter the password of your database user. You can change the password by clicking the username.
- Next to 'DB_HOST', enter the hostname of your database. You can find it by clicking on the database name in the database overview.
In our case, this looks as follows:
// ** MySQL settings - You can get this info from your web host ** //
        /** The name of the database for WordPress */
        define('DB_NAME', 'transi_wordpr2');
        /** MySQL database username */
        define('DB_USER', 'transi_user');
        /** MySQL database password */
        define('DB_PASSWORD', 'new_password');
        /** MySQL hostname */
        define('DB_HOST', 'transi-wordpr2.db.transip.me');
Place the backup of your website's files on the new hosting package
It is now time to put it all together by uploading the files of your website on the new hosting package. After completing the following steps, your website will be ready and can be viewed on the new domain name.
Step 1
Log in to the SFTP server by using an SFTP client such as Filezilla.
Step 2
Look for the folder in which you have saved your website's files and select it. Your files will be visible below.
Step 3
On the right side you will find your website's folders. Click the 'www' folder to open the contents. You will only see an index.php file which is created automatically on your Web Hosting package.
Drag the files and folders from the left side (your local folder) to the right side (the 'www' folder on the server). You will be asked to overwrite the index.php file. Click 'OK'.
After dragging the files and folders from your local folder to the 'www' folder on the server, your upload will start.
My website is still unavailable
Check if your domain name is configured to use the DNS of your new Web Hosting package. You can read all about the correct settings in the article 'The DNS settings of my Web Hosting'.
I do not want to keep using my old Web Hosting package
In that case you may consider to cancel your old Web Hosting package. Pay attention: Only do this after having completely moved your website to the new Web Hosting package.
The contents of your Web Hosting are completely erased when you cancel it. This includes both the web space and the email addresses on the Web Hosting package.
In this article we have explained how to move your website from one Web Hosting package to another.