


WordPress is the most used CMS system in the world and therefore a popular target for attacks. Even a secure server can send spam if websites hosted on it are not secure. In this article, we will discuss five tips to keep your WordPress website safe and prevent your website from sending spam:
Order Patchman
Patchman is an application on our web hosting servers. If you order and activate Patchman, we can scan your WordPress website for vulnerabilities or malware and notify you of any insecurities. If you activate automatic patching then Patchman also immediately solves these for you. This way you prevent intruders from misusing your website for spam or phishing.
You can find all the information about ordering and activating Patchman here: What is Patchman?
Updating plugins and Themes
Updating your plugins and themes is one of the most important measures you can take to keep your website safe. Older versions of plugins and themes are often targeted by attackers. We recommend to check for updates at least every month.
Besides updating it is best practice to keep as little installed on your website as possible. Switching off plugins or themes via your dashboard still saves your data. Make sure to delete all plugins you no longer use.
When a plugin or theme has not received any recent updates (3-6+ months), it is possibly no longer supported and kept up to date. In this situation we recommend looking for a replacement plugin or theme.
WordPress uses a very simple process for updating:
Step 1
Log in to the admin environment of your WordPress website (e.g. https://example.com/wp-admin).
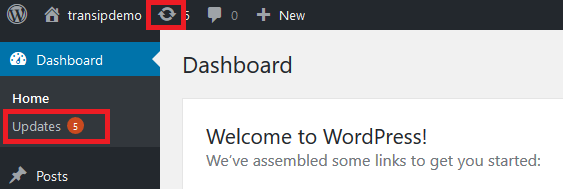
Step 2
When updates are available, you will see an icon at the top with a number for the number of plugins and themes for which an update is available. Click this icon or 'updates' under 'dashboard'.
Step 3
You now land on a page from which you can easily update all plugins at once. First, click 'Select All' under 'Plugins' and then click 'Update Plugins'.
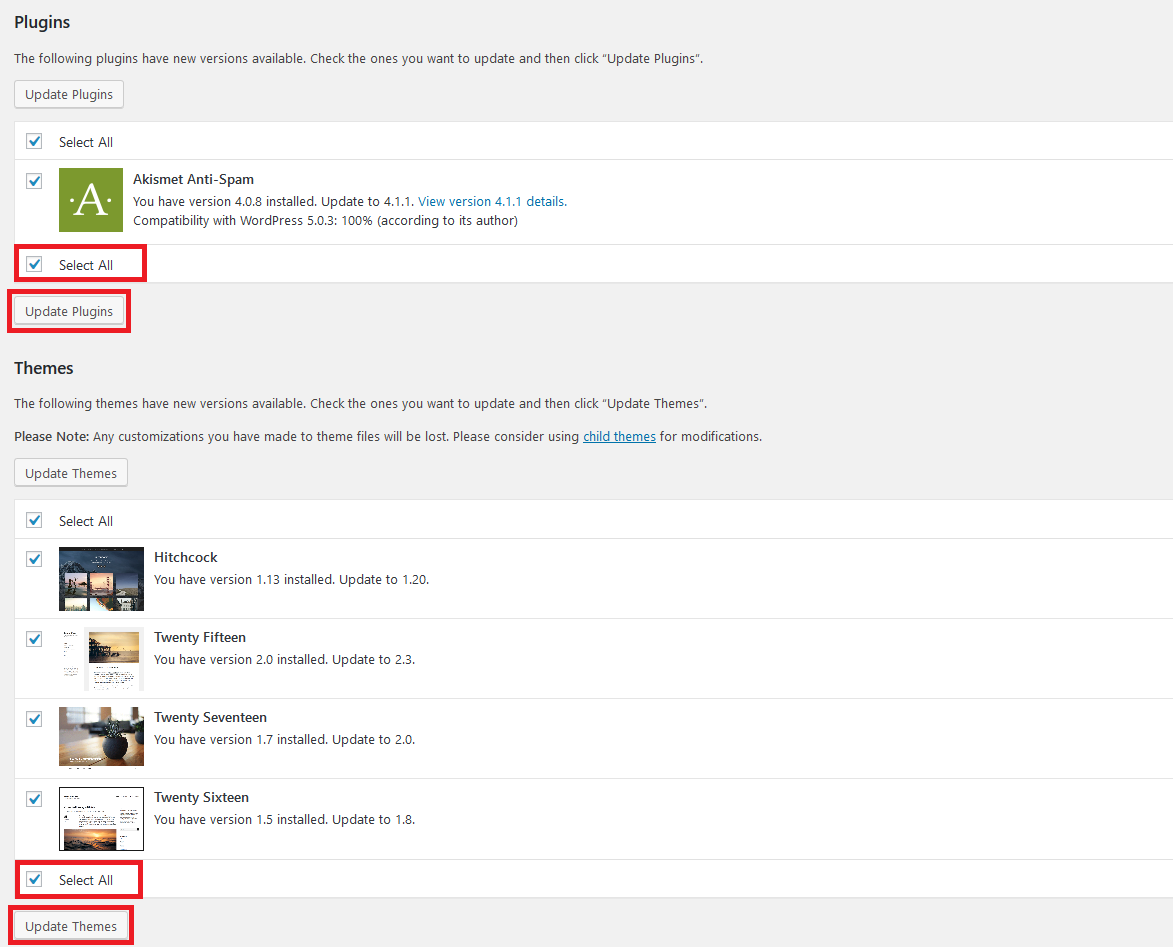
When this process is finished, you will return to the previous page with 'Return to WordPRess Updates page'. Now click 'Select All' under 'Themes' and then click 'Update Themes'.
Updating WordPress
Besides your plugins and themes, it is important to keep WordPress up-to-date (this happens automatically from WordPress 3.7 and on). Not only from a safety point of view but also to work optimally with the latest PHP versions, for
example. You can update WordPress automatically or manually. For the latter, see 'Updating WordPress manually'.
Installing WordFence
WordFence is an endpoint firewall and malware scanner for WordPress websites and is a good choice to secure your website. You install and use the plugin as follows:
Step 1
Log in to the admin environment of your WordPress website (e.g. https://example.com/wp-admin).
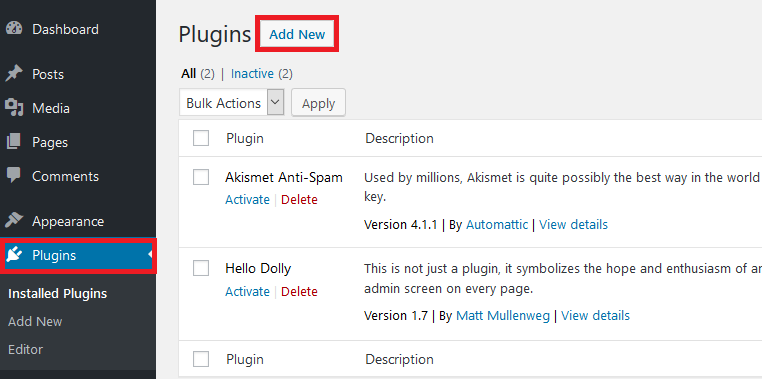
Step 2
Click 'Plugins' on the left and then 'Add New'.
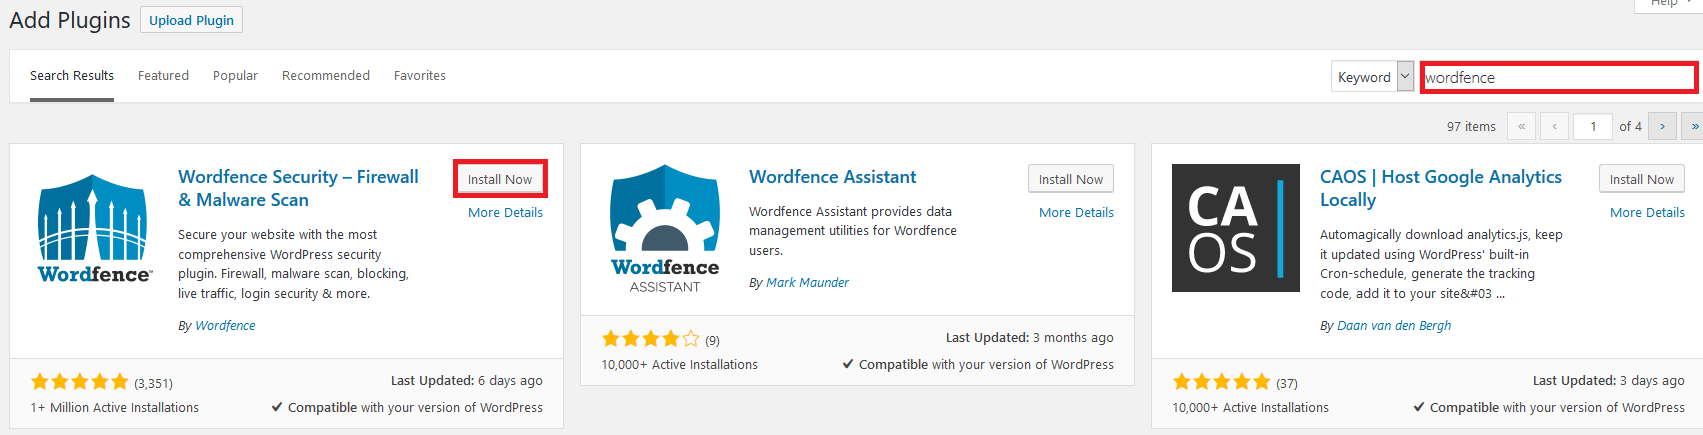
Step 3
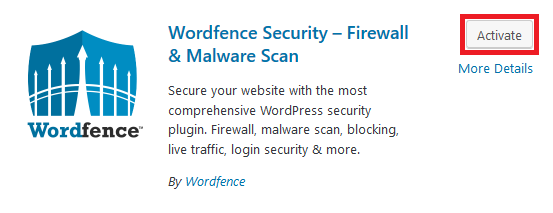
At the top right, look for 'Wordfence' and click 'Install Now' at 'Wordfence Security - Firewall & Malware Scan'.
Step 4
After installation, the 'Install Now' button will change to 'Activate' to enable WordFence.
Step 5
WordFence will now ask for a license. Click 'Get your wordfence license' if you do not already have one.
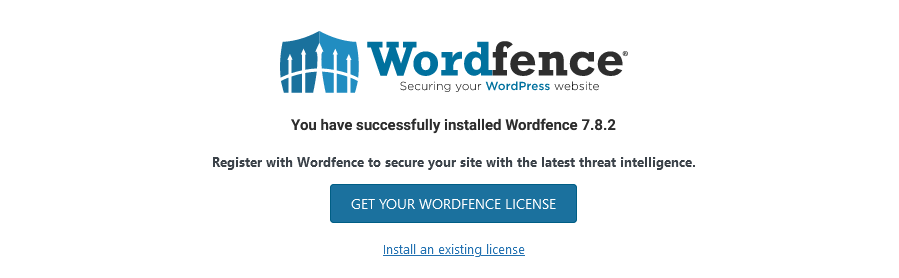
If you do have a WordFence license, click 'Install an existing license'. You can then paste your license key in the next window.
Step 6
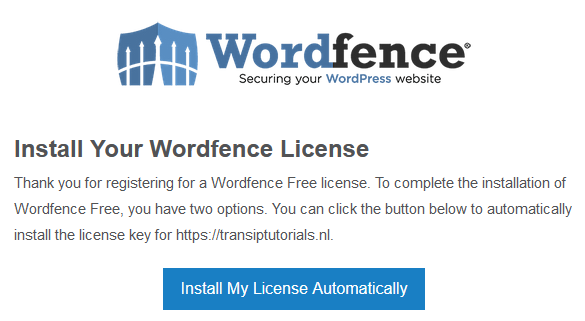
You are now given the choice between different versions. You can always upgrate later, so choose the free option.

Step 7
You can install the license directly from a button in the mail you receive after registering. The email also contains the key you need if you want to install it manually.
Step 8
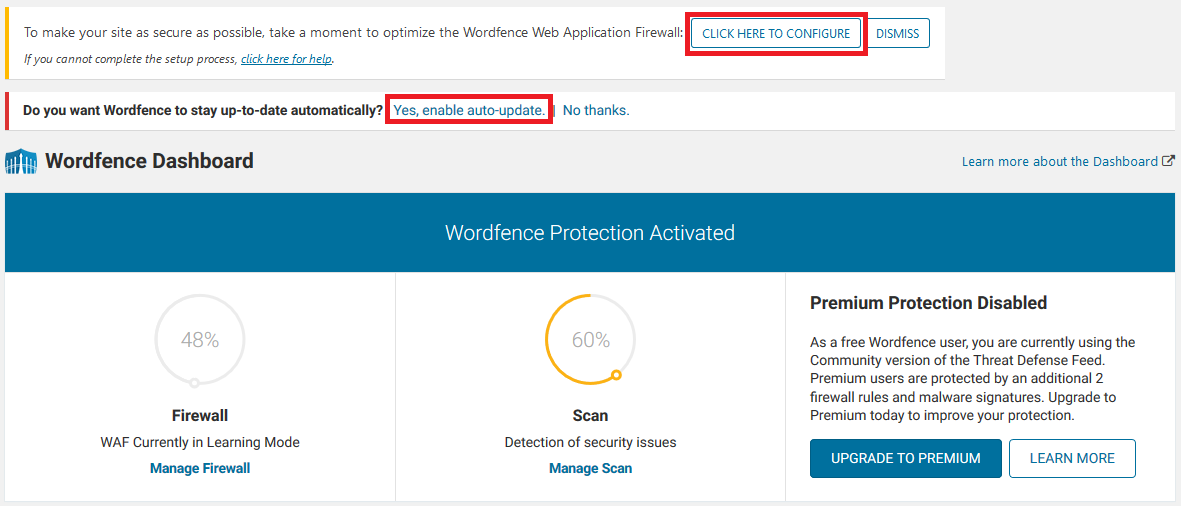
A Wordfence option has now appeared in the left menu in your admin environment. Click on it to open Wordfence. You will first see a brief explanation of the WordPress environment.
After reading that, click 'Yes, enable auto-update' and then click 'Click here to configure'.
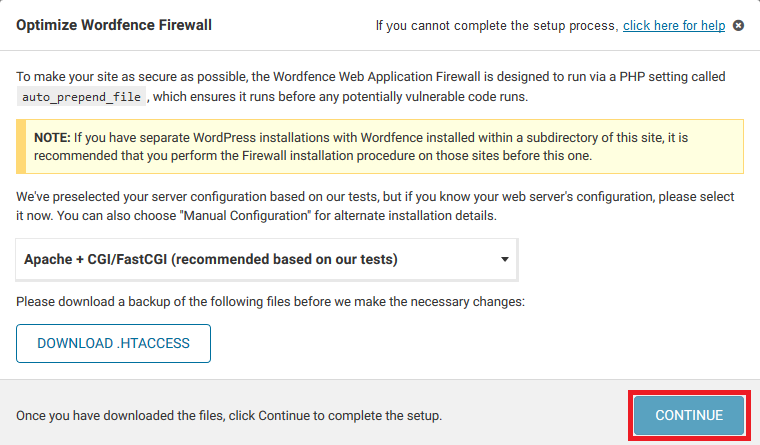
Step 9
Wordfence now offers to install a .htaccess file. This file ensures that Wordfence is executed before malicious code is executed. Download the backup and then click 'Continue' to automatically install this file on your WordPress website.
Step 10
Now click 'Scan' in the left menu under 'Wordfence'. Wordfence basically does this automatically for you, but you can also scan manually by clicking 'Start new scan' to scan your website.
Wordfence will give you a score indicating how well your website is secured. Your website is perfectly secured after these steps and the only method to get the score at 100% is to take a premium subscription. However, this is optional and not necessarily required.
Using a captcha
If your WordPress website uses a contact form, it is advisable to use a Captcha. A Captcha determines whether a website visitor is a computer or a person. By using a Captcha, you prevent automatic bots from filling in your form, which can be abused to send spam.
A very good choice for this is Google's reCAPTCHA. This adds a Captcha that automatically protects your forms. You only need to do two things:
- Create a reCAPTCHA at Google (use the Admin console on this page). You will receive a site key and a secret key.
- Add the keys you received to your contact form plugin via your WordPress dashboard.
As an alternative to Google's reCAPTCHA, you can also use a Captcha plugin. An example of such a plugin is hCaptcha, which is compatible with most contact forms.
Activating HSTS
Besides the importance of using an SSL certificate for your website, you have the option to make sure your website only accepts secure connections.
By using HSTS (HTTP Strict Transport Security) your website will tell your browser to only allow HTTPS connections.
To activate HSTS, follow the steps in this Knowledge Base article: 'I want to activate HSTS on my webhosting package'.
Blocking IP addresses
Whever you suspect your website is under attack, you can find which IP address is responsible for the majority of visits by looking at your website's access logs.
By using an .htaccess file you can then block the acess to your website for certain IP addresses. An in depth explanation for this can be found in the following Knowledge Base article: 'I want to limit access to my website'.