When using our web hosting services, you have the option to restore backups of your website free of charge.
We automatically save backups of your web hosting package. These are available up to 10, 14, or 30 days in the past, depending on which hosting package you have:
Webhosting, WordPress Hosting and Managed WordPress:
- 14 days - Webhosting Core
- 30 days - Webhosting Pro*
- 30 days - Webhosting Max*
* Backups of the most recent 14 days are available via the control panel. Backups of 15 to 30 days ago can be restored by our support. You can contact them via the 'Contact' button.
The overview below shows how many backups you have at your disposal.
- 1 backup per hour for the first 24 hours.
- 1 backup per day for the days after that.
We save backups of your website files and database(s). However, stored procedures and custom database functions in phpMyAdmin are not saved.
We also do not save email backups. Due to technical limitations, we can only manually restore email backups by request (if available). If you wish to retrieve an email backup, please contact our support team for more information.
Restoring an automatic backup
The automatic backups of your web hosting package can be found inside your control panel.
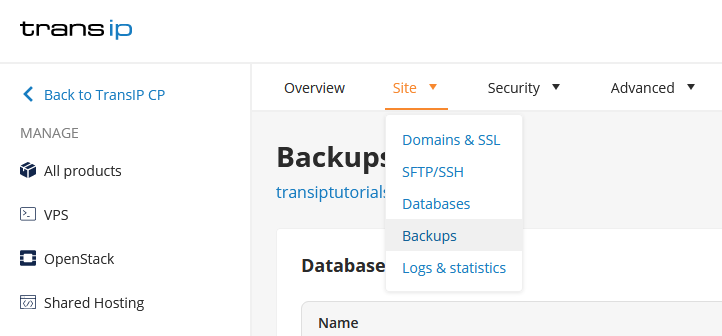
Log in to the control panel and navigate to your domainname via the 'Domain & Hosting' tab. Click 'Manage webhosting' next to 'Webhosting' to manage your website on the webhosting package.

Click the 'Site' tab at the top of the screen, followed by 'Backups'. Here you will see an overview of your databases and below that, the backups of your website files.
To restore a backup of an earlier point in time, click the 'Restore' button next to the desired date and time.
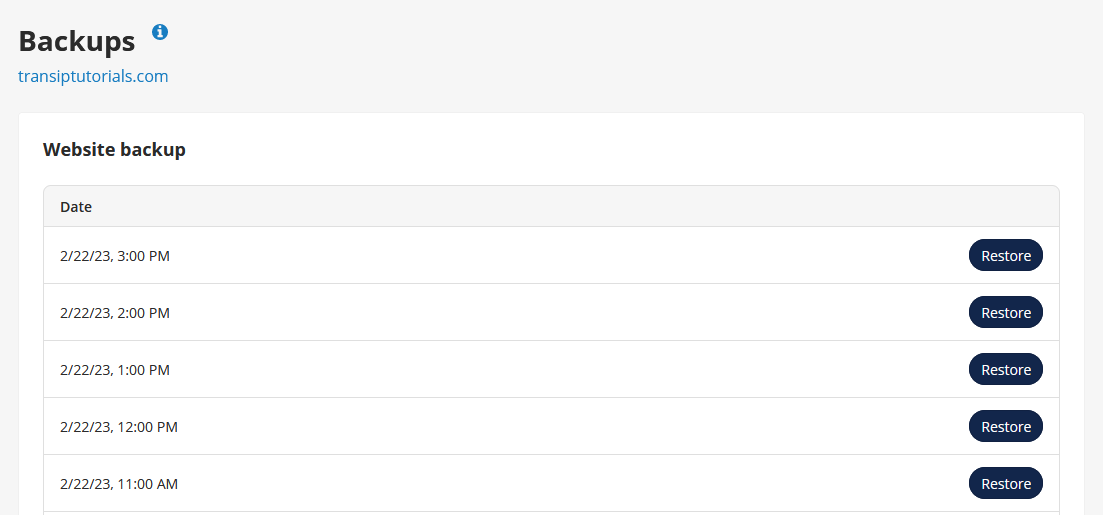
Restoring a backup can take several minutes. The length may vary depending on the size of your database(s) and your website files.
Downloading backups manually
Would you rather restore a backup yourself? You can download a backup of your website files or your datbase(s). To do so, click 'Manual backups'.
There is an interaction between your database and your website's files.
When restoring a backup, we therefore recommend doing so for both your database and your website files. It is best to choose backups of the same timestamp.
Downloading database backups
To download a backup for your database, click on the database name in the overview. You will then be able to choose a backup from the list. Click the 'Download' button to download a backup of your database.
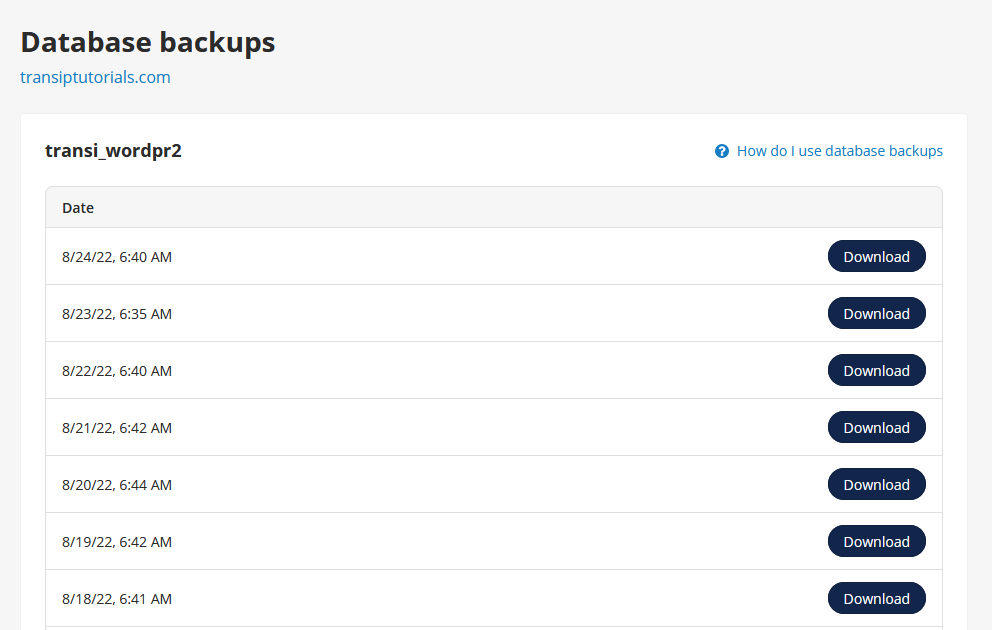
To place the database back onto your hosting, you will have to import the downloaded backup via phpMyAdmin. Follow the steps for 'restoring a backup of your website's database' in this Knowledge Base article.
Downloading website backups
To download a backup of your website's files, go to the backups overview and pick a backup from the list below 'Files'. Once chosen, click the 'Select' button.
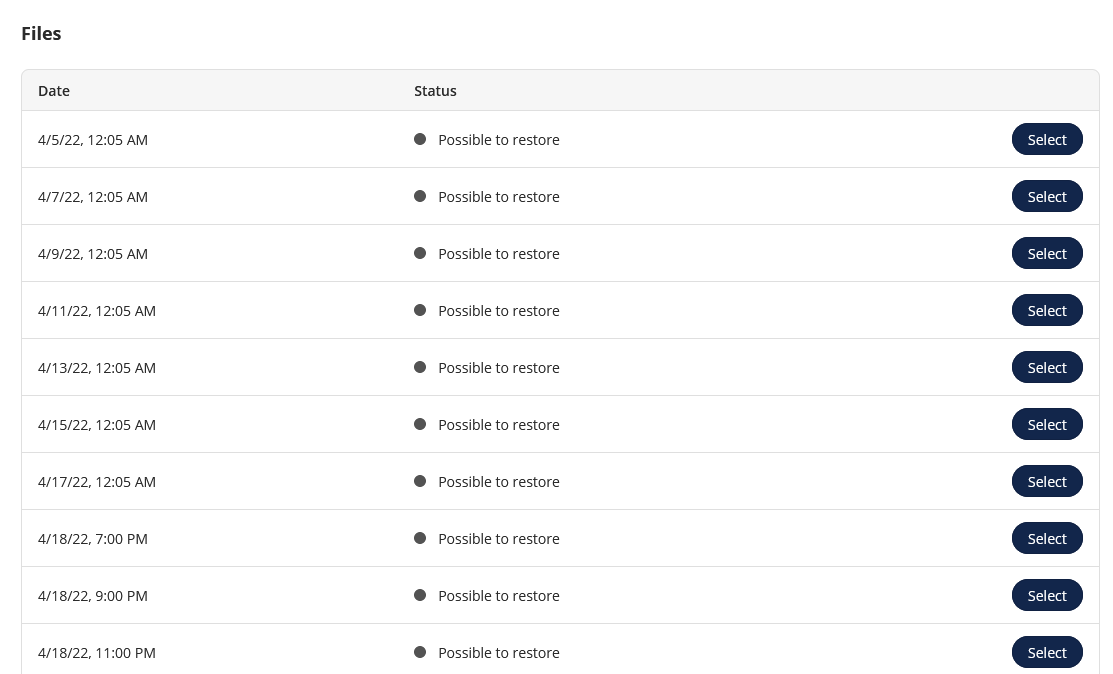
This will create a backup of your files in the 'restored-backups' folder of your File Manager.
To place the files back onto your website, copy the files from the 'restored-backups' folder to the folder of your website. This is the 'www' folder for your rootdomain. For a subdomain, your website's files need to be placed in the correct 'subsites' folder.
In order to restore a backup, sufficient web space is required. If the control panel tells you insufficient web space is available, try to scale down the web space of your email addresses or databases and try again.
If this doesn't create enough web space to restore the backup, consider upgrading your web hosting package.
In this article we talked about restoring automatically created backups on our web hosting packages.
If you have any questions regarding this article, please contact our support team. You can reach them using the 'Contact us' button below or via the 'Contact' button inside your control panel.
If you wish to discuss this article with other users, feel free to leave a comment below.