


With an SMB File Server you can share folders and files within an Active Directory (AD) domain. For example, you can make a network folder available where people can store files from which they can work together.
In this guide, we will show you how to install the File Server role on a Windows Server and then create a 'share': a share is the term used for folders that are shared on a File Server.
- The disk on which you share data, for example a Big Storage, must be formatted as NTFS if you also want to use the File Server Resource Manager or DFS Replication.
- Before you start, add the VPS that will serve as File Server to your AD domain and to the same private network as your Domain Controller.
Installing a file server
TL;DR: Use the following command in powershell and then create file shares via Server Manager > File and Storage Services node > Shares > New Share.
Install-WindowsFeature -Name FS-FileServer -IncludeAllSubFeature -IncludeManagementTools
Step 1
Connect to the VPS you want to use as file server via Remote Desktop or the VPS console.
Step 2
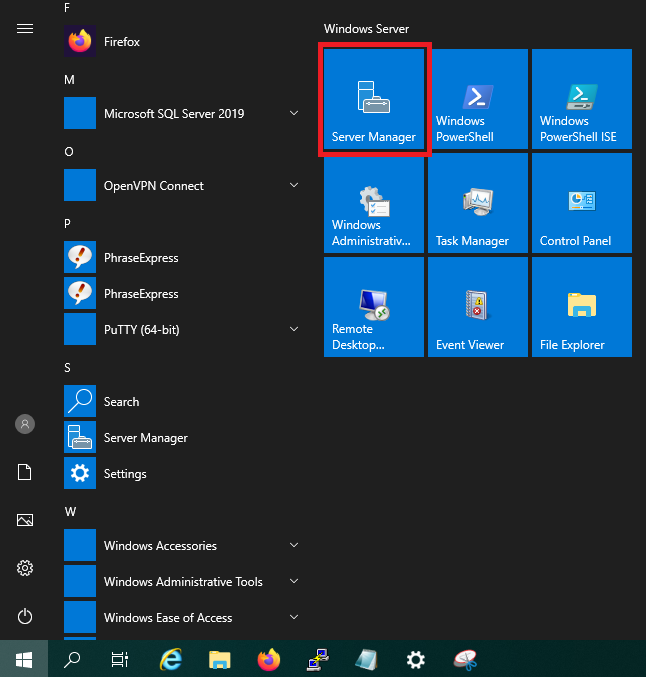
Click the Windows Start button and then click 'Server Manager'.
Step 3
Next click 'Add roles and features'.

Step 4
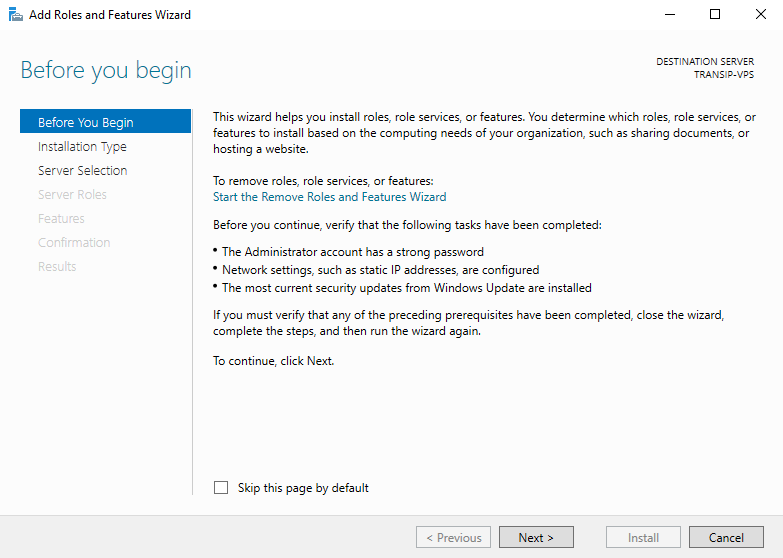
You will now see the 'Before You Begin' page. You can select not to see this page again when you add roles & features in the future. Click 'Next' after you have gone through the points under 'Before you continue'.
Step 5
Under 'Installation Type' you can choose from 'Role-based or feature-based' and 'Remote Desktop Services installation'. Choose 'Role-based or feature-based' and proceed to the next step.
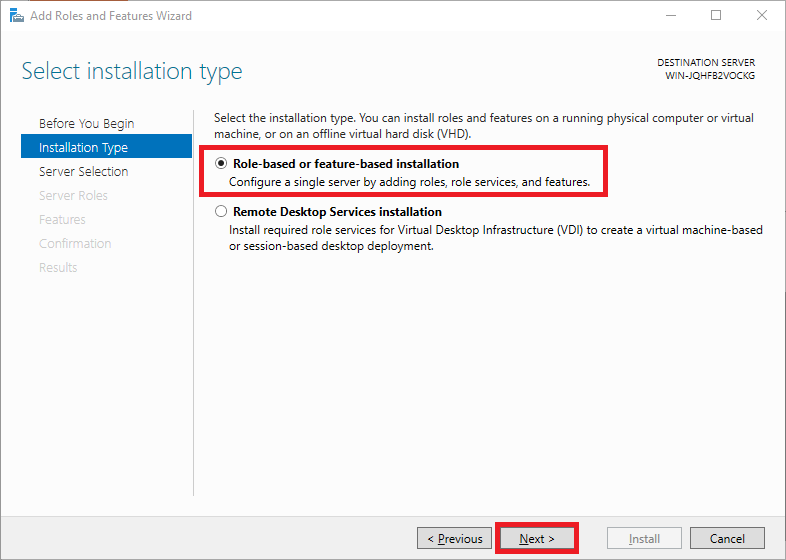
Roles add software focused on specific tasks such as hosting websites to Windows Servers, features add extra functionality to that software.
Step 6
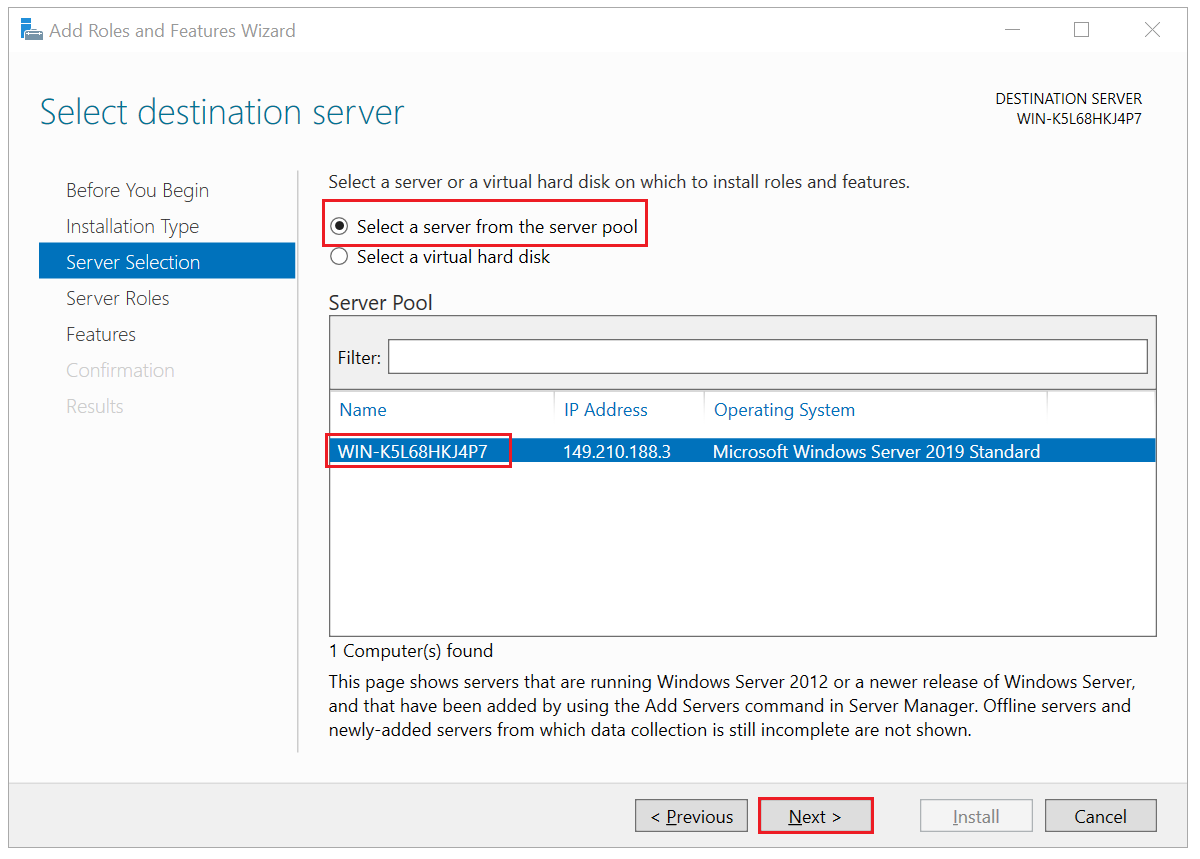
Then choose on which VPS you want to perform the installation. By default, the VPS on which you will go through the installation will be selected. Click next to continue.
When you use a server pool to install and manage roles from one central server, you will see multiple servers and select the desired server here.
Step 7
Expand the 'File and Storage Services' and 'File and iSCSI' options, check the 'File Server' and 'File Server Resource Manager' options.
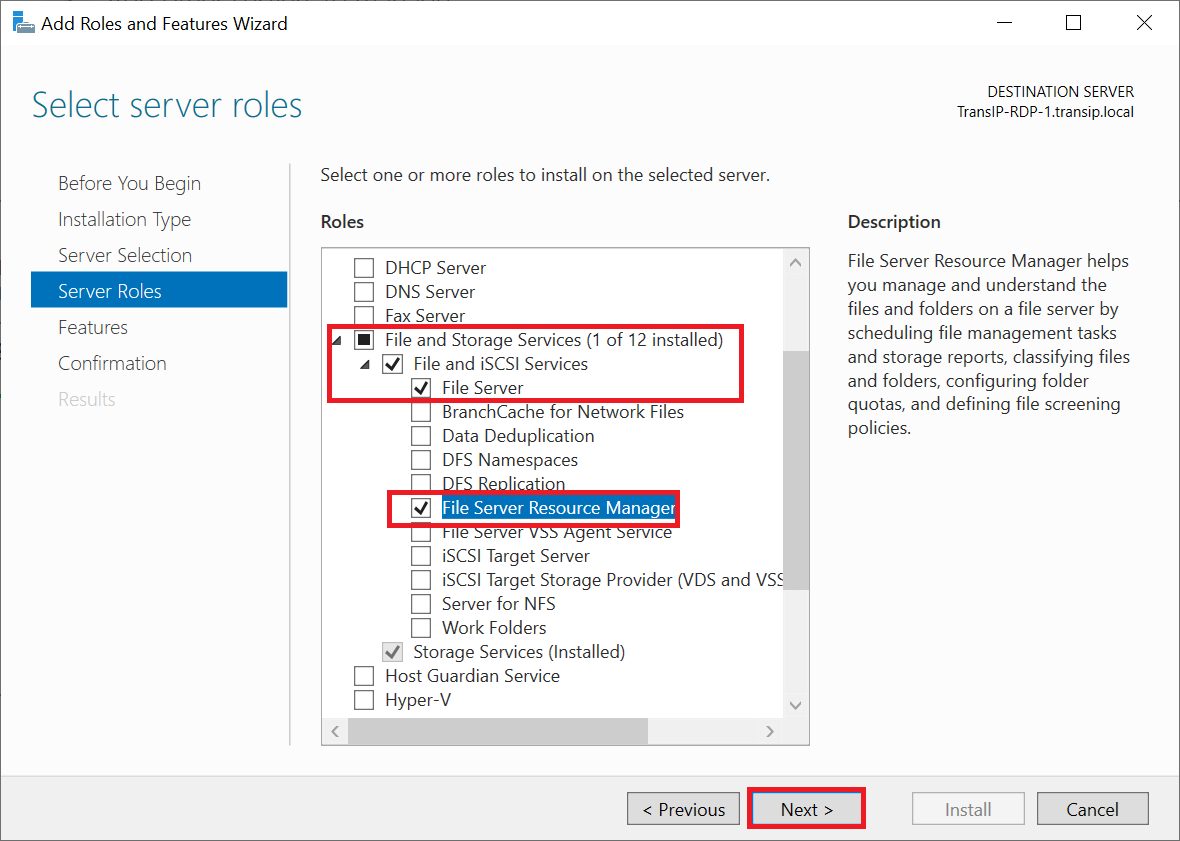
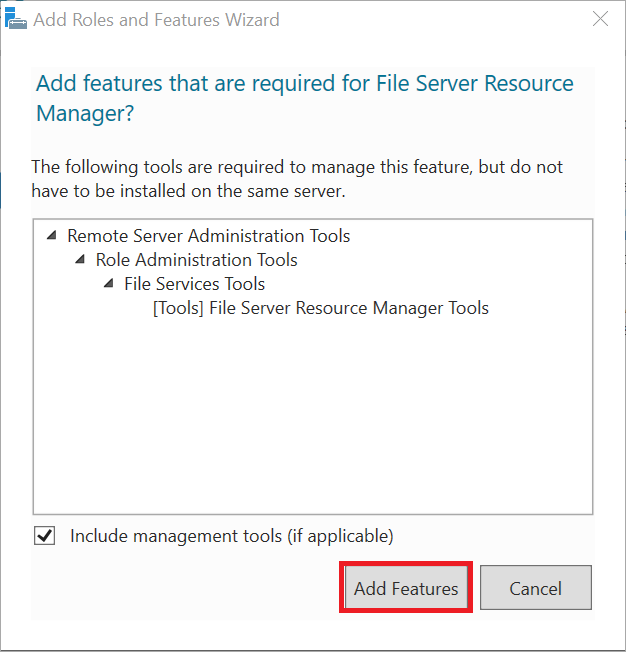
You will now see a pop-up asking if you want to install missing features. Click 'Add features'.
The File Server Resource Manager is optional, but provides useful options, such as the ability to set quotas.
The other options are outside the scope of this manual, but can be a very useful addition depending on your use case. On this page you will find an explanation of the roles that you can select.
Click 'Next' to continue.
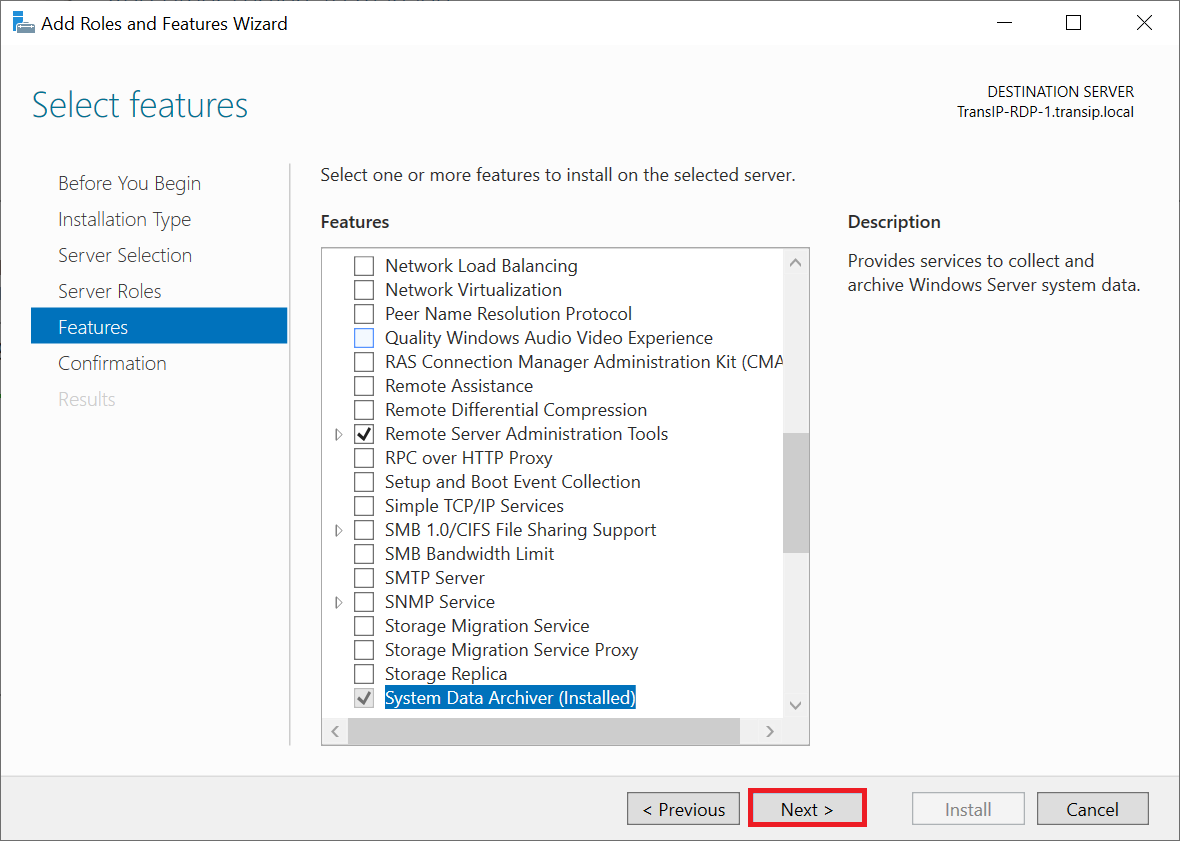
Step 8
Do not select any optional features and click 'Next' directly to continue.
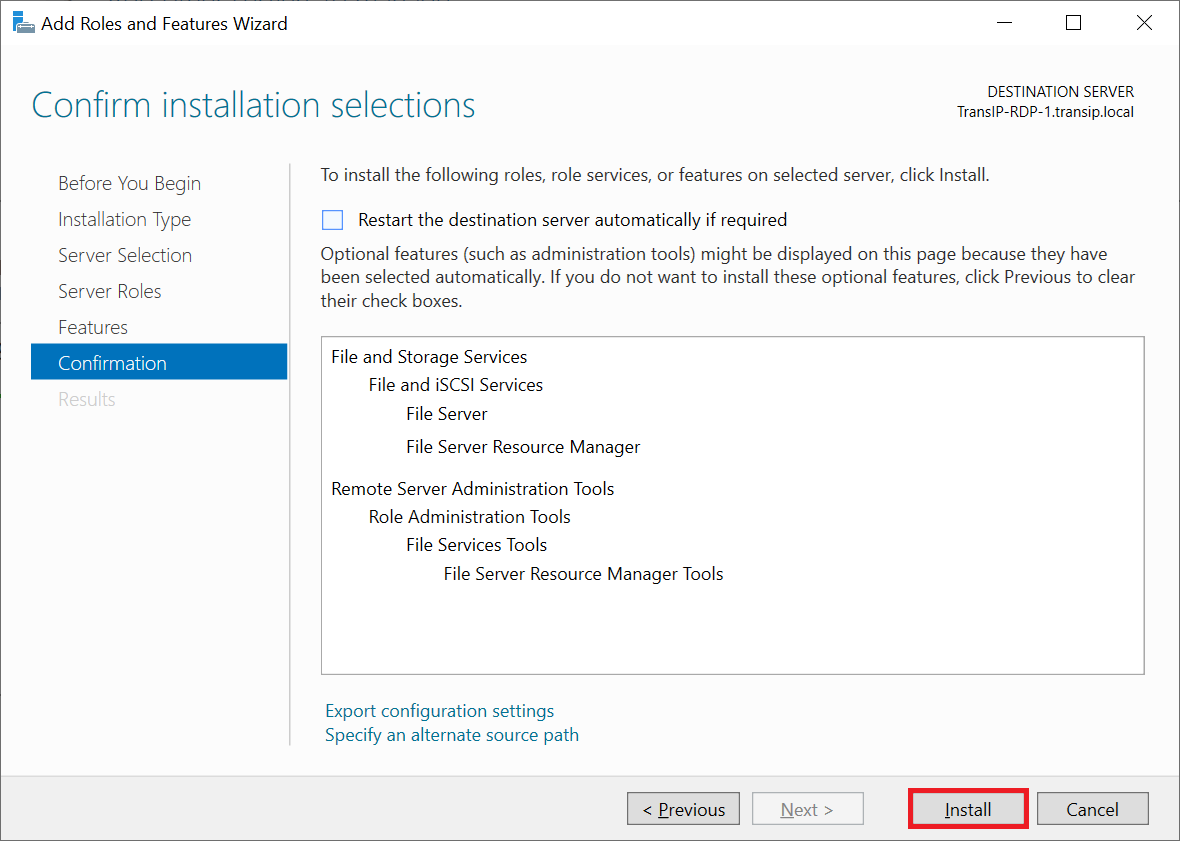
Step 9
You will now see a confirmation of the selected options. Click 'Install' to start the installation. A server restart is not required.
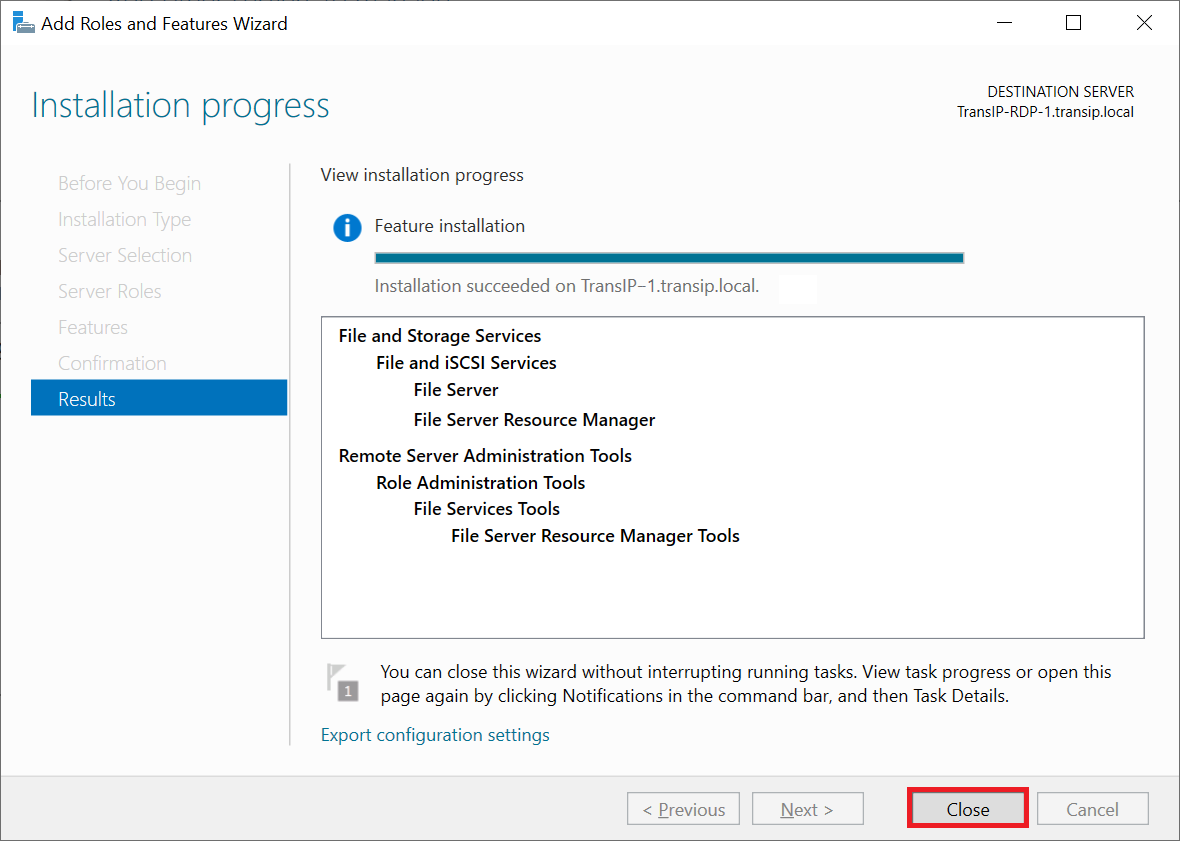
Step 10
The installation is completed quite quickly. Click 'Close' to continue and return to the Server Manager. In the next section, we will show you how to add a 'share' to your server.
Adding a share
If you use a server pool and went through the previous step from a central server on which you install and manage roles and features, first restart the SMB server and then follow the steps in the remainder of this article on the actual SMB server.
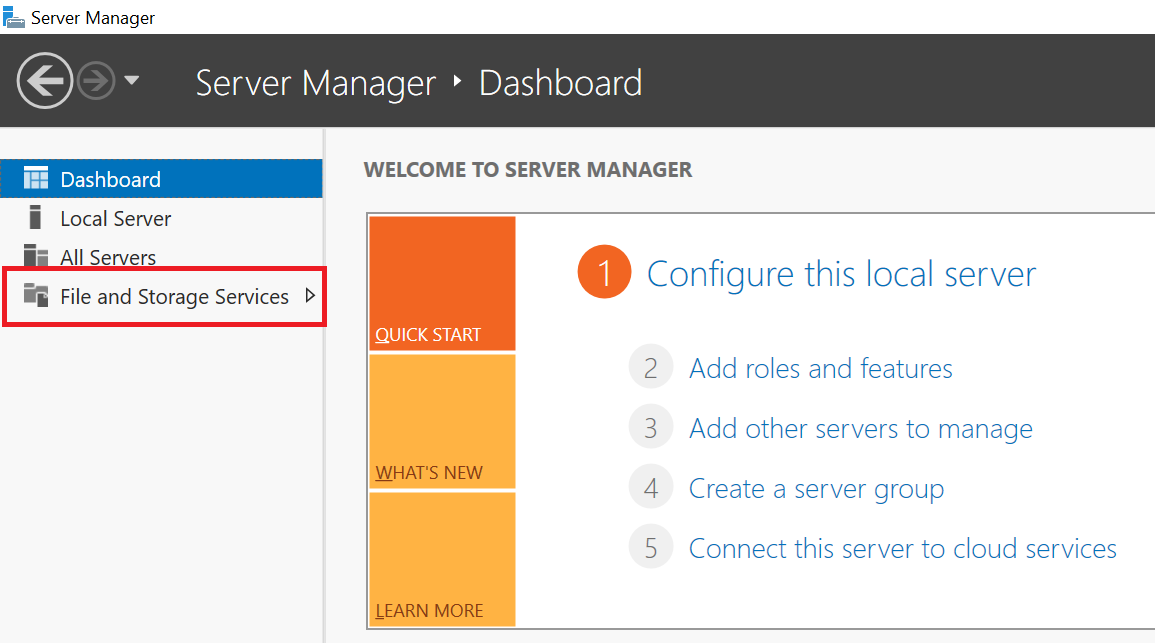
Step 1
Restart the Windows Server Manager if you closed it after installing the File Server Role and click 'File and Storage Services'.
Step 2
Then click 'Shares' > 'To create a file share, start the New Share Wizard'.

Step 3
You will now be given the option to select a profile. SMB is the default solution for Windows Servers and can also be used on Linux systems by installing Samba. NFS is the default Linux solution that can also be used by Windows Servers. However, SMB is the standard for Windows and supports most features. Therefore, select 'SMB quick' and click 'Next'.
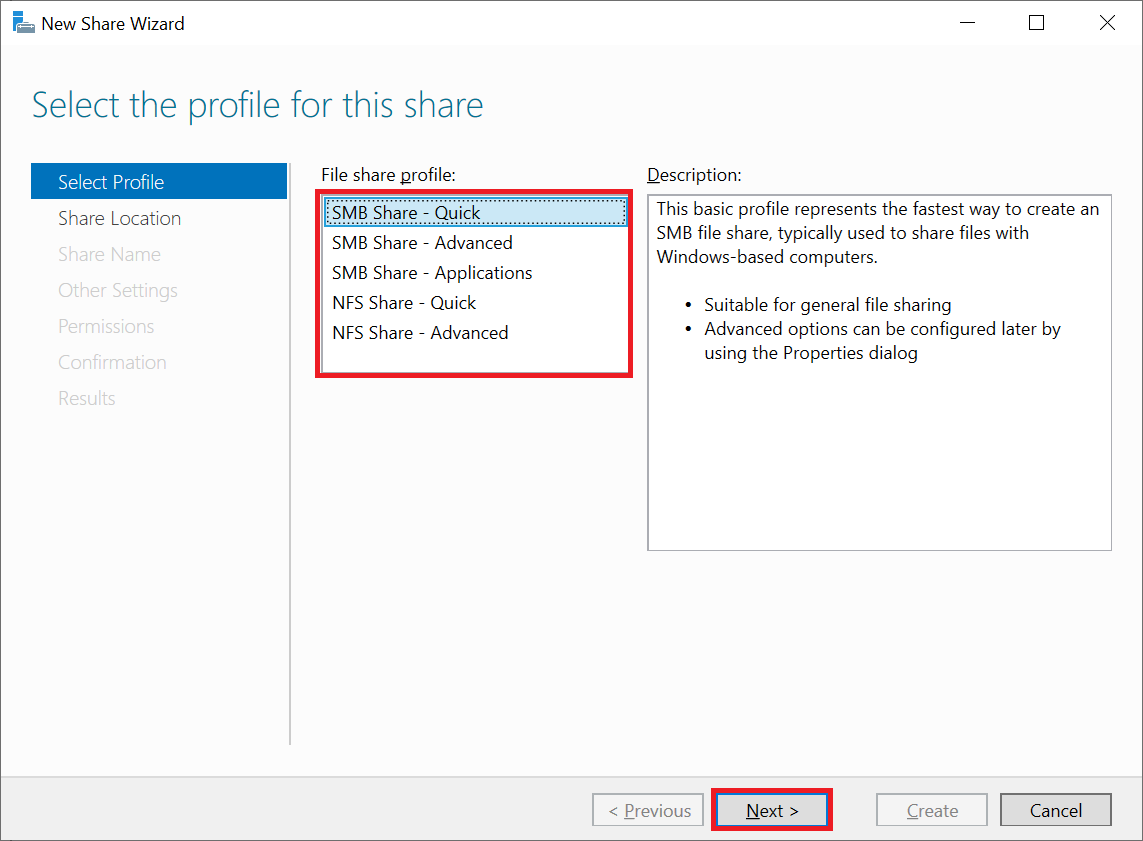
You are free to use the 'Advanced' option. However, the settings that you can adjust with this can also be adjusted afterwards.
Step 4
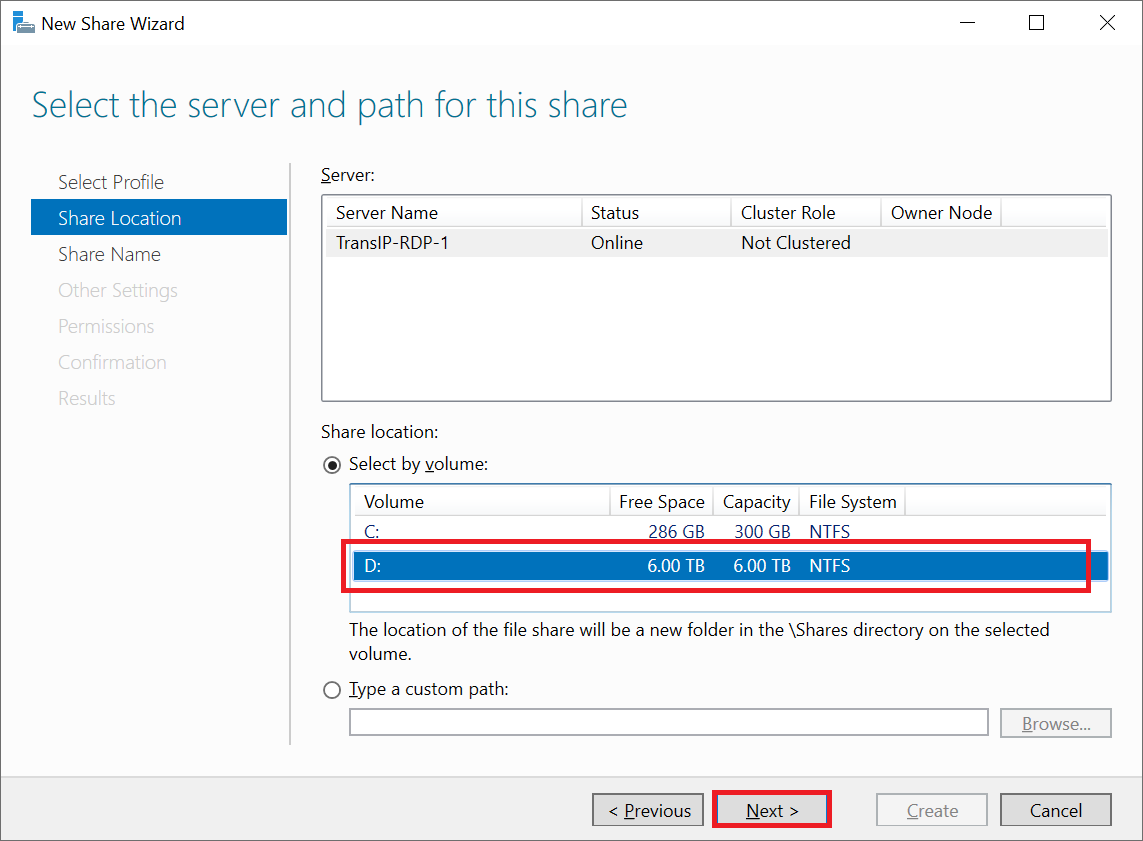
Then select the disk (volume) on which you want to create the share and click 'Next'. In the example below we use a Big Storage.
There is also an option to create a specific folder, but a folder will already be created on the selected drive automatically in the next step.
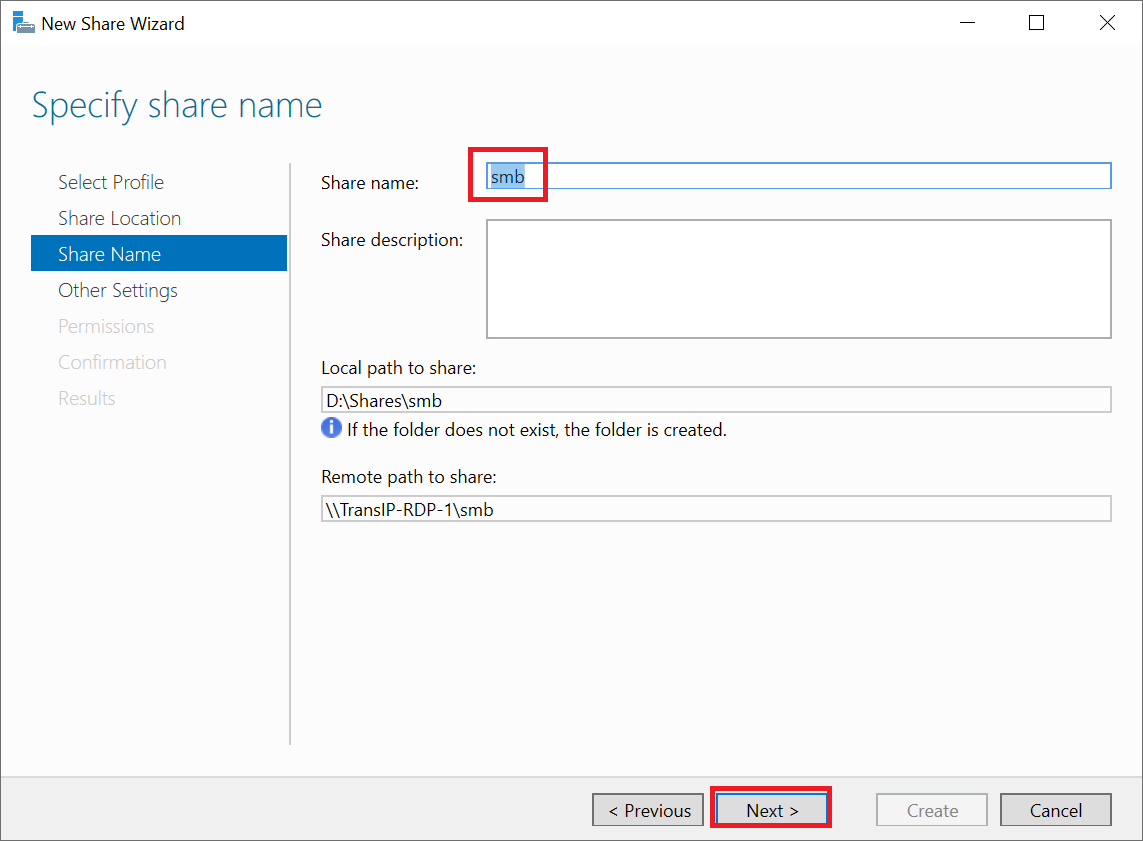
Step 5
Enter a name for your share and note the 'Remote path to share'. Other users need this to be able to use your share, see the 'adding a network location' section.
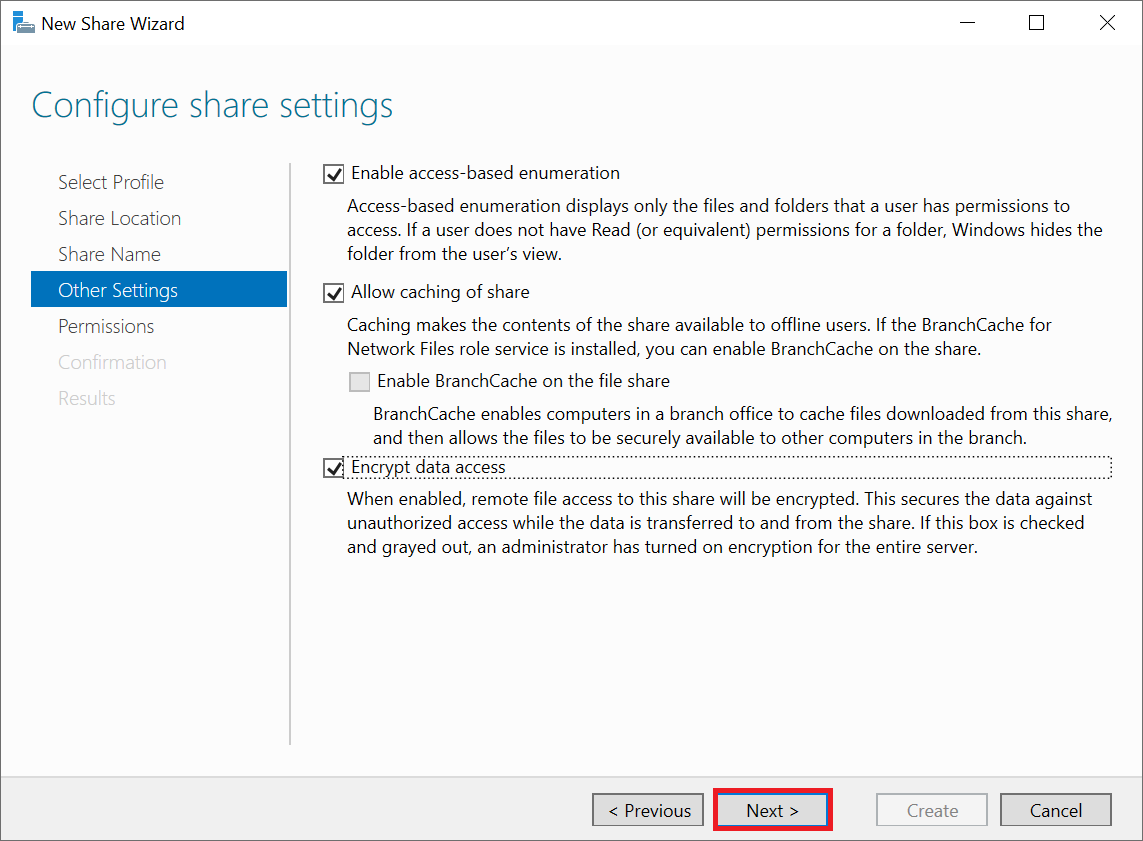
Step 6
The options on the 'Other settings' page are all optional, but no less important:
- Enable access-based enumeration: A user only sees the files and folders he/she has access to.
- Allow caching of share: Files are also available offline because they are cached.
- Encrypt data access: The connection to the share is encrypted.
- Check the options you want to use and click 'Next'.
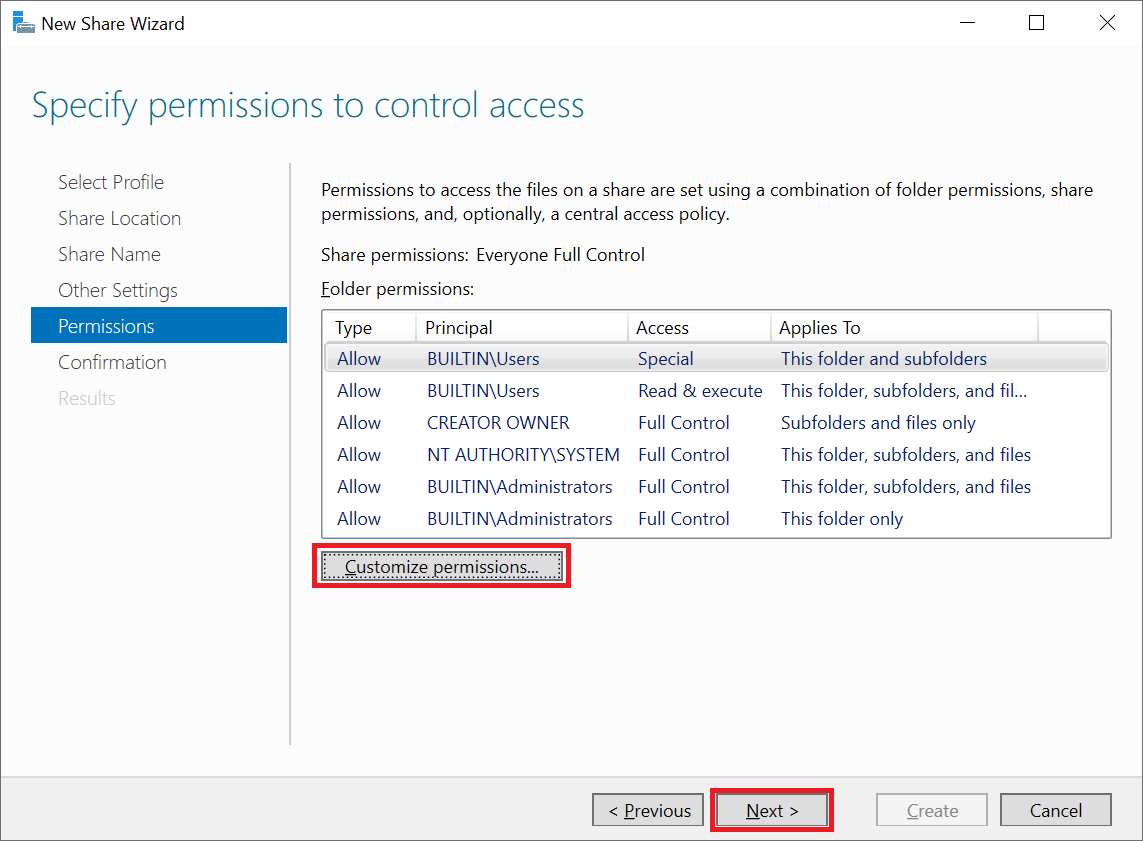
Step 7
In the permissions screen you can adjust which users have what kind of access to the share (e.g. full control or read only).
This is a very important but optional step and you can also change it later if, for example, you haven't created any Active Directory users yet. You do this by right-clicking the name of a share in the Server Manager under 'File and Storage Services' > 'Shares' and selecting 'Properties'. In the screen that opens, you can further adjust the rights under 'Permissions' as described in this step.
Click 'Customize permissions'.
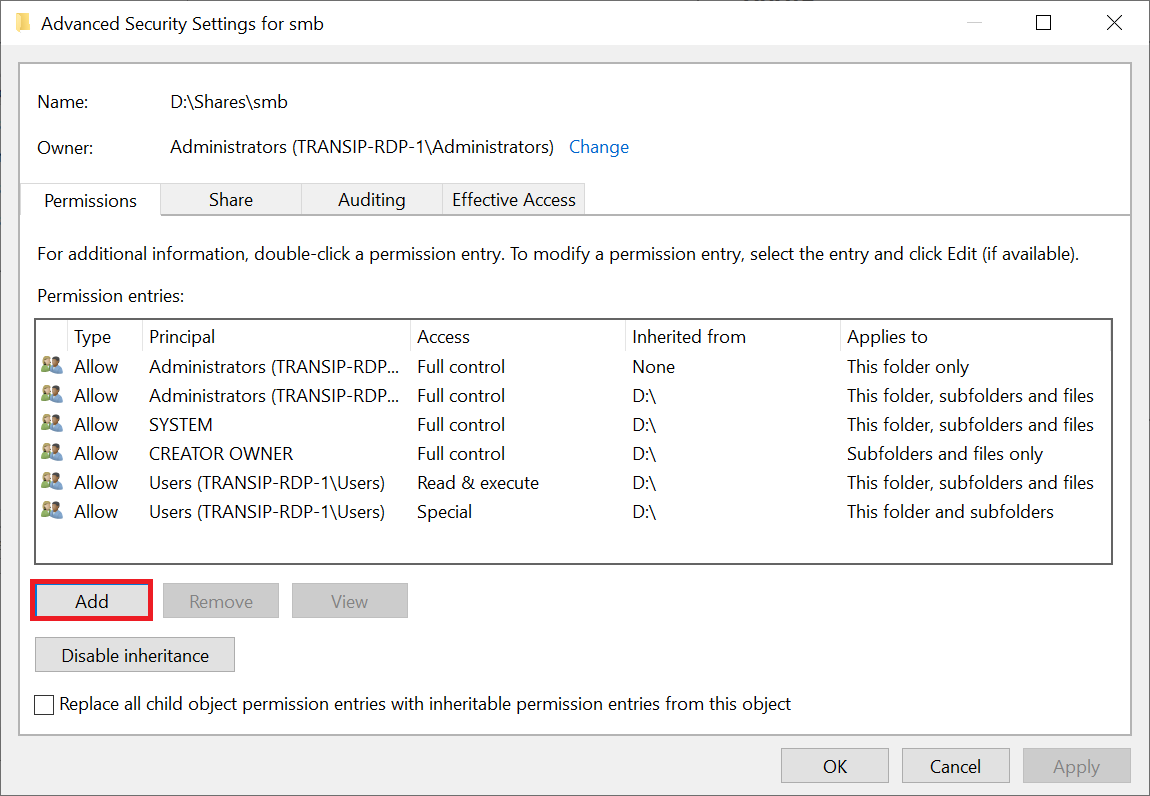
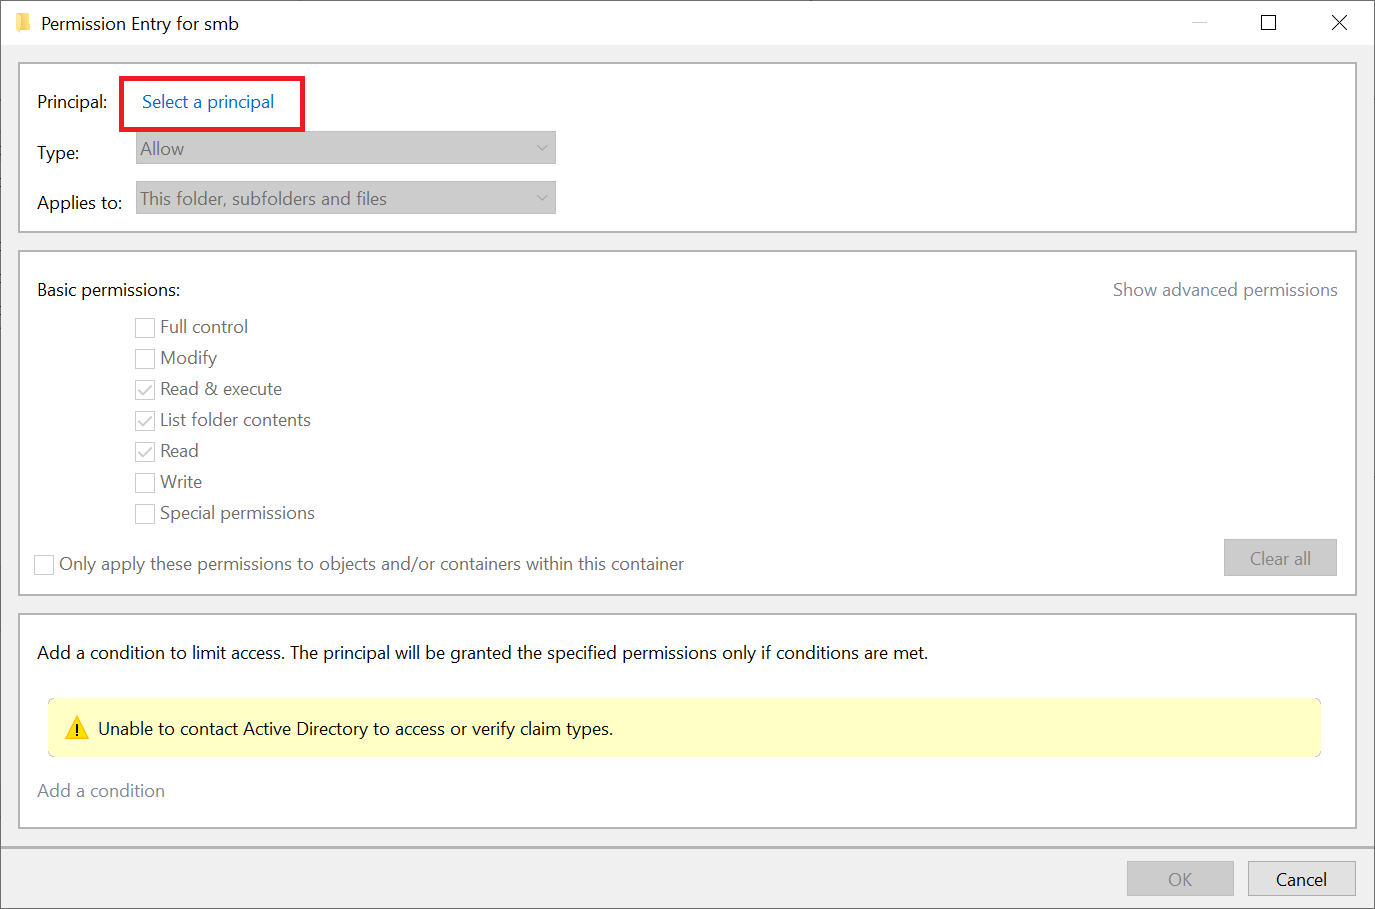
The 'Advanced Security Settings' screen appears. Click 'Add' to add a user or group (or select an existing user or group and click 'View' to change the permissions).
The 'Permission Entry' screen appears. At the bottom you will see a heading 'Conditions'. Making use of this is optional and requires you to use 'Claim Types'. Additional documentation will be provided about this in 2022 and we will adjust this step in due course.
Click 'Select a principal' to actually add a user or group.
The familiar 'Select User, Computer, Service Account or Group' screen appears. Search for the exact name here, or part of the name of a user, group, computer or service account and click 'Check names'.
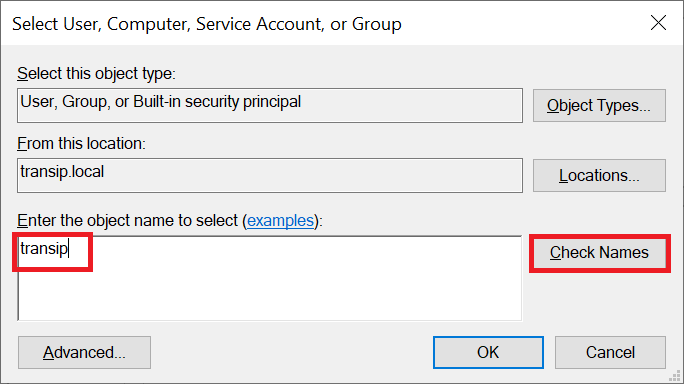
You will now see a pop-up. Enter the name and password of an AD user who has sufficient rights to join this server to the domain and click 'OK'.
For security reasons, it is recommended not to use the Administrator account in a production environment, but to create a separate user for each administrator with administrator rights.
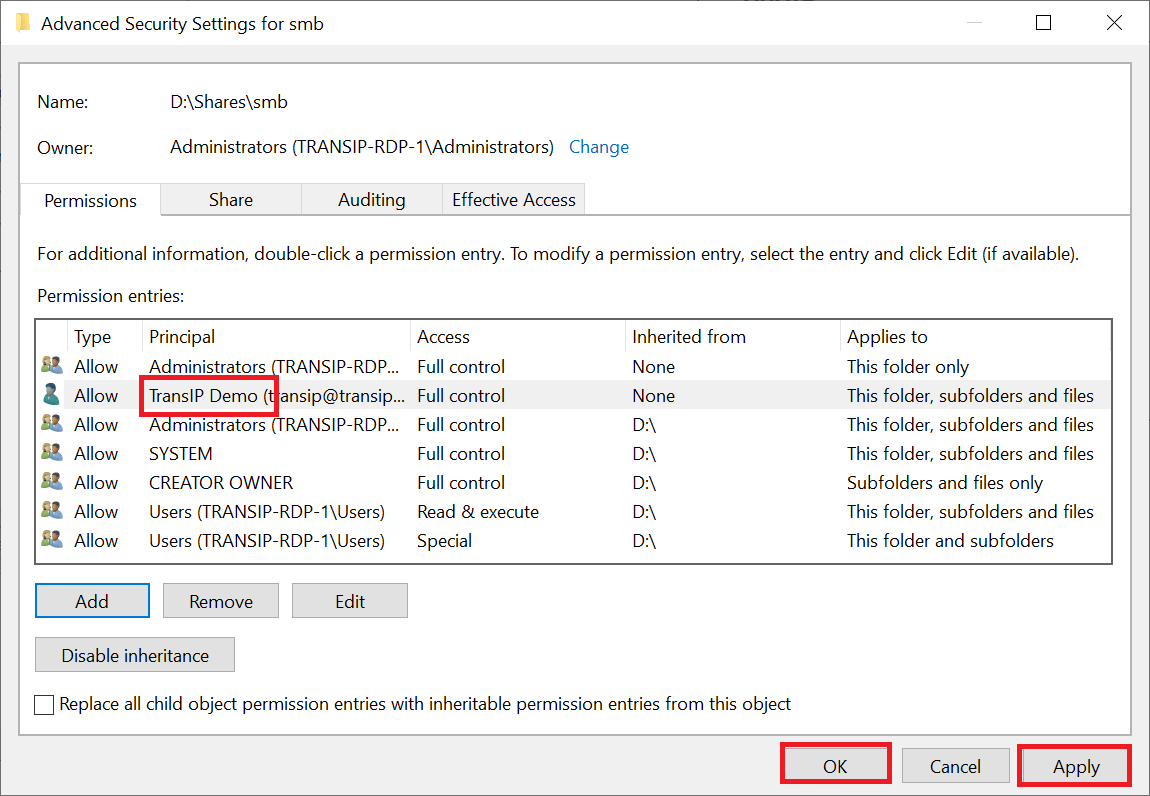
You are now back in the previous 'Advances Security Settings' screen. Click 'Apply' and 'OK' to apply the changes.
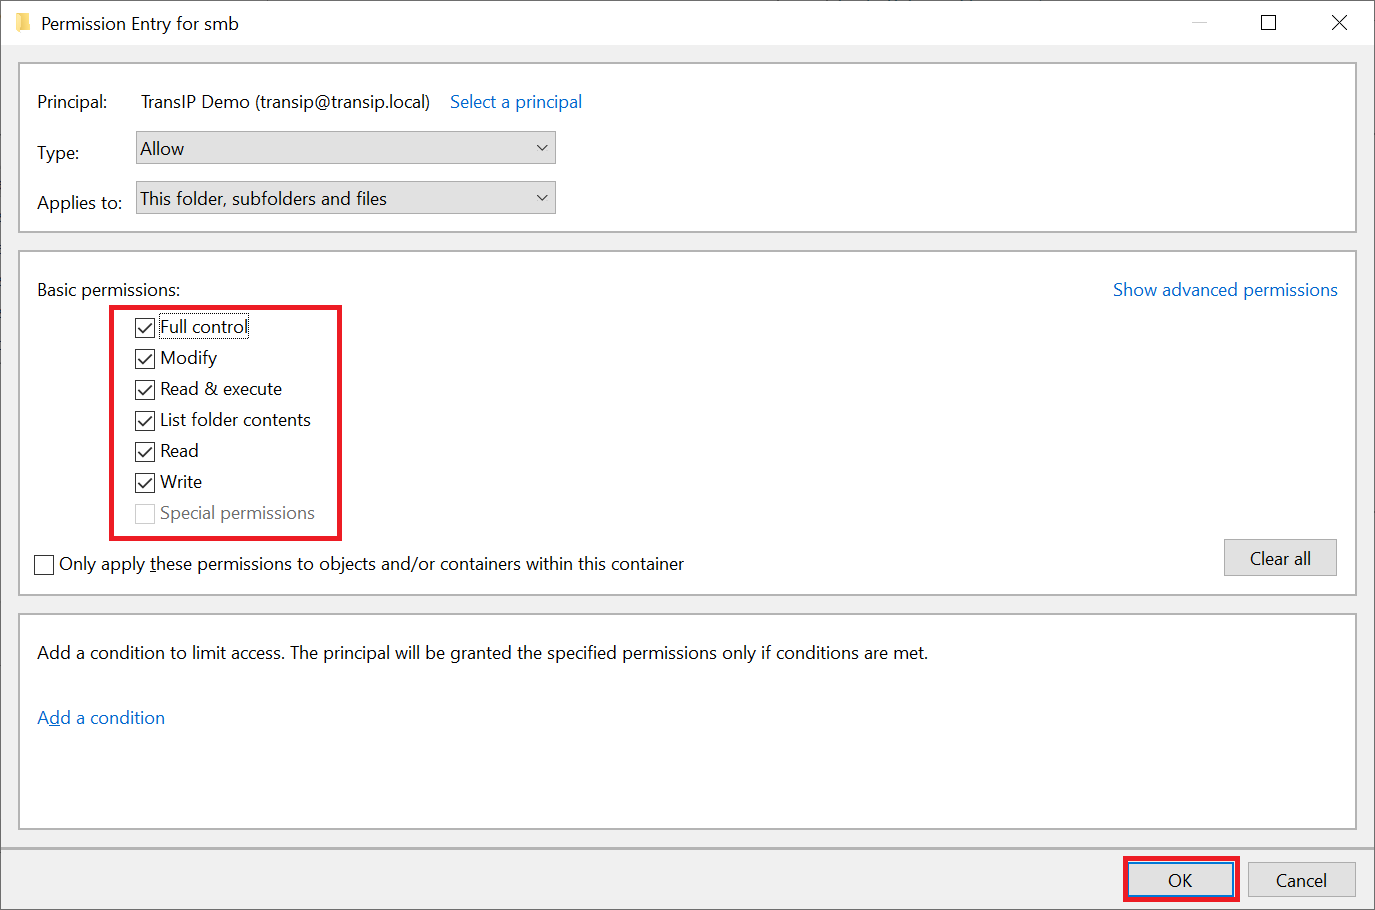
Click 'Next' when you are back in the Permissions section of the New Share wizard.
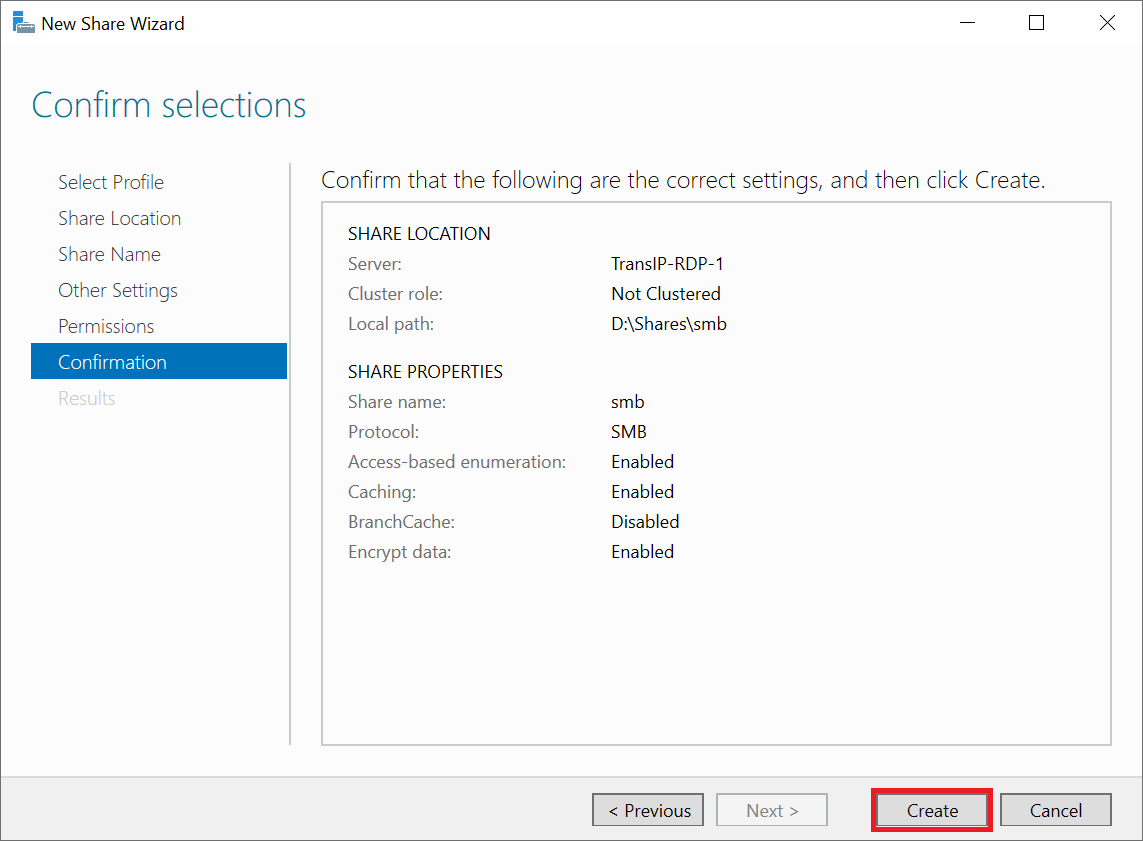
Step 8
You will now see a confirmation overview of the previous steps. Click 'Create' to create the share.
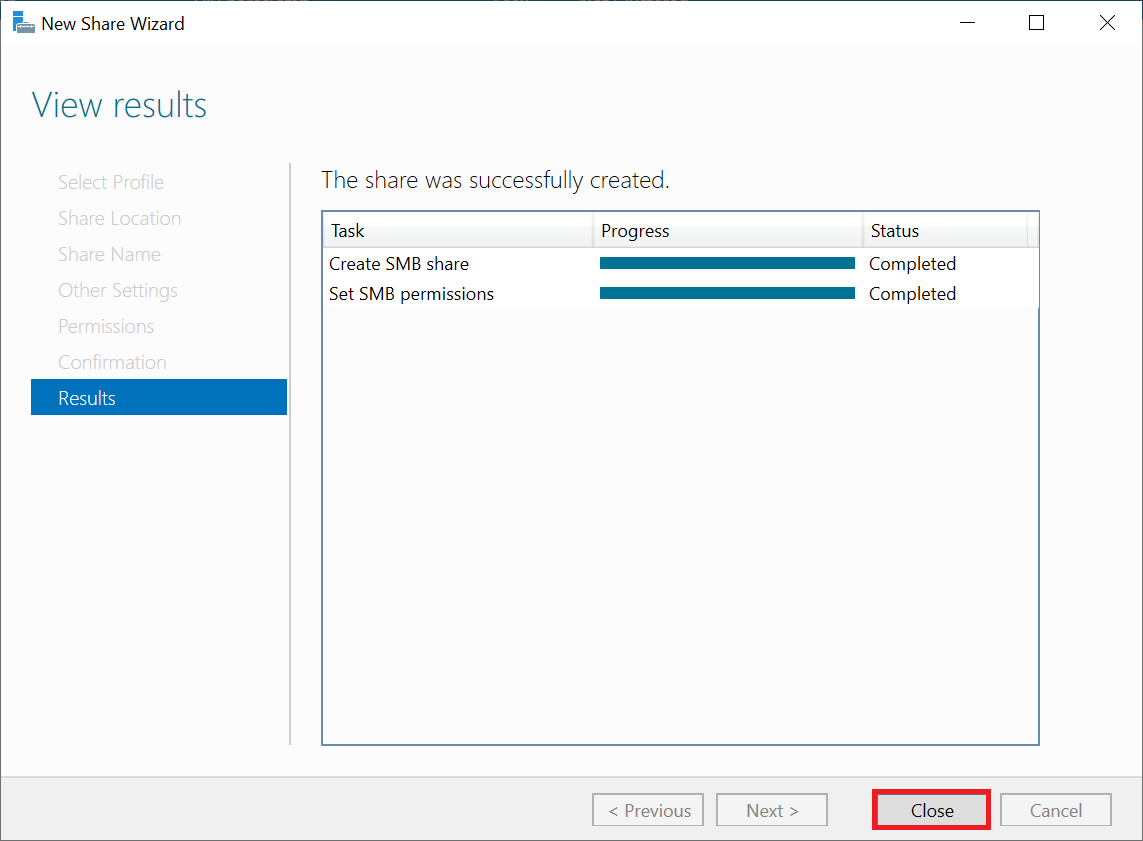
Step 9
After creating the share you will see the confirmation below. Click 'Close' to close the wizard. In the next section, we'll show you how to use the share from another Windows Server/computer within your Active Directory.
Adding a network location
Now that you've created a share, you naturally want to test it or use it right away. You do this by adding the share as a network drive in Windows Explorer.
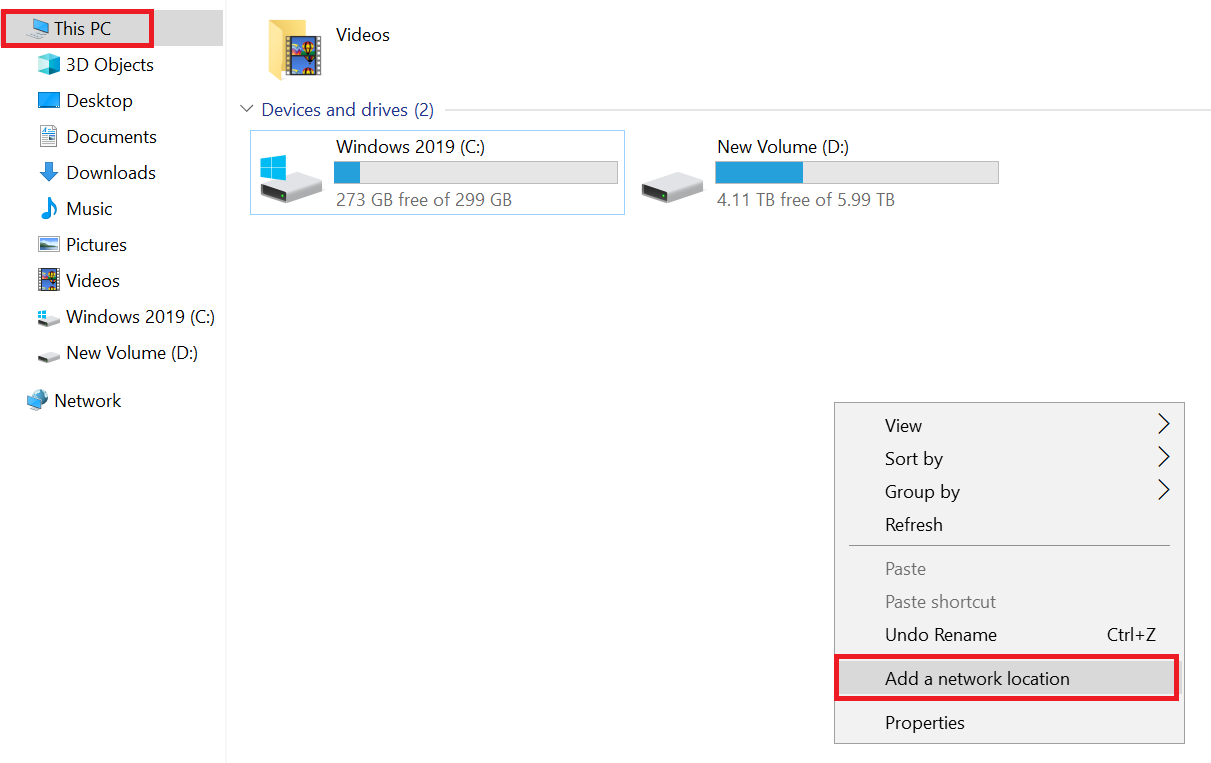
Step 1
Open Windows Explorer and go to 'This PC'. Right click an empty part and select 'Add a network location'.
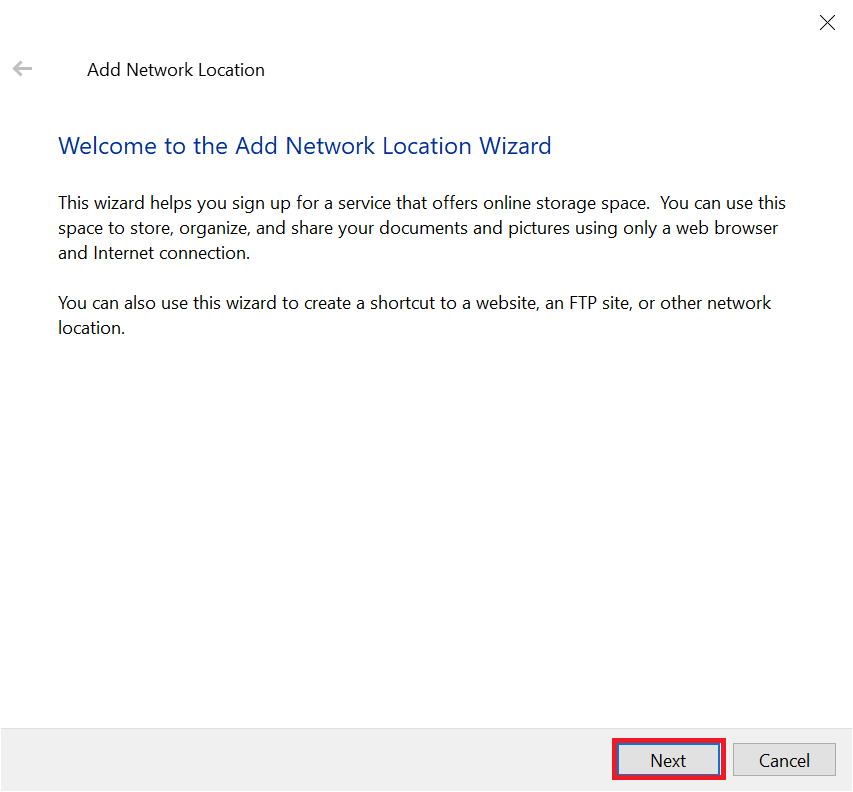
Step 2
The 'Add Network Location' wizard opens. Click 'Next' to get started.
Step 3
You will now be asked where you want to create the network location, but there is only one option for that. Select 'Choose a custom network location'.
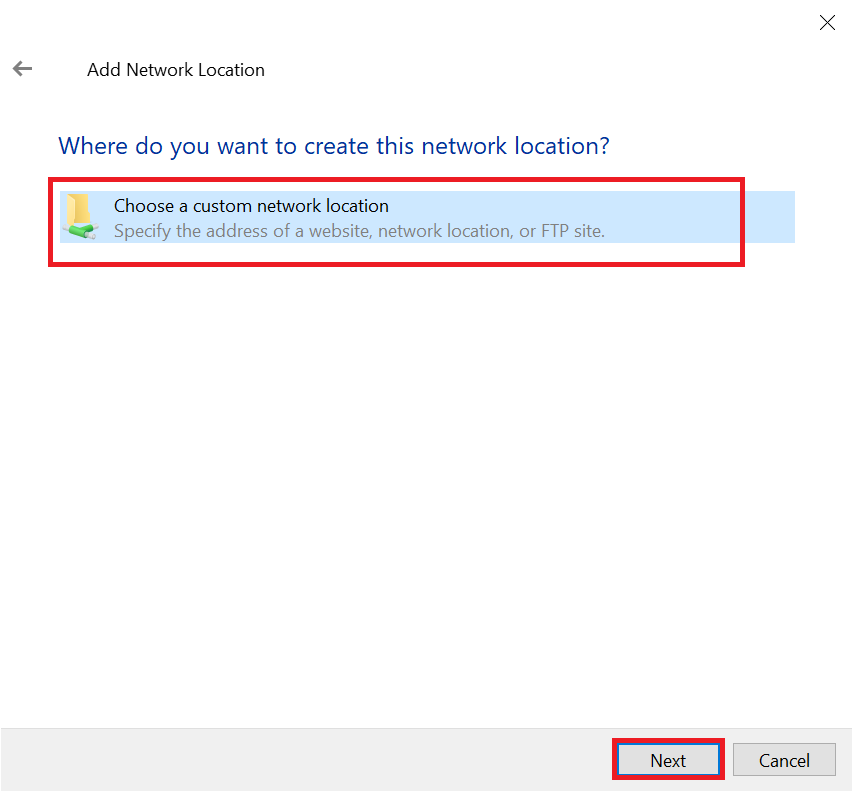
Step 4
Enter the network location you noted in step 5 of adding a share and click 'Next'.
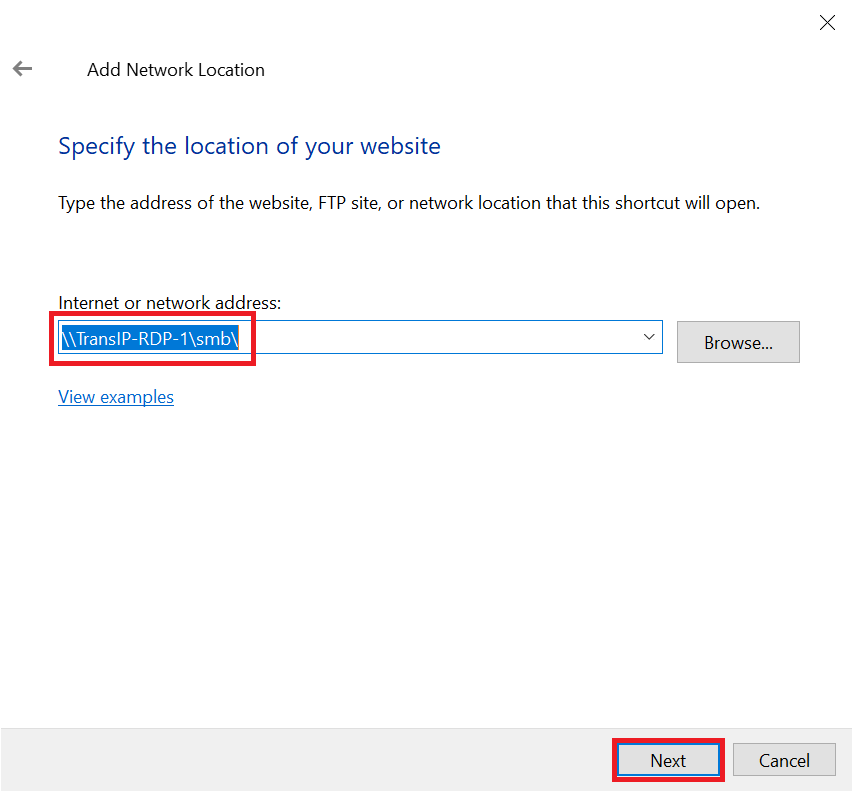
Have you lost the network location? In your File Server, go to Server Manager > File and Storage Services > Shares. The name of your share is here and the network location is \\thenameofyourserver\thenameofyourshare
Step 5
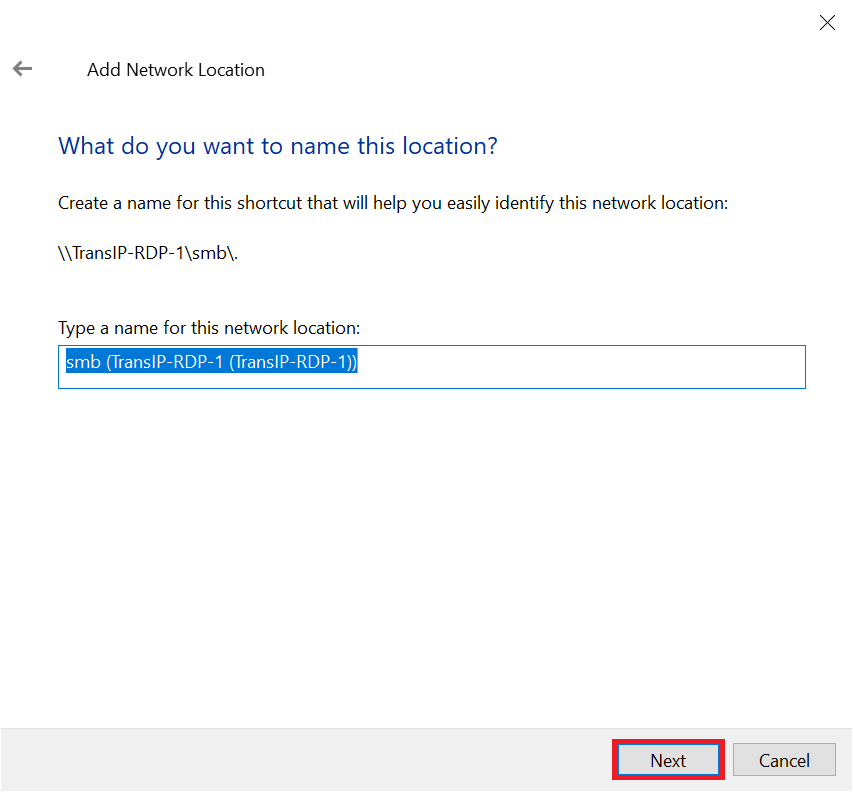
Give the network location a name that makes it easy to remember what the network location is for and click 'Next'.
Step 6
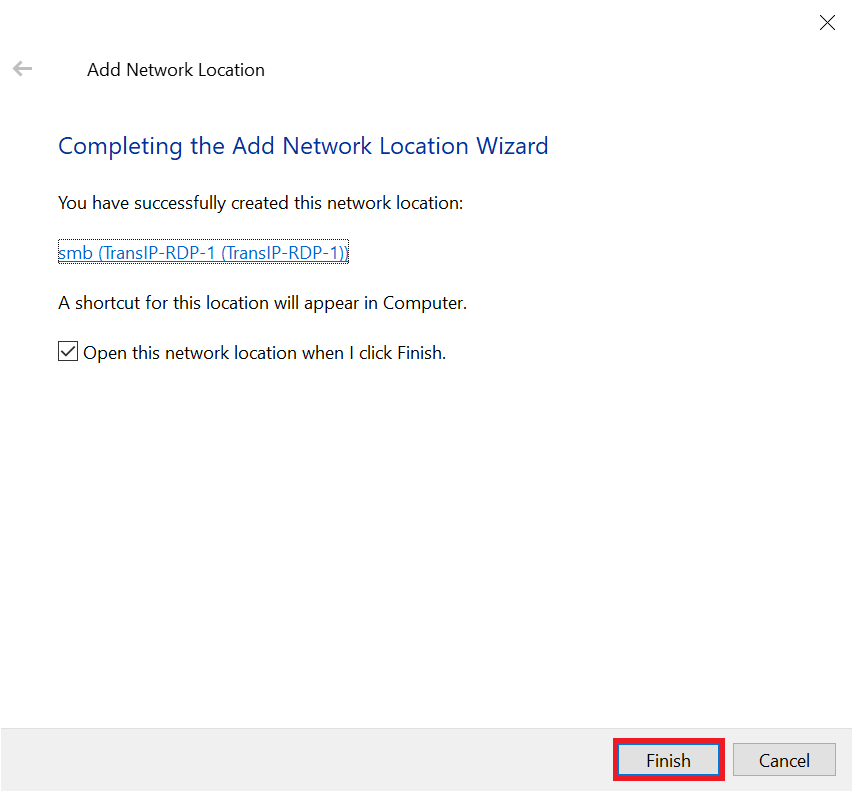
Click 'Finish' to complete the wizard. You are now done adding your network share as a network location within Windows. For example, if you are working in an Office program and saving a file, you can now also navigate to this network location and save your file on the share instead of on your computer/server.
This brings us to the end of this guide on installing and configuring a Windows File Server. Additionally, take a look at our tutorial 'Using the Windows File Server Resource Manager'.