Over time you may forget your root password, but luckily there usually is a solution. In this tutorial, we will show you how to reset your root password in CentOS 7. For CentOS 8, CentOS Stream, AlmaLinux and Rocky Linux, see this tutorial.
Do you still have your root password, but have you lost another user's password? Then use the following command as root user to change the password::
passwd username
Step 1
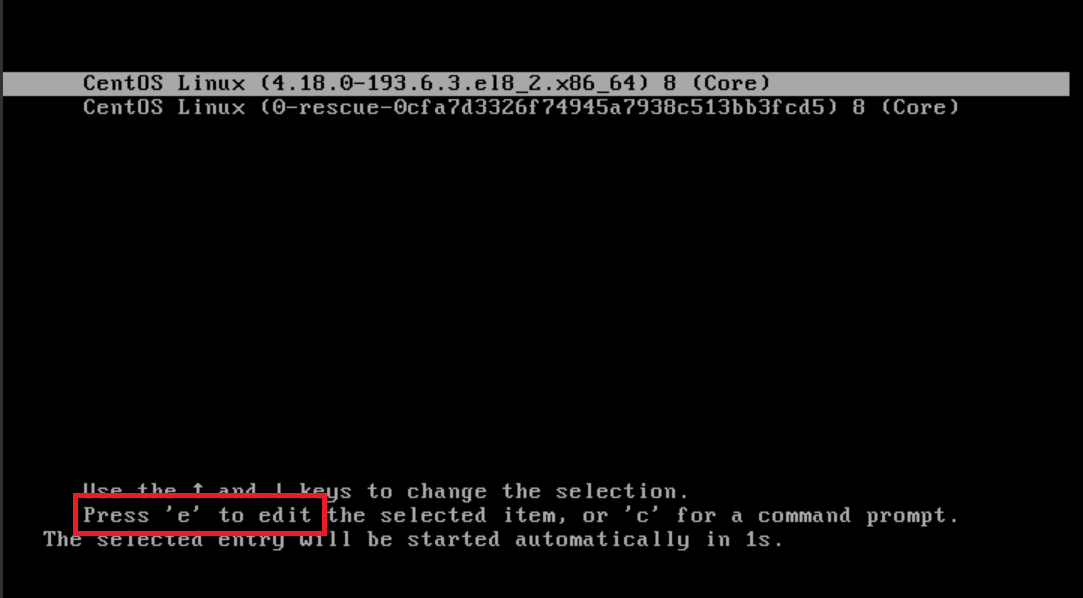
To reset your root password, switch to the 'single user mode' of your VPS. To do this, save your work and restart your VPS using the CTRL+ALT+DEL button in the VPS console. Press the 'e' key on your keyboard as soon as you see the screen below.
Please note: this screen will only appear for a very short time, and it may take a few reboots to get hold of it.
Step 2
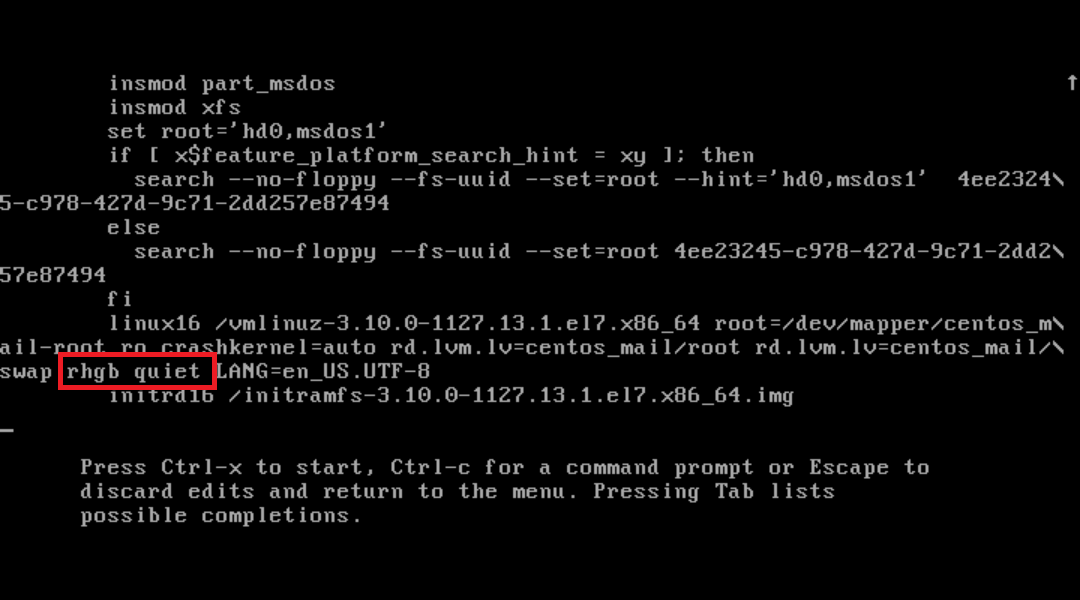
You will now see a lot of text on your screen. This determines the boot parameters of your VPS. Use the arrows on your keyboard to navigate down and look for the 'linux16' section and within that for either 'ro' (newer installations) or 'rhgb quiet' (older installations). You may have to scroll down a bit before you actually see the line that says rhgb quiet.
ro: if you see 'ro' remove both it and everything behind it up to the part that says 'initrd16' and replace this with 'rw no_timer_check rd.break enforcing=0' (without the brackets)
rhgb quiet: Change this part to 'init=/bin/bash' (without parentheses) so that it looks like this:
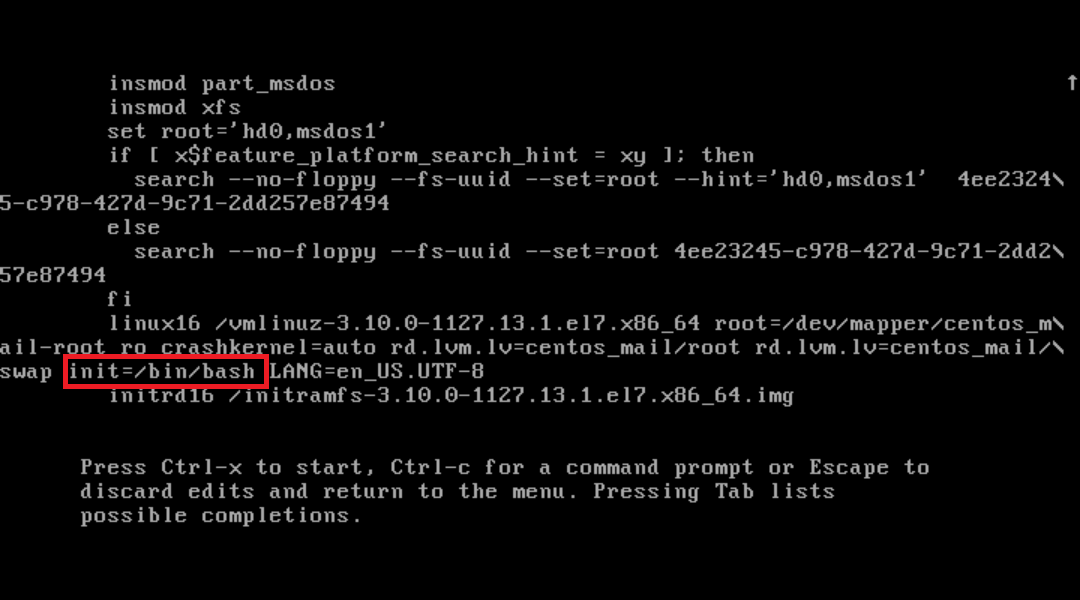
Now press ctrl + x to start your VPS with the modified boot parameters.
Step 3
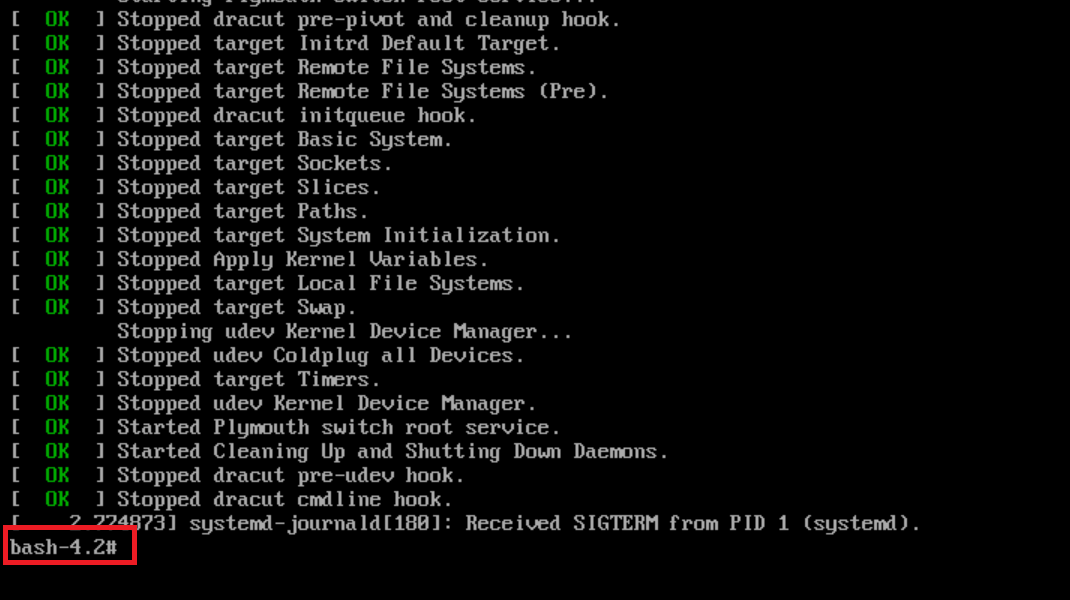
After launching you will see a bash prompt like the one below.
Step 4
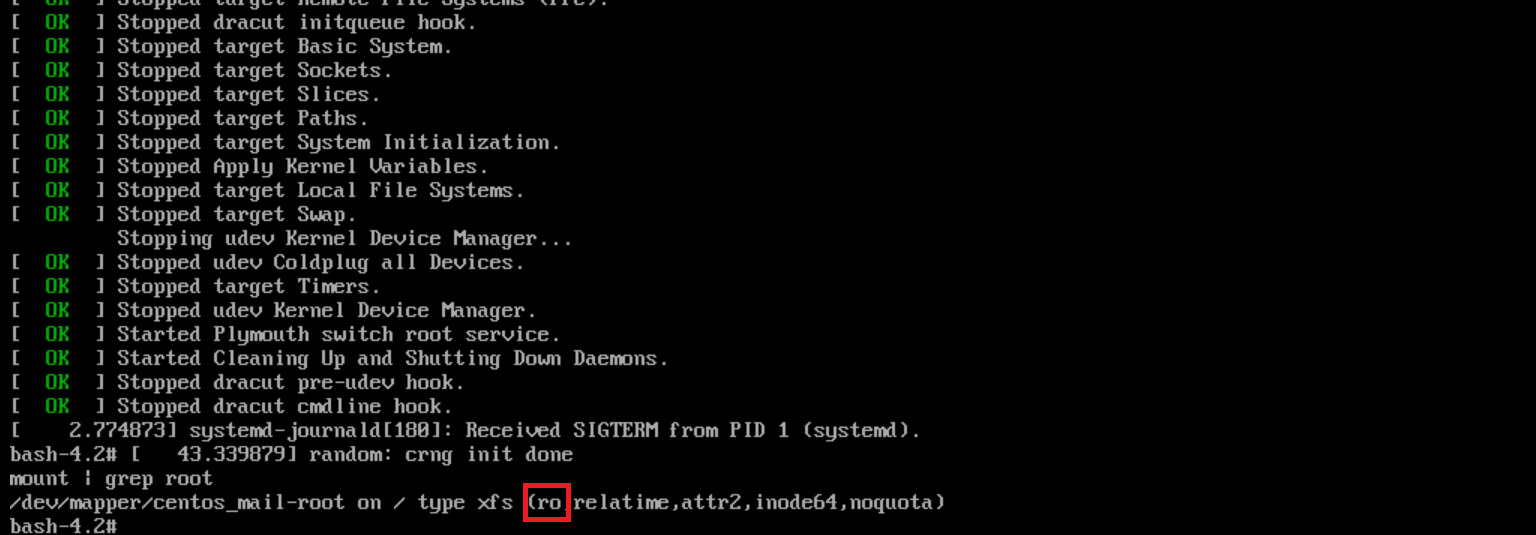
Now check the status of your root partition with the command:
mount | grep rootIn the output you may see that the partition is 'ro', or read only:
However, you need write permissions to be able to change the root password. Change read-only (ro) to read-write (rw) with the command:
mount -o remount,rw /
You can check if the remount with read-write was done correctly with:
mount | grep root
The result now looks like this:

Step 5
You can now reset your root password with the command:
passwd root
touch /.autorelabel- passwd root resets the root password
- touch /.autorelabel adds a hidden file called autorelabel in the root directory. This file tells SELinux to relabel the entire filesystem. Without this additional step, your password reset won’t work. More information about labeling in SELinux can be found here.
Step 6
Reboot your VPS with the command below. You can now login with your new root password!
exec /sbin/init
That brings us to the end of this tutorial to resetting your root password in CentOS 7.
Should you have any questions left regarding this article, do not hesitate to contact our support department. You can reach them via the ‘Contact Us’ button at the bottom of this page.
If you want to discuss this article with other users, please leave a message under 'Comments'.