


Using HSTS (HTTP Strict Transport Security) you can make sure your website tells the browser to only accept connections through HTTPS. This is very useful if you want to properly protect of the files on your website.
When you have placed your website on a webhosting package, you can easily activate HSTS on it. In this article we will explain how to do this for your .PHP and .HTML website.
Activating HSTS on a PHP website
To activate HSTS on your PHP website, you need to make a small change to the index.php file of your website's root folder.
You can reach the index.php file via SFTP by making use of the File Manager in the control panel or by using an SFTP client such as Filezilla or Cyberduck.
In this article we will show you how to use the File Manager to edit the index.php file. The steps are similar for Filezilla and Cyberduck.
Step 1
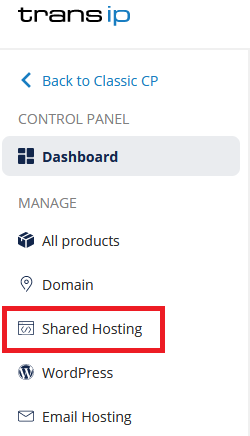
Log in to the control panel and click 'Shared Hosting' in the menu. Next, select your domain below 'Products'.
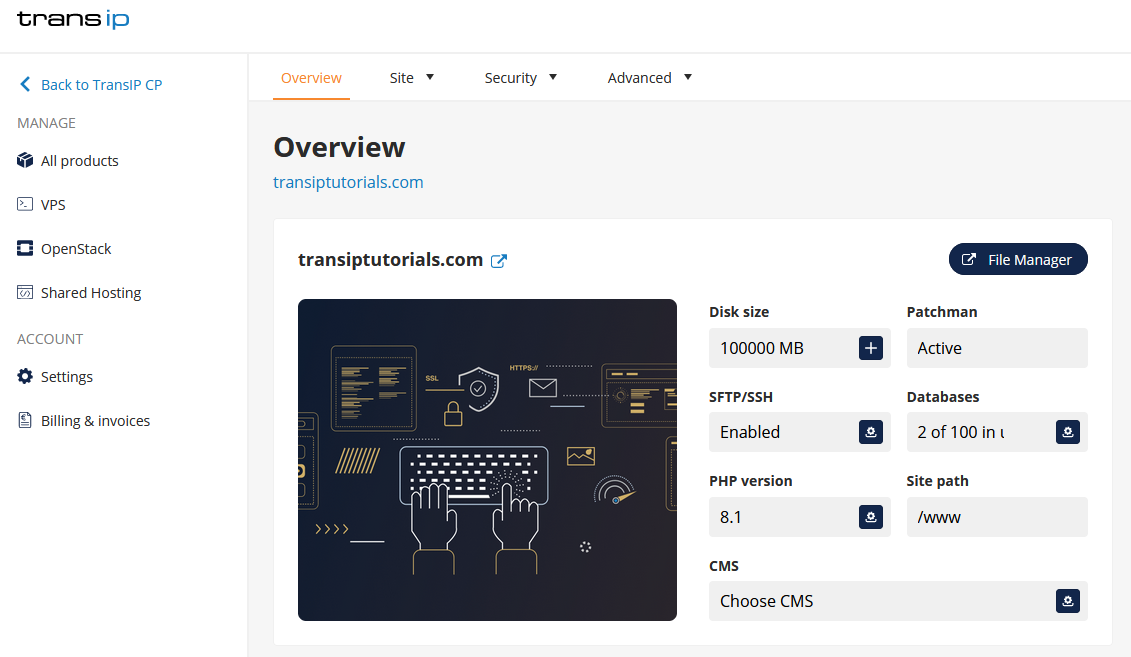
On the overview page, click 'File Manager' at the top right.
Step 2
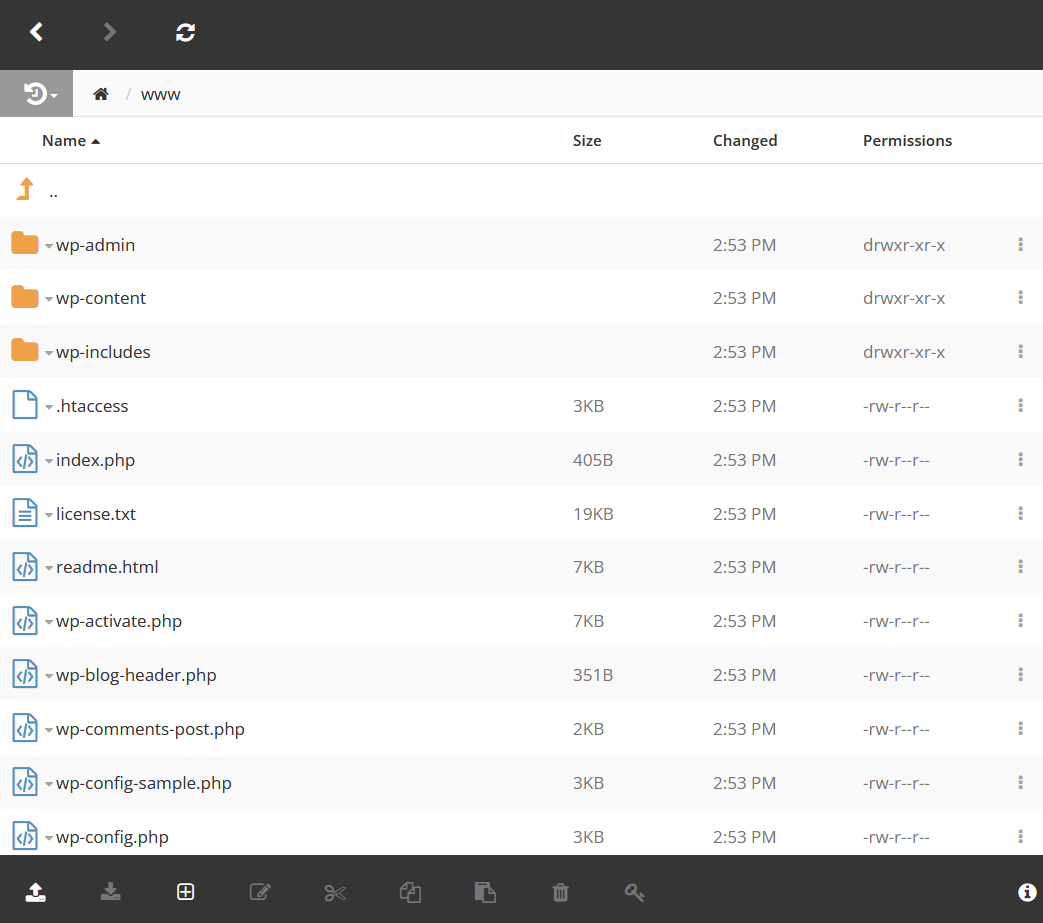
Open the 'www' folder and look for the index.php file. Select the file and click 'Edit' to edit the file directly. You may also choose to download the file if you prefer editing it that way.
Step 3
You will find the following line at the very start:
<?phpAdd two white lines and the following:
header('Strict-Transport-Security: max-age=31536000');Your index.php should then look like this:
<?php

header('Strict-Transport-Security: max-age=31536000');
Save the index.php file. If you have downloaded the file in order to edit it, upload the file. You can do so in the 'File Manager' by using the 'Upload' button which is located at the bottom left.
HSTS in now active on your PHP website! Your website will now only accept HTTPS connections from browsers.
Activating HSTS on an HTML website
In order to activate HSTS on your HTML website, you need an .htaccess file. You can either edit the existing .htaccess file of your website or create and add a new one.
First, check if there is an existing .htaccess file on your website. You can do so by making use of the File Manager in the control panel or by using an SFTP client such as Filezilla or Cyberduck.
In this article we will show you how to find the .htaccess file via the File Manager. The steps are similar for Filezilla or Cyberduck.
Step 1
Log in to the control panel and click 'Shared Hosting' in the menu. Next, select your domain below 'Products'.
On the overview page, click 'File Manager' at the top right.
Step 2
Open the www folder and look at the top of the list. Because the .htaccess file always starts with a dot, it should be at the top.
# Use HSTS to only accept HTTPS connections from browsers
Header always set Strict-Transport-Security "max-age=31536000; includeSubDomains; preload"
# Use HSTS to only accept HTTPS connectiosn from browsers
Header always set Strict-Transport-Security "max-age=31536000; includeSubDomains; preload"