In this article you will learn how to create and manage a database on a web hosting package at TransIP.
A database is a place where you can store, retrieve and configure the data of your website. Databases are created via your TransIP control panel and managed via PHPMyAdmin.
Creating and managing a database
Step 1
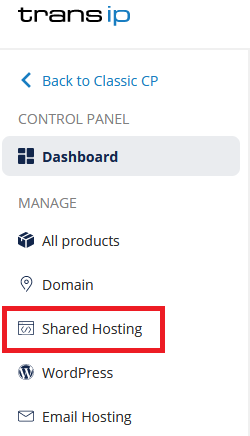
Log in to the control panel and click 'Shared Hosting' in the menu. Next, select your domain below 'Products'.
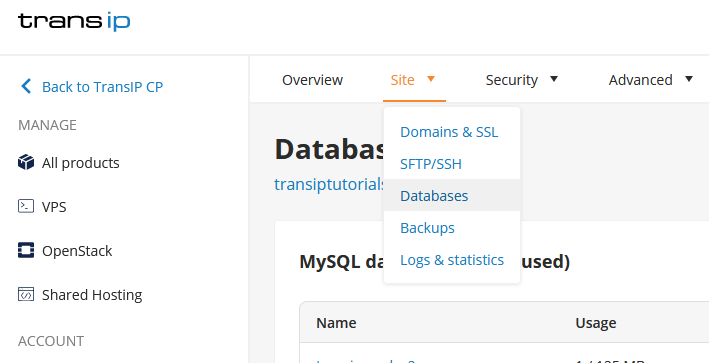
Click the 'Site' tab at the top, followed by 'Databases'.
Step 2
Now, click '+ Add database'.

Step 3
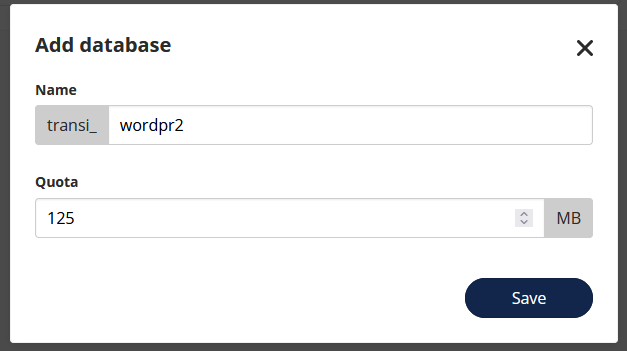
Choose a name for your database and allocate space to it. We recommend using at least 100 MB. The maximum size for databases is 15 GB (15000 MB).
Click 'Save' to create the database.
Step 4
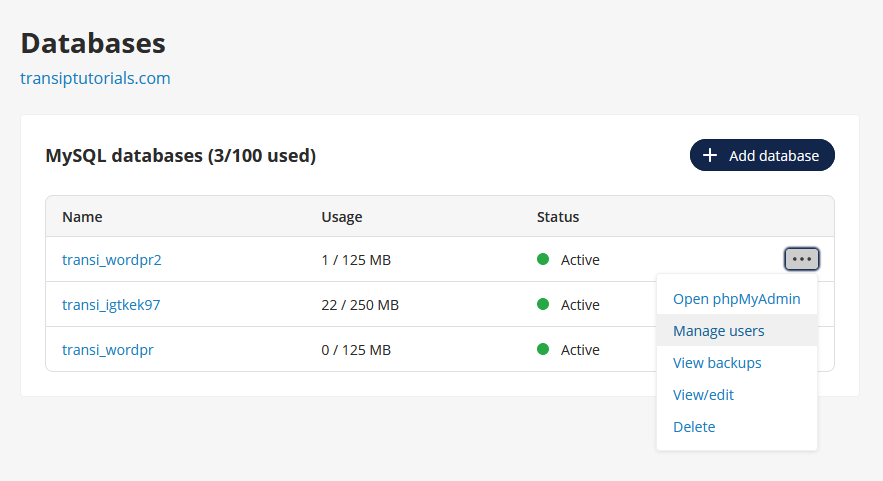
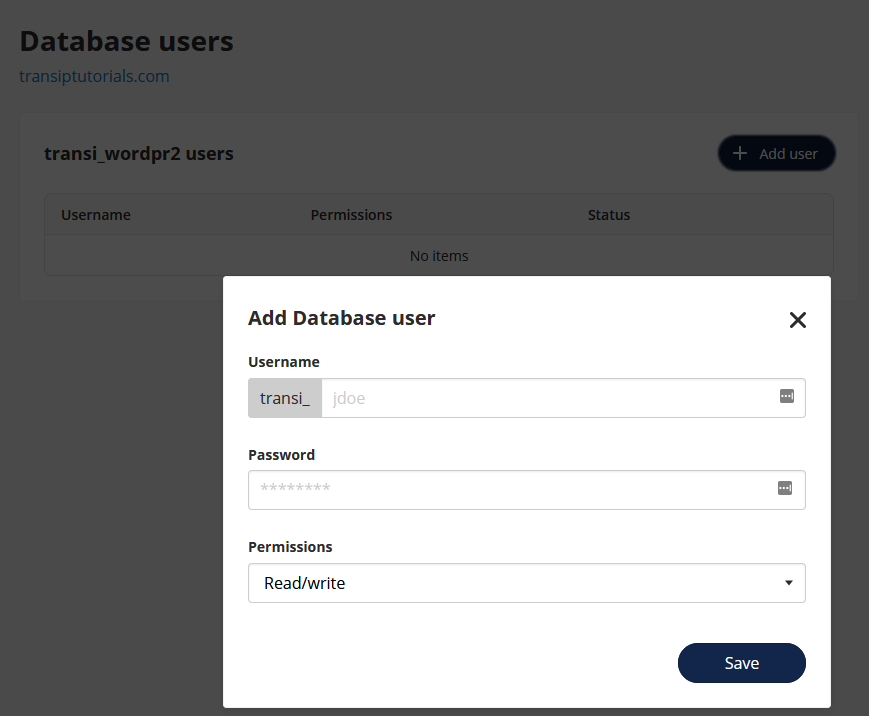
After a few moments your database will become active. To be able to log in, you first need to create a database user. Click the three dots on the right of your database, followed by 'Manage Users'
Click '+ Add user' to set a username and password.
Step 5
Click the three dots again, followed by 'Open phpMyAdmin' to log in to phpMyAdmin automatically.

The password of your database
In case you've lost the password of your database, we recommend opening the configuration file of your website as the database password is stored there in most cases. The configuration file of your website is usually a config.php or wp-config.php file (for WordPress) and is stored in the www folder of your website. This file contains the login details that your website is currently using to connect to the database.
You can use 'SFTP filemanagement' to navigate to the 'www' folder, in which you will find the (wp-)config.php file.
Open the configuration file file and navigate to the following line:
/** MySQL database password */
define('DB_PASSWORD', 'passwordexample');
This password (in our example passwordexample, we recommend using a stronger password) is used to log in to the database, as stated in Step 4.
Below the password of your database in the config file, you will find the hostname:
/** MySQL hostname */
define('DB_HOST', 'hostname_here');
When your website uses a database on a TransIP webhosting package, you will find the hostname by clicking the database name in your database overview (see step 1 and 2).
If you wish to change the password of your database, keep in mind that this password will have to be changed in the configuration file of your website as well.
To change the password of your database, visit the database overview in your control panel. Click the three dots next to your database and select 'Manage users'. Click on a username to set a new password for that user.
As mentioned before, the changed password has to be changed in the configuration file of your website as well. If you do not change it in this file, your website will not be able to connect to the database, resulting in your website becoming temporarily unavailable.
In order to change the password in the configuration file of your website, download the file using SFTP filemanagement in your control panel.
Open the www folder and search for the configuration file (config.php or wp-config.php). Select the file by clicking it and click 'Download' to download the file.
Now open the file with a simple text editor such as 'Notepad++' and look for the old password (see the code block above).
Take note: Do not use an advanced text editor such as Word. These editors add hidden markup, rendering the file unusable.
Now replace the old password with the new password and save the configuration file. Next, upload the updated configuration file to the same location it was previously in (usually the www folder of your website).
- If you have an active WordPress website, we recommend not changing the password of your database. In stead, look up the current password in the wp-config.php file and use that password.
- It is only possible to connect to your database via your website or with phpMyAdmin. Due to safety reasons it is not possible to connect to a database on a TransIP webhosting package from an external server.
- If you use a different type of website, you may have to provide the database with content yourself. In case you wish to tinker with your database, we recommend doing research on editing databases, as the smallest adjustments to a database can have major consequences.
In this article we explained how to create and manage a database on your web hosting package.
Should you have any questions left regarding this article, do not hesitate to contact our support department. You can reach them via the 'Contact us' button at the bottom of this page and via the 'Contact' button inside your control panel.
If you wish to discuss this article with other users, feel free to leave a comment below.