This tutorial will show you how to use an IPv6 address alongside your IPv4 address on your OpenStack instance. Please note that while creating an OpenStack instance it is also possible to automatically assign an IPv6 address.
In OpenStack, you cannot set an IPv6 and IPv4 address on the same interface simultaneously. In this tutorial, you'll create a second interface to which you'll attach the IPv6 address.
This tutorial is written for the following operating systems:
- Ubuntu 20.04, Ubuntu 22.04, and Debian 11
- Ubuntu 18.04 and Debian 10
- CentOS 7+, Alma Linux 8+, and Rocky Linux 8+
- Windows (from 'Windows Server 2016')
Step 1
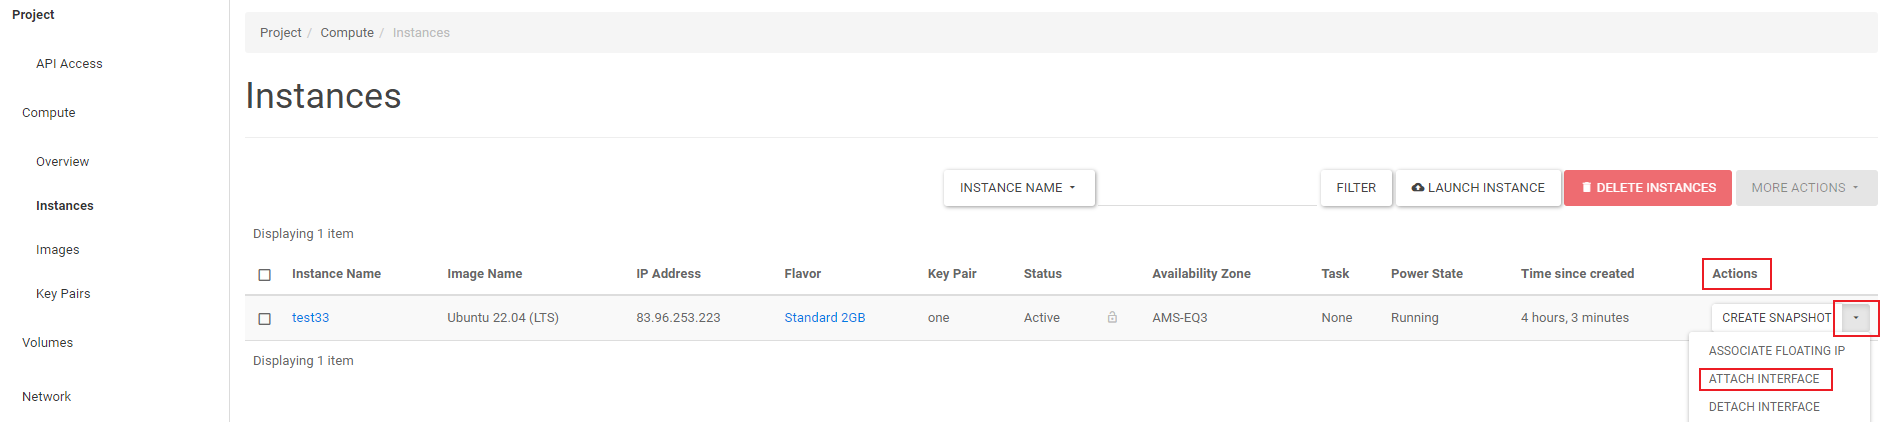
Log in to the Horizon web interface of OpenStack, and in the left menu under 'Compute', click on 'Instances'.
Step 2
To the right of the instance, under 'Actions', click the down arrow. In the drop-down menu, click 'Attach Interface'.
Step 3
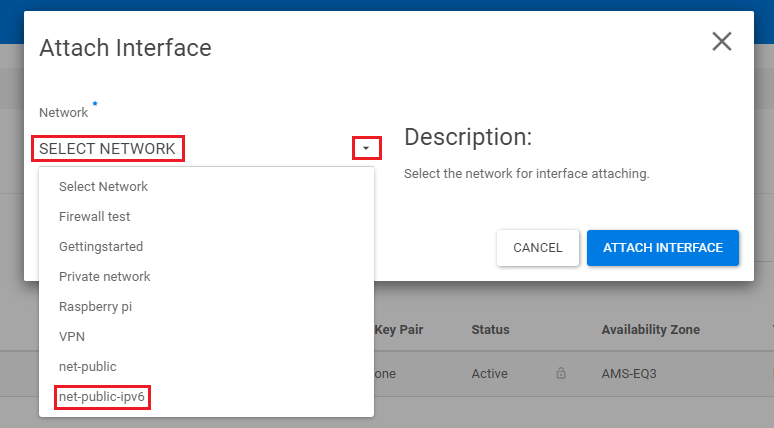
Click the down arrow next to 'Select Network' and select 'net-public-ipv6' from the drop-down menu.
Step 4
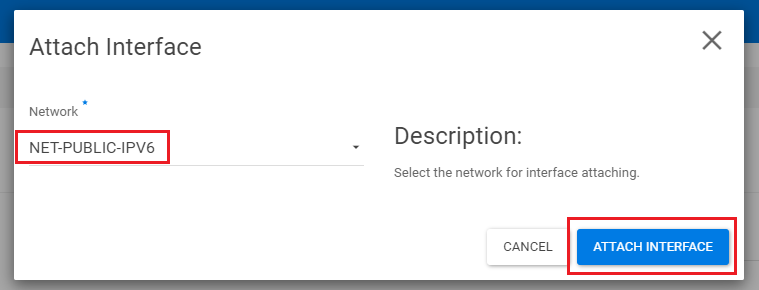
You will now see 'Network net-public-ipv6' below. Click 'Attach Interface' at the bottom right to attach the interface to the instance.
Step 5
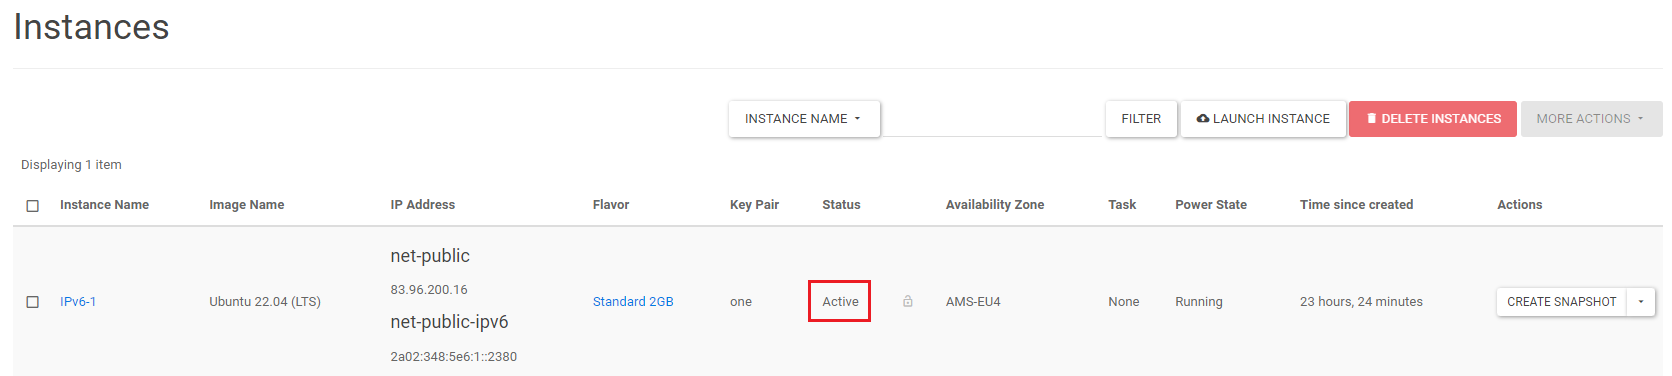
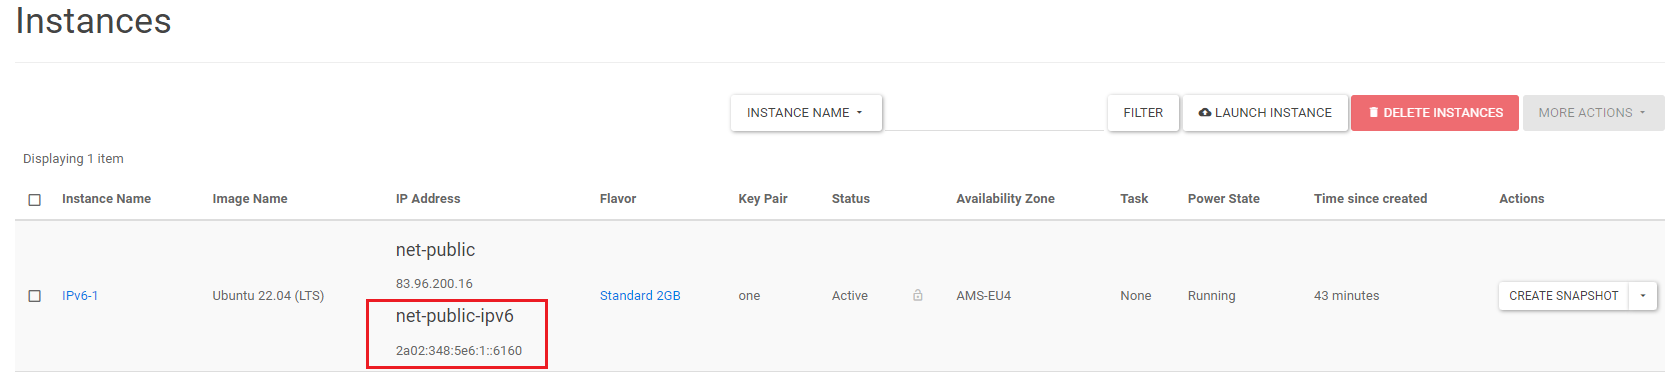
The IPv6 address is now attached to the instance. You will see the IPv6 address (net-public-ipv6) listed alongside your IPv4 address (net-public).
Configuring IPv6 on Your Instance
Step 1
First, configure the IPv6 address on your instance. For Linux distributions, click the arrow next to your used distro/operating system, or use one of our guides for configuring the IP address of your instance on our VPS platform. See this overview.
For Windows Server installations, go directly to Step 2. Windows Server 2016 and later versions will automatically add the second interface.
Step 1
Log in using ssh to access the command-line and use the following command to open the 'interfaces' file in the Nano text editor.
sudo nano /etc/network/interfaces
Step 2
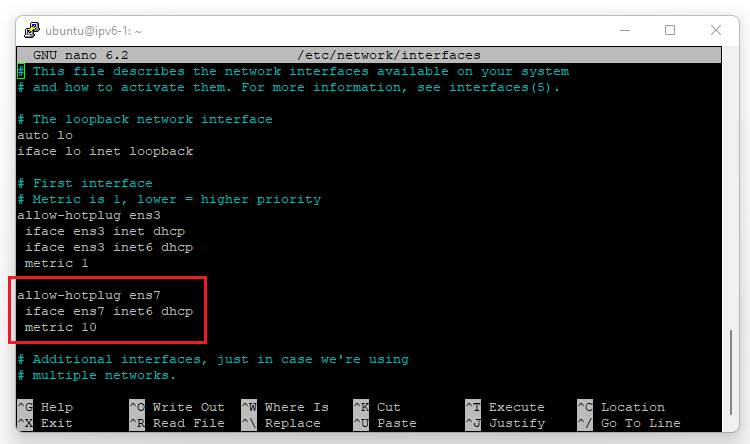
Paste or type the following code below the existing interface, as shown in the image below. Save the changes and close the file with ctrl + x > y > enter.
allow-hotplug ens7
iface ens7 inet6 dhcp
metric 10
Step 3
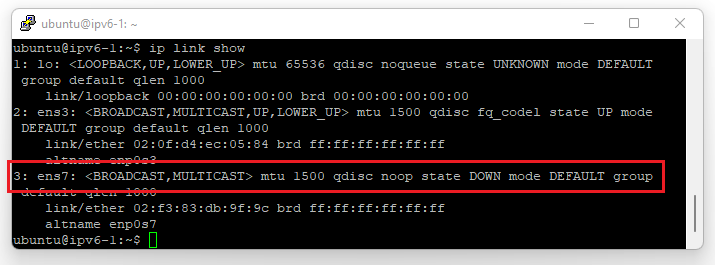
Check your network interfaces using the command:
ip link show
You will now see that the 'ens7' interface is in the 'DOWN' state, meaning the interface is not yet active.
Step 4
Activate the 'ens7' interface by changing its state to 'up' using the following command:
sudo ip link set dev ens7 up
Step 5
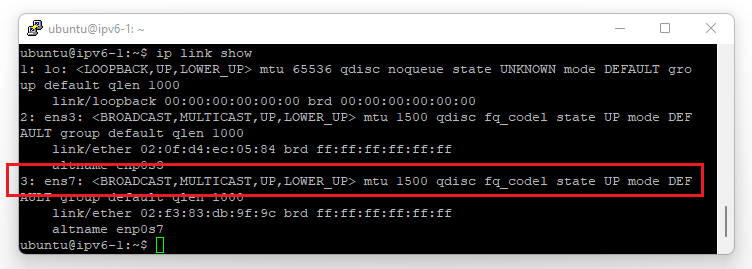
Check your network interfaces using the command:
ip link show
You will now see that the 'ens7' interface is in the 'UP' state.
Step 1
Log in using ssh to access the command-line and use the following command to open the 'interfaces' file in the Nano text editor.
sudo nano /etc/network/interfaces
Step 2
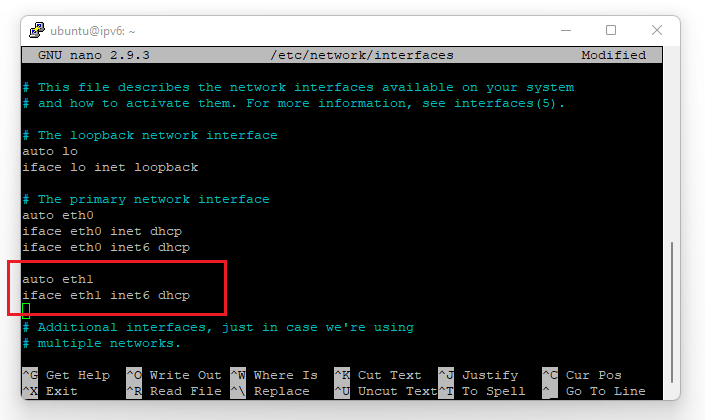
Paste or type the following code below the existing interface, as shown in the image below. Save the changes and close the file with ctrl + x > y > enter.
auto eth1
iface eth1 inet6 dhcp
Step 3
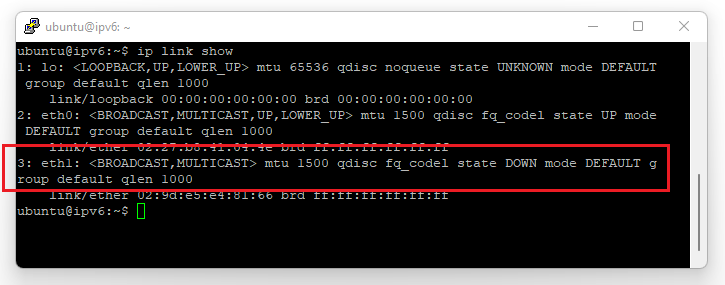
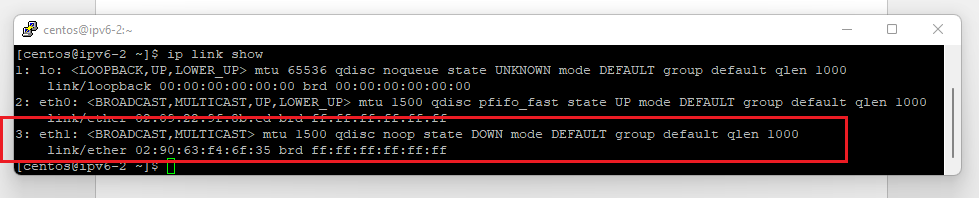
Check your network interfaces using the command.
ip link show
You will now see that the 'eth1' interface is in the 'DOWN' state. This means the interface is not yet active.
Step 4
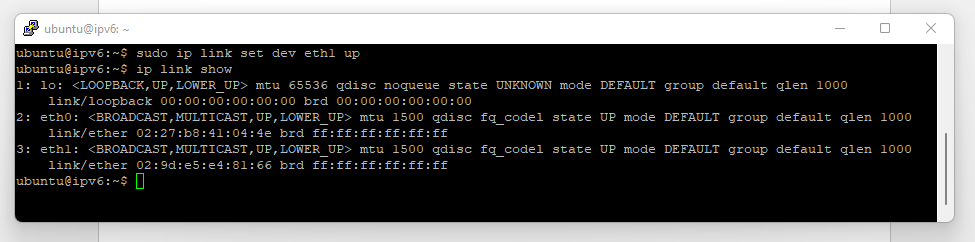
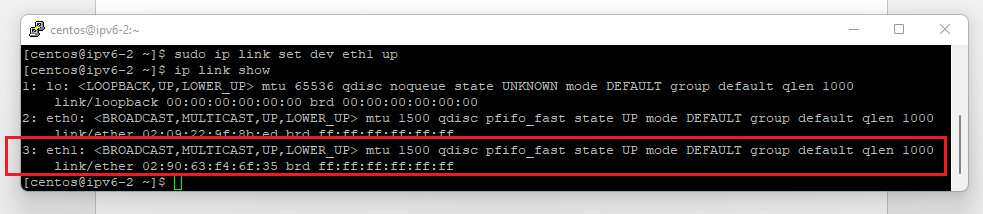
Activate the 'eth1' interface by changing its state to 'up' using the following command:
sudo ip link set dev eth1 up
Step 5
Check your network interfaces using the command.
ip link show
You will now see that the 'eth1' interface is in the 'UP' state.
Step 1
Log in via ssh to access the command-line. Type the following command on the command line to create an empty file 'ifcfg-eth1' using the Nano text editor.
sudo nano /etc/sysconfig/network-scripts/ifcfg-eth1
Step 2
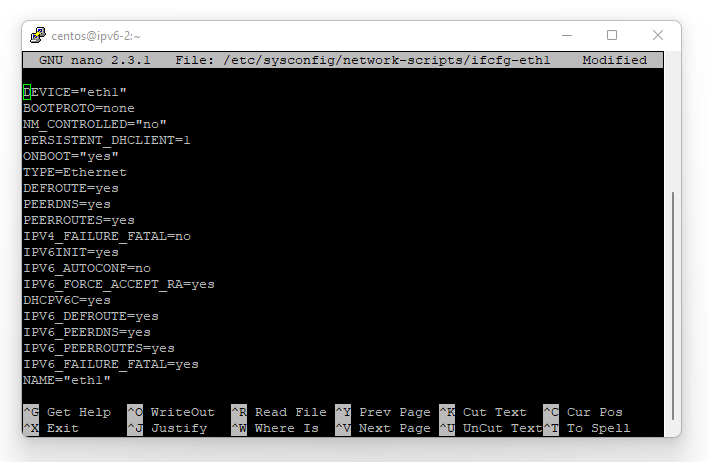
Paste or type the following code into the empty file to add the IPv6 interface, as shown in the image below. Save the changes and close the file with ctrl + x > y > enter.
DEVICE="eth1"
BOOTPROTO=none
NM_CONTROLLED="no"
PERSISTENT_DHCLIENT=1
ONBOOT="yes"
TYPE=Ethernet
DEFROUTE=yes
PEERDNS=yes
PEERROUTES=yes
IPV4_FAILURE_FATAL=no
IPV6INIT=yes
IPV6_AUTOCONF=no
IPV6_FORCE_ACCEPT_RA=yes
DHCPV6C=yes
IPV6_DEFROUTE=yes
IPV6_PEERDNS=yes
IPV6_PEERROUTES=yes
IPV6_FAILURE_FATAL=yes
NAME="eth1"
Step 3
Check your network interfaces using the command.
ip link show
You will now see that the 'eth1' interface is in the 'DOWN' state. This means the interface is not yet active.
Step 4
Activate the 'eth1' interface by changing its state to 'up' using the following command:
sudo ip link set dev eth1 up
Step 5
Check your network interfaces using the command.
ip link show
You will now see that the 'eth1' interface is in the 'UP' state.
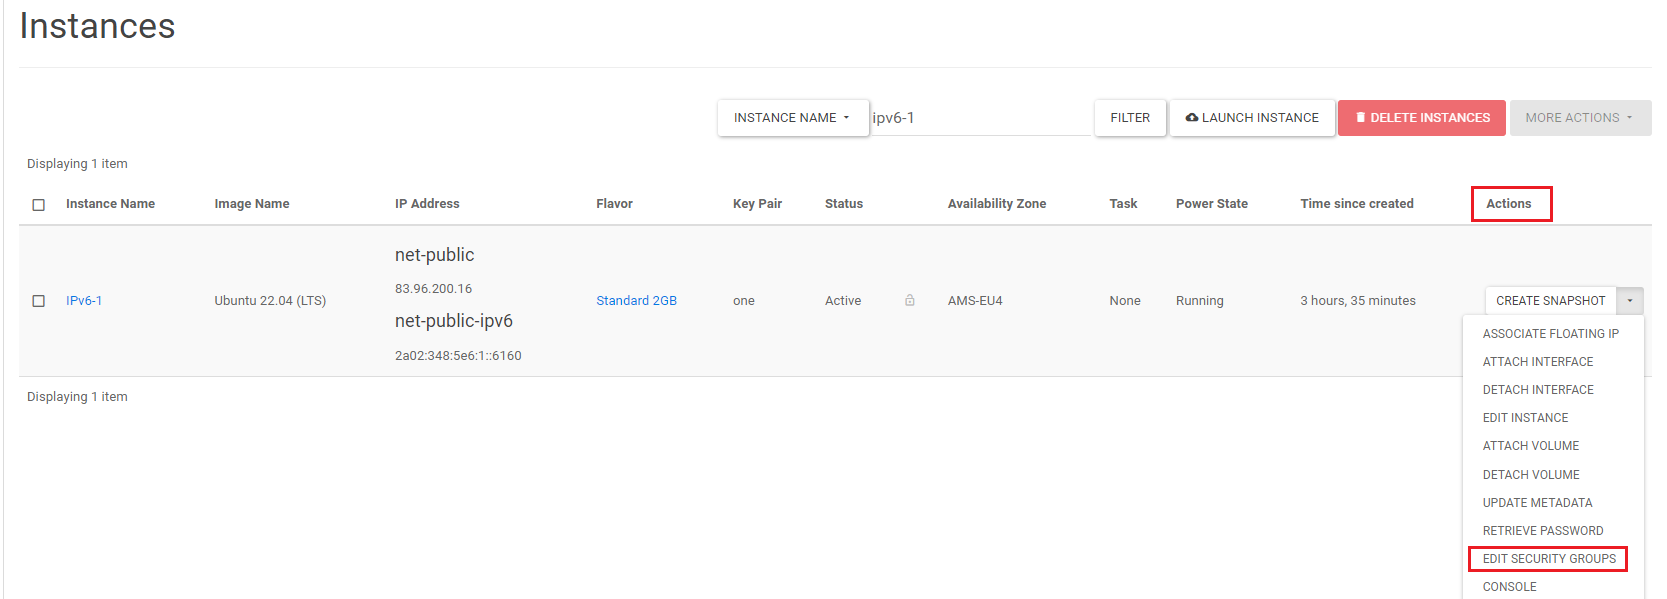
Since the new IPv6 address doesn't automatically include existing security groups, you need to re-add the security groups to the instance to get the IPv6 address working.
On the right side of the instance under 'Actions', click the downward arrow, then click 'Edit Security Groups' in the dropdown menu.
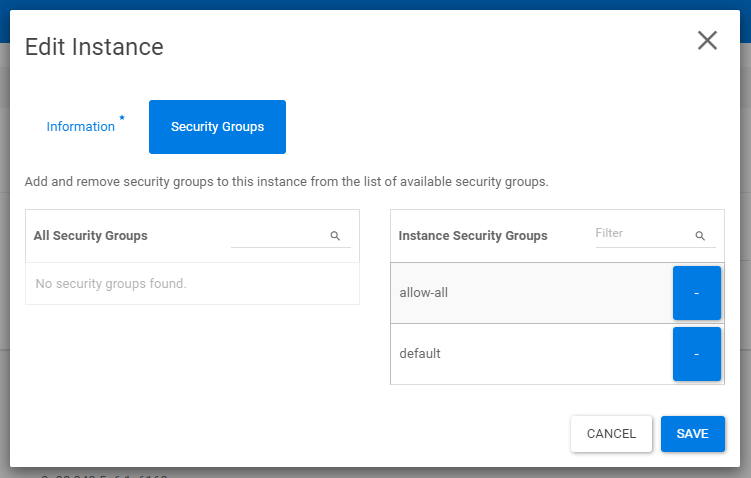
Step 3
A pop-up titled 'Edit Instance' will appear. Click 'Save' to re-add the security groups.
Step 4
To apply the changes to the instance, it needs to be rebooted. Save your work and shut down the instance from the operating system's command line.
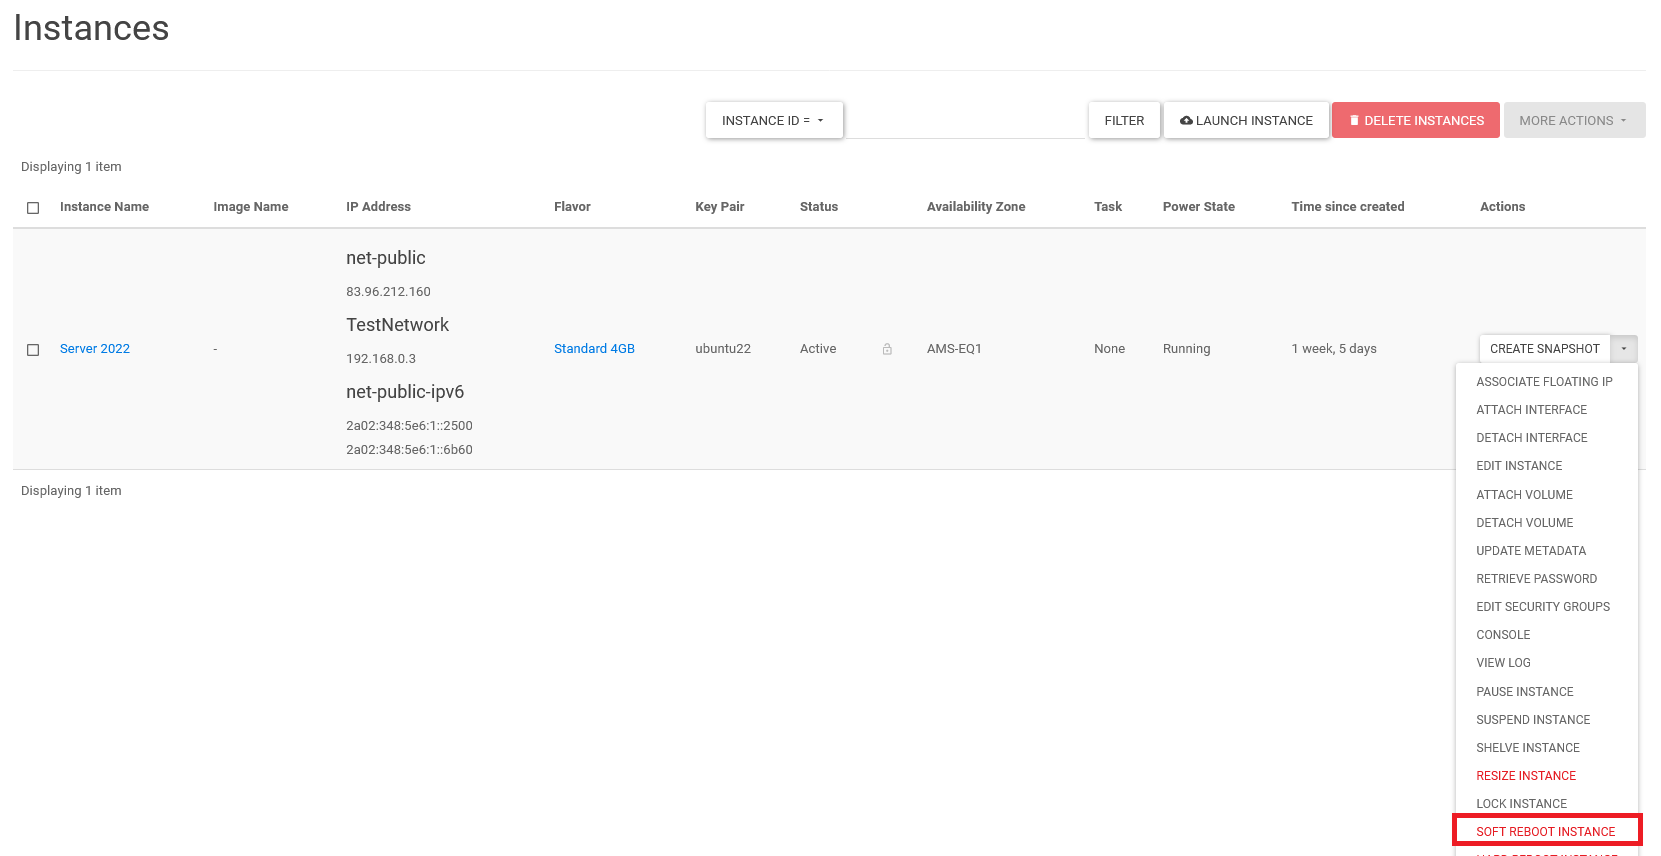
On the right side of the instance under 'Actions', click the downward arrow. Then click 'Soft Reboot Instance' in the dropdown menu.
Step 5
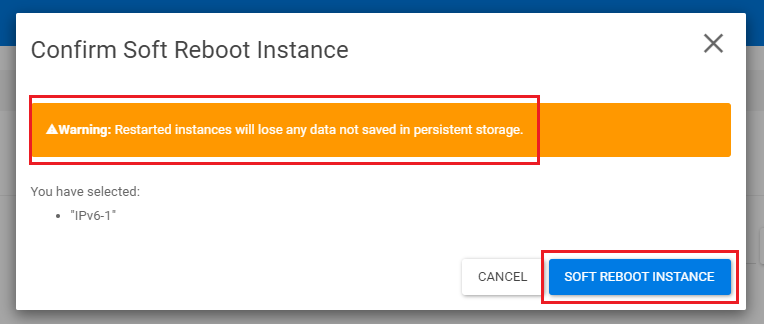
In the confirmation window at the bottom-right, click the 'Soft Reboot Instance' button in the pop-up to restart the instance. The 'Warning' indicates that if you haven't saved the changes, they will be lost. If you've followed all the steps in this guide carefully, you can ignore this warning.
Below the 'Reboot Started' bar, you will see that the instance is booting up. In most cases, the reboot process will take up to half a minute.

Once this process is complete, the instance will be back to the 'Active' state and ready to use. Congratulations! You now have a working IPv6 address on your instance.