This is the fifth part of our DirectAdmin Tutorial Series. If you are planning a new VPS, then we recommend starting with part 1 and to not skip any parts.
Uploading your website to your VPS
In this chapter, we show you how to upload your website to your VPS. To upload your site, you can use FTPS or the DirectAdmin File Manager. We prefer FTPS since the DirectAdmin File Manager does not offer an easy option to upload files in bulk.
After reading this section, use the following manuals if you want to install WordPress, Joomla, or Drupal on your DirectAdmin VPS. These manuals can only be used after you have created a database (see the explanation in this article)!
Creating and importing a database
Websites often use an SQL database. In this section, we show you how, in addition to uploading your website, you also create a database and import your existing database into it. Don’t use a database for your website? Then after uploading your site, directly proceed to chapter 6 to set up your email.
DirectAdmin uses phpMyAdmin to manage databases. Before you can use phpMyAdmin and you can import your database, you first have to create a database.
Using SSL on your website
If your website processes confidential data of customers (for example a web store), it is important to secure your website with SSL. You enable SSL after you have placed your website online. DirectAdmin offers you two SSL options:
- Use your own certificate
- Free Let's Encrypt SSL certificates
In this article, we explain how to install your own SSL certificate or Let's Encrypt in DirectAdmin.
FTPS
DirectAdmin is automatically configured to use FTPS. You do not need to make any configuration changes and you can start using FTPS immediately.
FTPS is more secure than FTP and uses an SSL connection. DirectAdmin automatically uses self-signed certificates for this FTPS connection. Further information about FTP, FTPS, SFTP, and related terms can be found in our article on the differences between FTP, FTPS, and SFTP.
Step 1
With DirectAdmin, you can use out-of-the-box FTPS for your 'admin' account. If you only use DirectAdmin yourself, proceed to step 4.
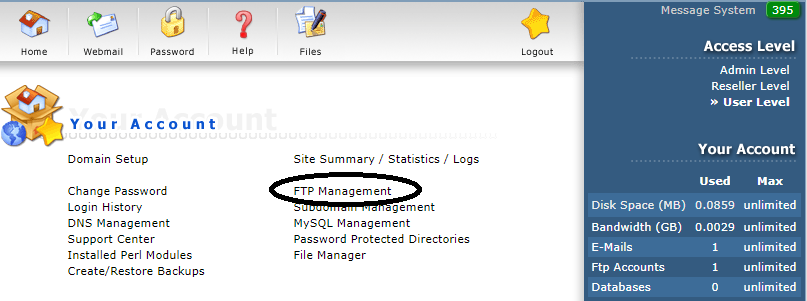
Resellers and regular users need a private or shared FTP account if you want to give them permission to edit a website via FTPS. First, log in to DirectAdmin at 'User Level' and click 'FTP Management' to create an FTP account for this.
Step 2
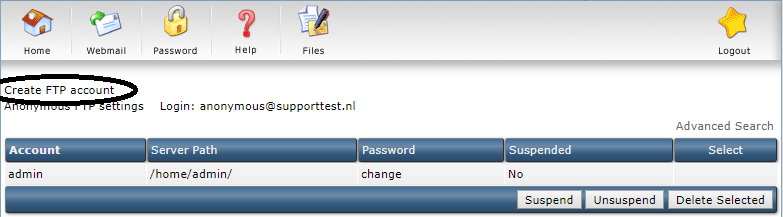
An overview of your FTP users appears. Click on 'Create FTP account' to create an FTP user account.
Step 3
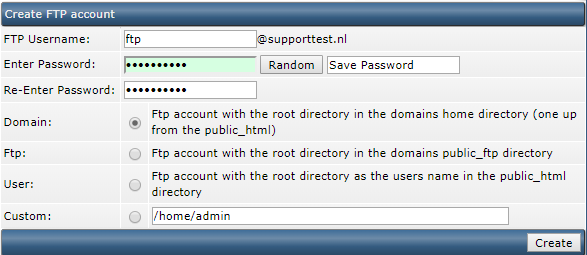
Your new FTP account will always use @yourdomainname.com as the name. Fill in the fields and select Domain as the level of access. Domain is generally preferred because the FTP user has access to data that is important for the domain:
- logs: Useful for retrieving error messages and the like.
- htpasswd: For securing elements of your site (this is beyond the scope of this manual).
- public_ftp: This folder is used for anonymous FTP access. For security reasons, anonymous access is disabled by default.
- public_html: This is the folder in which you place your site.
- stats: usage statistics from your site are stored in this folder.
You now actually upload your website to your VPS. We use the FileZilla program in this manual and recommend using FileZilla to follow these steps one by one.
Start FileZilla and click 'File'> 'Site Manager'> 'New Site' and then enter the data as in the example below and click 'Connect'.
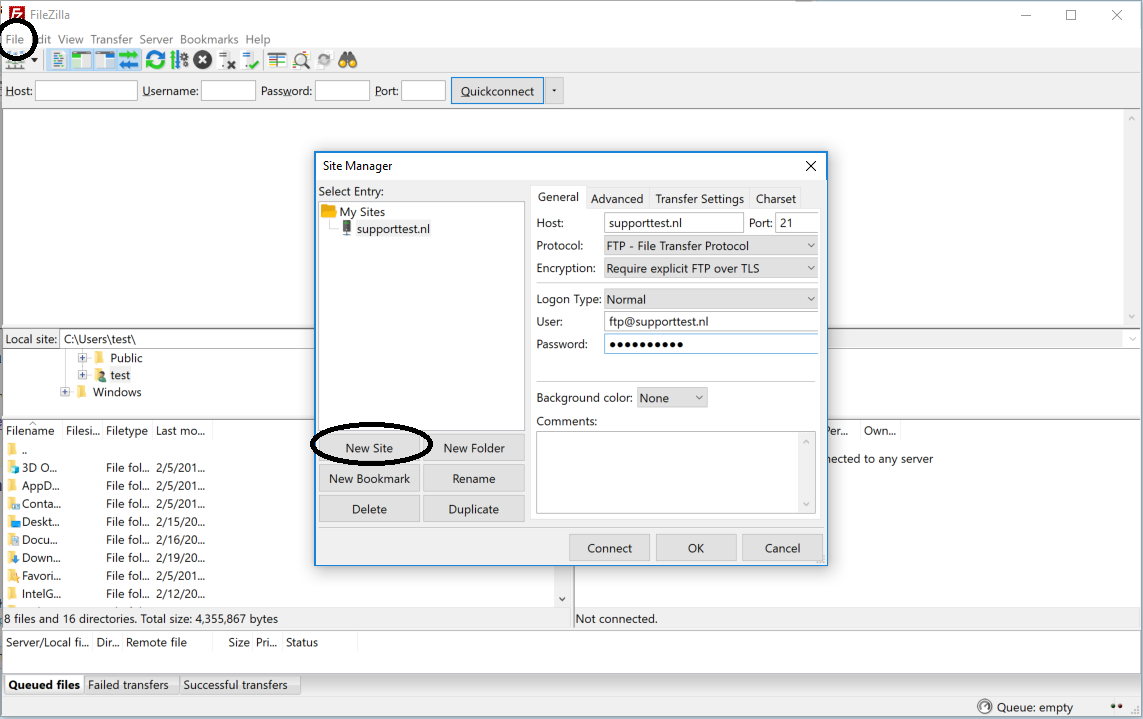
- Host: This is the name of your domain. In the above example, this is supporttest.nl
- Port: Use port 21 for this. DirectAdmin is configured to use FTPS over port 21.
- Protocol: Select the 'FTP File Transfer Protocol'.
- Encryption: Change this option to 'Require explicit FTP over TLS'. For optimum safety, this is mandatory and not optional.
- Logon Type: Change 'Logon Type' to 'Normal'. Using this option, you specify that a username and password is required for connecting to your VPS via FTPS.
- User: The username you created under step 3 or your 'admin' user. In the latter case, only enter 'admin' under 'User' as the name.
- Password: Enter the password of the relevant user. For the 'admin' user, this is the password that is sent in the delivery email and that you also use to login to DirectAdmin as an admin.
Step 5
You will be greeted by the message in the screenshot below. This message is shown because the certificates that DirectAdmin automatically generates for your TLS connection use the corresponding domain name (in this example supporttest.com).
FileZilla expects that the hostname of your VPS which you specified during the ordering and installation of your VPS is actually listed under 'Host'. However, this is no objection to the use of FTPS.
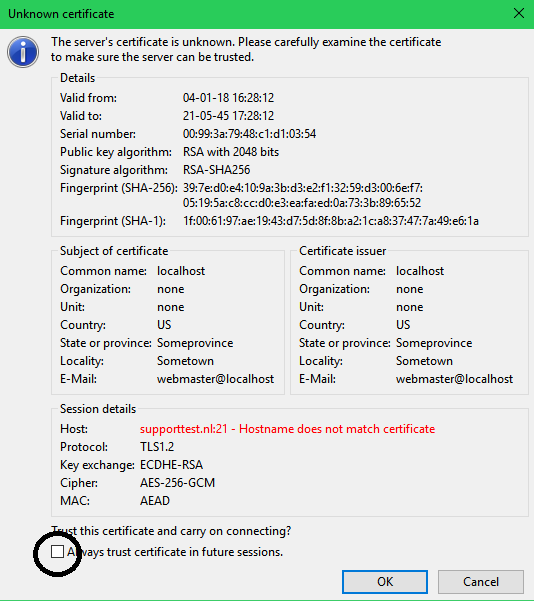
Select 'Always trust certificate in future sessions' and click 'Ok'.
Step 6
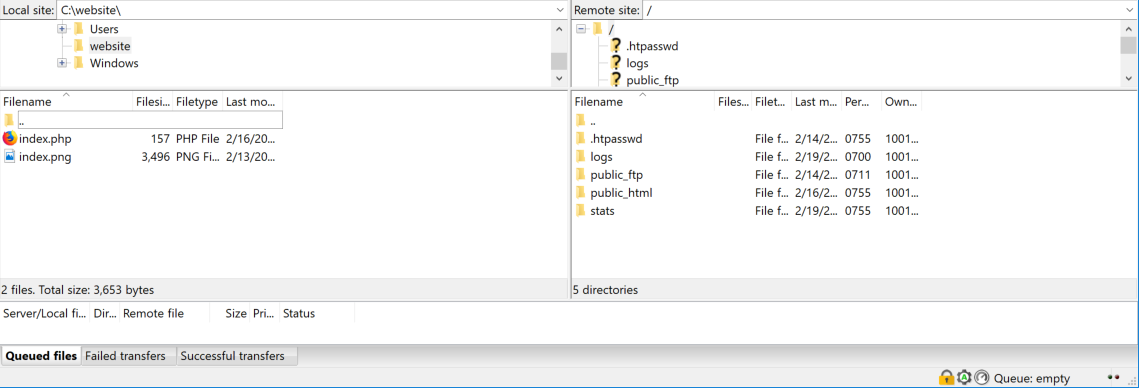
In FileZilla, under 'Local site', you navigate to the folder on your computer where your website is located and under 'Remote site', you click on 'public_html'.
Step 7
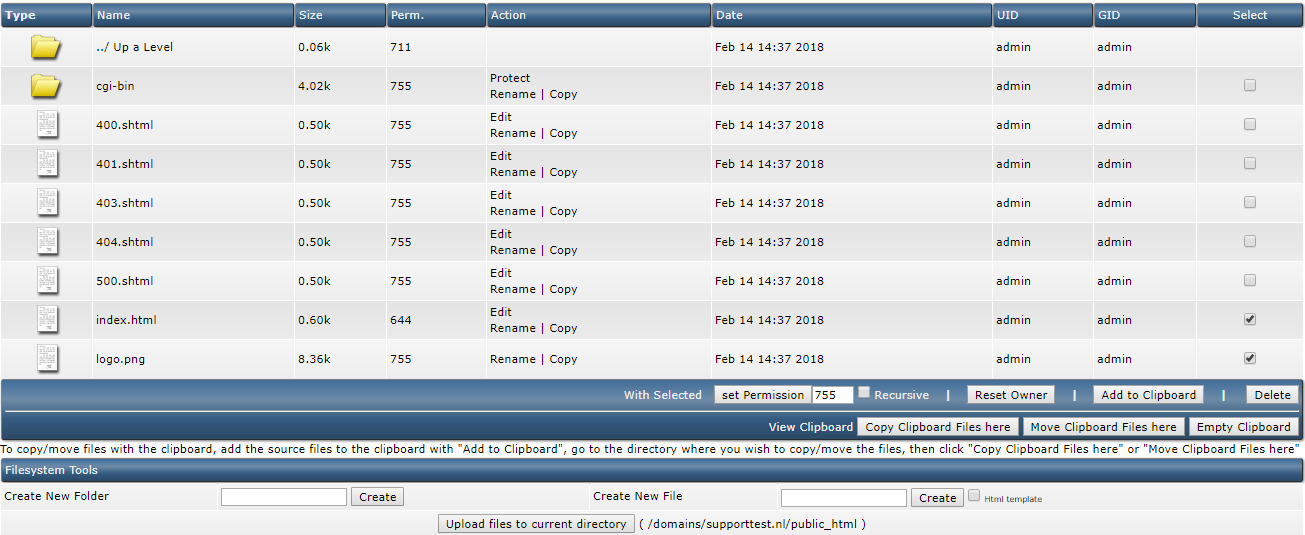
With a new VPS, you will see that the public_html folder already contains a number of files. The 400, 401, 403, 404 and 500.shtml files are used if your site would trigger one of these error codes (400, 401, etc.).
- Select the index.html and logo.png files and press delete to delete them. These files are only placeholders until you put your own site online.
- Then select the files and folders that you want to upload to your website on your computer and drag them to the right to the public_html folder

Your website is now online! If you do not have a database linked to your website, it is immediately visible online.
The DirectAdmin File Manager
The DirectAdmin File Manager is especially suitable if you want to upload some files, or for example, want to delete or move files. The File Manager has no option to upload files in bulk. If you want to upload more than +- ten files at a time, we recommend using FTPS.
Step 1
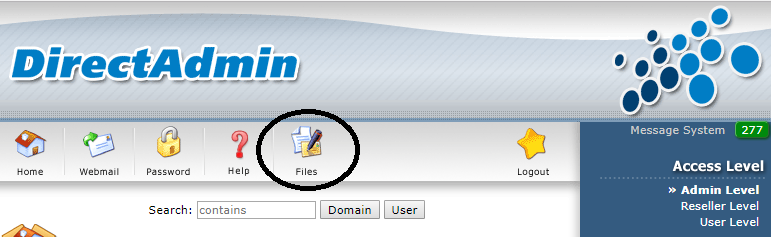
Log in to DirectAdmin and click the 'Files' button. Do you only host one domain? Then click 'public_html' and continue to Step 4.
Step 2
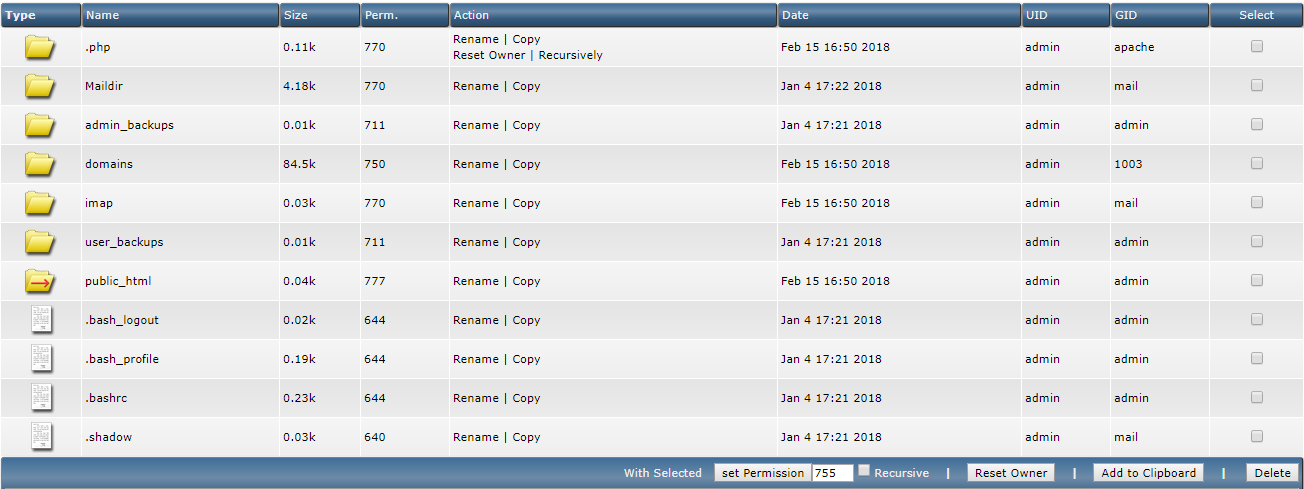
You now see an overview of the folders and files. Click 'Domains'
Step 3
Click the name of your domain. In this manual we use supporttest.nl.

Click 'public_html'. This is the folder in which you place your site.

With a new VPS, you will see that the public_html folder already contains a number of files. The 400, 401, 403, 404 and 500.shtml files are used when your site would trigger one of these error codes (400, 401, etc.). Delete the index.html and logo.png files; these are only placeholders until you put your own site online.
Then click 'Upload files to current directory'.
Step 5
Click 'Choose file' to select a file and then 'Upload Files' to upload your selected files.

Your uploaded files are now immediately visible on your site.
Creating an SQL database
In the steps below, you create an SQL database. Most websites use a database, e.g. to store customer data.
Step 1
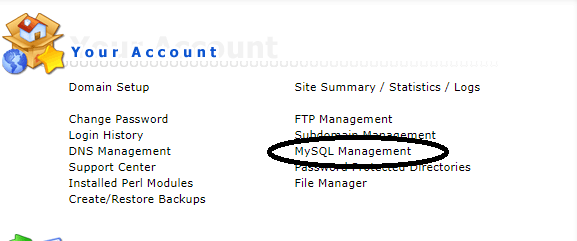
Log in to DirectAdmin at 'User Level' and click 'MySQL Management'.
Step 2
Click 'Create new Database' to create a database.

Step 3
Then enter the database name, username, and password and click 'create'.
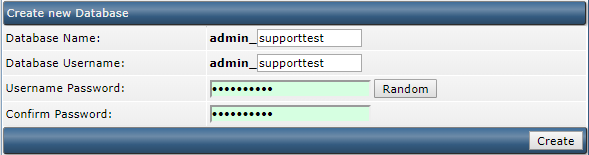
DirectAdmin uses the name of the user you are logged in with the addition _ for the database name and username. In the above example, this is admin_.
Step 4
You will now see the confirmation below. Click 'Here' to return to the overview of your databases.
Importing your database
If you already have an existing website that you want to host on your VPS, then you probably have a corresponding database. The steps below show you how to import your existing database.
Step 1
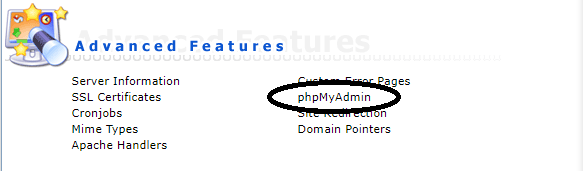
Now that you have created a database in the previous steps, you can import your existing database. Click 'Home' in the top left and then 'phpMyAdmin' under 'Advanced Features'.
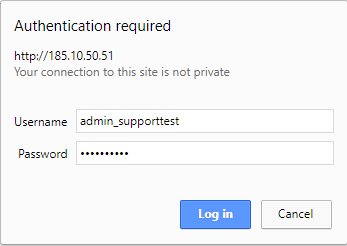
Step 2
A login screen then appears. To log in, use the username and password that you previously set when creating your database above.
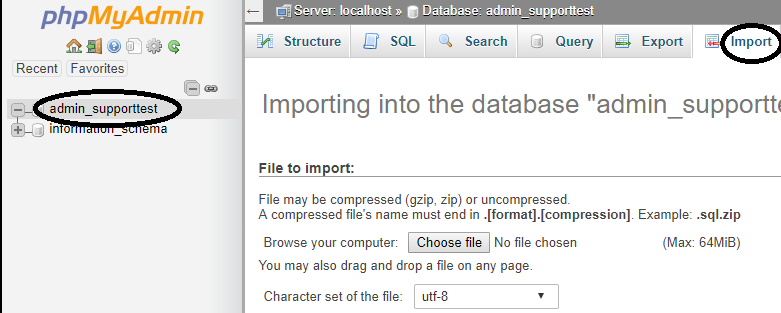
Step 3
You will now enter the main screen of phpMyAdmin. Click the name of your database at the top left and then click 'Import'. In the example below this is 'admin_supporttest'.
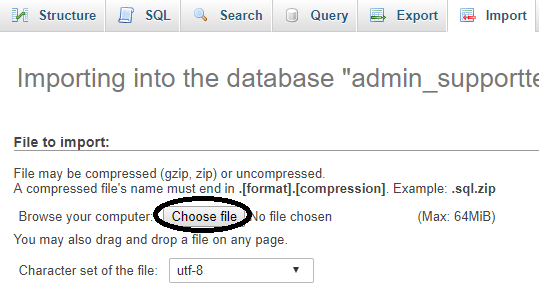
Step 4
Click 'Choose file' and select your database on your computer.
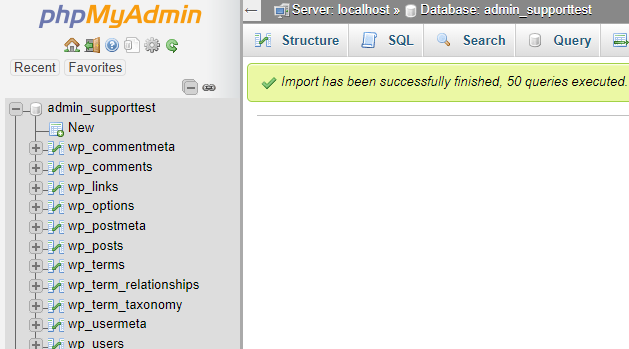
Step 5
Click 'Go' at the bottom left to upload your database to your VPS.

You will see a success report and immediately see the tables in the left overview within your database.
Please note: if your site uses a database, do not forget to check that you set the correct database name, user, server and associated password in the configuration file on your site.
In the setup that we use for this manual, it looks like this:
$servername = "localhost";
$username = "admin_supporttest";
$password = "**********";
$db = "admin_supporttest";
Adjusting the PHP version per domain
In part 3 of this tutorial series, you have installed two different versions of PHP. For each domain, you can adjust which version you use by following the steps below.
Step 1
Log in to DirectAdmin at 'User Level'. There are 2 options depending on whether you host one or more domains on your VPS.
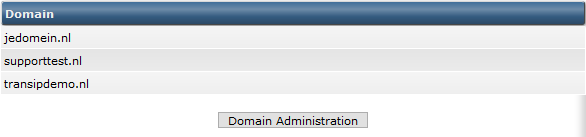
- Multiple domains: Click 'Domain Administration'.
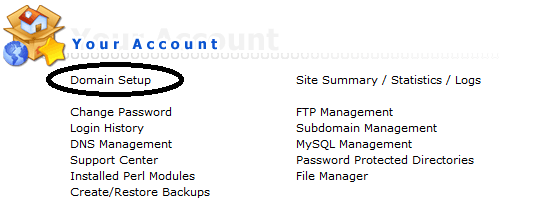
- One domain: Click 'Domain Setup'.
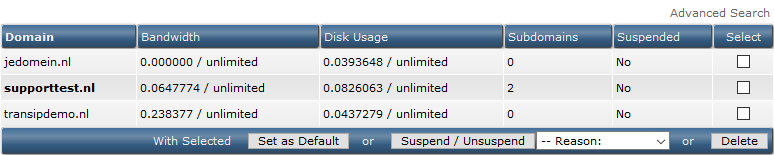
Step 2
Click the name of your domain. You will then see an overview of the general settings of your domain.
Step 3
Adjust the value of 'First PHP' and 'Second PHP' at the bottom under the heading 'PHP Version Selector', select the version number you want to use as 'First PHP'. Finally, click 'Save' to save the change.

Your website is now accessible to the entire world! Proceed to the next section ‘Part 6: Creating and using email addresses' to, amongst other things, create email addresses for your domain and to find out the email settings for your domain, or go to 'Part 7: Additional articles and other questions' if you do not use email for your domain.
Should you have any questions left regarding this article, do not hesitate to contact our support department. You can reach them via the ‘Contact Us’ button at the bottom of this page.
If you want to discuss this article with other users, please leave a message under 'Comments'.