In this guide we'll show you how to install Microsoft SQL Server 2016, 2017 or 2019 on your Windows VPS. In order to test the installation, we've made use of Windows Server 2016 and SQL Server 2016 - Standard and a Windows Server 2019 with SQL Server 2017 - Standard and SQL Server 2019 - Web.
Please note that you are free to use newer Windows Server versions while following this guide. On this page you can find more information about the differences between SQL Server Web, Standard and Enterprise. You'll find the download link of the ISO for SQL Server in your control panel. No license key is required, it's built into your custom download link.
You can order an SQL Server license on this page if you don't have a license yet.
Before you begin
- In this guide we'll assume the basic configuration of your VPS is completed and that you've configured an Active Directory (AD). It's important that your Active Directory is installed on a different VPS than the one you'll install SQL Server on.
- The latest java runtime environment must be installed on your VPS. You can download this from the Oracle website.
- The installation process is higly similar for MS SQL 2016, 2017 and 2019. When we speak of MS SQL or SQL Server in this article, we reference any of these three versions.
- Please note! This is relatively complex material so it's recommended to first create a snapshot of your VPS prior to performing the steps in this guide. In case of a misconfiguration a snapshot will allow you to revert back to a previous state.
Installing MS SQL Server
Step 1
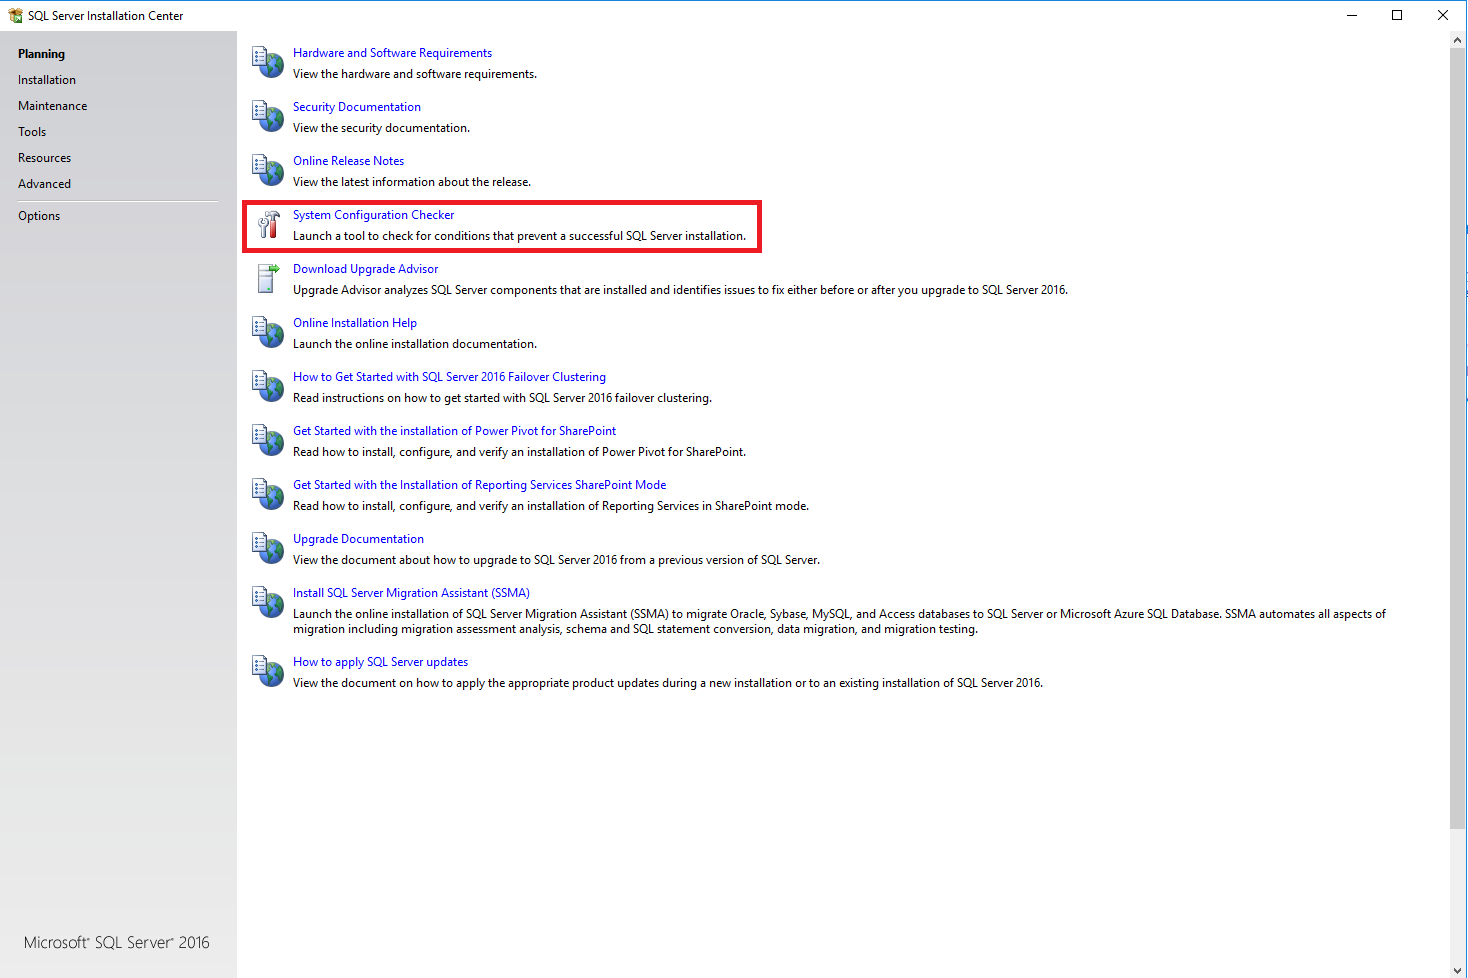
When starting the installation for the first time you'll be greeted by the screen below. This mainly concerns documentation about SQL Server. We recommend reading the documentation to help you determine exactly what features your SQL Server installation requires. Microsoft SQL Server is fairly complex and offers a very wide range of installation options. In this guide we'll focus on the basic requirements.
First click on the option 'System Configuration Checker'. Using this you'll perform a check on your VPS to determine if it meets all prerequisites, which will help you tackle problems before starting the actual installation.
Below you'll see the results of the 'System Configuration Checker' and the requirements for the installation. Should any of the checks produce an error you'll be able to click on 'warning' (or 'error') for more information.
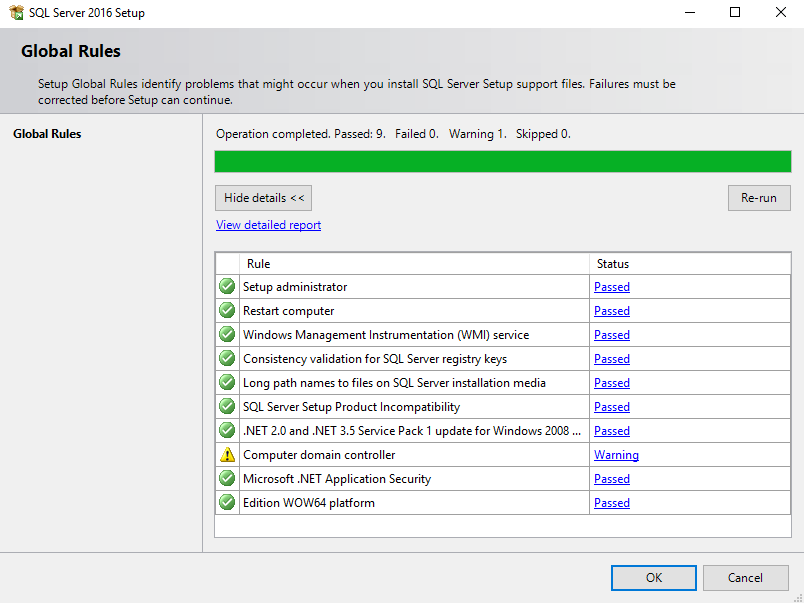
In this case we received a warning because our demo VPS is also our Domain controller (AD), which is why we'll ignore this warning. From a security point of view however, we recommend installing SQL Server and your Domain controller (AD) on two different VPS'es in your production environment.
Step 3
After performing the pre-installation checks we'll start the actual installation. Click on 'Installation' in the menu on the left hand side and select the first option 'New SQL Server stand-alone installation or add features to an existing installation'.
The installation of a single-node SQL Server failover cluster and R Server (Machine Learning Server) fall outside the scope of this guide.
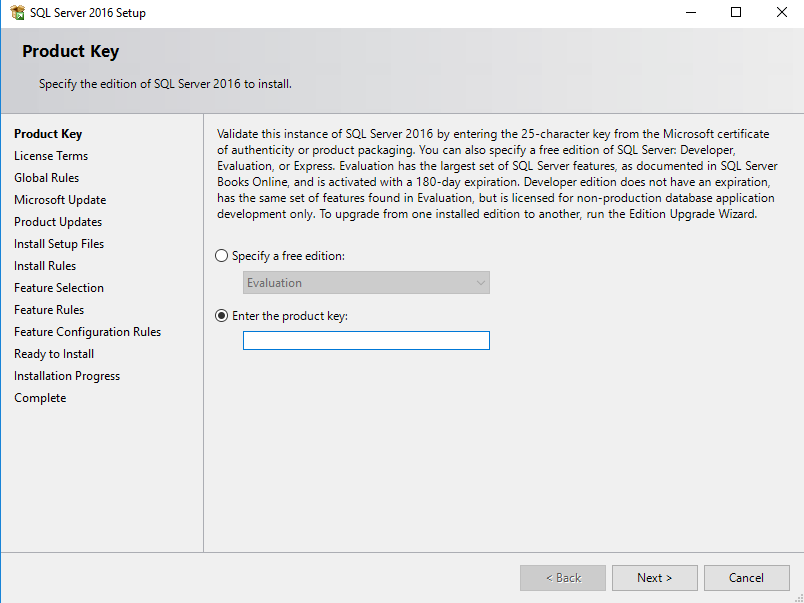
Step 4
Your license will be prefilled on this page. You need not make any adjustments and can proceed to the next step right away.
Step 5
Read the license terms of SQL Server and accept them.
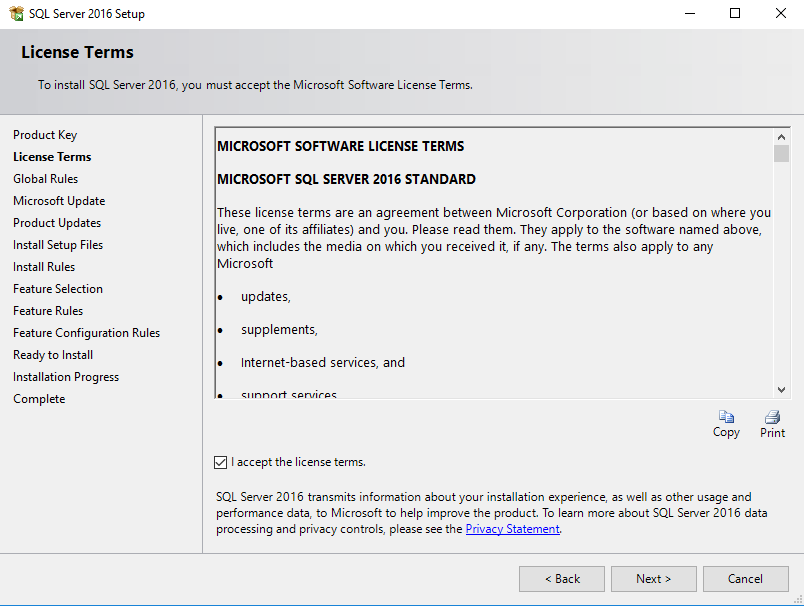
This will be followed by a Global Rules check, but with an up-to-date installation of your Windows Server including the basis components this check will be performed so quickly that it appears as though it has been skipped.
Step 6
For security reasons it's always advisable to keep your Windows Server and your software up to date. As such we'll choose for the option to use Microsoft Update to keep SQL Server up to date automatically.
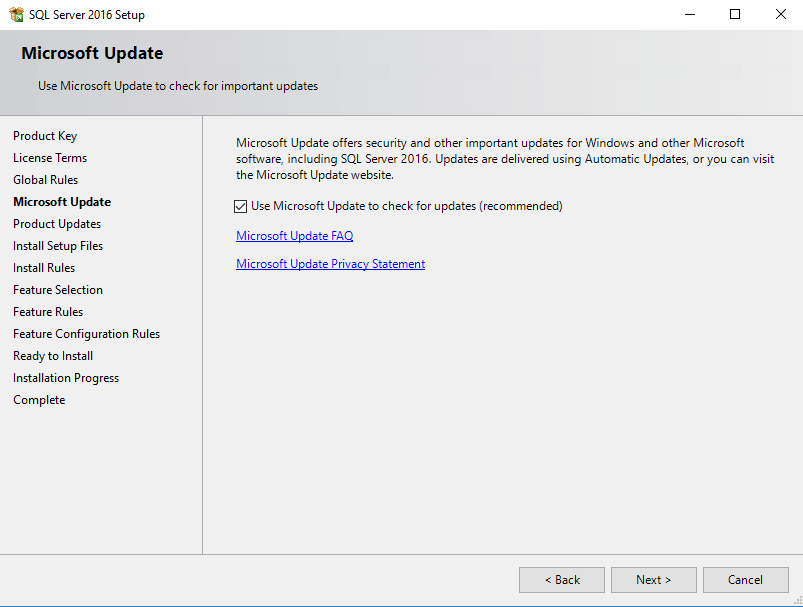
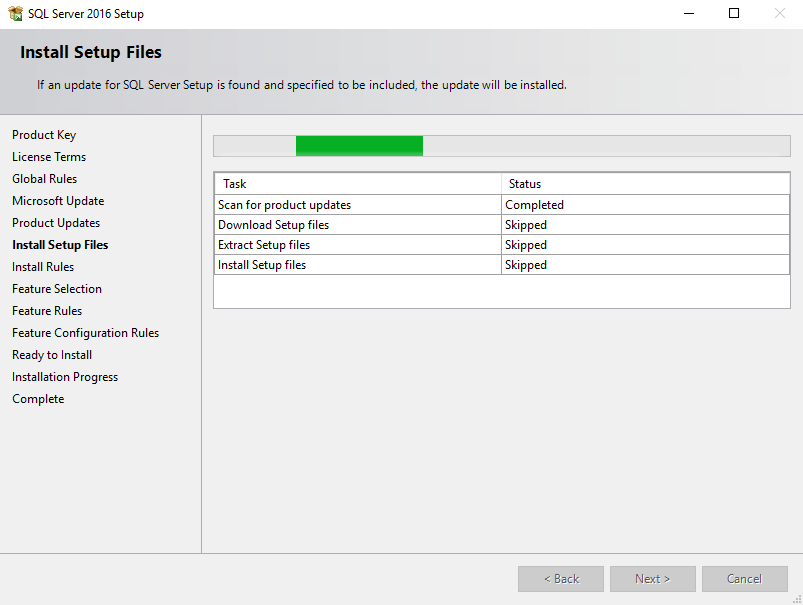
After this step you may receive a notification at 'Product Updates' that for example a critical update is missing. You can click on 'Next' to have it installed automatically as part of the SQL Server installation. 'Install Setup Files' will appear briefly to install any missing components, or to indicate that all required components have already been installed.
Step 7
If there are any issues requiring your attention you'll see this on the 'Install Rules' page. In our installation we received the following two warnings:
- Our VPS is also the domain controller (see step 2). For security reasons we don't recommend installing SQL Server on a domain controller in your production environment, but this is no problem for an internal test setup.
- Windows firewall rules have not yet been configured for SQL Server. This won't prevent you from installing SQL Server and can be done afterwards. See this manual for configuring your firewall.
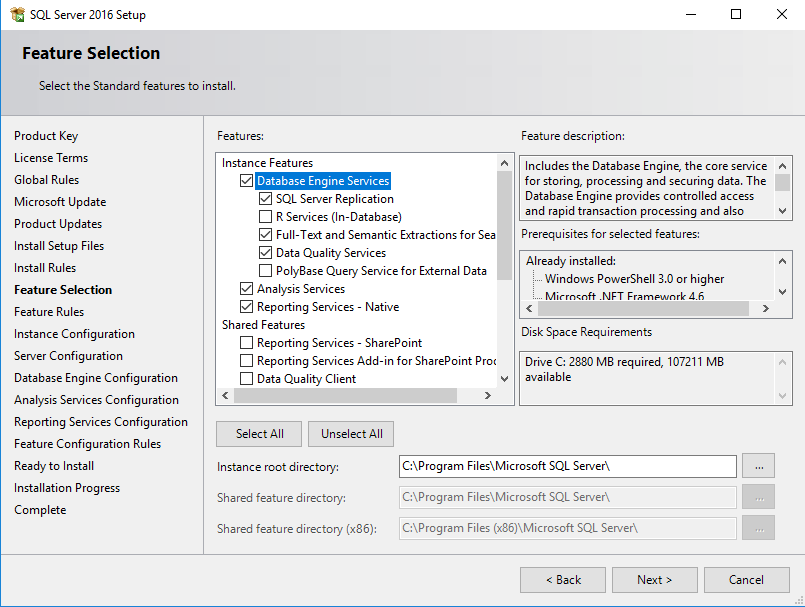
Step 8
Select the features you'd like to install under 'Features Selection'. The selection depends on the functionality you need from your SQL Server. In our guide we'll install basic features. A brief description of each feature can be found under 'Feature description', or in more detail on this page.
Data Quality Services is included automatically in MS SQL 2019. In addition, you'll notice the following new features:
- Machine Learning Services and Languages: Unlike what the name suggests, the primary goal of this feature is to add support for R, Python en Java by means of T-SQL statements to MS SQL.
- Full-Text and Semantic Extractions for Search: A useful feature which adds a Search Engine to MS SQL which speeds up text searches in MS SQL databases.
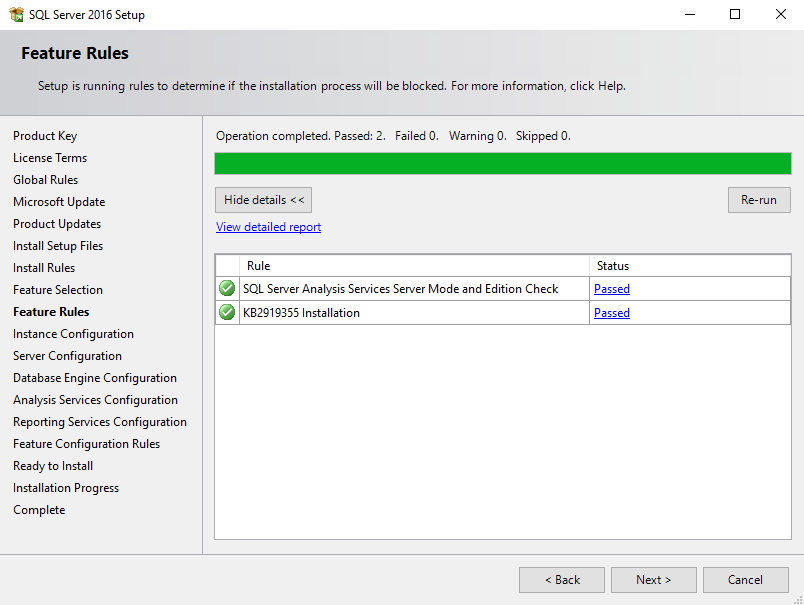
Step 9
The 'Feature Rules' step checks if the selected features can be installed and if there are any missing components (e.g. an update) and will offer the option to install them along with SQL Server 2016 or 2017.
Step 10
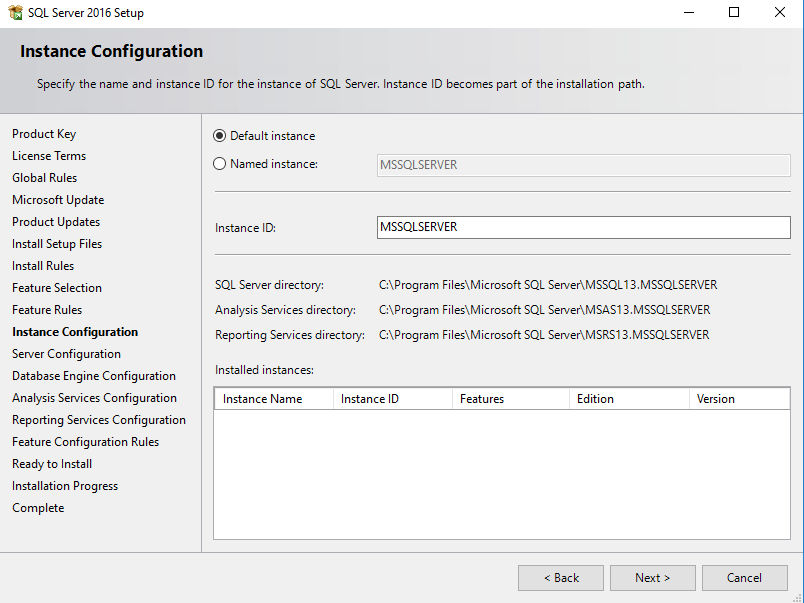
Choose 'Default Instance' when installing a single instance of SQL Server on your VPS. You can also perform multiple installations of SQL Server on a single VPS. In that case you should select 'Named Instance'.
Step 11
In the 'Server configuration' step you'll indicate which user account uses which of the services of SQL Server. By default SQL Server provides virtual accounts, as seen in the screenshot below. These are automatically managed and can contact the AD network using the account details of the VPS.
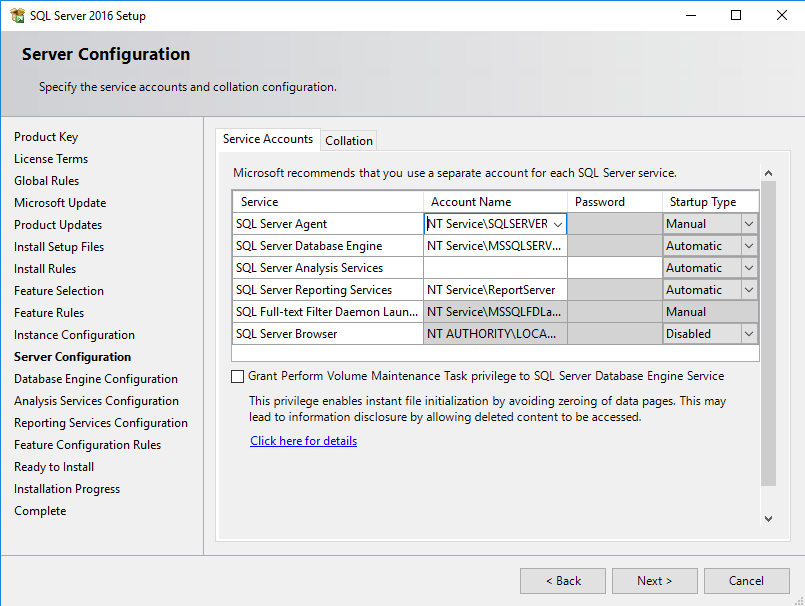
It's preferable to use a specific user which is managed from the Active Directory.
Ideally you'll use a unique user account for each service in this overview. The provided password should be strong or you will see the error 'Invalid or missing username or password. To continue, provide valid credentials for the SQL Server Agent Service'.
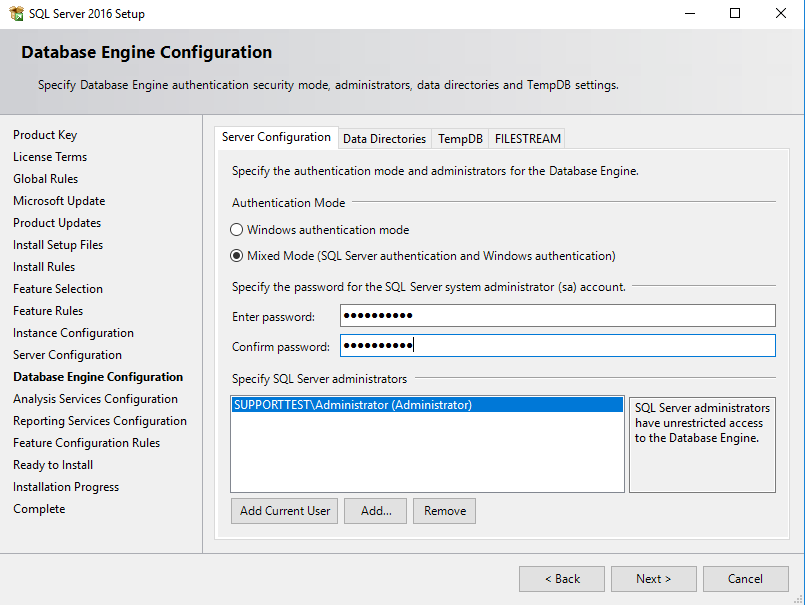
Select 'Mixed Mode', after which you'll need to provide an administrator account. If you're connected using the account 'administrator' (or another admin account) you can click on 'Add Current User' in order to quickly add the current user. In the 'enter password' and 'confirm password' fields you will have to provide the password for the current user.
Step 13
In the tab 'Data directories' you can change the directories used for this installation. This can be useful for example if you'd like to store your data on a Big Storage disk and / or place your back-ups on a different disk.
MS SQL 2019 + : 2 tabs are added to respectively control MS SQL's CPU and RAM usage, called 'MaxDOP' (amount of cores which are used in paralel to run an SQL statement) and 'Memory'. The values are automatically filled by MS SQL ingevuld. You're not required to change these.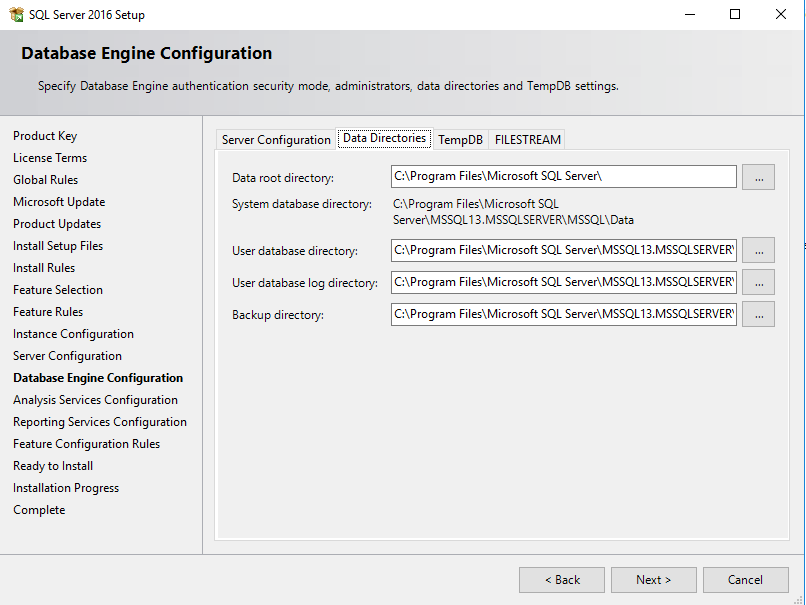
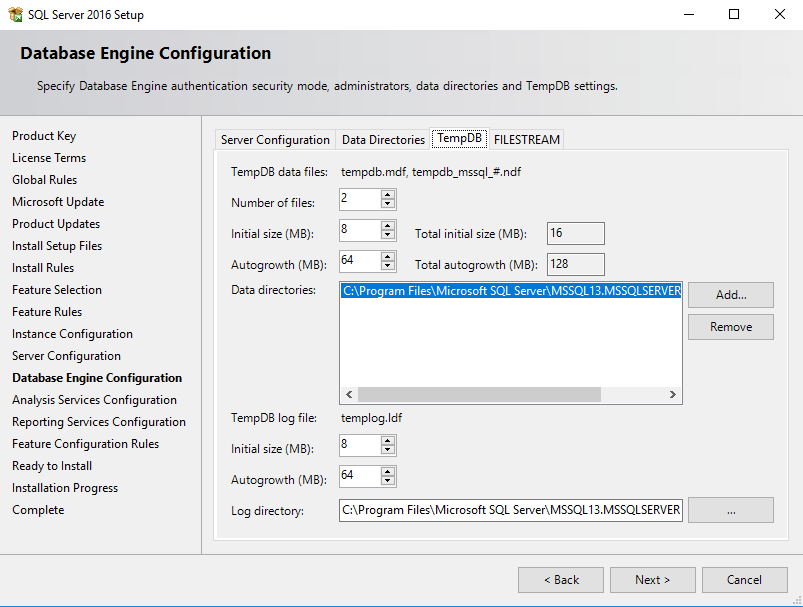
Step 14
No adjustments arenecessary in the 'TempDB' tab. The initial size can be increased afterwards manually. Changing the value during the installation can increase the installation time of SQL Server.
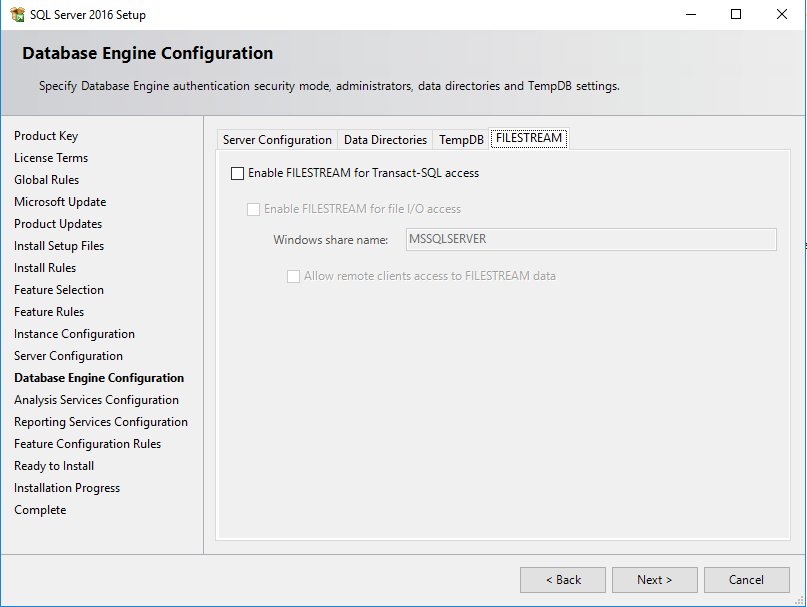
Step 15
Under 'FILESTREAM' you can leave the settings as they are. Usually you won't require the listed options. You can find more information about FILESTREAM here.
MS SQL 2019: this step is no longer present as it's part of the integrated installation of the Data Quality Services.
The step 'Analysis Services Configuration' provides three installation options. We select 'Multidimensional and Data Mining Mode' for this installation. In short the differences are:
- Multidimensional and Data Mining Mode: Using this option you'll install Analysis Services with support for online analytical processing databases and data minig models.
- Tabular mode: Tabular models are Analysis Services databases which operate in-memory or in DirectQuery mode, and retrieve data directly from backend data sources. This is mainly used to accomodate functionality between MOLAP and a relational database.
See this page from the Microsoft website under 'Model features' for an overview of the differences between Multidimensional and Tabular Analysis Services.
- Power Pivot: Select this option if you'll be using SQL Server in combination with SharePoint.
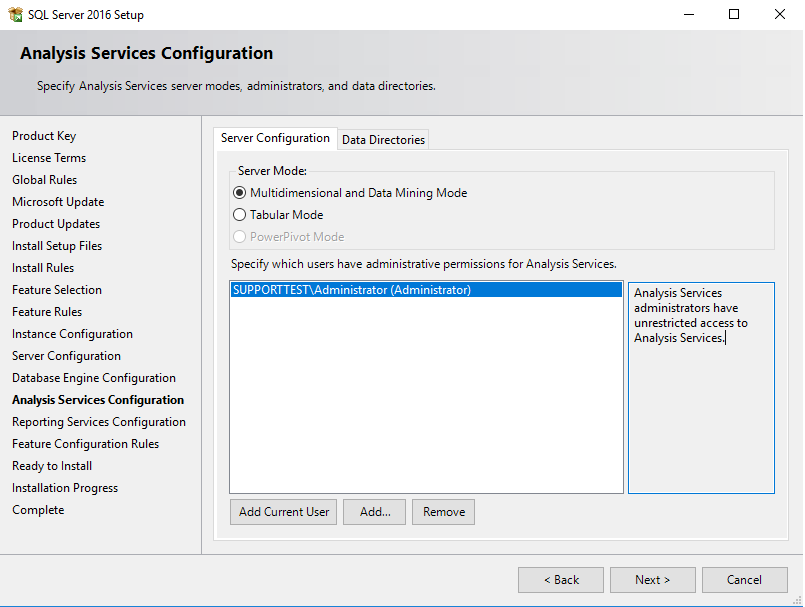
Click 'Add Current User' to authorize your account for Analysis Services (like in step 12). You can provide more than one user.
Step 17
MS SQL 2019: this step is no longer present as it's part of the integrated installation of the Data Quality Services.
Select 'Install and configure' under 'Reporting Services Configuration'.
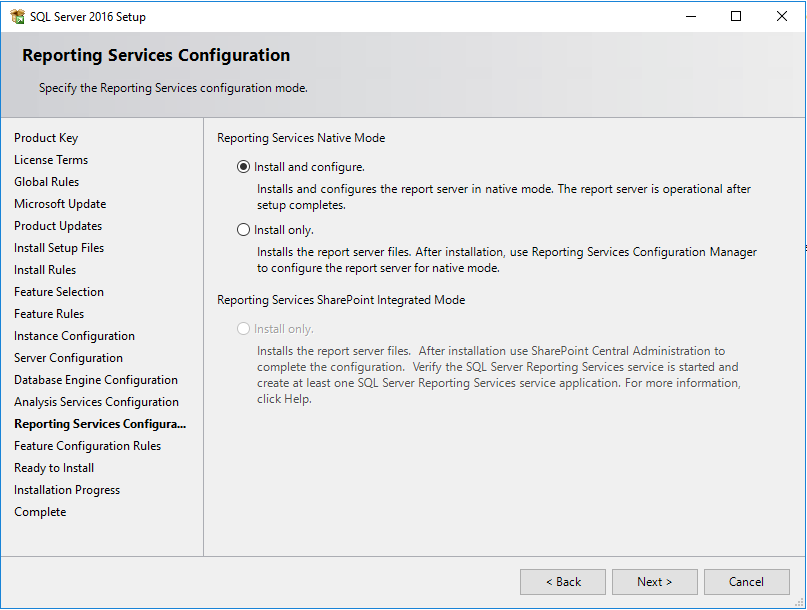
In our installation only 'Native Mode' is available. The option 'Reporting Services SharePoint Integrated Mode' is meant for using SQL Server in combination with SharePoint (see step 16).
Step 18
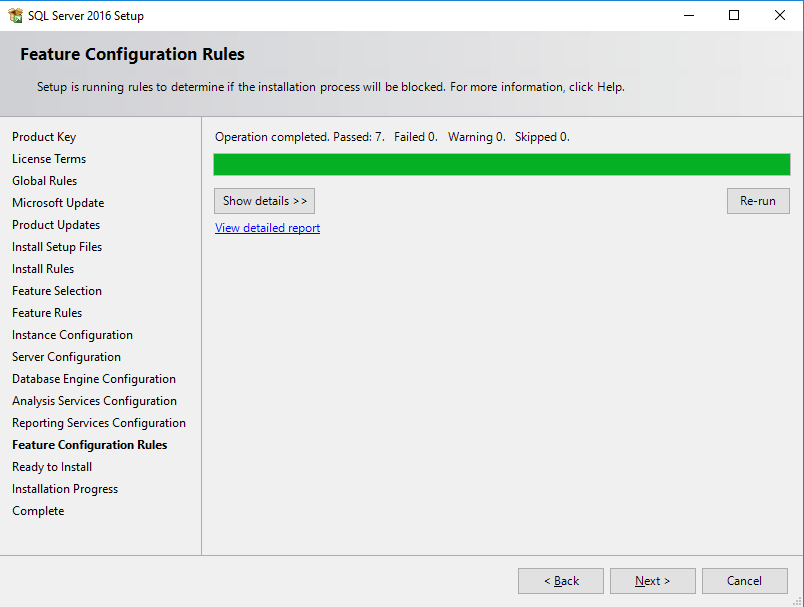
The step 'Feature Configuration Rules' is another automated check in order to determine whether the installation can proceed with the current selections. This check will normally be done so quickly that you may not see it at all and immediately arrive at 'Ready to Install'.
Step 19
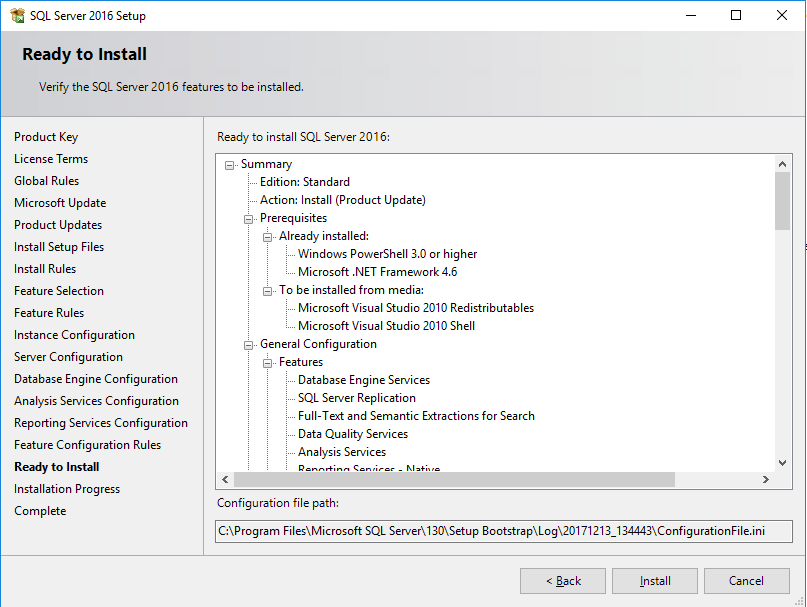
You'll now see an overview of the features selected for the installation of your SQL Server and the location of your configuration file. Click 'Install' after having reviewed the options.
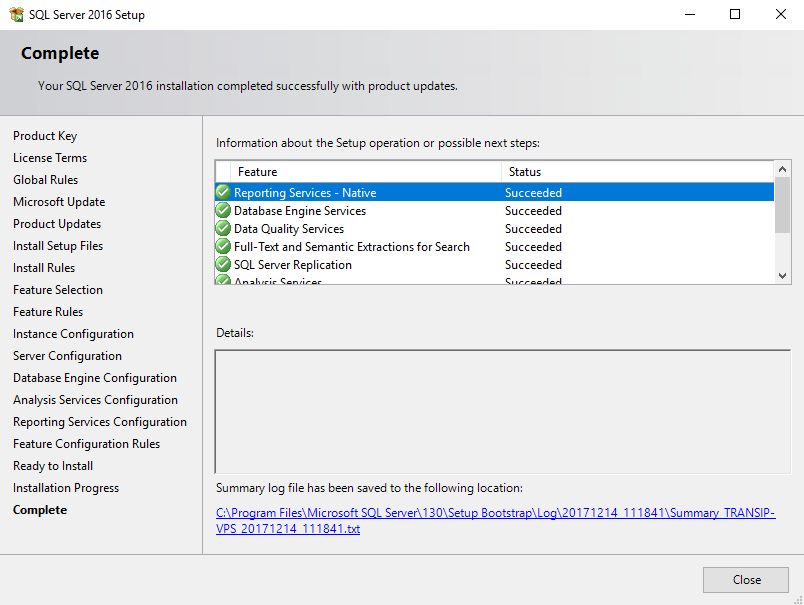
Step 20
After the installation you'll see a confirmation of the installed features. We recommend configuring your firewall now or at least prior to using SQL Server.
Should you have any questions left regarding this article, do not hesitate to contact our support department. You can reach us via the ‘Contact Us’ button at the bottom of this page.
If you want to discuss this article with other users, please leave a message under 'Comments'.