At TransIP you can easily create email addresses using our Email Only- and Webhosting packages.
You can usually configure your TransIP email addresses in Office for Outlook 365 by following the steps in the article 'Configuring your email address in Outlook for Office 365'.
If you receive an error message after following all the steps in the article above, you can manually enter the advanced email settings to be sure everything is configured properly. In order to do so, you will have to add your email address in a slightly different way.
By following the steps in this tutorial, you can work around the error message and add your e-mail address to Outlook for Office 365.
Configuring your email address manually in Outlook for Office 365
Step 1
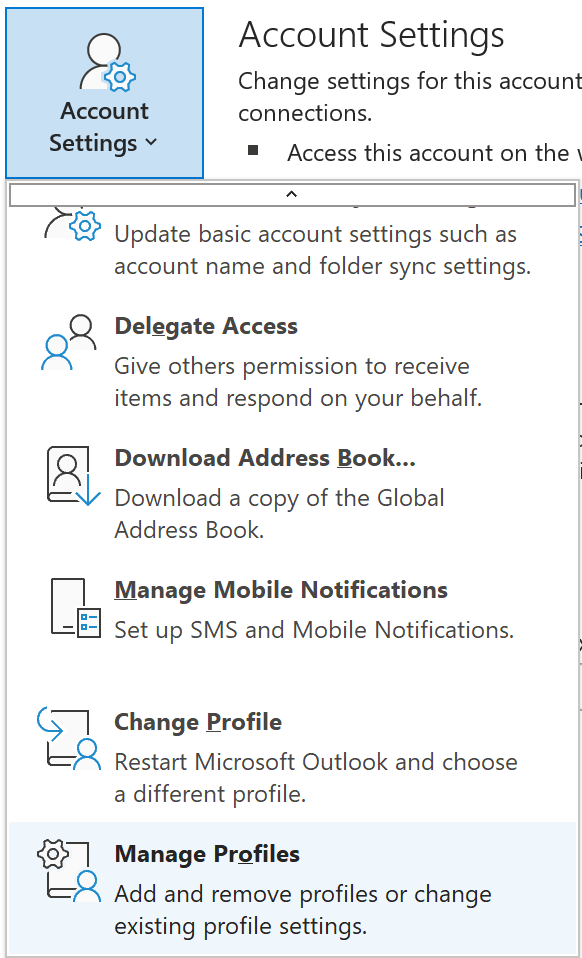
In Outlook, go to 'File' at the top left. Instead of clicking 'Add Account', click 'Account Settings'. A menu will drop down, click 'Manage Profiles' at the bottom of the menu.
Step 2
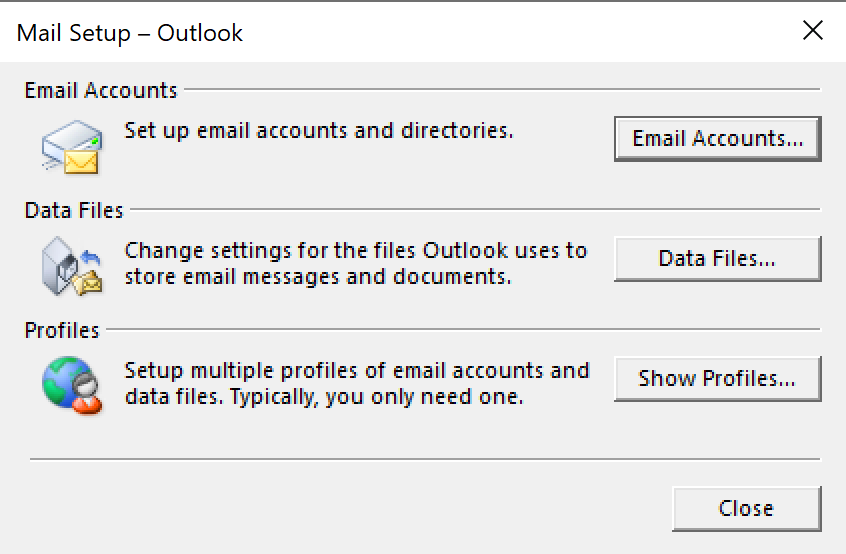
In the next window, click 'Email accounts...'.
Step 3
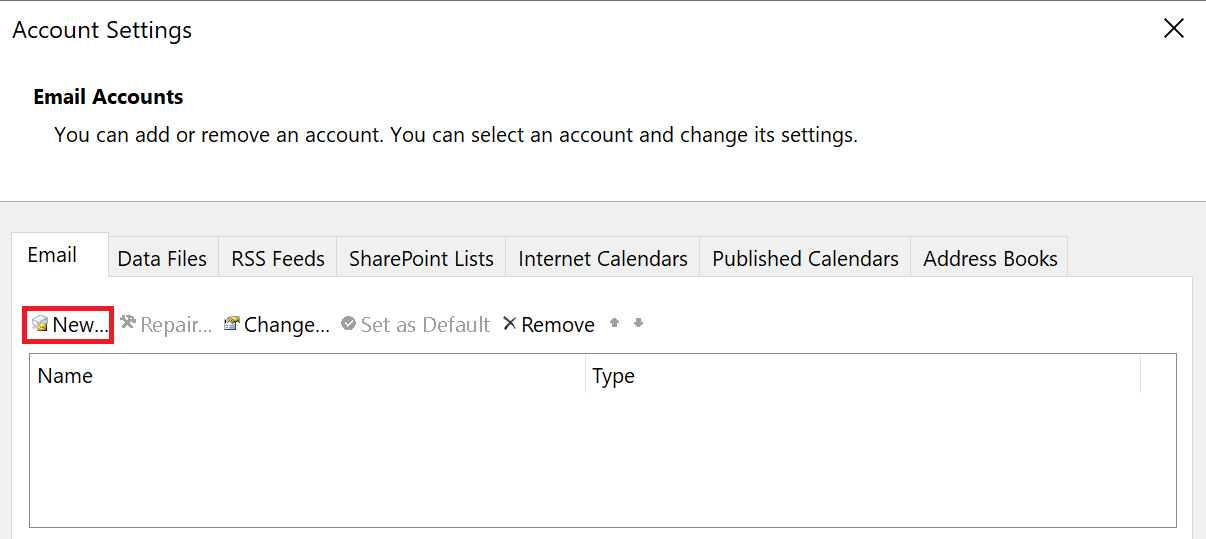
Click 'New...' to add your email address.
A window will open that lets you add your email address. Because you are entering all settings manually, make sure 'Manual setup or additional sever type' is selected and click 'Next'.
Select 'POP or IMAP' and click 'Next' again.
Step 4
Add the email server settings as shown in the example. Make sure to add your own information below 'User Information' and 'Login Information'.
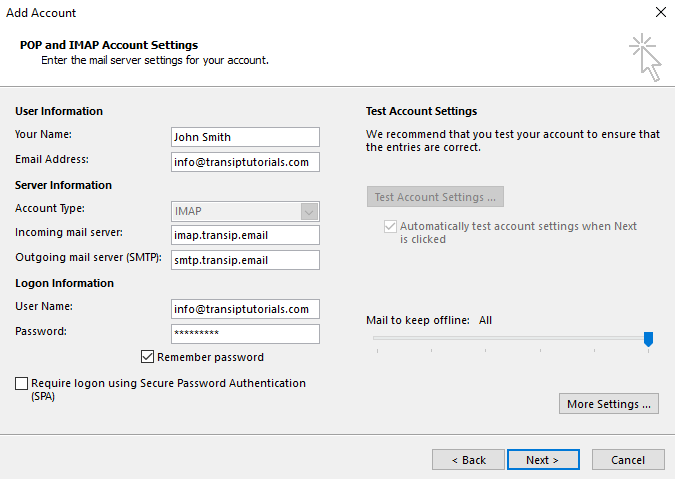
User information
Your Name: Enter the name you want shown when sending emails.
Email Address: Enter your email address here.
Server Information
Account type: IMAP
Incoming mail server: imap.transip.email
Outgoing mail server (SMTP): smtp.transip.email
Login Information
Username: Enter your email address here.
Password: Enter the password of your email address.
Can't remember your password? Use the steps in the article 'Changing the password of your email address' to set a new password.
Once you have entered the email settings, it is time to configure the email servers. Click 'More settings' to continue.
Step 5
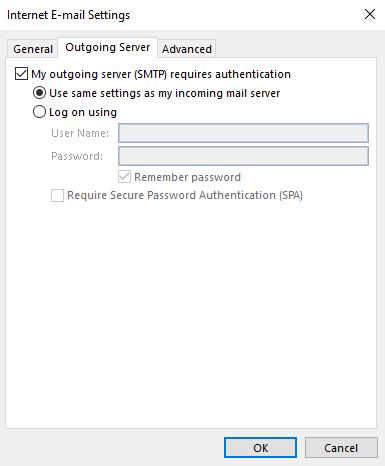
In the next window, select the tab 'Outgoing server'.
Check the box next to 'My outgoing server (SMTP) requires authentication' and make sure 'Use same settings as my incoming mail server' is selected.
Stap 6
Open the 'Advanced' tab to enter additional information for the incoming and outgoing email servers.
- Incoming server (IMAP): 993
- Use the following type of encrypted connection: SSL
- Outgoing server (SMTP): 465
- Use the following type of encrypted connection: SSL
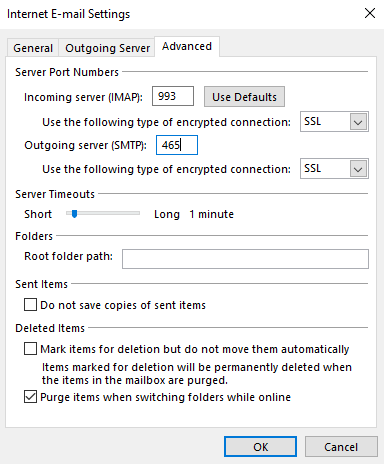
Click 'OK'.
Stap 7
You will now return to the window 'Add account'.
If you want to test if the email account is configured correctly, click 'Test account settings...'. Outlook will then run two tests to verify if email can be sent and received.
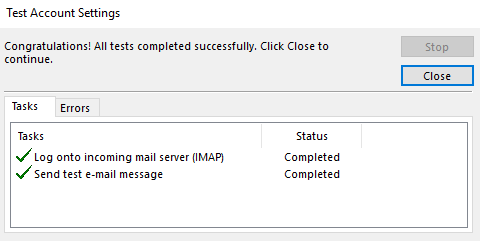
If the account is configured correctly, two green checks will appear. If an error message appears, check the previous steps to see if everything is entered correctly.