In this article we'll explain how to forward emails to an email address of your choosing using our Forwarding service, Email Only service and Web Hosting service. To order these services, click on one of the links to visit the corresponding product page.
To use these services, you will need a domain name. You can register a new domain name or choose an existing one at TransIP after selecting one of the services using the corresponding product page.
Forwarding emails with the Forwarding service
The Forwarding service allows you to forward emails sent to your domain name to an email address of your choosing. The steps below show you how to set up your Forwarding service to forward emails. Afterwards you can read how to use the Email Only service and Web Hosting service for the same purpose.
Step 1
Visit the control panel and click on the tab 'Domains & Hosting' at the top. Next, select the domain name with the Forwarding service on the left (don't check the box).
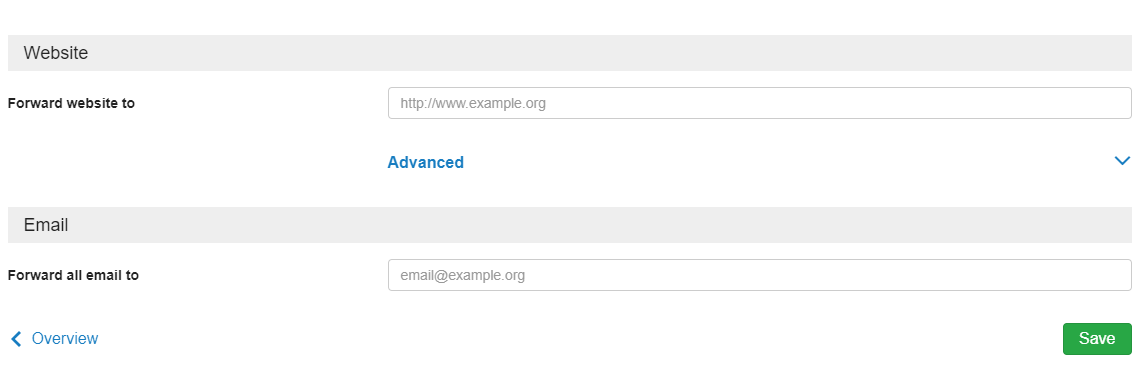
Now click on the cog wheel next to 'Redirect your visitors', followed by 'Forwarding settings'.

Step 2
Next to 'Forward all email to', enter the email address you want to receive the emails on that are sent to your domain name.
The Forwarding service also allows you to forward visitors of your domain name to a different website. Read the article 'Forwarding your domain name' for more information.
Forwarding emails with Email Only and Web Hosting
Our Email Only and Web Hosting services allow you to create and manage email addresses. Web Hosting also includes web space, which allows you to host your very own website.
Both services enable you to create Mailboxes, Mail forwards and Mail groups.
- A Mailbox allows you to create a fully functional email address to send and receive emails with. Read the article 'Set up your email address' to learn how to set up your email address in an email client like Outlook or Gmail.
You can also use a Mailbox to forward received emails to a different email address. Scrol down to the header 'Mailboxes' to learn how.
- A Mail forward allows you to forward received emails to a different email address as well, though a Mail forward can't be used to send or receive emails.
You can also use a Mail forward as a 'catch all', allowing you to forward all received emails to an email address of your choosing. Emails sent to existing Mailboxes are not included.
- A Mail group allows you to forward emails for a specific email address to a number of other email addresses. This can be useful when you use a generic email address and you want all your employees to be able to read emails sent to that generic email address.
- Sending and receiving emails is disabled for Mail forwards and Mail groups. If you want to send and receive emails, while also forwarding emails, we recommend using a Mailbox.
- When using our Email Only and Web Hosting services, there is a limit to how many email boxes you can create (Excluding the Web Hosting XL service, which has no limit). Email boxes is the collective name for Mail boxes, Mail forwards and Mail groups.
For instance, when using an Email Only service, you can create 3 email boxes. This means you can create up to 3 Mail boxes or 1 Mail box, 1 Mail forward and 1 Mail group.
Forwarding emails with Mailboxes, Mail forwards & Mail groups
We will now explain how to forward emails using Mailboxes, Mail forwards and Mail groups.
We will first explain how to create a Mailbox. If you've already created a Mailbox, first follow Step 1 and then continue to Step 5.
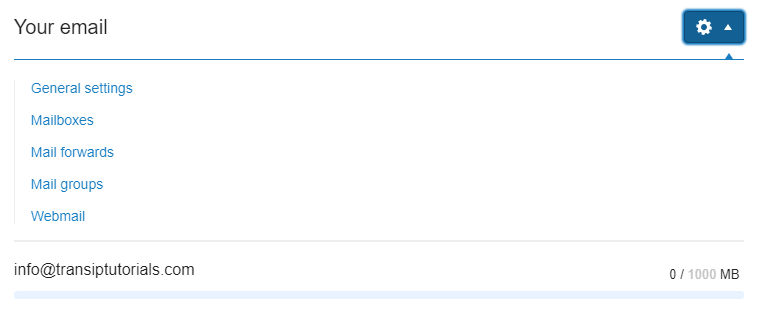
Step 1Visit your control panel and click on the tab 'Domains & Hosting' at the top.
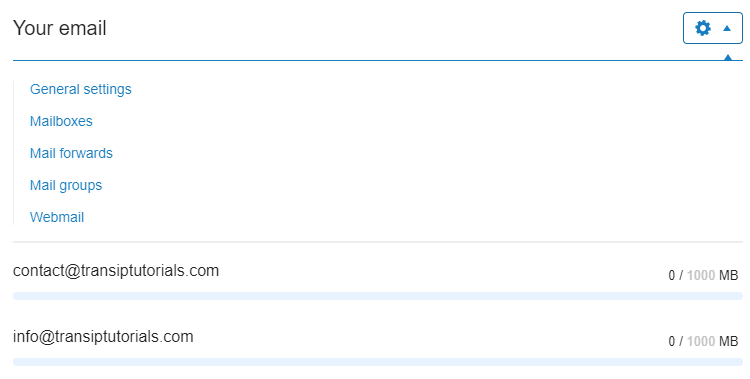
Click the cog wheel next to 'Your email', followed by 'Mailboxes'.
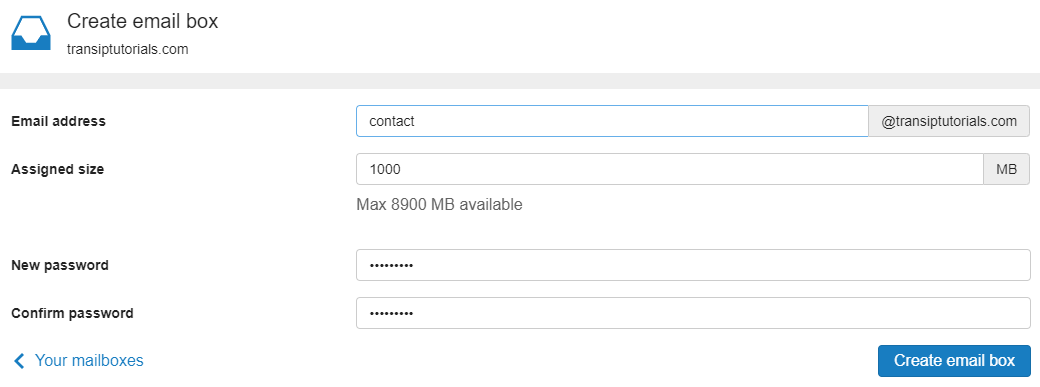
Step 2Click on '+ Create email box'.

Step 3Enter the first part of the email address you wish to create and choose how large the Mailbox should be.
Enter the password you want to use twice and click 'Create email box'.
Step 4You'll now return to the overview 'Your mailboxes'. The email box will be created after a few minutes. Refresh the page until the new email box is visible in this overview.

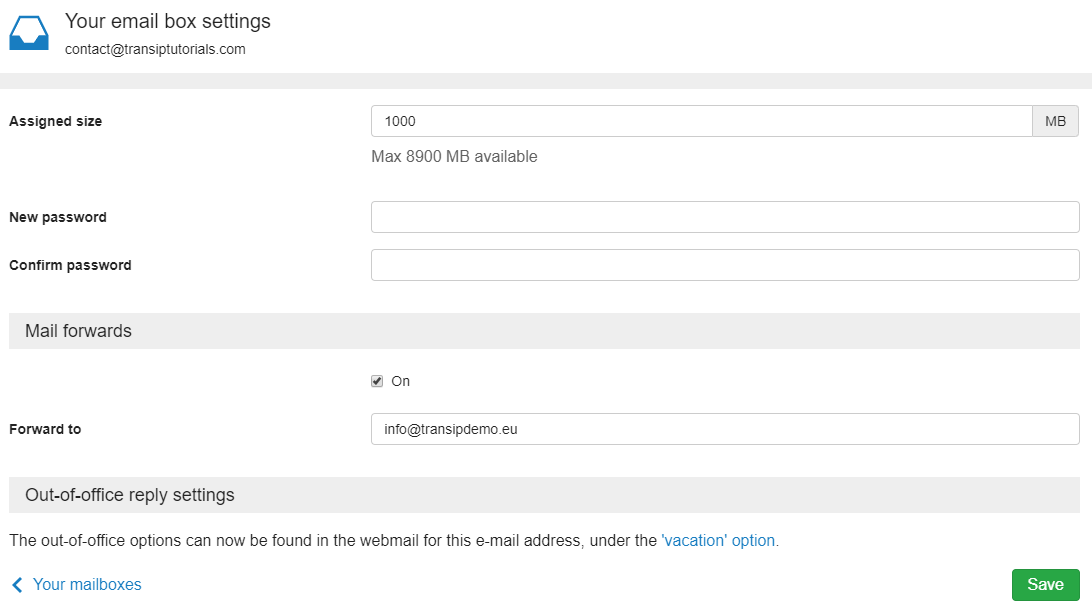
Step 5One your email box is visible in the overview, you will now be able to forward it to another email address. Click on the email box you want to forward to land on the 'Your email box settings' page.
In order to forward your email box, check the box below 'Mail forwards' and enter the email address you want to forward to next to 'Forward to'.
In here, you can also change the size of your mailbox and enter a new password for your email address. Once you're ready, click 'Save'.
As we mentioned earlier, you can send and receive emails with a Mailbox. Read the article 'Set up your email address' to learn how to configure your email address in email software like Outlook.
Step 1
Visit your control panel and click on the tab 'Domains & Hosting' at the top of the page. Now click on the cog wheel next to 'Your email', followed by 'Mail forwards'.
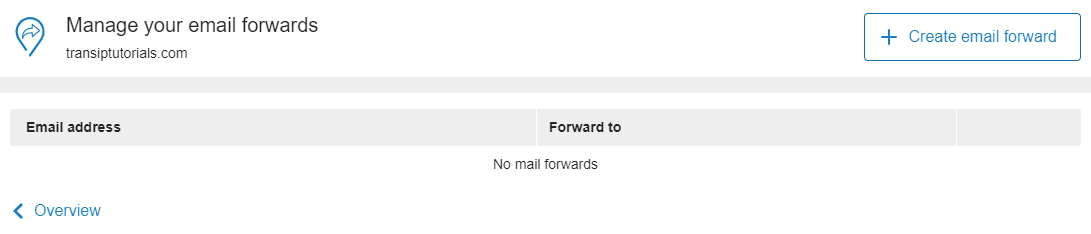
Step 2You will now land in the overview 'Manage your email forwards'. Click on '+ Create email forward' on the right.
Step 3Enter the name of your email forward next to 'Email address'.
Enter the email address you want to forward to next to 'Forward to'.
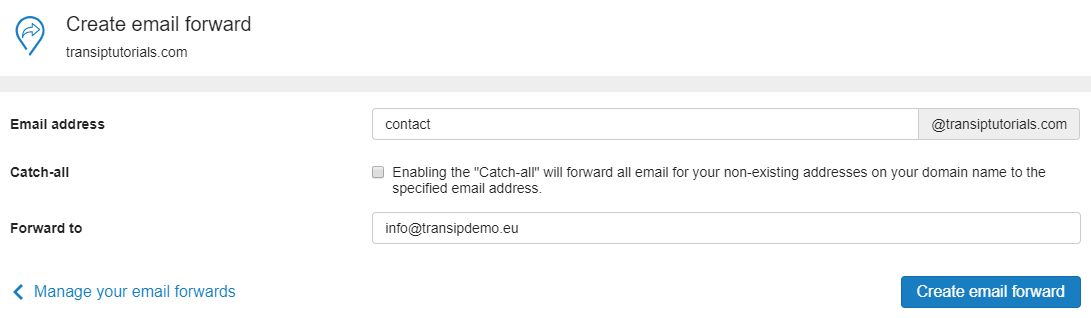
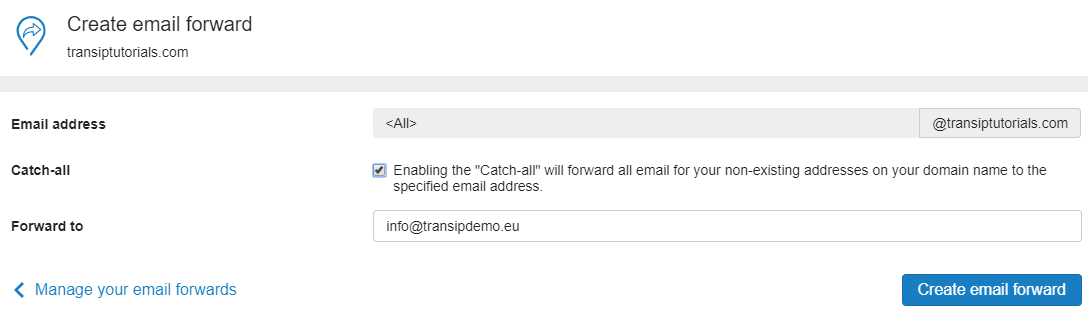
Check the box next to 'Catch-all' if you want to forward all received emails to the forward address. This forwards all email sent to your domain name to the forward address, excluding emails sent to existing Mailboxes.
Step 4
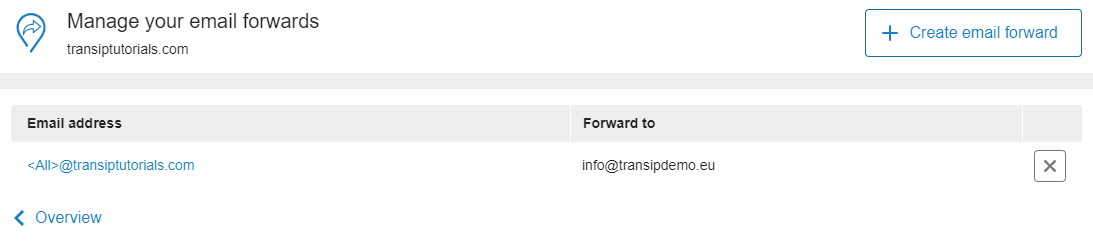
You'll now land on the 'Manage your email forwards' page again. After several moments the email forward will be visible. Refresh the page until that's the case and your email forward will be ready for use!
In our example below you can see we set up a catch-all for <All>@transiptutorials.com, which forwards incoming emails to info@transipdemo.eu.
Step 1
Visit your control panel and click on the tab 'Domains & Hosting' at the top of the page. Now click on the cog wheel next to 'Your email', followed by 'Mail groups'.
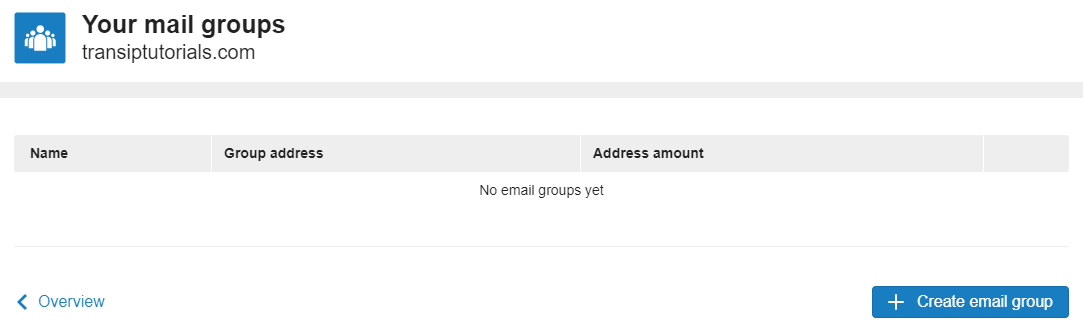
Step 2Click on '+ Create email group' to land on the 'Create email group' page.
Step 3Enter the name you want to give to your Mail group. Next, enter the email address you want to forward emails with. Emails sent to this email address will be forwarded to all participants of the Mail group.
Lastly, enter the email addresses of the participants of the Mail group. These can be email addresses of the same domain or external domain names.
Take note that if you enter email addresses of the same domain name, you will also need to create Mailboxes for them. This way these email addresses will be able to receive and reply to emails sent to the Mail group.
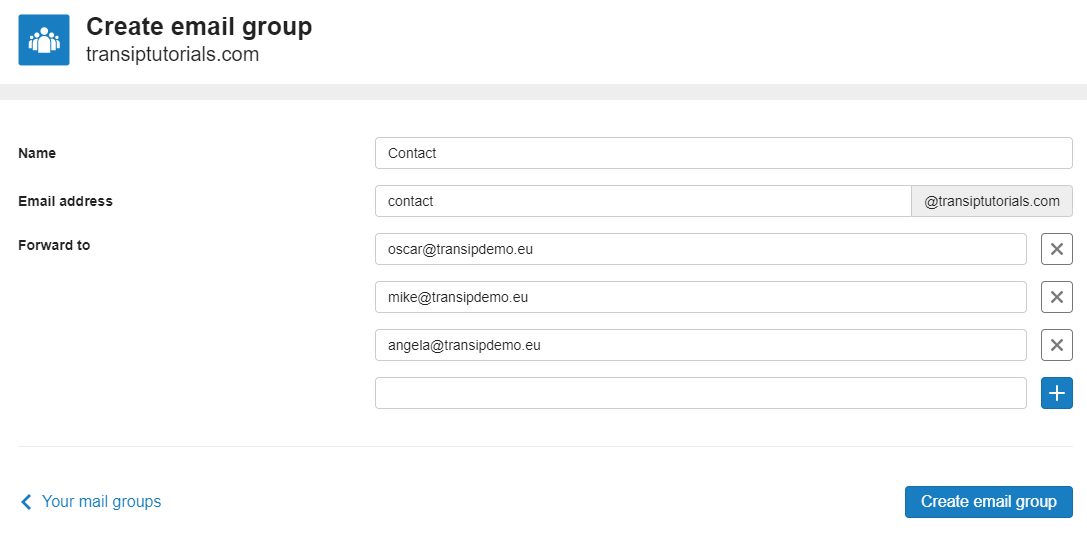
In our example we've created a Mail group with the name 'Contact'. Email addresses sent to contact@transiptutorials.com will be forwarded to oscar@transiptutorials.com, mike@transiptutorials.com and angela@transiptutorials.com.
In this article we explained how to forward emails using our Forwarding Service, Email Only Service and Web Hosting Service.
If you have any questions regarding this article, please contact our support team. You can reach them using the 'Contact us' button below or via the 'Contact' button inside your control panel.
If you wish to discuss this article with other users, feel free to leave a comment below.