In this article, we show you how to install an SSH server in Ubuntu 16.
SSH stands for Secure Shell and is a network protocol that provides a secure (i.e. encrypted) way to connect to a remote computer or server.
SSH has some advantages over the VPS console in your control panel: for example, you can maximize your screen and simply paste text copied with the right mouse button.
Follow the steps in this article as the root user, or switch to the root user.
Installing OpenSSH
Step 1
Connect to your VPS via the VPS console in your control panel.
Step 2
Install OpenSSH with the command:
apt-get install -y sshThat's all! Your SSH server is immediately active and accessible. You can now check the status of your SSH server with the command:
systemctl status sshConnect to your VPS via SSH
Now that you are running SSH server, you naturally want to connect to your VPS immediately. We recommend changing the SSH port first and switching off root access (see additional tips).
In our article on command-line & SSH, we show you how to connect to your VPS via SSH on a Windows computer or Mac and explain some useful commands.
Important additional tips
- Bots continuously try to attack port 22 at random IP's (i.e. the default SSH port). We therefore recommend that you change your SSH port
- Most attacks targeting your VPS will try to connect as root users. It is therefore advisable to switch off root access via SSH.
Opening the SSH port in your firewall
After installing the SSH server, the SSH port is not opened automatically in your firewall. Ubuntu 18.04 comes with UFW by default, in which you open the SSH port using the command:
ufw allow 22- Replace 22 with the actual SSH port if you've changed it.
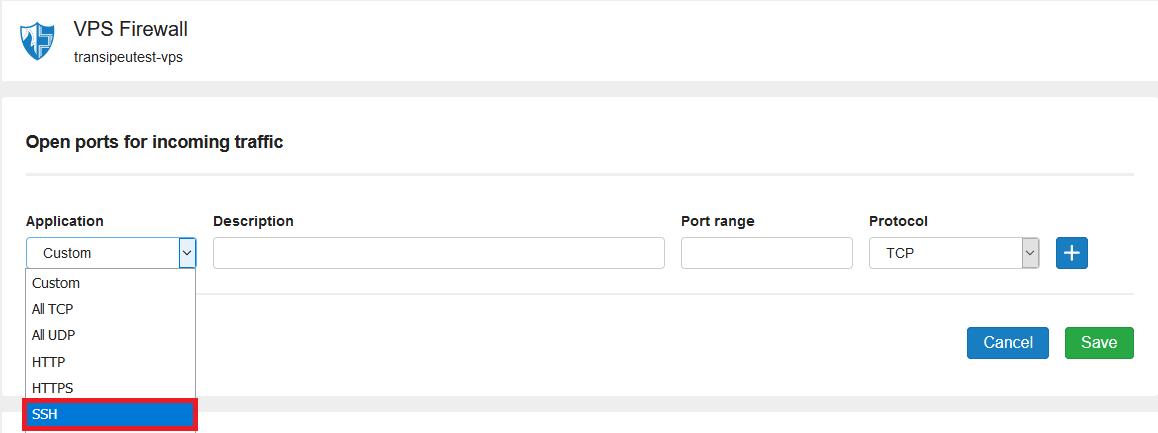
Do you use the VPS firewall instead? Then open port 22 in your control panel:
Should you have any questions left regarding this article, do not hesitate to contact our support department. You can reach them via the ‘ContactUs’ button at the bottom of this page.
If you want to discuss this article with other users, please leave a message under 'Comments'.