This is the fourth part of our cPanel Tutorial Series. If you are setting up a new VPS, then we recommend starting with part 1.
Before you can use a (sub)domain within cPanel, your domain has to be linked to your VPS. You link your (sub)domains by having your DNS settings from your domain refer to your VPS and adding your domain in cPanel.
In the first part of this tutorial series, under the heading ‘logging in to cPanel for the first time', you probably already added a domain in step 7. If you want to link a website and / or email for the domain specified, follow the steps under 'DNS' below and then continue with part 5 of the cPanel tutorial series.
In this part we cover the following topics:
- Supporting additional domains & redirects
- Setting up the DNS of your domain
- Adding a domain to your VPS in WHM
- Adding a Domain to an existing user in cPanel (addon domain)
- Adding a subdomain
- Linking multiple domains to one website
If you add a domain, addon domain, or subdomain to cPanel & WHM, the best available SSL certificate is automatically used to secure it. If no certificate is available, a self-signed certificate is generated (by AutoSSL if you follow these tutorials).
More information about this can be found in our article 'Installing an SSL certificate in cPanel' and we will also briefly cover it in the next part of our cPanel tutorial series.
Supporting additional domains & aliases
cPanel/WHM uses 'addon domains' and 'parked domains' to respectively add multiple domains to one cPanel account and for using domain aliases. These options are disabled by default but are easily enabled in two steps:
Step 1
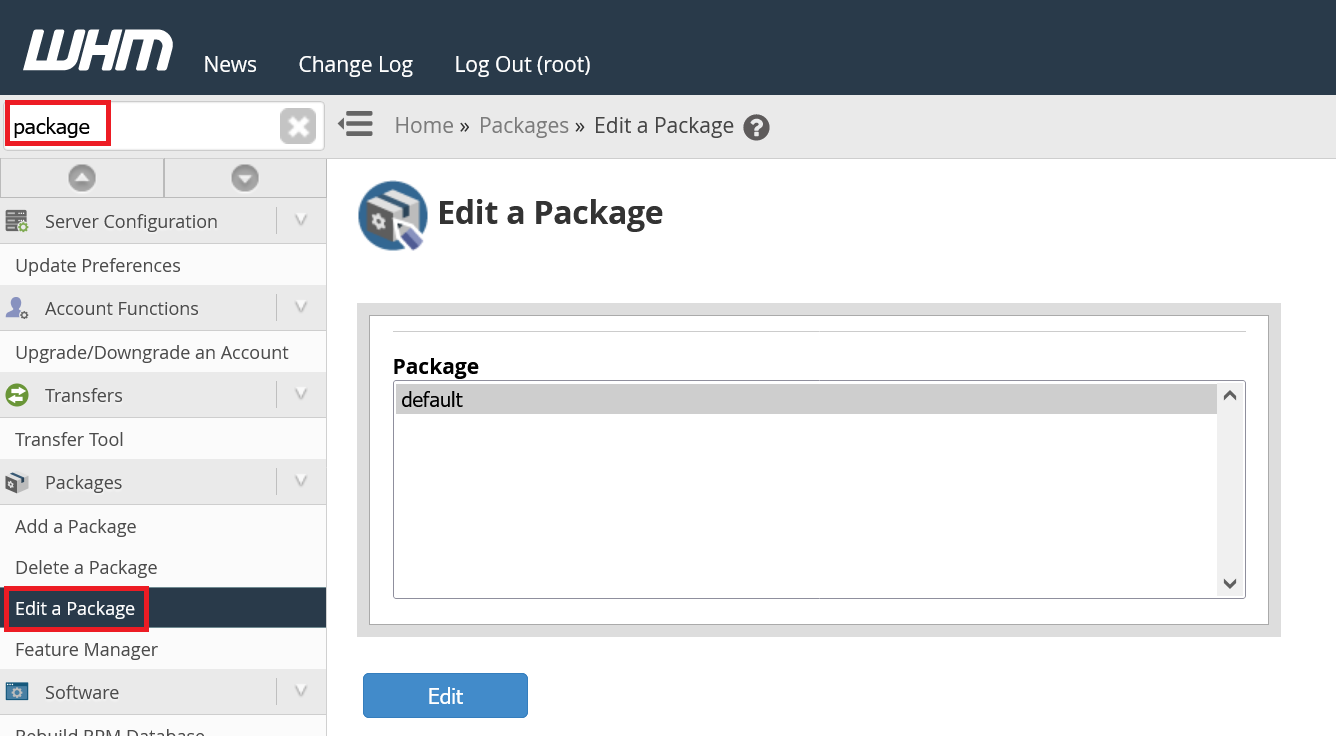
In WHM, search for 'Packages' and click on 'Edit Package'. Next, select 'default' and click 'Edit'.
Step 2
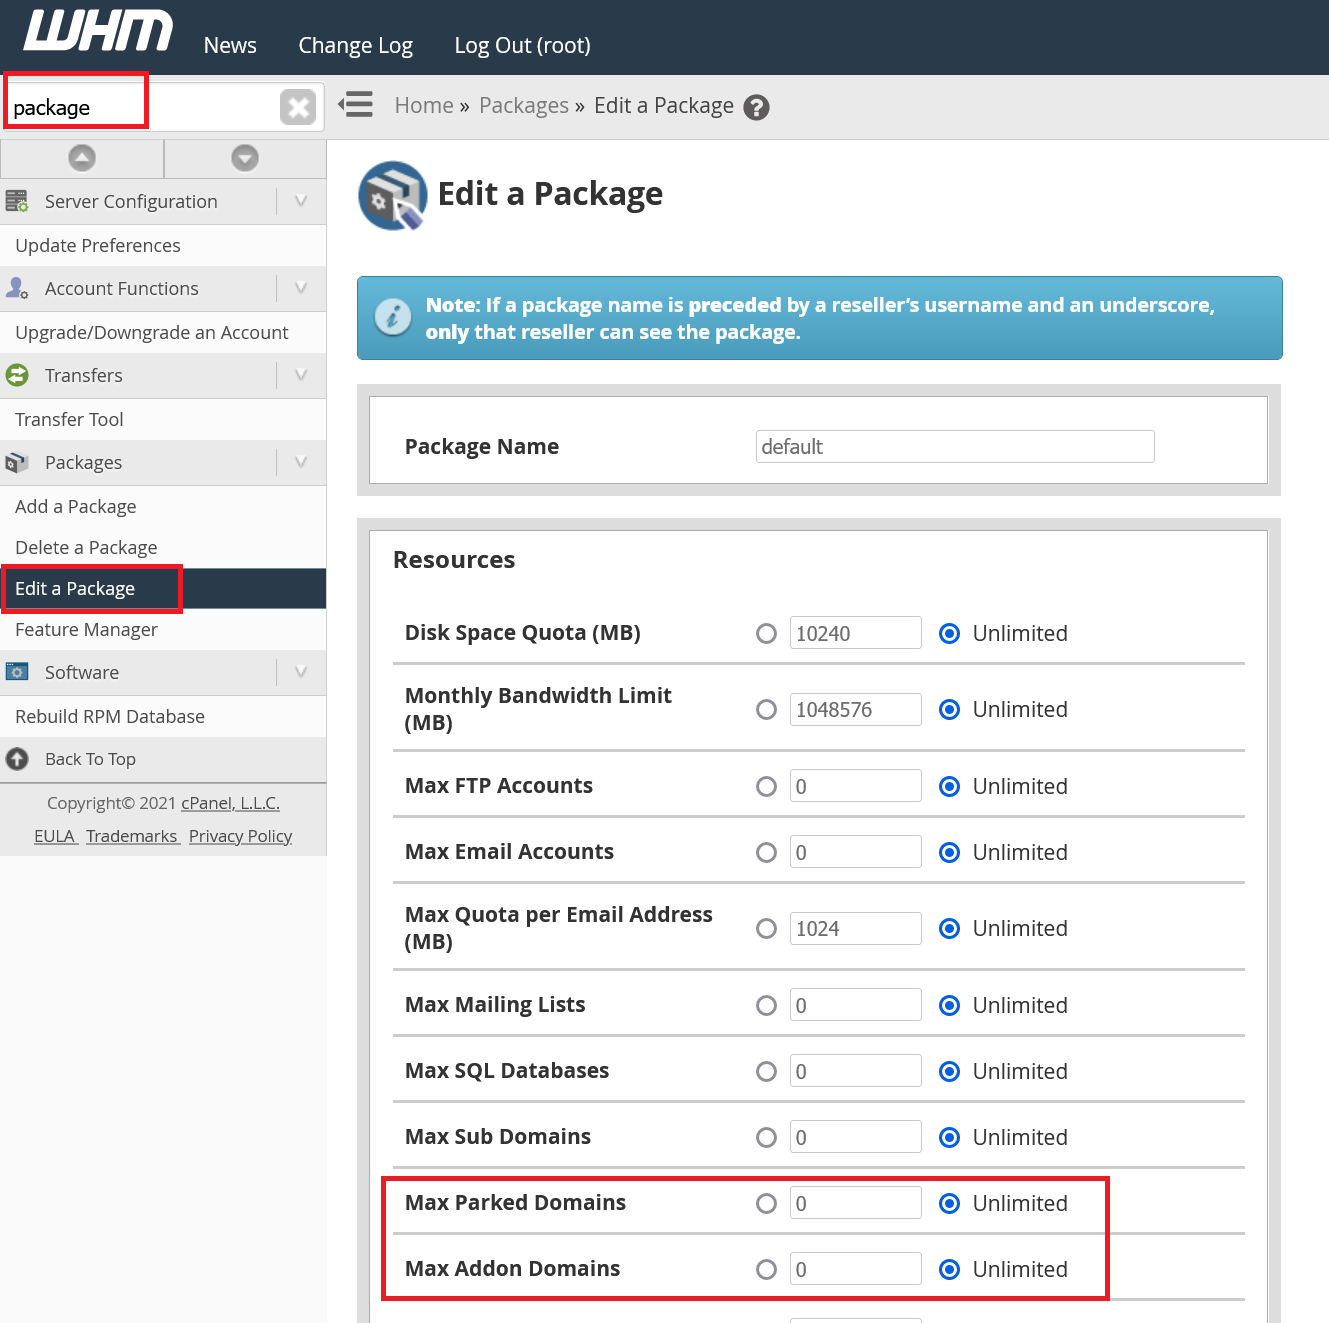
Change the option 'Max Parked Domains' and 'Max Addon Domains' to 'Unlimited'. Next, scroll down and click 'Save Changes'.
Setting up the DNS of your domain
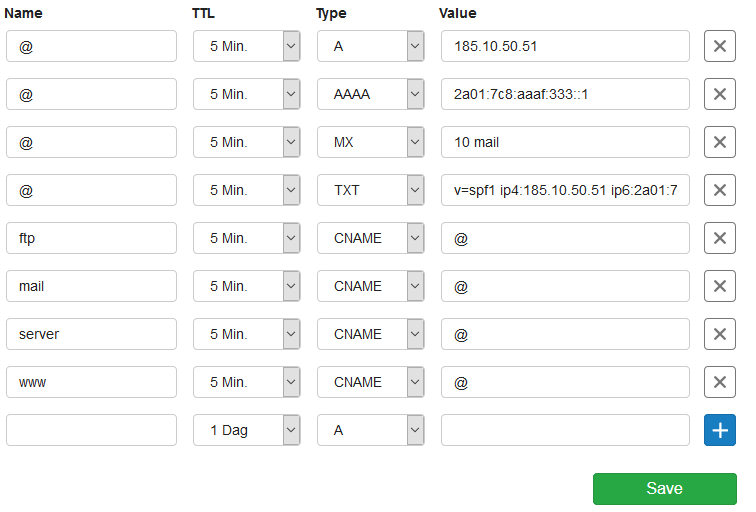
If you host a website for your domain on your VPS, it is not automatically accessible. You have to refer DNS records from your domain to your VPS for this. Below is an example of what the DNS records of your domain can look like.
It takes up to 24 hours (often shorter) before DNS changes are processed and visible worldwide. This is something that we have no influence on unfortunately.
Please note: The ins and outs of DNS fall outside the scope of this manual. For more information about DNS, see this article.
Adding a domain to your VPS in WHM
WHM offers you two options to add a domain to your VPS:
- Create a completely new cPanel account to manage a new domain
- Add a domain to your VPS. CPanel calls this an 'addon domain'.
In the steps below, we show you how to add a domain to a new account (as an addon domain).
For security reasons, you will always create a new FTP user for the FTP management of the domain during this process. We do not recommend giving SSH root access to this new user for security reasons.
Step 1
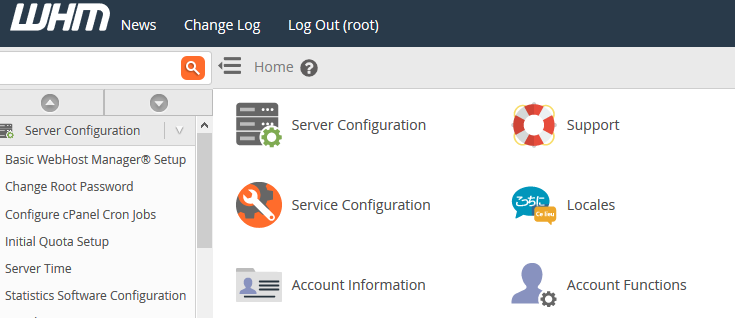
Log in to WHM, or click the name WHM if you are already logged in. Then click 'Account Functions'.
Step 2
Click ‘Create a New Account’.

Step 3
The same overview appears as seen in step 7 of the section 'logging in to cPanel & WHOM for the first time' in the first part of our cPanel tutorial series. Fill in the fields as shown in the example below (but with the data of your new domain) and click 'Create'.
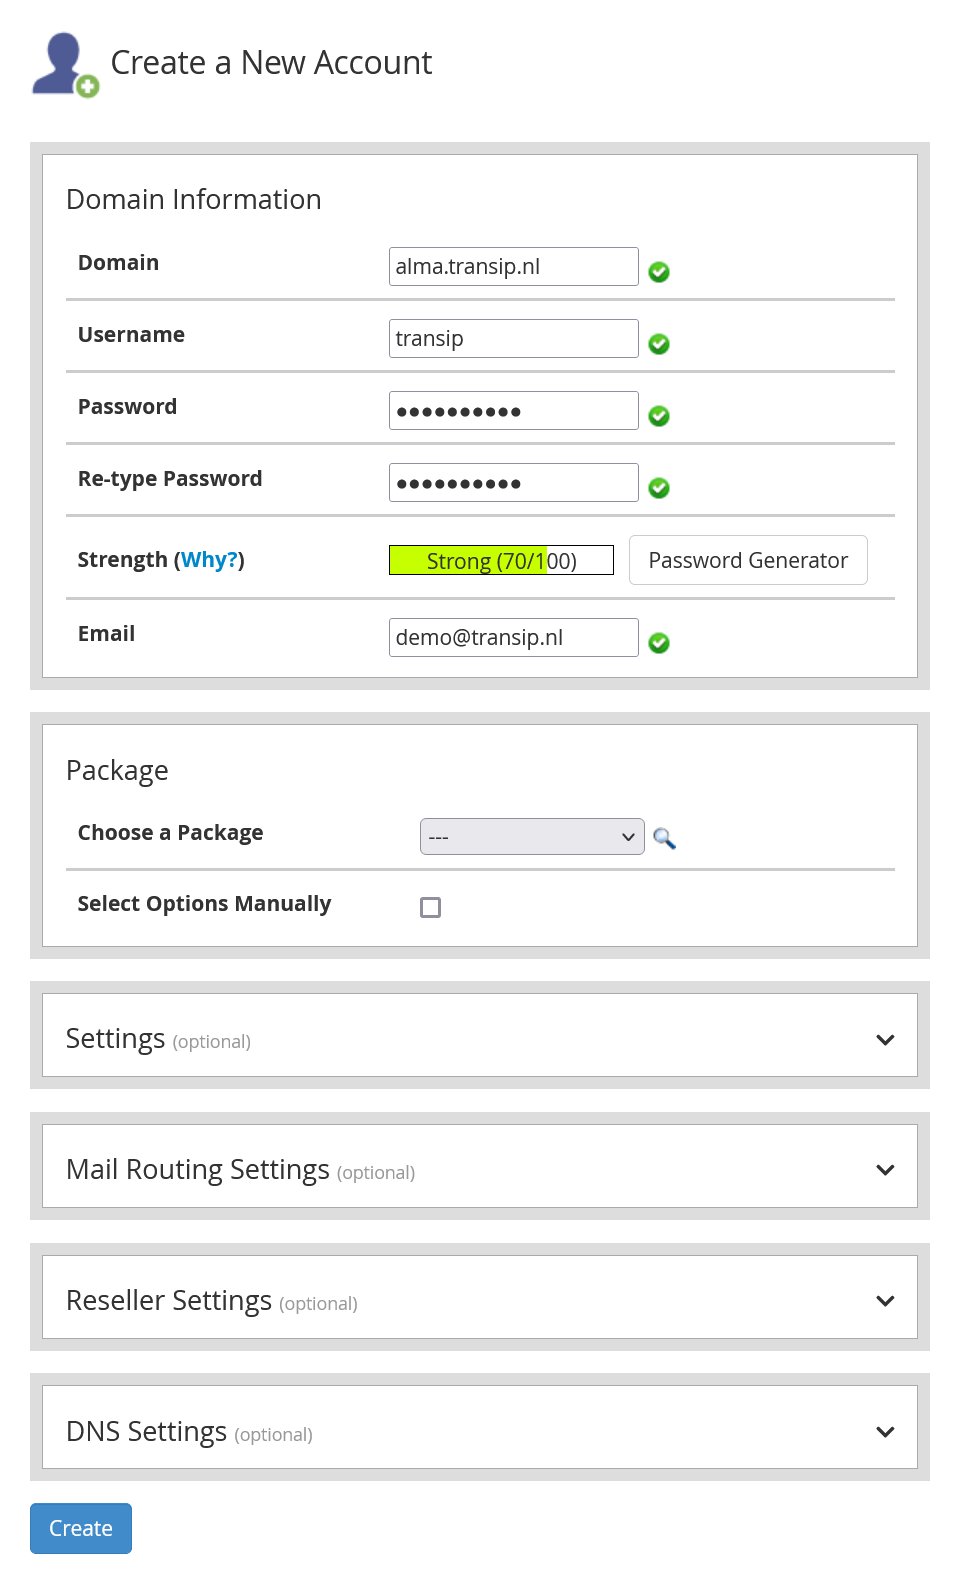
To manage the domain, log in to cPanel with the username and password you just created.
Adding a Domain to an existing user in cPanel (addon domain)
If you want to add a domain to an existing user in cPanel, you use the 'Addon Domain' function. By default, a user can create unlimited Addon Domains. If you prefer to set a limit, you do so from 'WHM'> 'Account Functions' > 'Modify an Account'.
Step 1
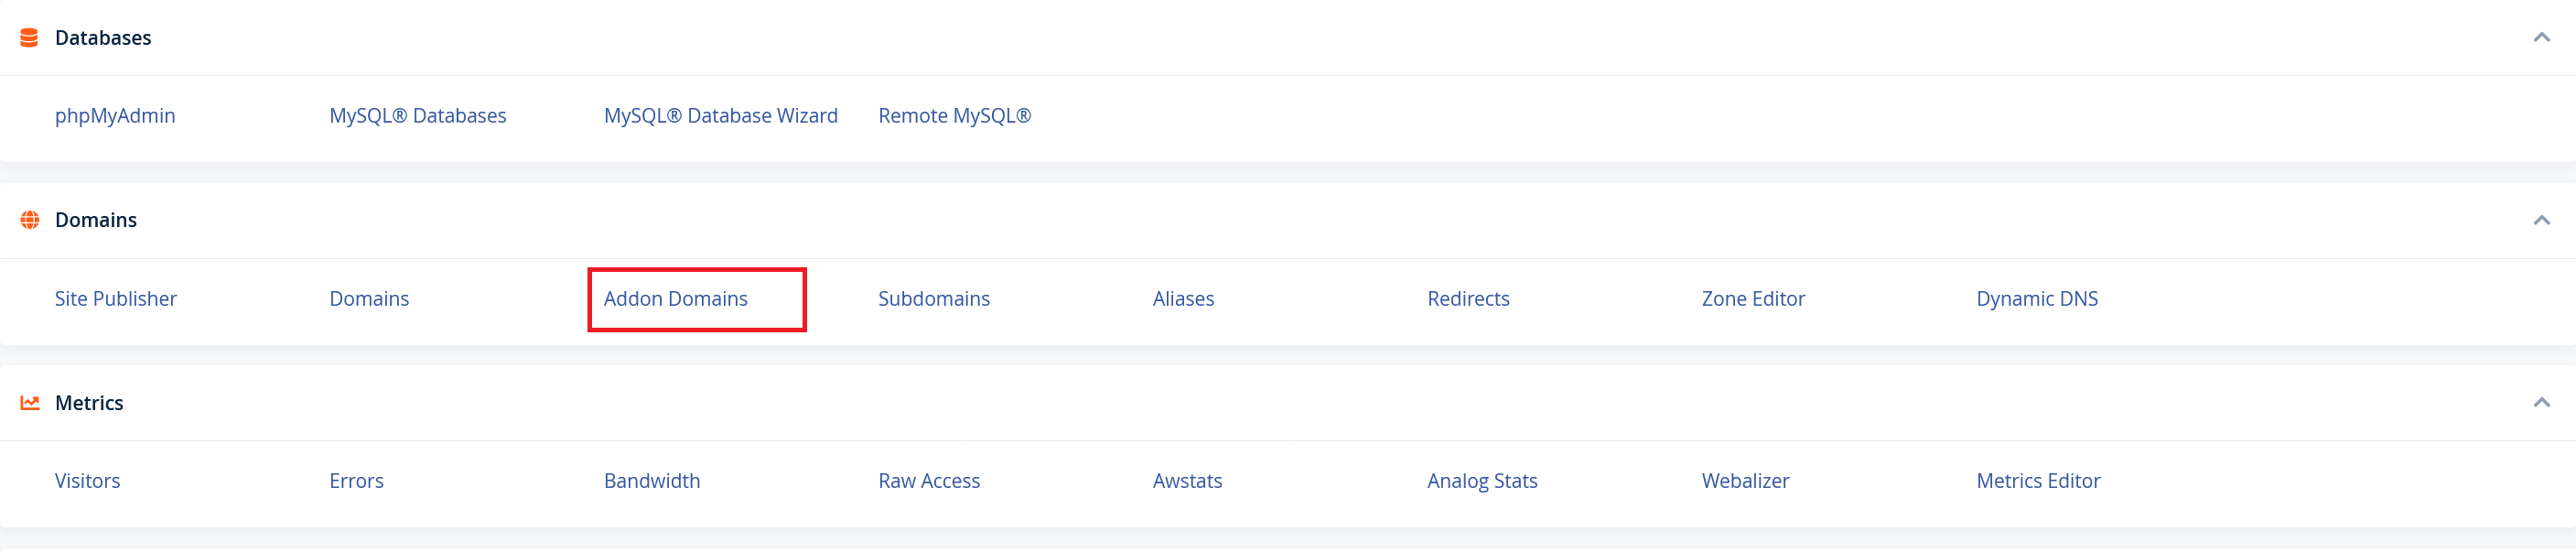
Log in to cPanel with the account in which you want to add the domain and click 'Addon Domains' under 'Domains'.
Step 2
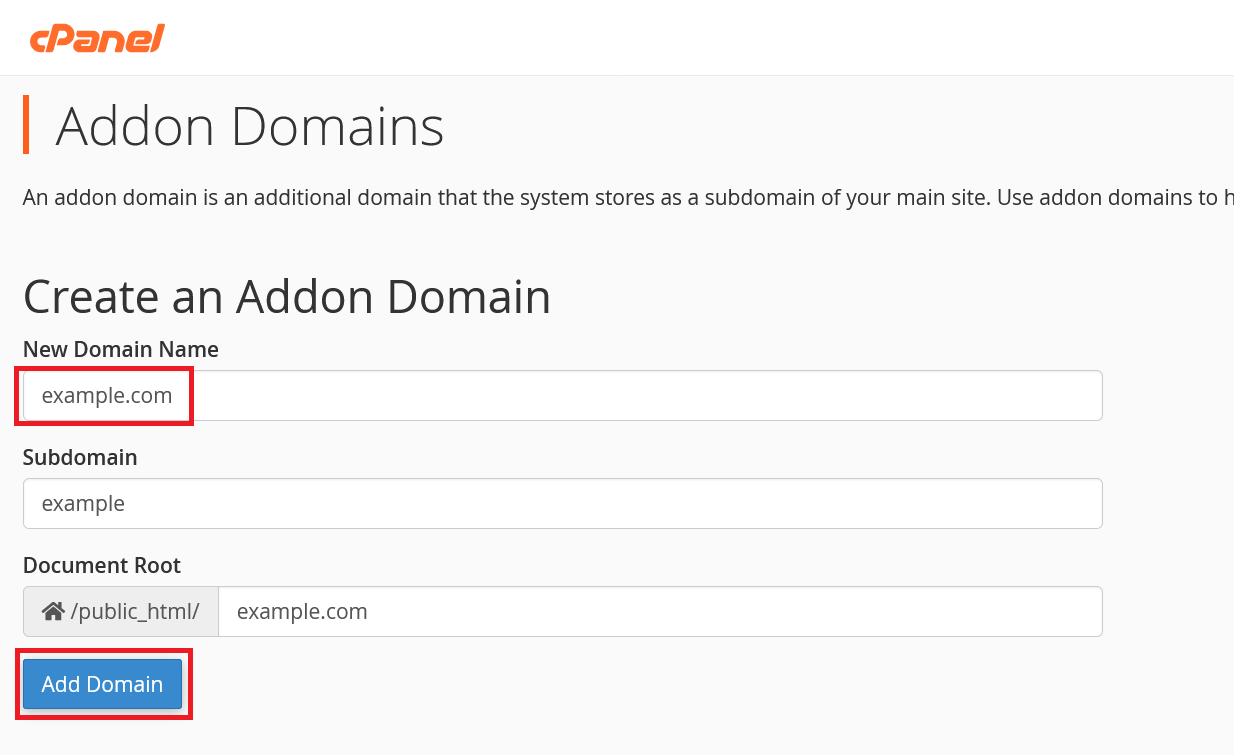
Fill in the fields as shown in the example below (but with your own data) and click 'Add Domain' to add your domain.
Creating a new FTP user for this domain specifically is optional. If you do not check 'Create an FTP account associated with this Addon Domain', then you use the FTP data of the account you are currently logged into with in cPanel.
Your extra domain is now added to your existing cPanel account.
Please note: cPanel automatically creates a subdomain folder for your Addon domain in the public_html folder of the domain that is associated with your cPanel account. This does not affect the functioning of your extra domain and we will get back to it in the next part of the cPanel tutorial series.
Adding a subdomain
In the previous sections we explained how to add an extra domain in cPanel. Below we show you how to add a subdomain in cPanel.
Step 1
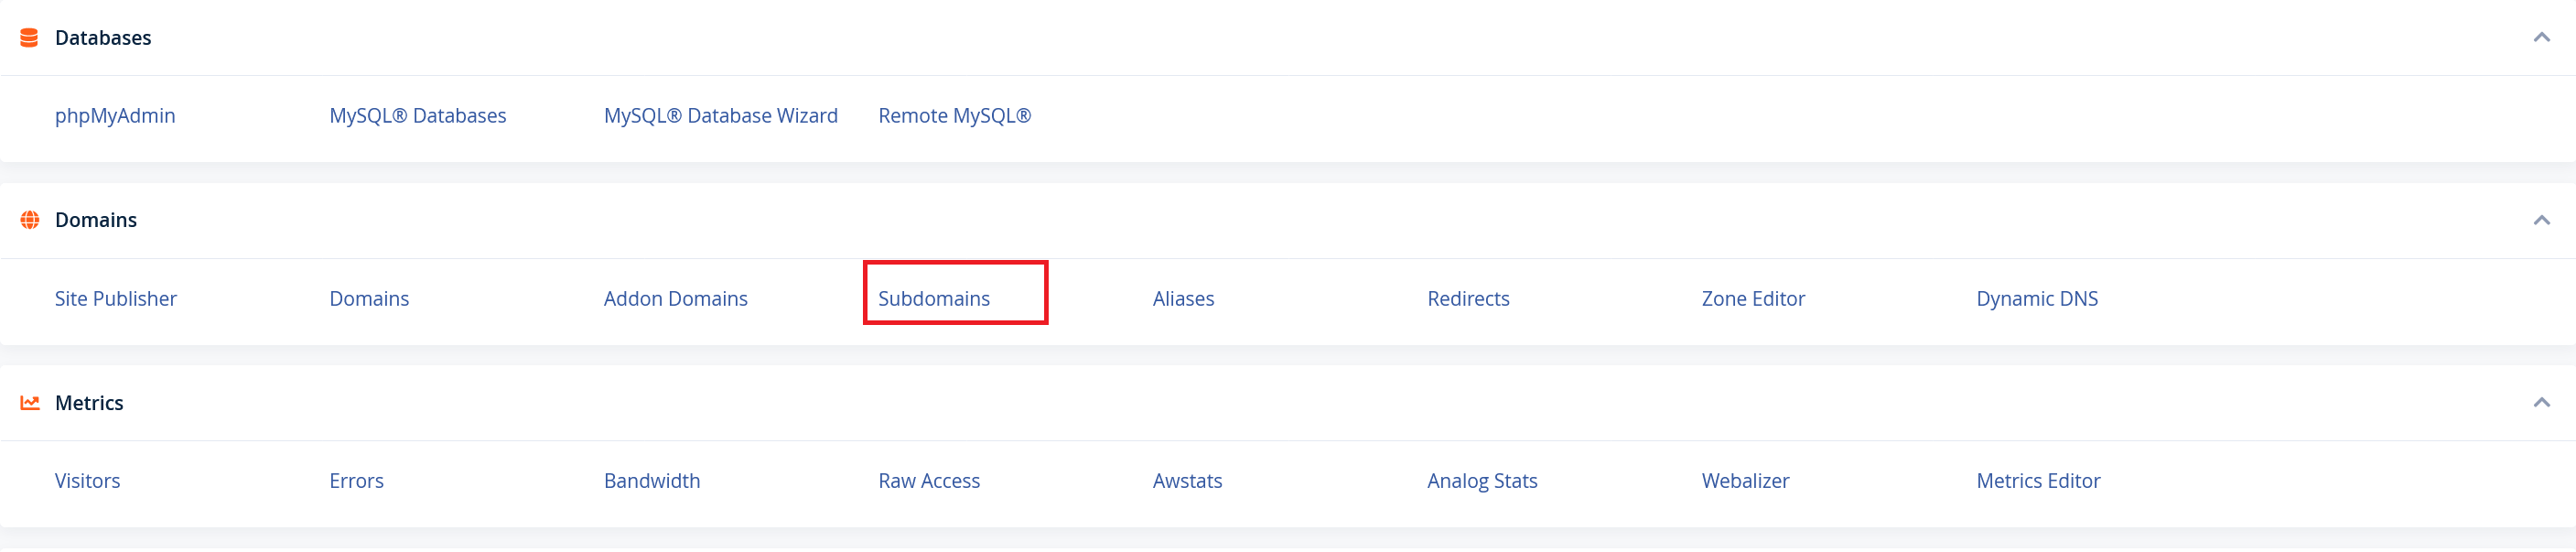
Log in to cPanel and click 'Subdomains' under 'Domains'.
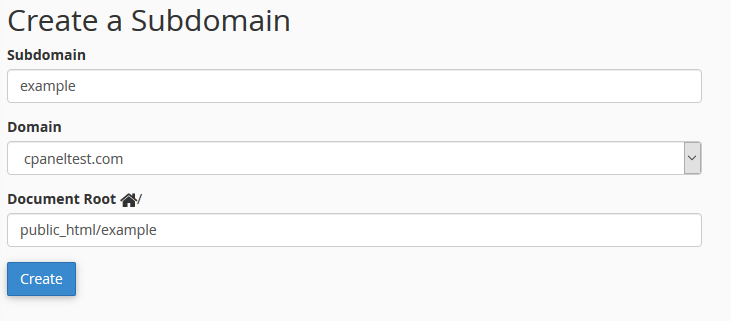
Step 2
Enter the name of your subdomain under 'Create a Subdomain' and select the domain for which you want to add a subdomain under 'Domain'. Then click 'Create' to add your subdomain.
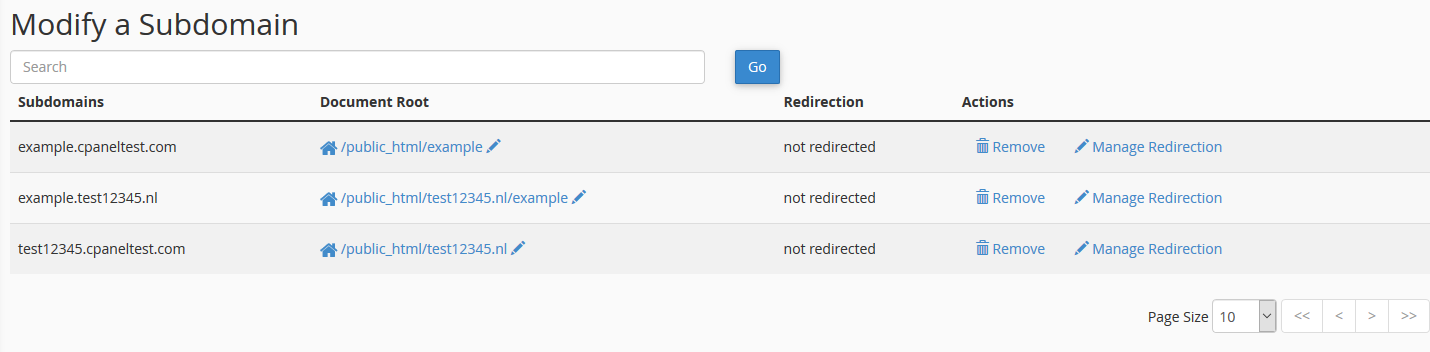
Please note: Regardless of whether you add the subdomain for the root domain or an addon domain, a folder with the name of your subdomain is created for FTP in the public_html folder.
This can be difficult when, for example, you have the subdomain example.cpaneltest.com and example.seconddomain.com then both use the same FTP folder. We therefore recommend changing the folder under 'Document Root' to public_html/seconddomain.com/example, see the screenshot below for an example of the result.
Linking multiple domains to one website
You may want to have more than one domain display the same website. CPanel offers two different options for this:
- A 'Parked Domain / Domain Alias': Using this method, the name of your domain does not change when you visit the site. Suppose you link the domain example.net to example.com in this way. A visitor to example.net is then redirected to example.com but the address example.net is still visible in his browser.
- A '(301/302) Redirect': Using this method the name of your domain does change when you visit the site. Suppose you link the domain example.net to example.com in this way. A visitor of example.net is then forwarded to example.com and sees example.com as an address in his browser.
Parked Domain
An Alias / Parked Domain is basically the same, but you set up both differently. We show you how to use the Alias function in the steps below in cPanel, because it is very quick and easy to add.
Step 1
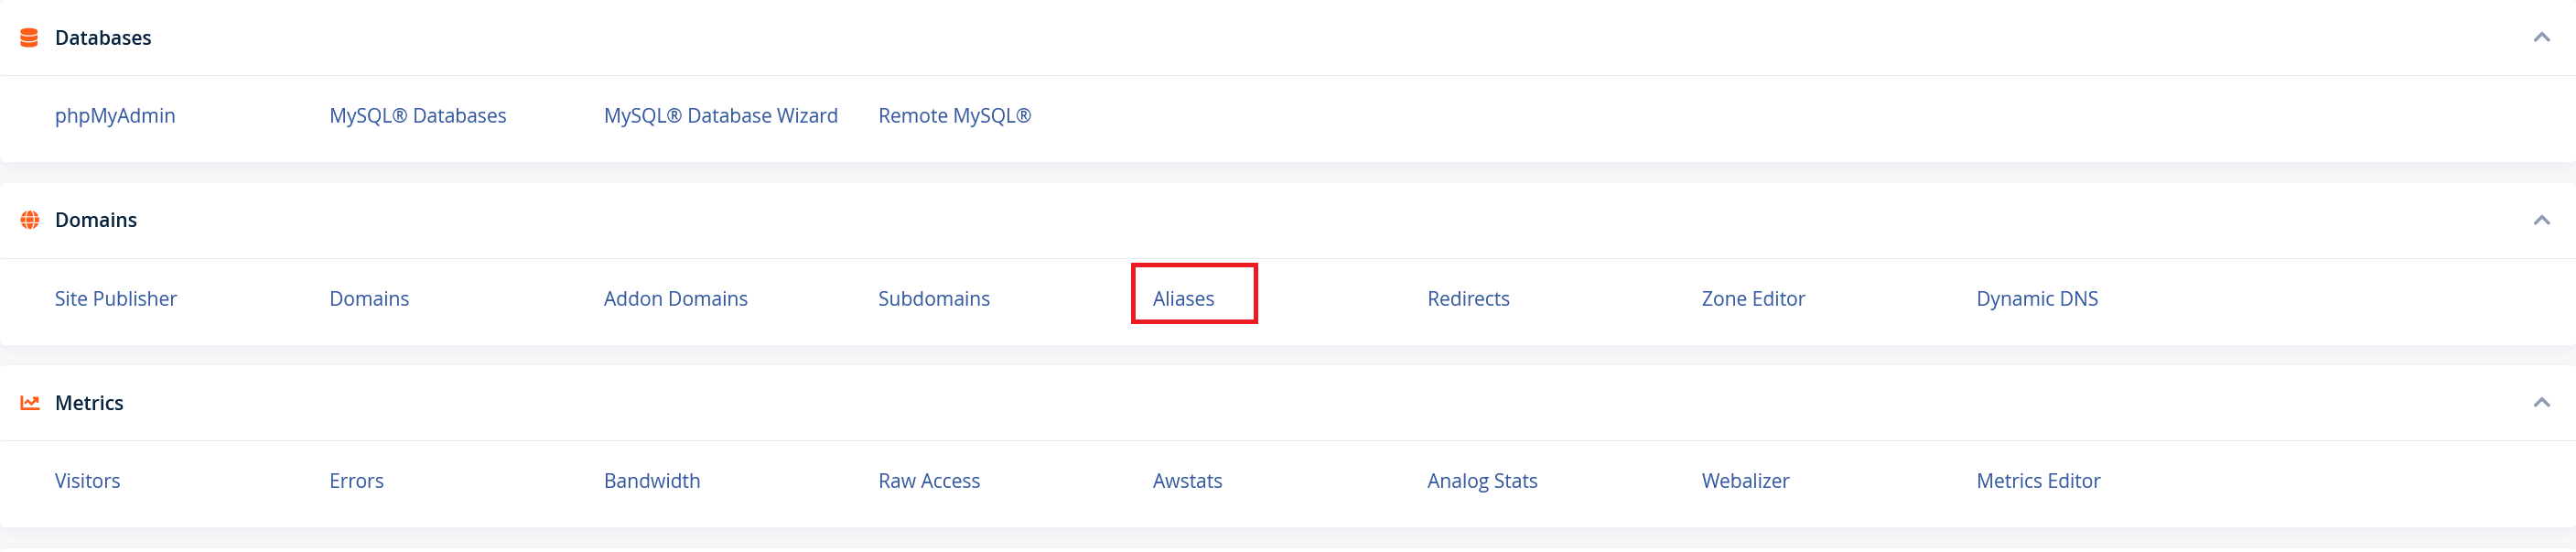
Log in to cPanel and click 'Aliases' under 'Domains'.
Step 2
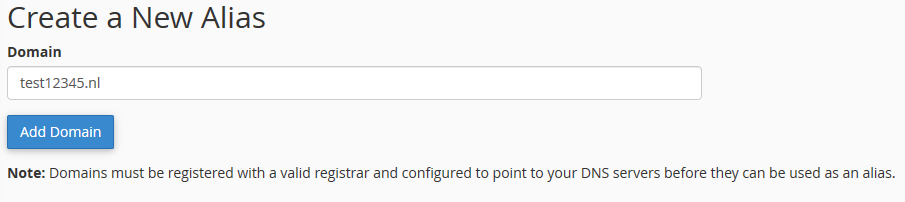
Enter your domain name under 'Domain' and click 'Add Domain'.
Step 3
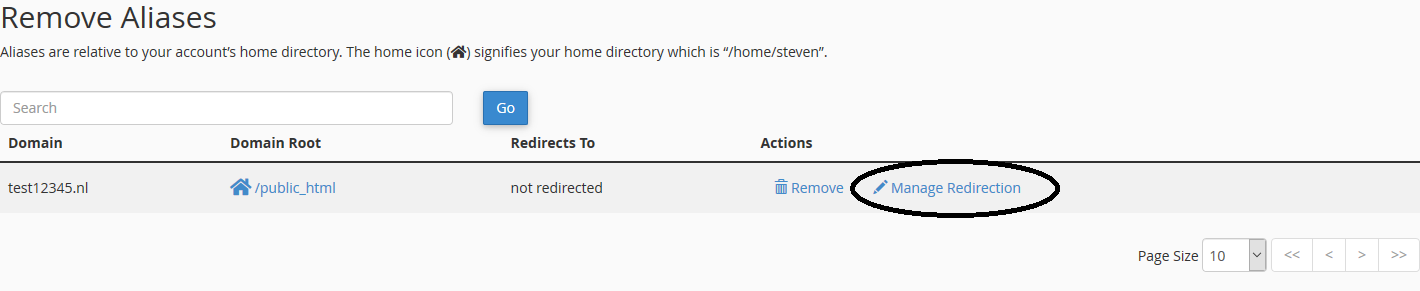
You will receive a confirmation that your domain has been successfully added as an alias. Click 'Go Back' to return to the previous page.

Your domain alias is not yet configured for forwarding. Click 'Manage Redirection' to set this.
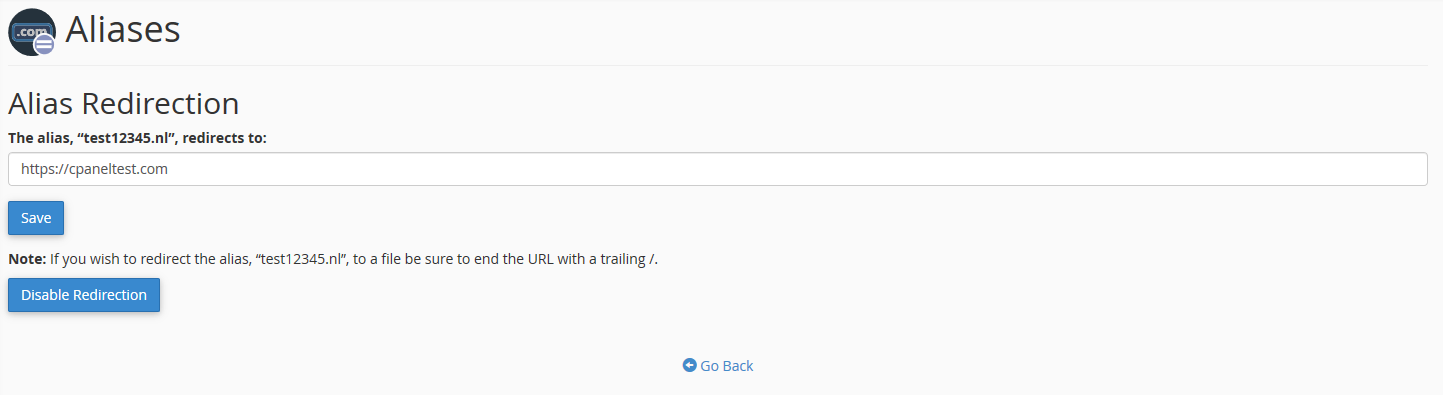
Step 4
Enter the domain you want to forward to and click 'Save'. Your alias domain now forwards to your domain.
Redirect
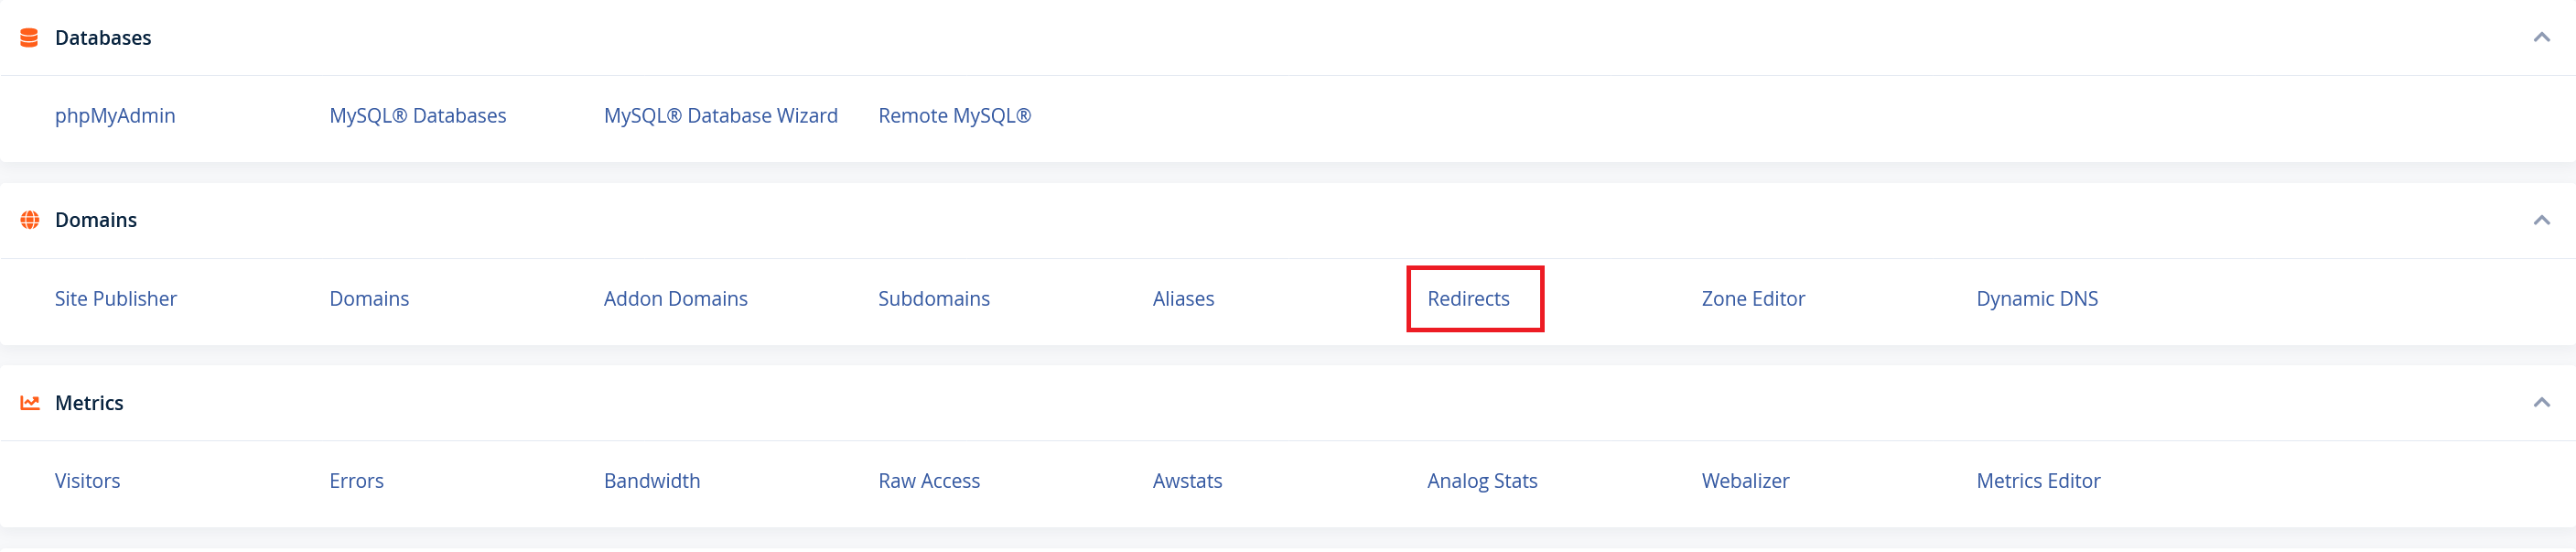
Step 1
Log in to cPanel and click 'Redirects' under 'Domains'.
Step 2
Then fill in the configuration of your redirect to your preference and click 'Add'. The options available to you are discussed beneath the screenshot.
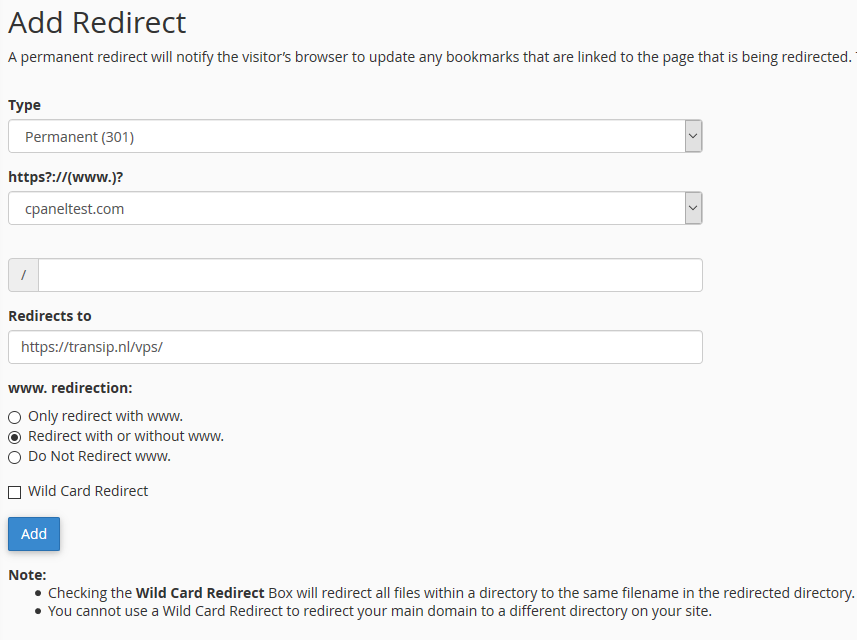
- Type: Use a 301 or 302 redirect.
- Https://(www.)?: Enter the domain you want to forward.o /: Enter the possible subdirectory you want to forward to in this field.
- Redirects to: Enter the domain you want to forward to here.
- www.redirection: Set whether you want to forward yourdomain.com and www.yourdomain.com, or just one of them.
- Wild Card Redirect: Using this option you also forward all your subdomains for this domain.
Now that you have linked your domain to your VPS you can set up your website and / or email. Proceed to part 5 for uploading your website, database and use of SSL, or continue to part 6 if you only want to set up your email.
Should you have any questions left regarding this article, do not hesitate to contact our support department. You can reach them via the ‘ContactUs’ button at the bottom of this page.
If you want to discuss this article with other users, please leave a message under 'Comments'.