By default your Windows Server comes allows you to use two Remote Desktop sessions (also known as RDS or RDP). If you'd like to use more than two Remote Desktop sessions on your VPS with Windows Server you can manually add a license to be able to do so. You can order an RDS license from this page or from your control panel.
In order to add an RDS license to your VPS, Remote Desktop Services and Remote Desktop Licensing must be installed on your VPS. In this guide we'll show you how to install both on a VPS. Visit this guide to see how to add a license when these prerequisites have already been installed.
Role-based or feature-based vs Remote Desktop Services installation:
You can choose one of two methods for installing Remote Desktop Services: 'Role-based or feature-based installation' or 'Remote Desktop Services installation'. Use the option 'Remote Desktop Services Installation' if you're setting up Remote Desktop Services in an Active Directory environment. Other than that, there are some differences between both installation methods:
- Role-based or feature-based installation: This is an advanced option for installing RDS which allows you to manually select roles and feature. If you'd like to add a single service such as 'Remote Desktop Session Host' this is the way to go.
- Remote Desktop Services installation: This option is comparible to an 'express installation'. Remote Desktop licensing is not automatically installed using this option. By default this option installs three basis roles:
- RD Connection Broker
- RD Web Access and
- RD Session Host.
Both methods allow you to add an RDS License to your VPS, which will be explained further down this article.
Consult this article if you'd like additional information on where you can review your license in your control panel.
Before you begin:
- If you're working in an Active Directory environment, make sure you're connected as a domain administrator when you follow the steps described in this tutorial.
- If you've never connected through Remote Desktop before you should use this manual to enable it.
Step 1
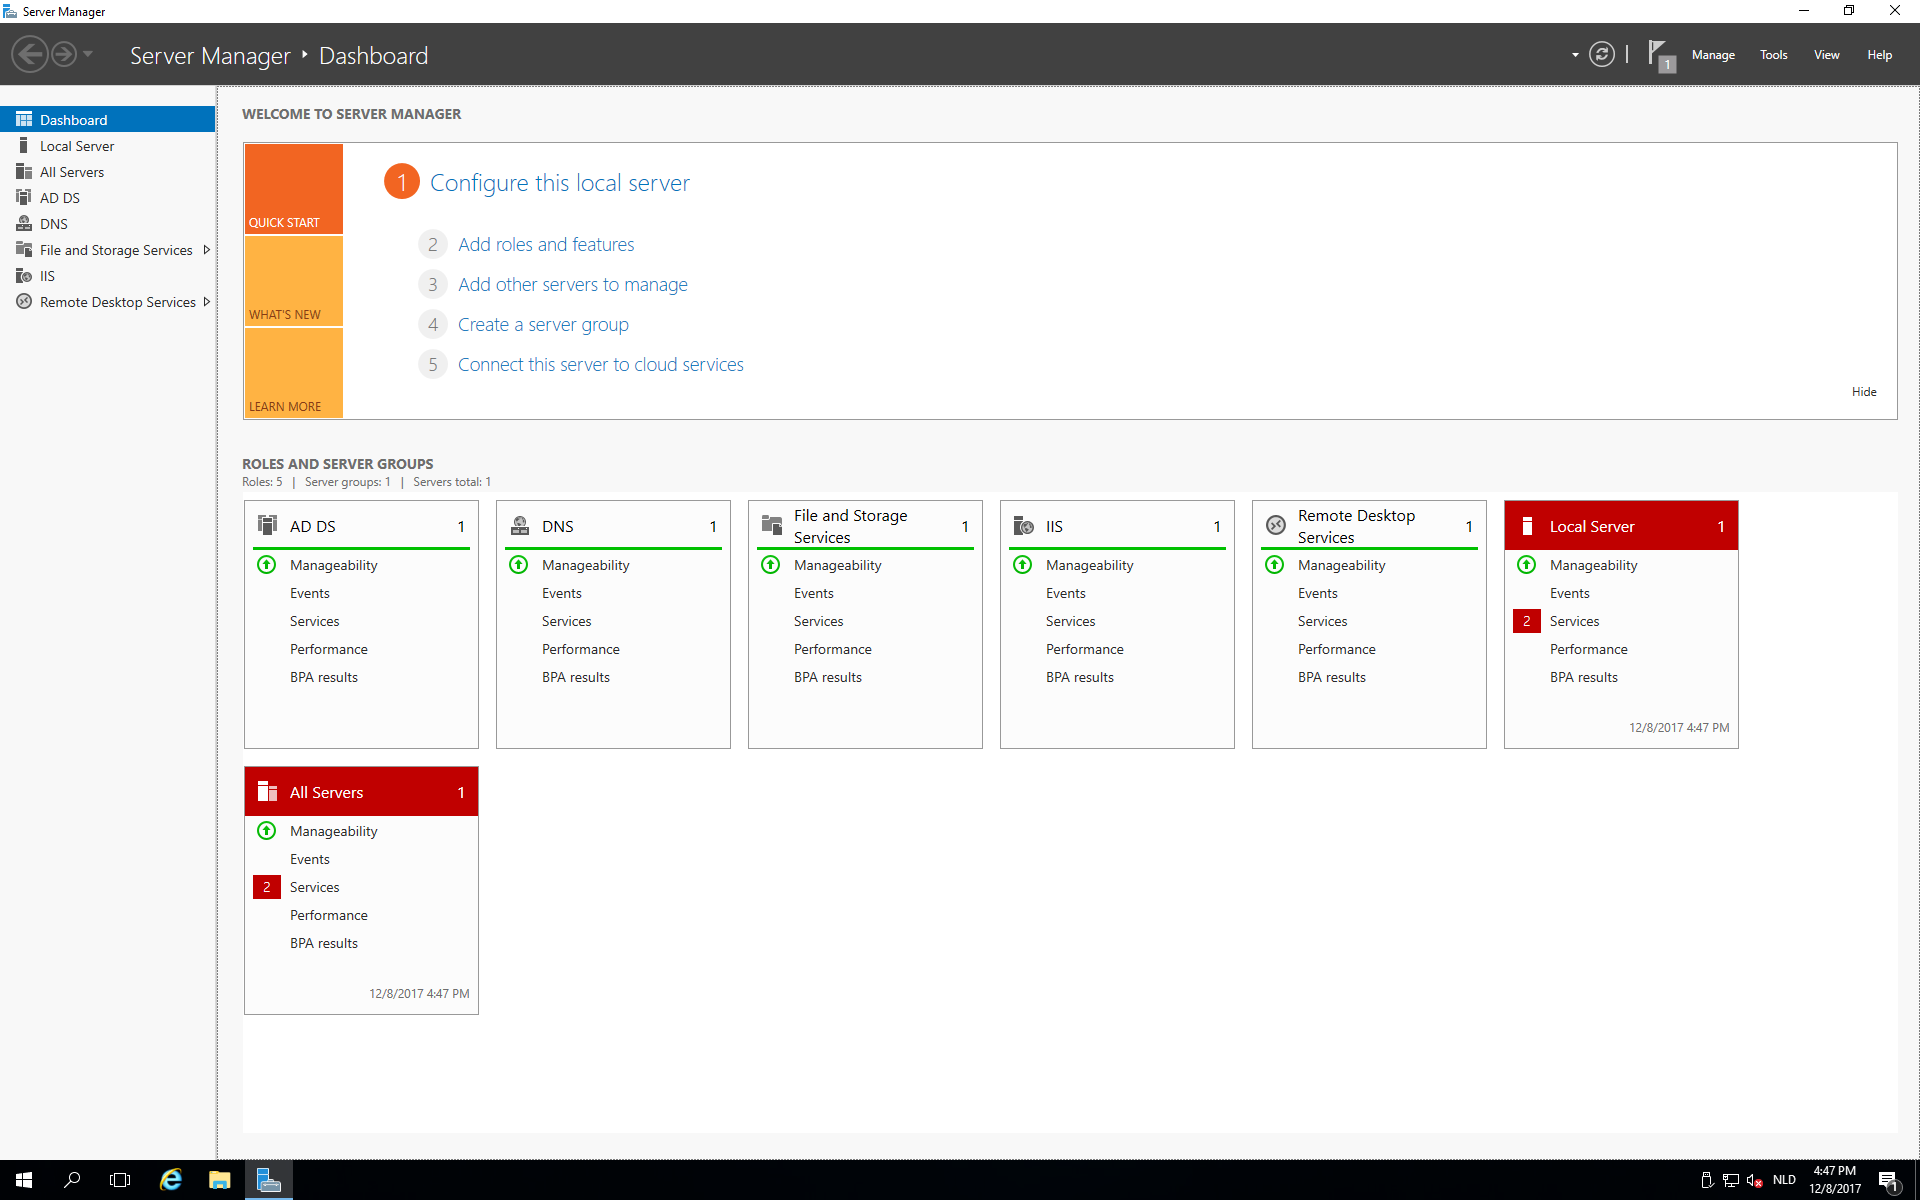
Connect to your Windows Server using Remote Desktop and open your Server Manager. This happens automatically when you open a new remote desktop session.
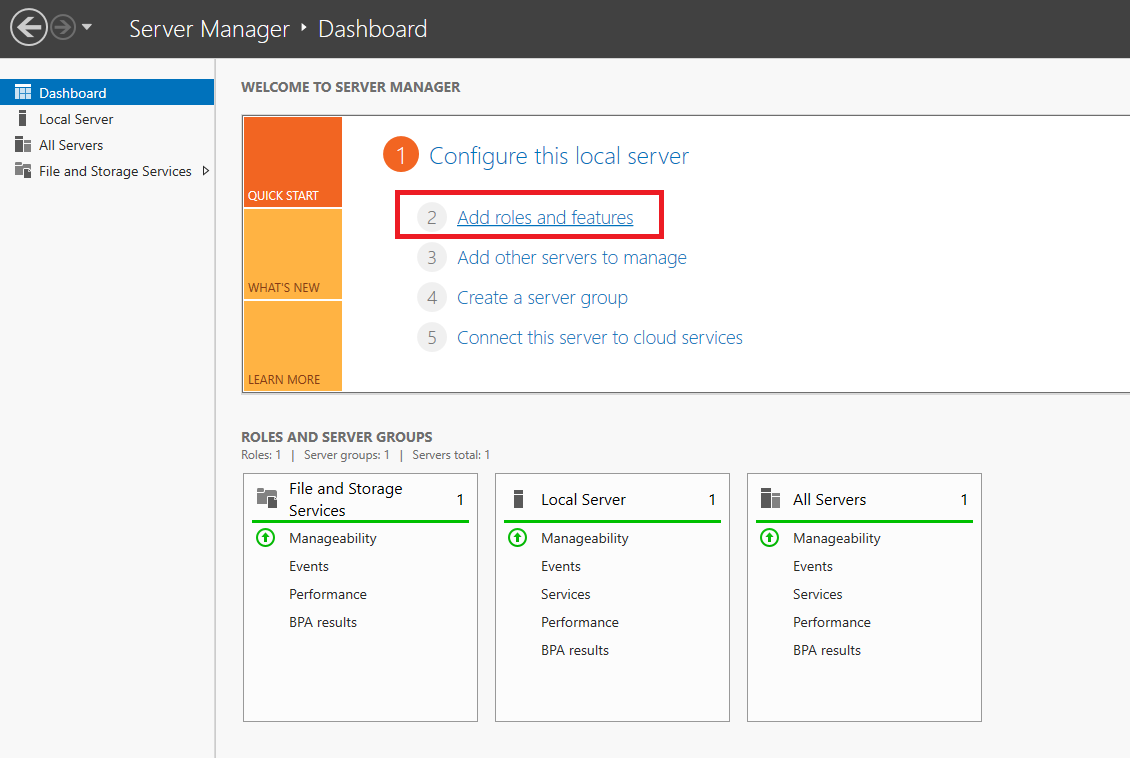
Step 2
Click on 'Add roles and features'.
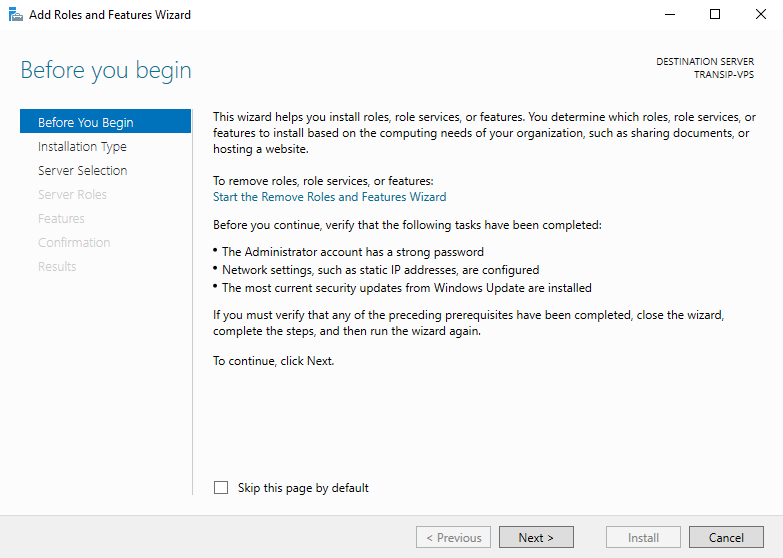
Step 3
You'll see the 'Before You Begin' page. You can opt to skip this page when adding roles and features in the future. Click 'Next' after having read the points below 'Before You Continue'.
Step 4
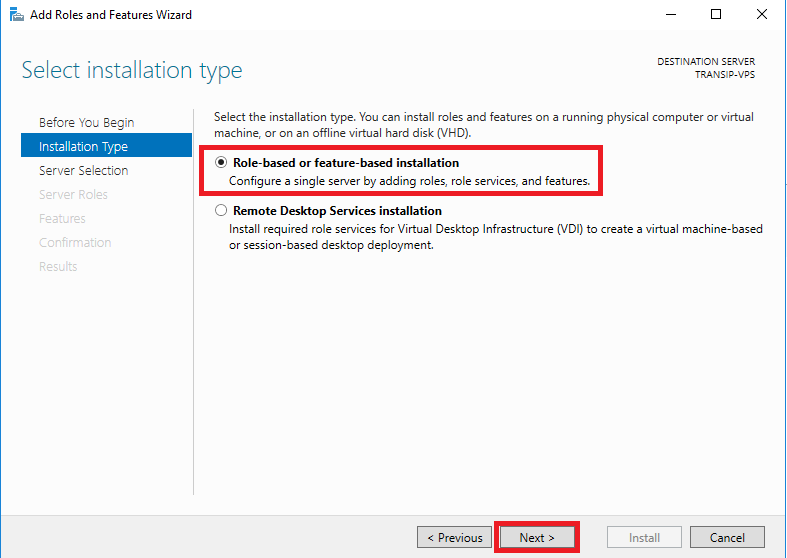
Beneath 'Installation type' you can choose Role-based or feature-based vs Remote Desktop Services installation, which are explained here. Select 'Role-based or feature-based' and proceed to the next step.
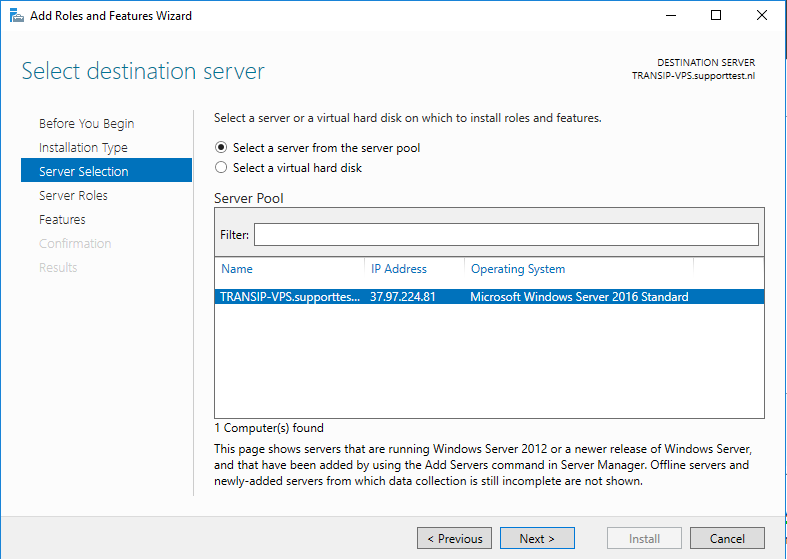
Step 5
Select the VPS on which you'd like to perform the installation. If you've added multiple VPS'es to your Active Directory they'll be visible here.
Step 6
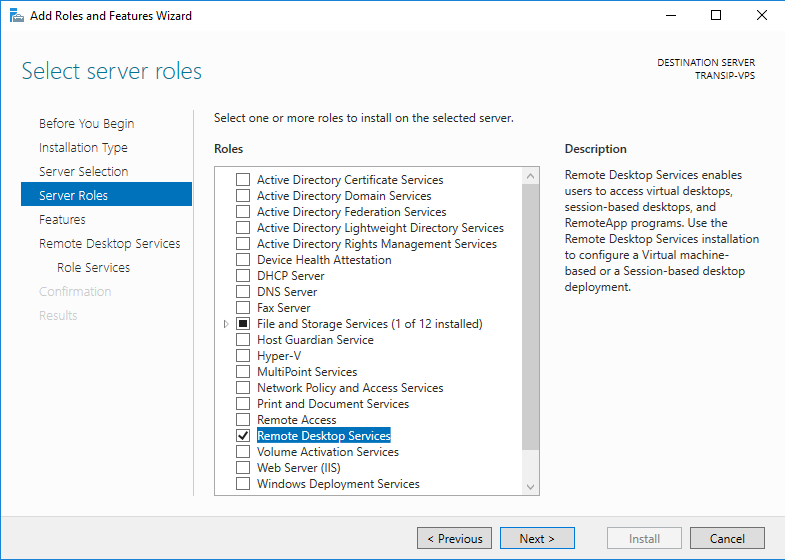
The next page allows the selection of a 'Server Role'. Select 'Remote Desktop Services' and click 'Next'.
Step 7
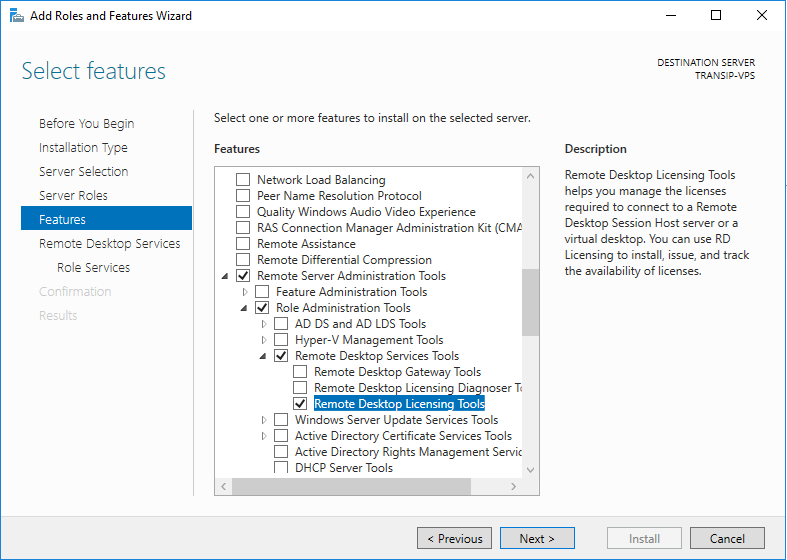
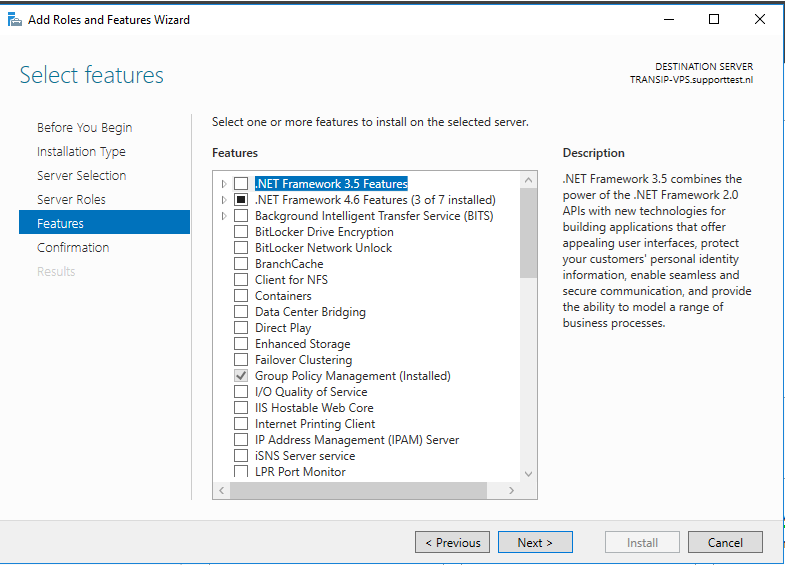
In this step you can add 'Features' to your VPS.
For this guide we'll select 'Remote Desktop Licensing Tools'. You can find this option under 'Remote Server Administration Tools' > 'Role Administration Tools' > 'Remote Desktop Services Tools'.
Step 8
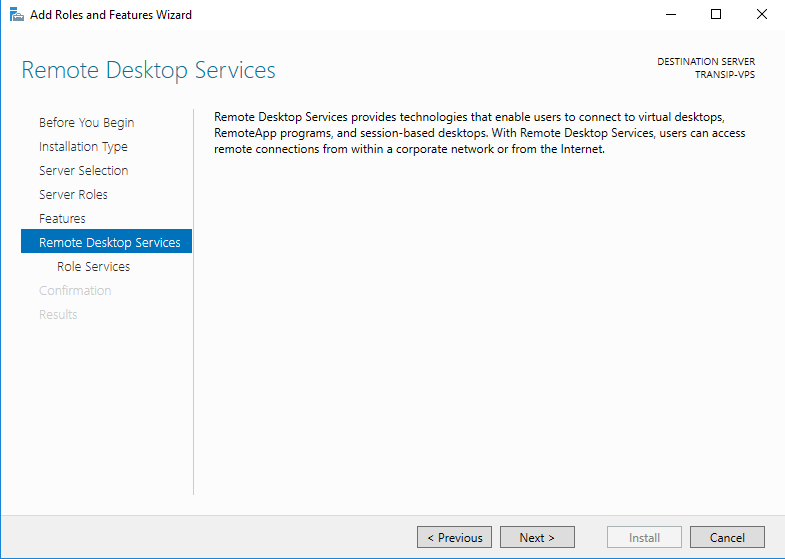
The 'Remote Desktop Services' step provides information about the use of Remote Desktop Services. You can immediately proceed to the next step 'Role Services'.
Step 9
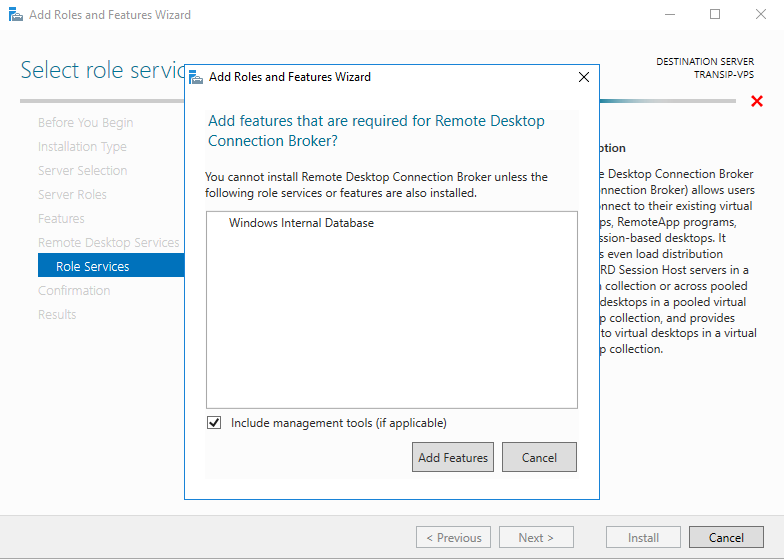
The 'Role Services' step checks if there are features that are required for the installation in order for the 'Remote Desktop Connection Broker' to function. Especially with new VPS'es it's possible features are missing. Check if 'Include management tools (if applicable)' is selected and click on 'Add features'.
Step 10
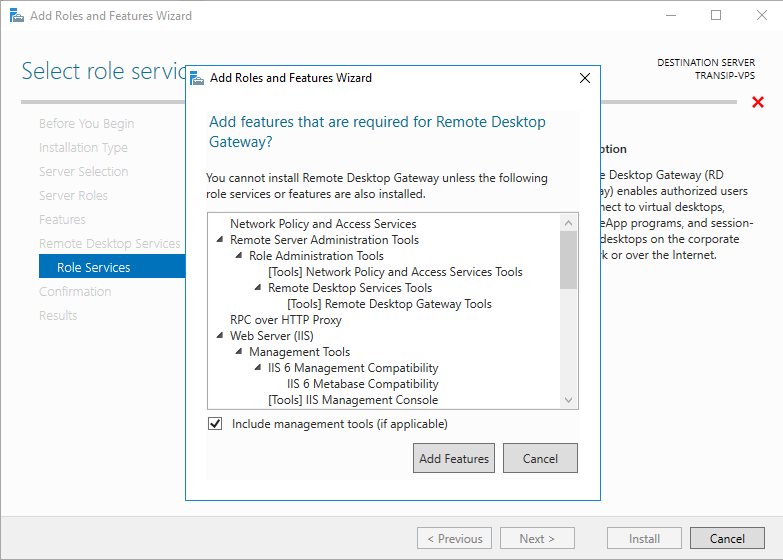
You'll now see an overview of the features required for 'Remote Desktop Gateway' to function. Check if 'Include management tools (if applicable)' is selected and click on 'Add features'.
Step 11
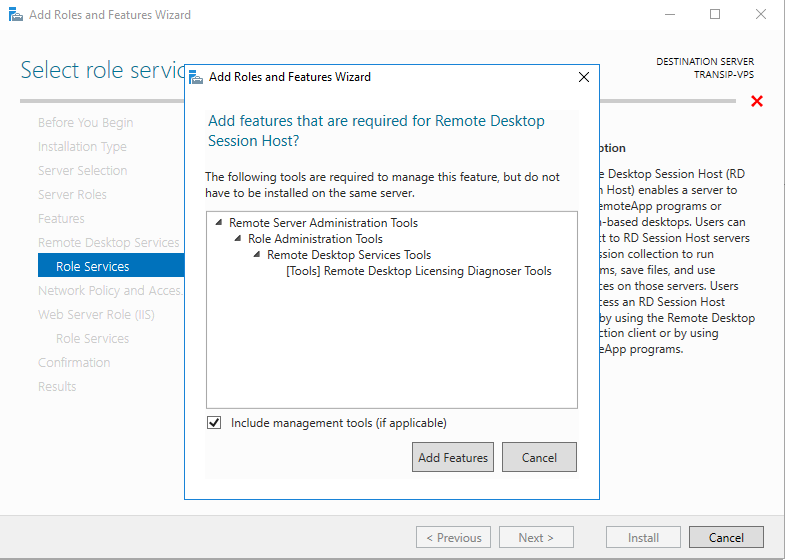
Next you'll see an overview of the features required for the 'Remote Desktop Session Host'. Check if 'Include management tools (if applicable)' is selected and click on 'Add features'.
Step 12
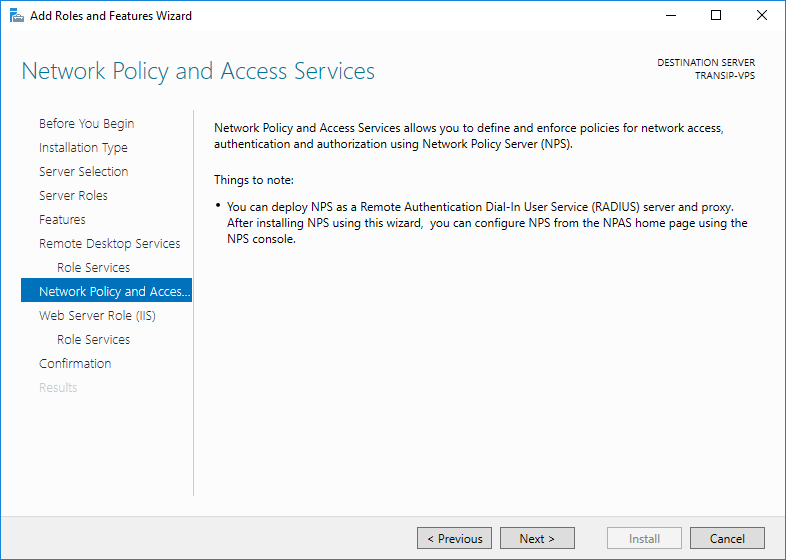
This page shows you information about the function of 'Network Policy and Access Services'. Click 'Next' to proceed.
Step 13
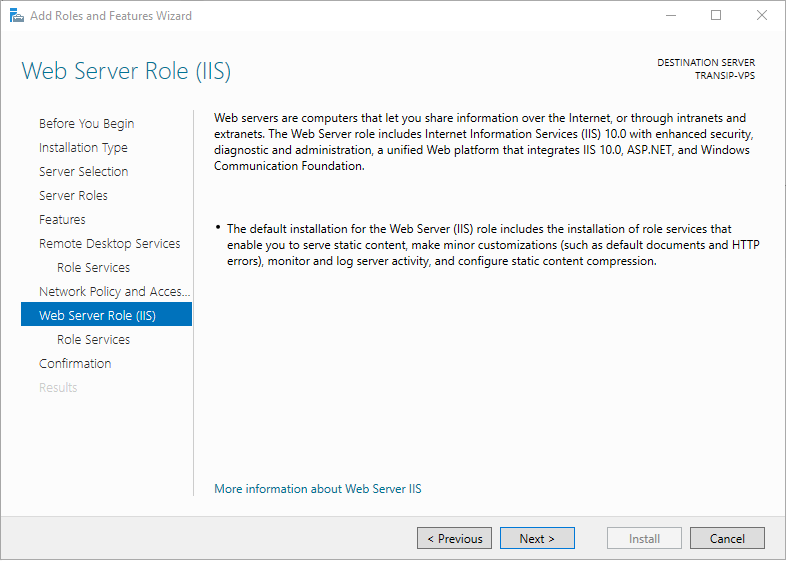
The 'Web Server Role' page shows information about this role. Again no action is required and you can proceed to the next step.
Step 14
You'll now see an overview of the 'roles services' which will be installed for the 'Web Server'. You don't need to change the default selection but are free to select additional role services or adjust the settings if you know your organization requires them.

Step 15
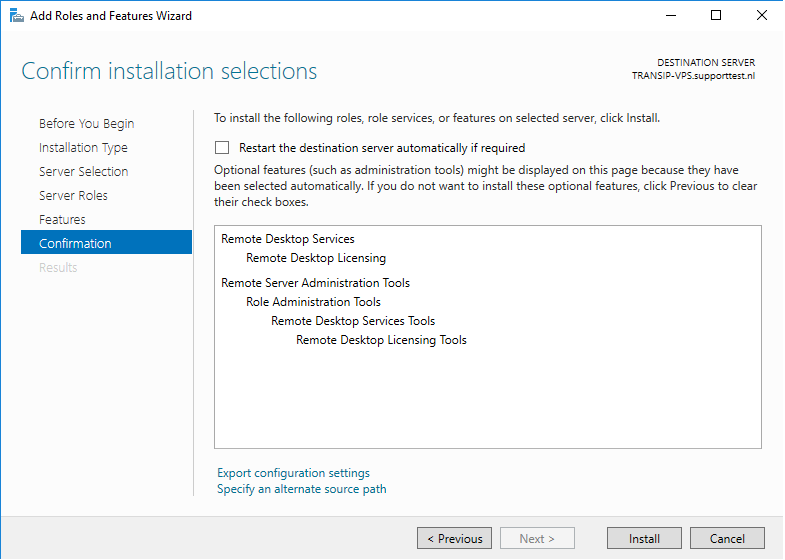
Finally you'll see a confirmation overview of the roles, role services and / or features that will be installed.
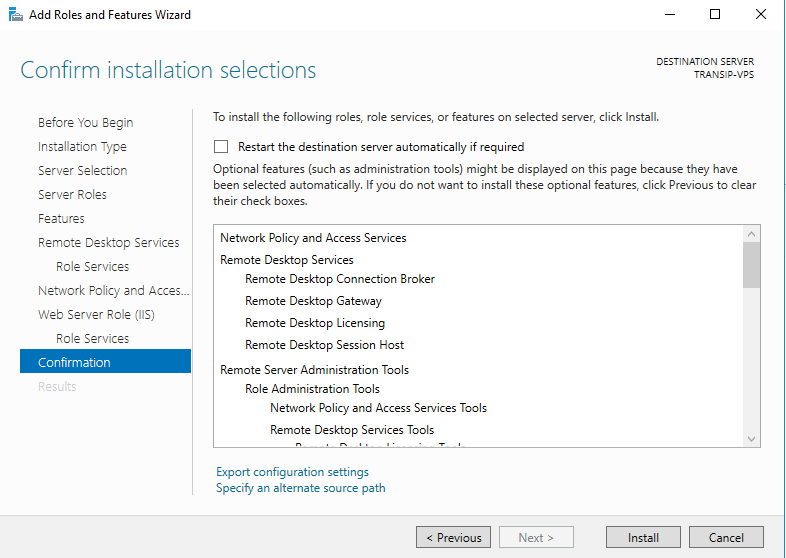
Optionally, you can select that your VPS will automatically restart. This is necessary for the RD Session Host installation so we recommend selecting this option.
The prerequisites are now installed on your VPS and you can proceed to this guide in order to add your Remote Desktop license.
Step 1
Connect to your Windows Server using Remote Desktop and open your Server Manager. This happens automatically when you open a new remote desktop session.
Step 2
Click on 'Add roles and features'.
Step 3
You'll see the 'Before You Begin' page. You can opt to skip this page when adding roles and features in the future. Click 'Next' after having read the points below 'Before You Continue'.
Step 4
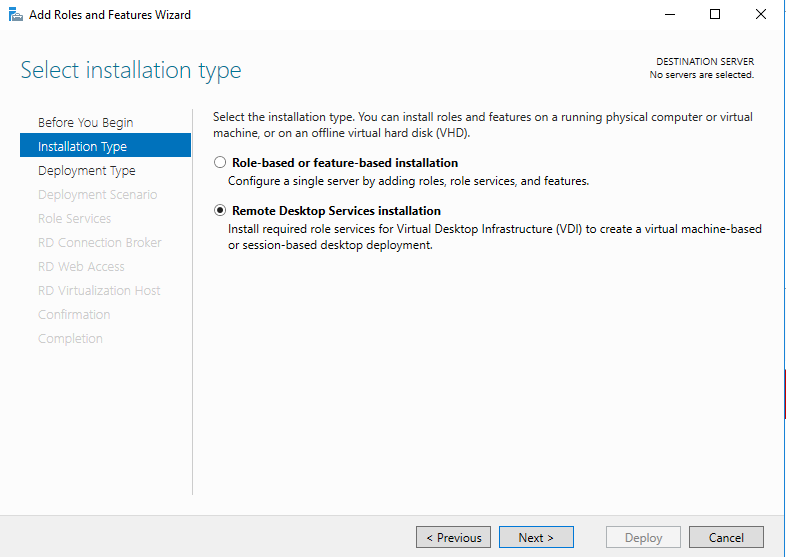
Beneath 'Installation type' you can choose Role-based or feature-based vs Remote Desktop Services installation, which are explained here. Select 'Remote Desktop Services installation' and proceed to the next step.
Step 5
Select the VPS on which you'd like to perform the installation. If you've added multiple VPS'es to your Active Directory they'll be visible here.
Step 6
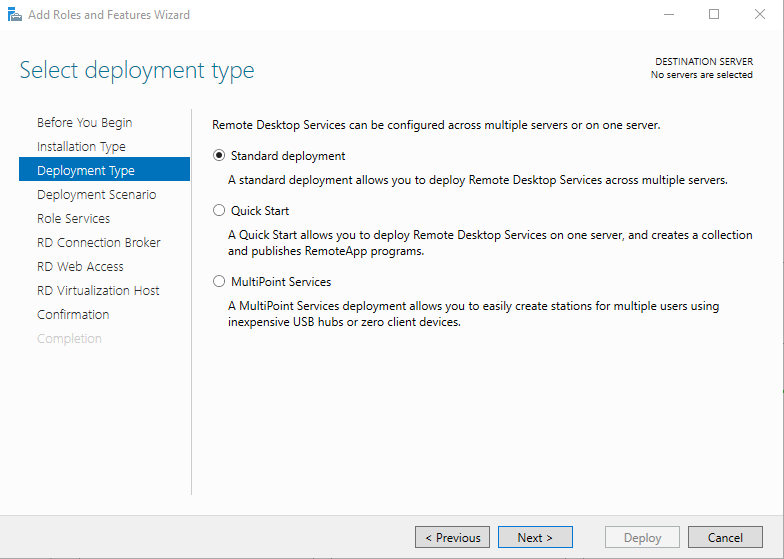
In this guide we assume you'd like to install Remote Desktop Services on one or multiple servers. Select 'Standard Deployment'.
Step 7
The following page allows you to choose between 'Virtual machine-based desktop deployment' (VDI) or 'Session-based desktop deployment'. The differences between both are explained in this article.
Select 'Session based desktop deployment'; Session based is prefered because of the better performance and because VDI is mainly meant for a virtual desktop OS, which we don't support on our platform.
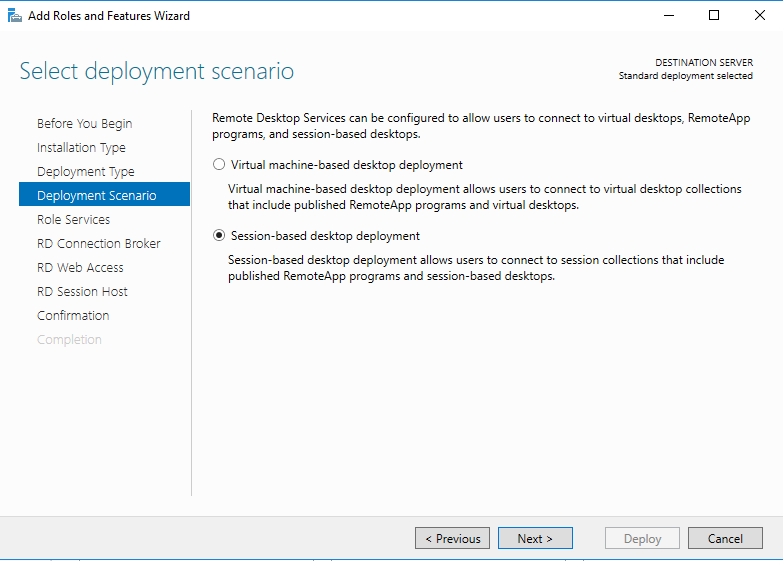
Optionally you can use the 'Quick Start' option if you only need Remote Desktop Services on a single VPS. We prefer the 'Standard' installation so that you always have the option to later add Remote Desktop Services to multiple servers easily.
Step 8
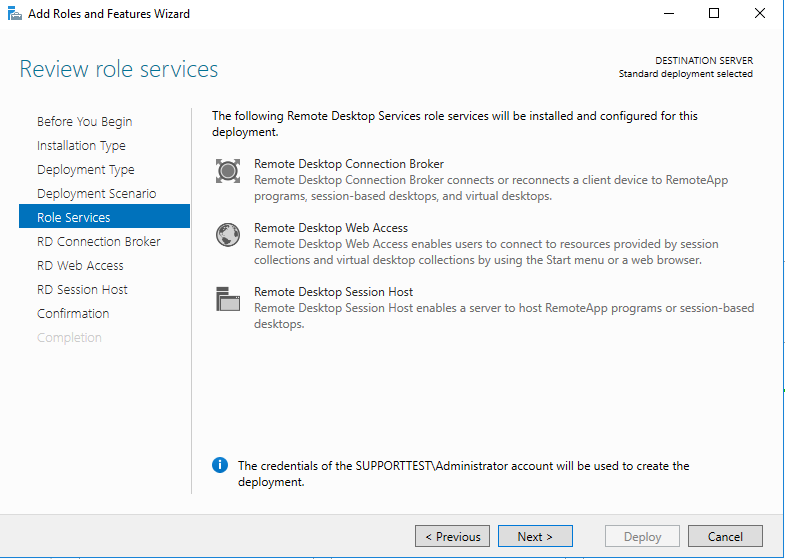
You'll see an overview of the role services which will be installed and configured on your VPS. Proceed to the next step.
Step 9
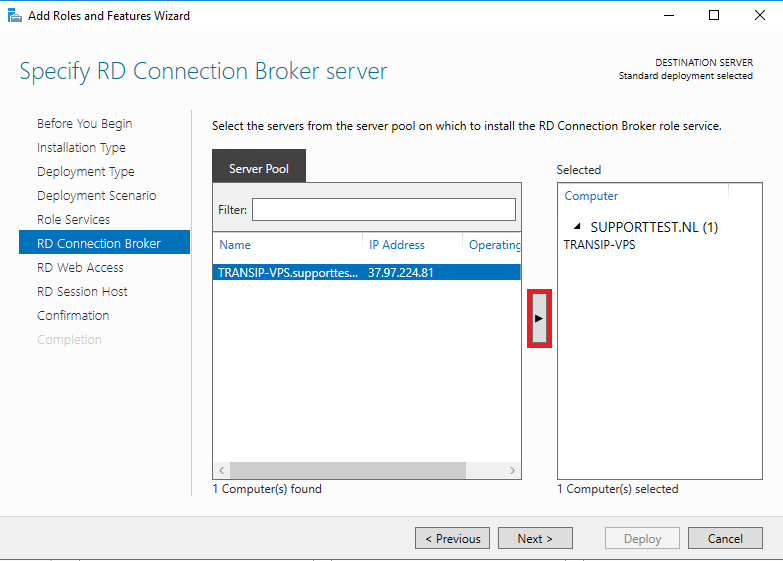
In this step you'll select the server on which the 'Remote Desktop Connection Broker' will be installed. If you added multiple VPS'es to your Active Directory they'll all be visible here. For this guide we are using a single VPS. Select the desired VPS and click the arrow in the middle and then on 'Next'.
Step 10
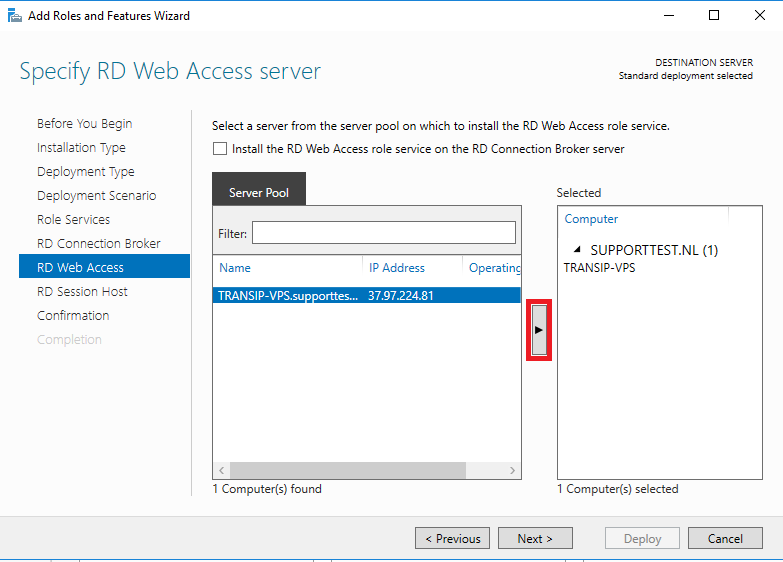
Select the server on which the RD Web Access role service will be installed and click the arrow in the middle again. Click on 'Next' afterwards.
Step 11
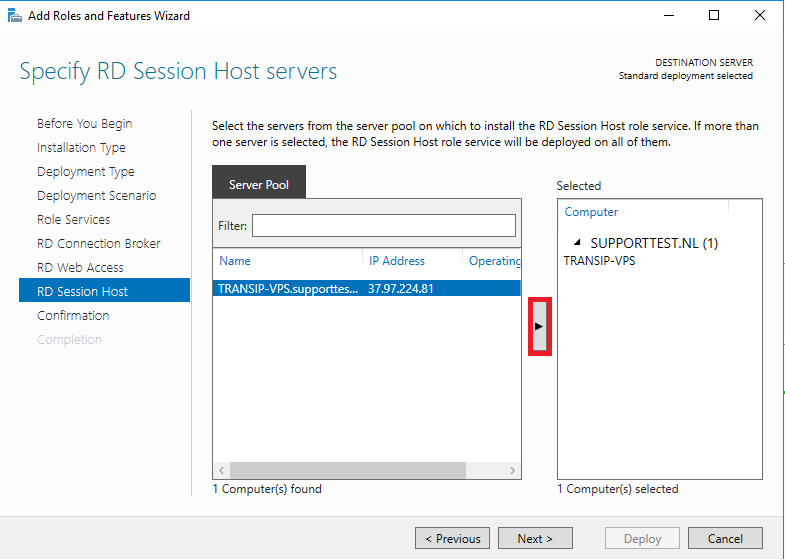
Next you'll select a server on which the RD Session Host role service will be installed and click the arrow in the middle. Proceed by clicking on 'Next'.
Step 12
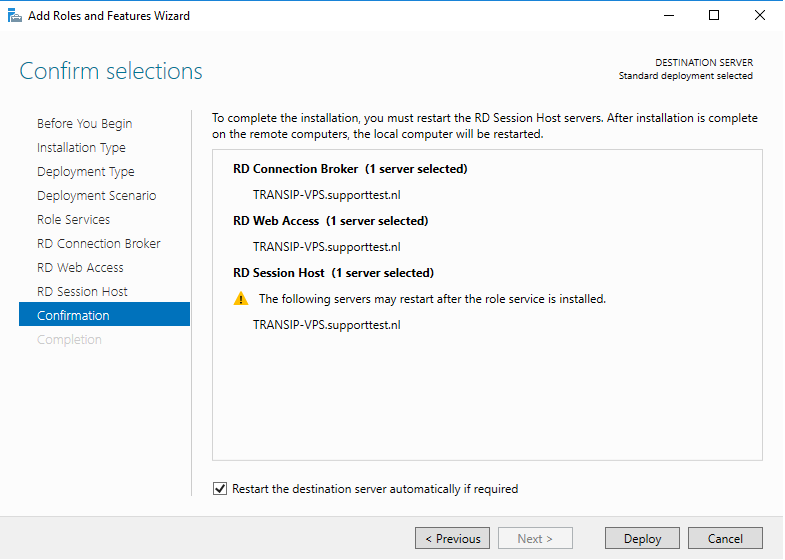
Finally you'll see a confirmation overview of the roles, role services and / or features that will be installed.
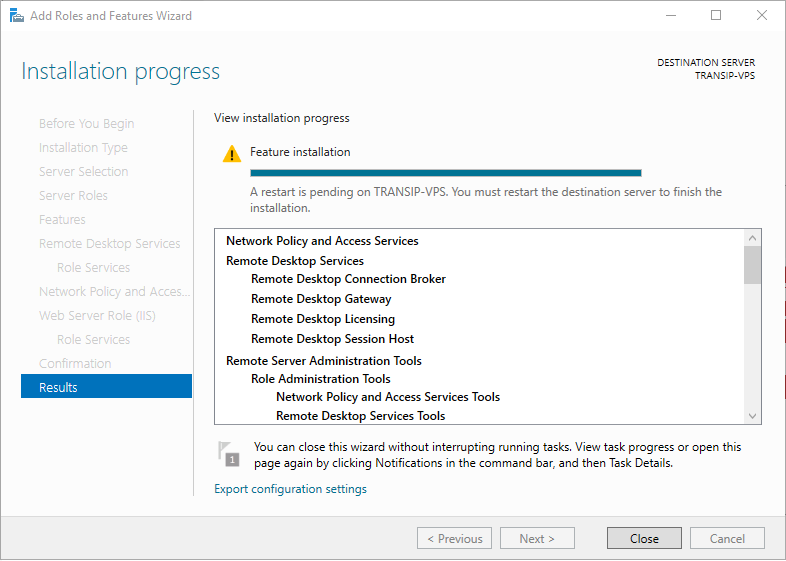
Optionally, you can select that your VPS will be automatically restarted if required. This is necessary for the RD Session host installation so we recommend selecting this option. Your VPS will automatically restart and resume the installation.
Step 13
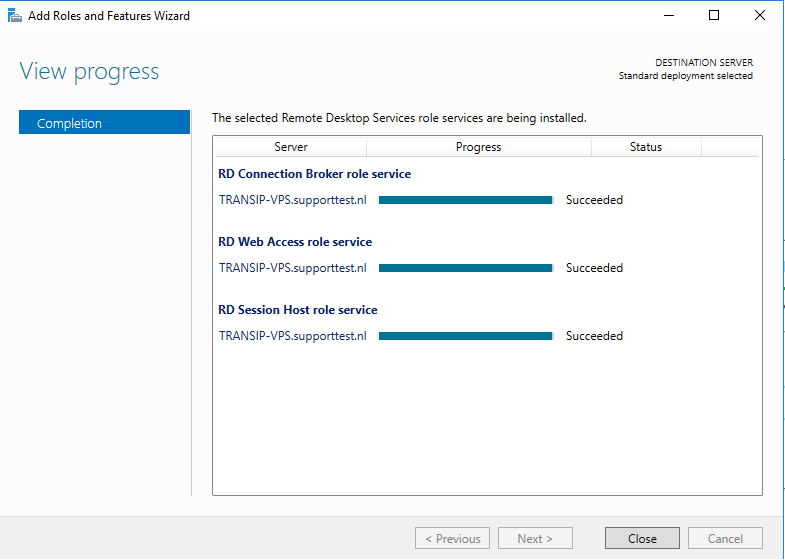
After the restart the installation will be resumed and finishes shortly after. Click on 'Close' once the installation finishes.
Take note that the 'Remote Desktop Services installation' procedure doesn't automatically install the 'Remote Desktop Licensing' role. We'll be adding it in the following steps.
Step 14
Open your Server Manager.
Step 15
Click on 'Add roles and features'.
Step 16
You'll see the 'Before You Begin' page. You can opt to skip this page when adding roles and features in the future. Click 'Next' after having read the points below 'Before You Continue'.
Step 17
Beneath 'Installation type' you can choose Role-based or feature-based vs Remote Desktop Services installation, which are explained here. Select 'Role-based or feature-based' and proceed to the next step.
Step 18
Select the VPS on which you'd like to perform the installation. If you've added multiple VPS'es to your Active Directory they'll be visible here.
Step 19
You'll now see an overview of the features required for the installation of 'Remote Desktop Licensing'. If features are already installed this will be indicated as (installed). Check if 'Include management tools (if applicable)' is selected and click on 'Add features'.
Step 20
Before the actual installation you'll see a confirmation overview of the roles, role services and/or features which will be installed. You can optionally select that your VPS will be automatically restarted if required. Most likely this won't be necessary.
The installation of the Remote Desktop Services and Desktop Licensing Tools is now concluded. You can proceed to this guide to add your license.
Should you have any questions left regarding this article, do not hesitate to contact our support department. You can reach us via the ‘Contact Us’ button at the bottom of this page.
If you want to discuss this article with other users, please leave a message under 'Comments'.